Hello hello dear community hivediy today I am going to share with you my experience in making some beautiful and delicate necklaces in the coquette style, I made them in two different ways and I love the final result.
The main reason to make these beautiful accessories was a request from my daughter 😁, you know that children absorb all those trends that promote social networks and my daughter does not escape that reality, so while I was making a craft with foami, my daughter curiously reviewed the materials I have and told me to make a necklace of small bows with satin ribbons.
At first I was surprised by her request and I asked her where she had seen them and she said "mommy, it is the coquette fashion, but since I am small I want some tiny bows 🎀" and while we were looking for ideas she told me that she wanted both of us to have the same necklace.
I couldn't resist my daughter's request hehehe, so with materials that I already had at home I made these necklaces, as it is the first time I make them I tried to make them in two ways, I will explain the step by step.
Hola hola querida comunidad hivediy hoy les voy a compartir mi experiencia al realizar unos hermosos y delicados collares al estilo coquette, los elabore de dos formas distintas y ame el resultado final.
El motivo principal para realizar estos hermosos accesorios fue una petición de mi hija 😁, ustedes saben que los niños absorben todas esas tendencias que promueven las redes sociales y mi hija no escapa de esa realidad, así que mientras yo realizaba una manualidad con foami, mi hija revisaba curiosamente los materiales que tengo y me dijo que le hiciera un collar de lacitos pequeños con cintas de raso.
Al principio me extraño su petición y le pregunté dónde los había visto y me dijo "mami, es la moda coquette, pero como yo soy pequeña quiero unos lazos pequeñitos 🎀" y mientras buscamos ideas me dijo que quería que las dos tuviéramos un collar igual.
No me pude resistir a la petición de mi hija jejeje, así que con materiales que ya tenía en casa idee hacer estos collares, como es primera vez que los hago intenté hacerlos de dos formas, ya les explico el paso a paso.
Materials/ Materiales
To make these necklaces I used very few materials:
- 0.4 and 0.6" satin ribbon - 1 meter each approximately
- 1 meter of each one approximately - - Crazy glue
- 2 clasps with rings.
In addition to this, my working tools were a ruler, a fork, scissors and tinder.
Para realizar estos collares utilice muy pocos materiales:
- Cinta tipo raso de 0.4 y 0.6
- 1 metro de cada una aproximadamente - - Pega loca
- 2 broches con argolla.
Adicional a ello, mis herramientas de trabajo fueron una regla, un tenedor, tijera y yesquero
🎀 Model 1 /Modelo 1 🎀
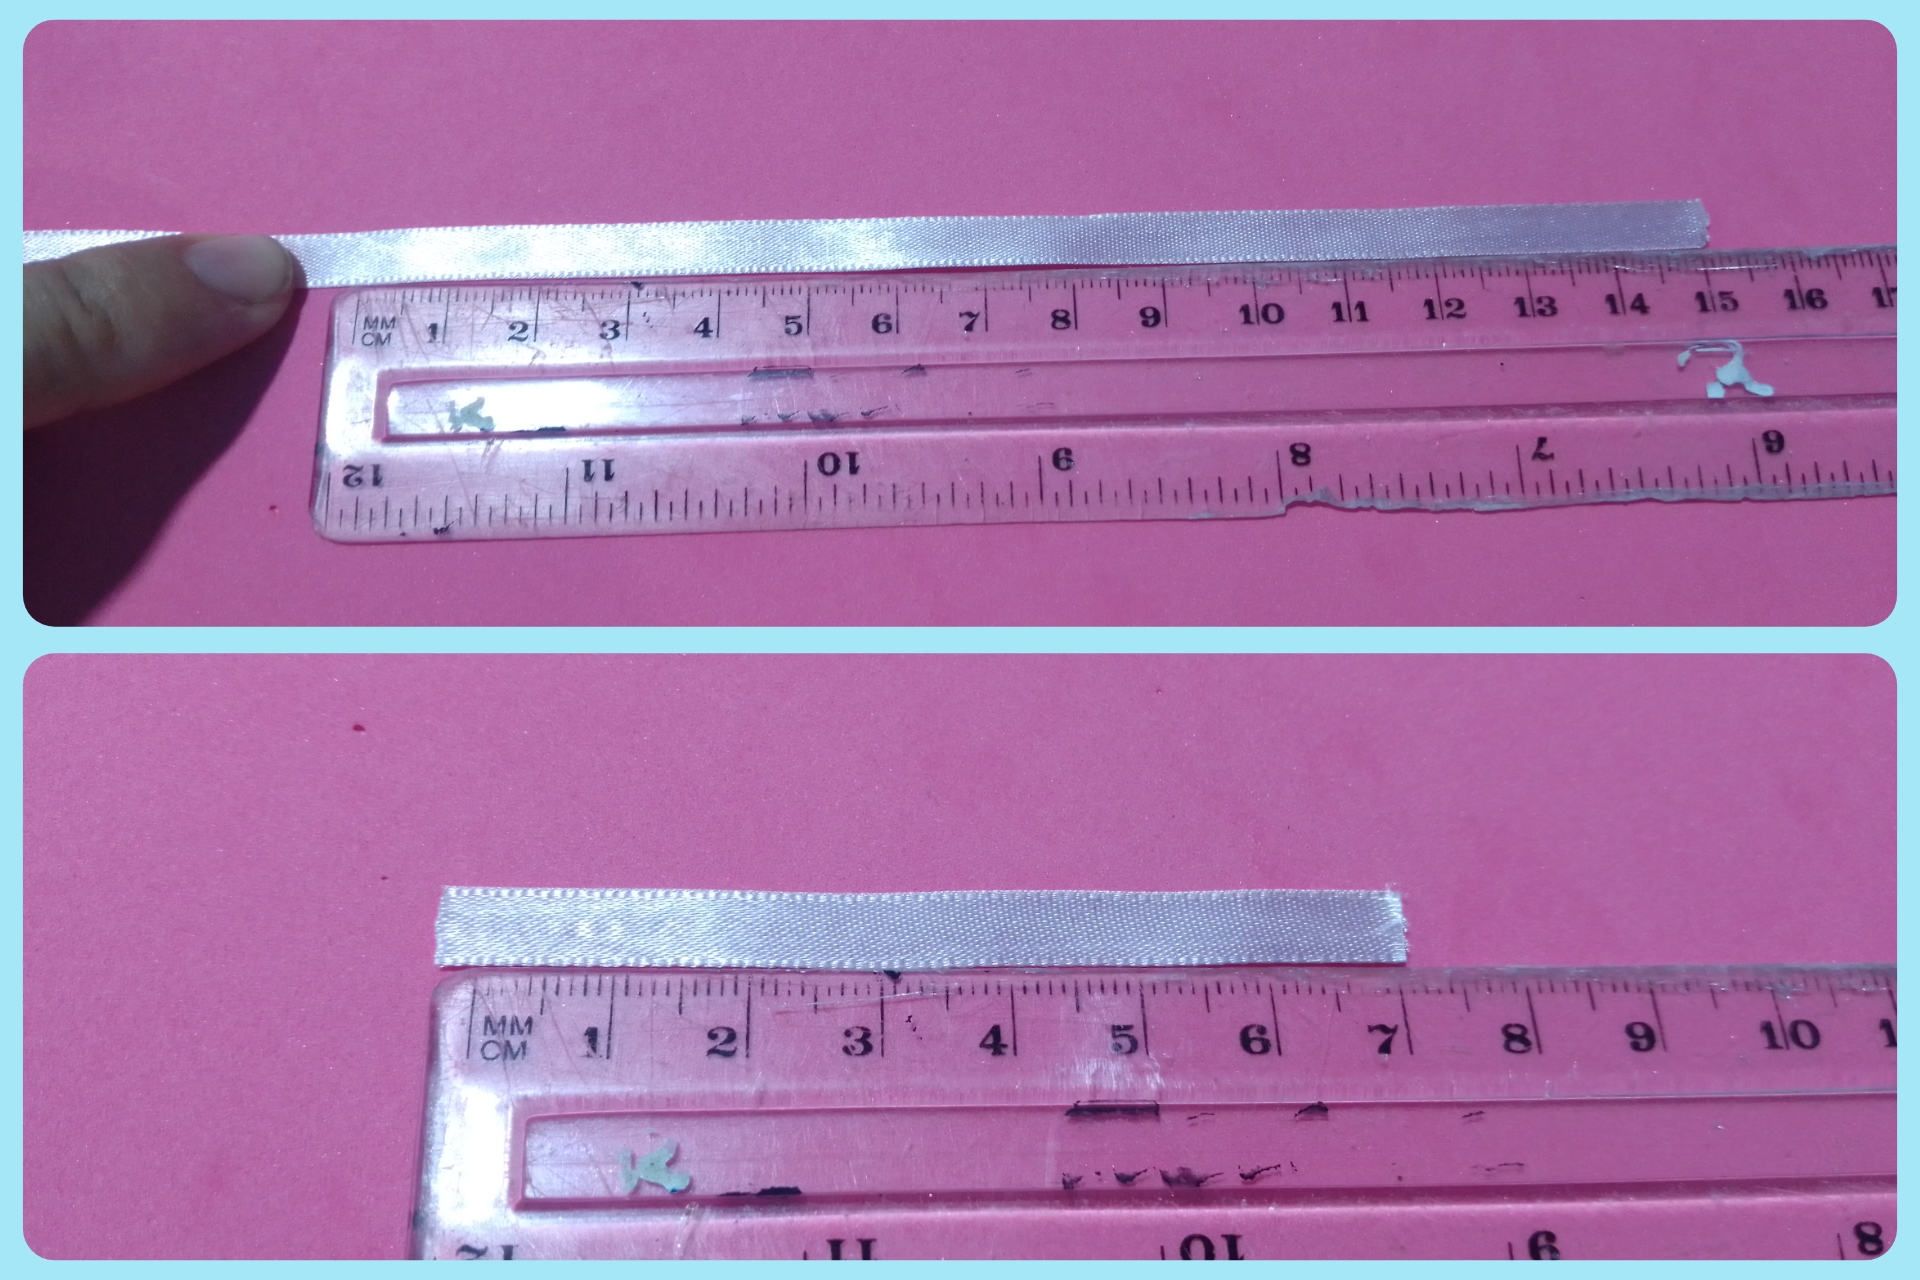
With the help of a ruler, measure three 15 cm strips and three 7 cm strips of the 0.6 cm thick tape.
Con ayuda de una regla, medi 3 tiras de 15 cm y tres tiras de 7 cm de la cinta con grosor de 0.6
From the longest strip, cross one end with the other to obtain an arched shape at the top, then with my finger take the highest point towards the center of the ribbon, where I had held it with my fingers, this to give it the shape of a loop.
Place the loop vertically over the shorter strip to start tying the strip and make the knot that will hold the loop.
De la tira más larga, cruce una punta con la otra par obtener una forma arqueada en la parte superior, luego con el dedo lleve el punto más alto hacia el centro de la cinta , en dónde le tenía sujetada con mis dedos, esto para darle forma de lazo.
Coloque el lazo en forma vertical sobre la tira más corta para empezar a amarrar la tira y hacer el nudo que sujetara el lazo.
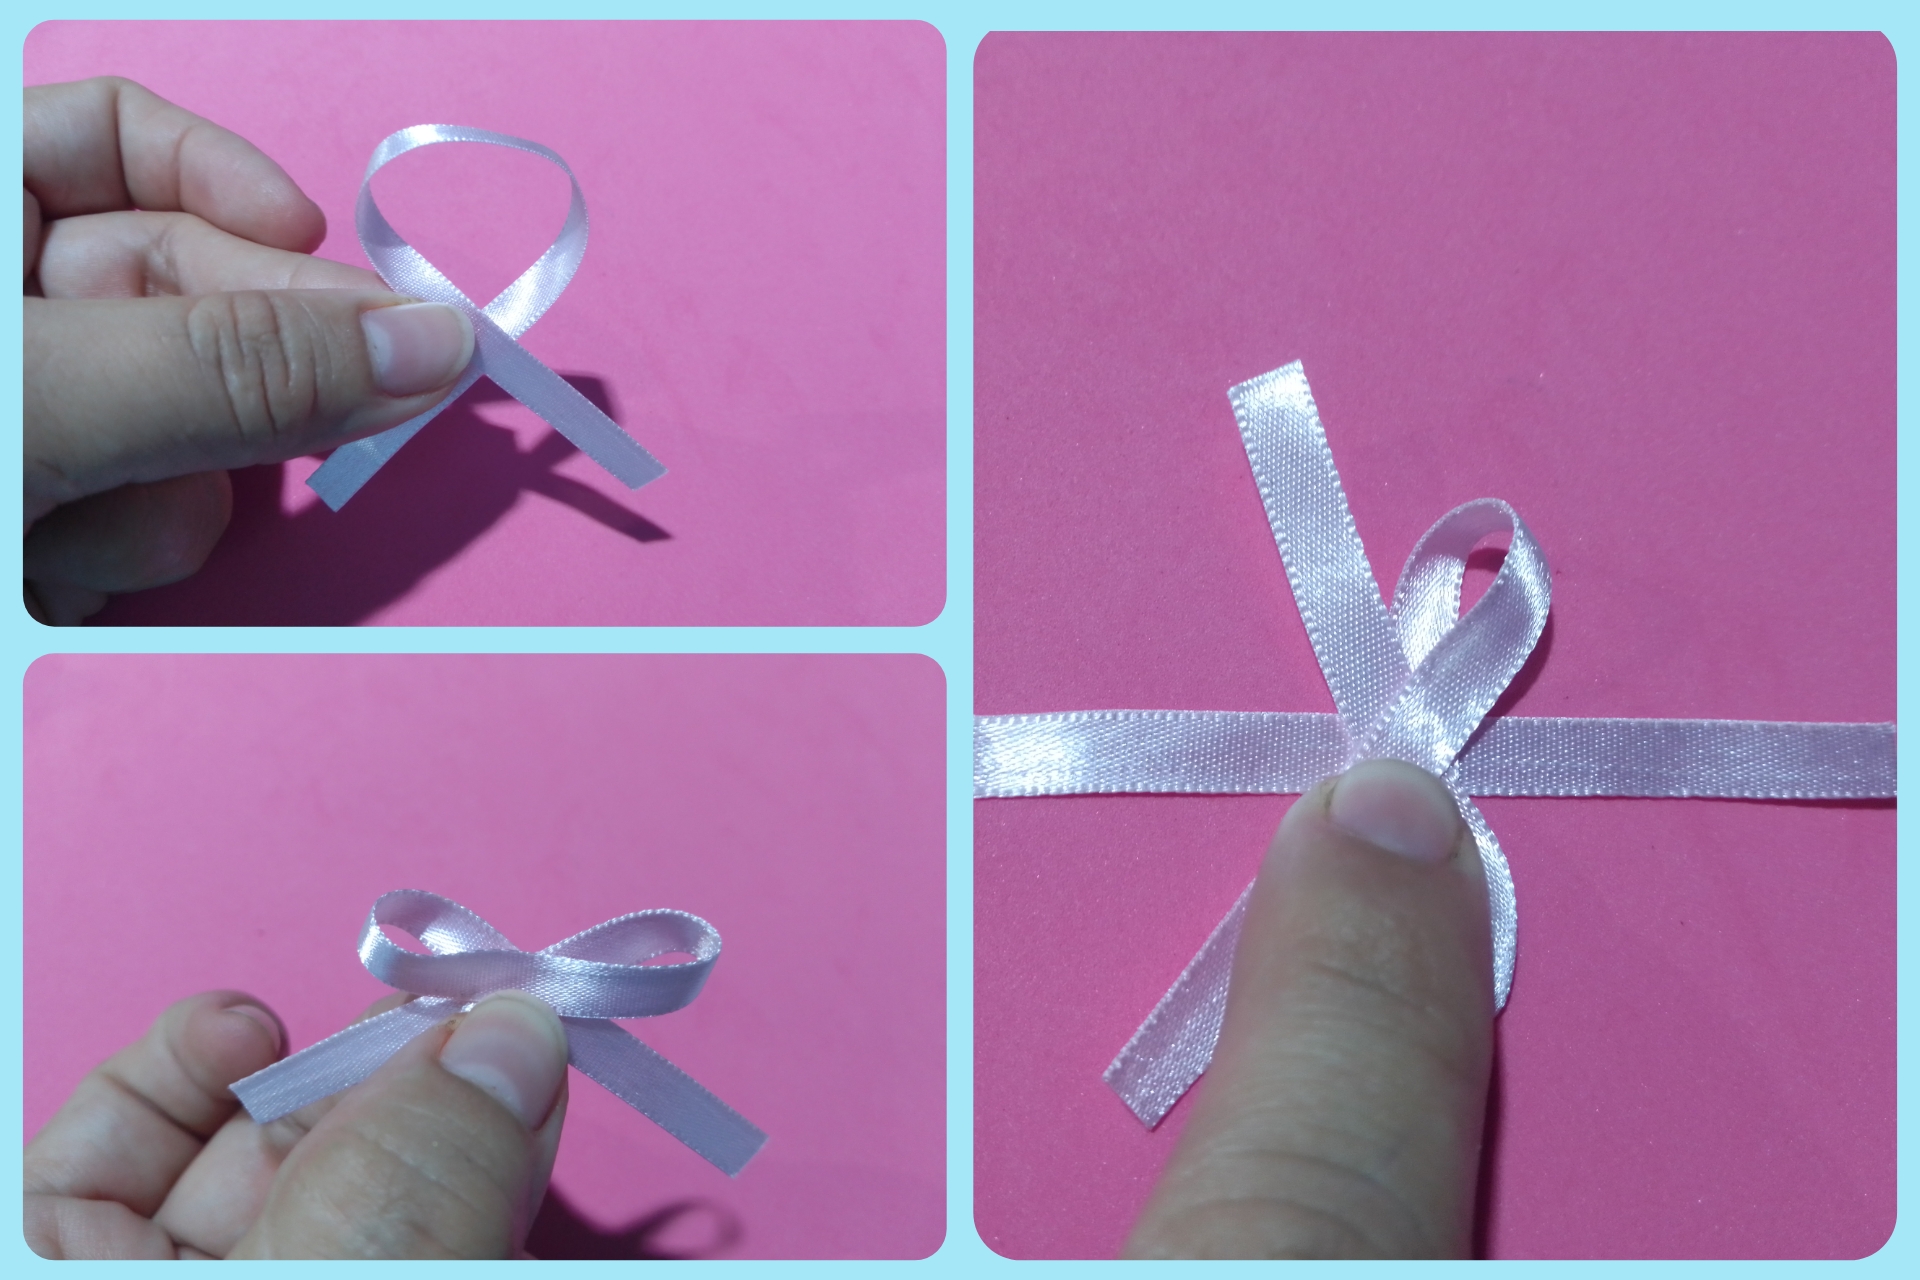
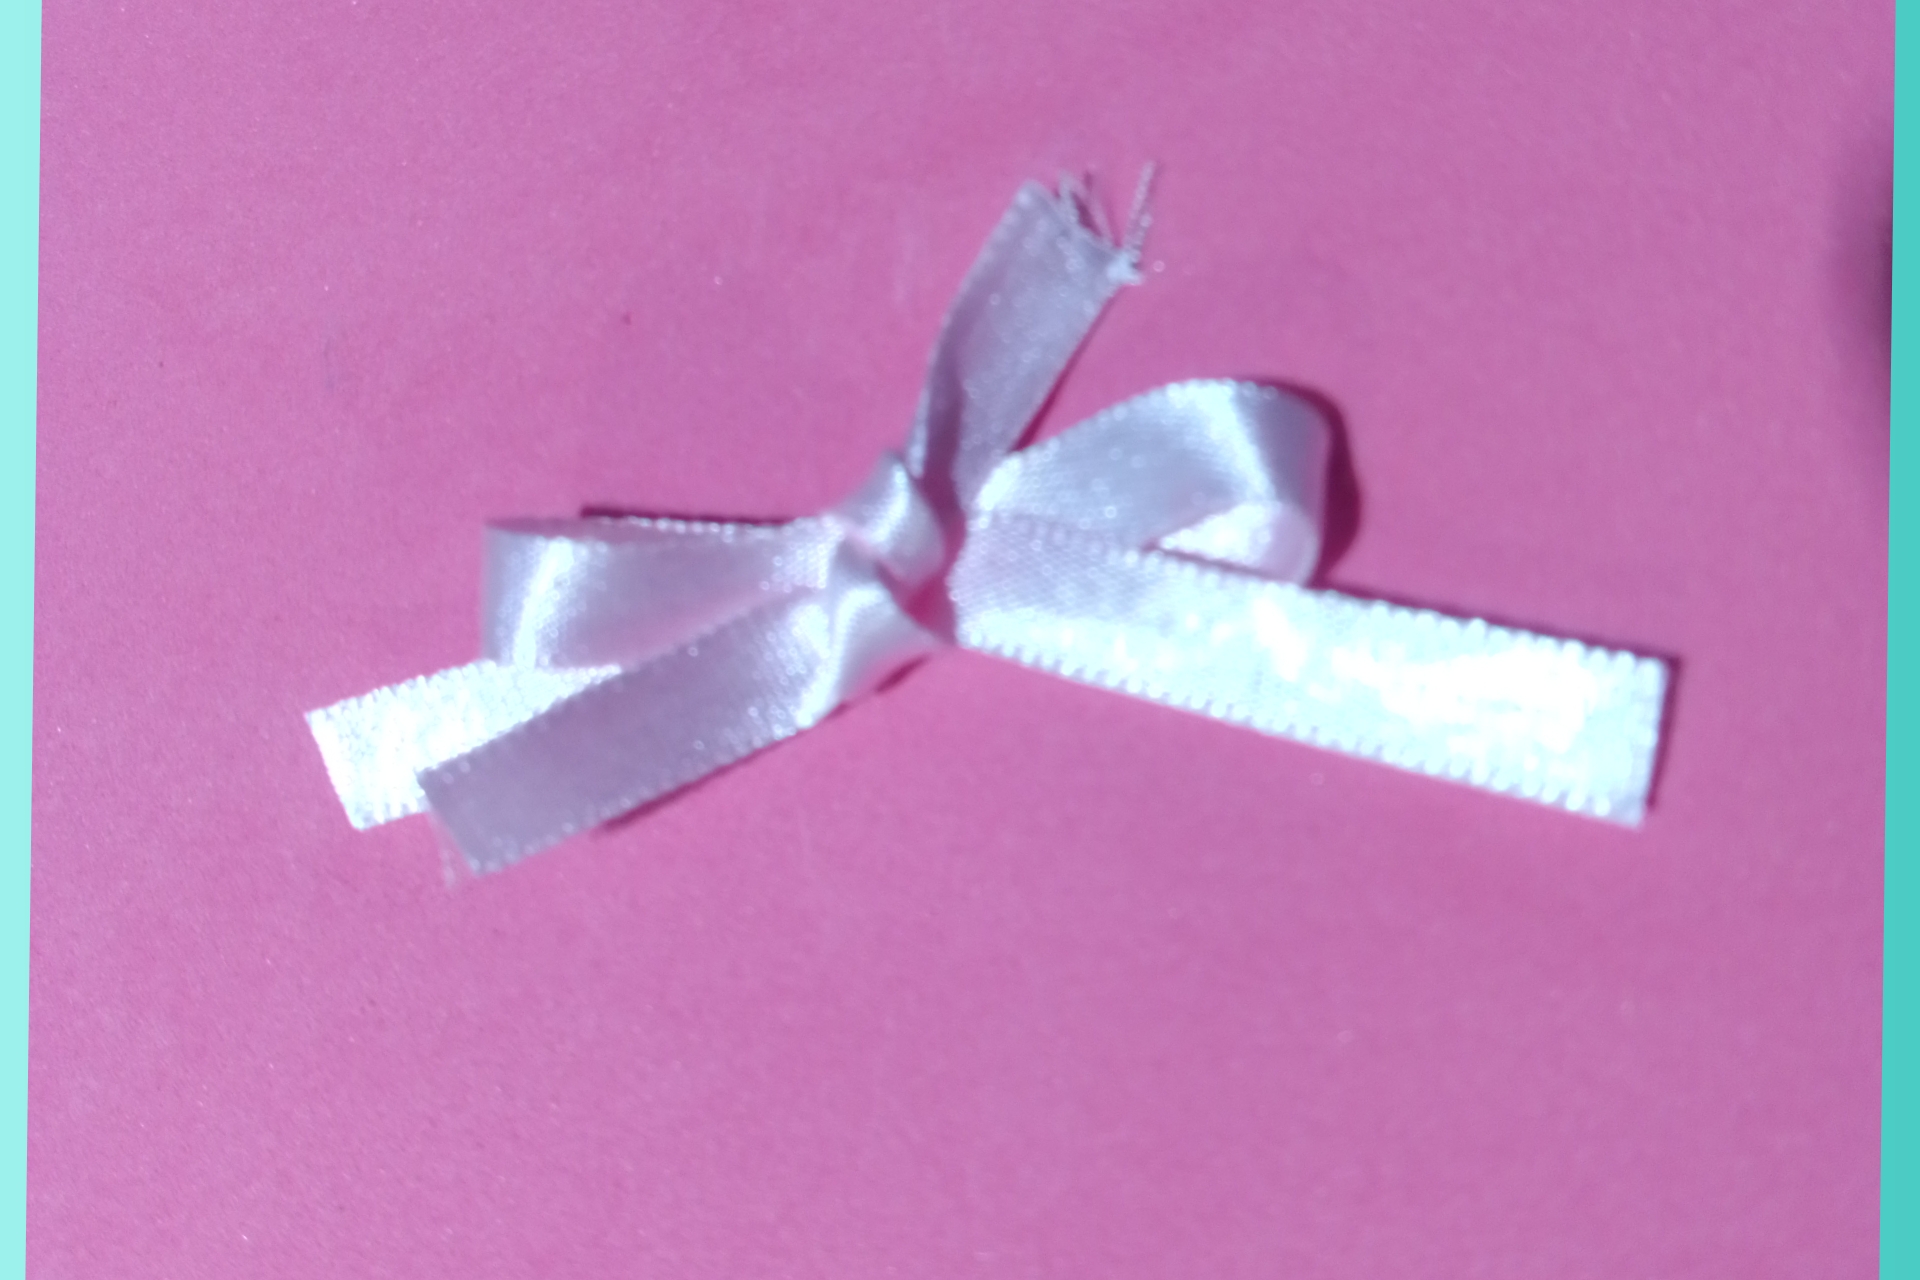
At the beginning you can't see the shape very well, but with the fingers we shape the ribbon, when we have the shape we like, we make a second knot, we cut the excess of the shortest strip and with the help of a tinder lightly bring the candle near the edges of the ends of the ribbon.
Al principio no se ve muy bien la forma, pero con los dedos vamos dándole forma al lazo, cuando tenemos la forma que nos guste, realizamos un segundo nudo, recortamos el excedente de la tira más corta y con la ayuda de un yesquero acercamos levemente la candela por los bordes de las puntas del lazo
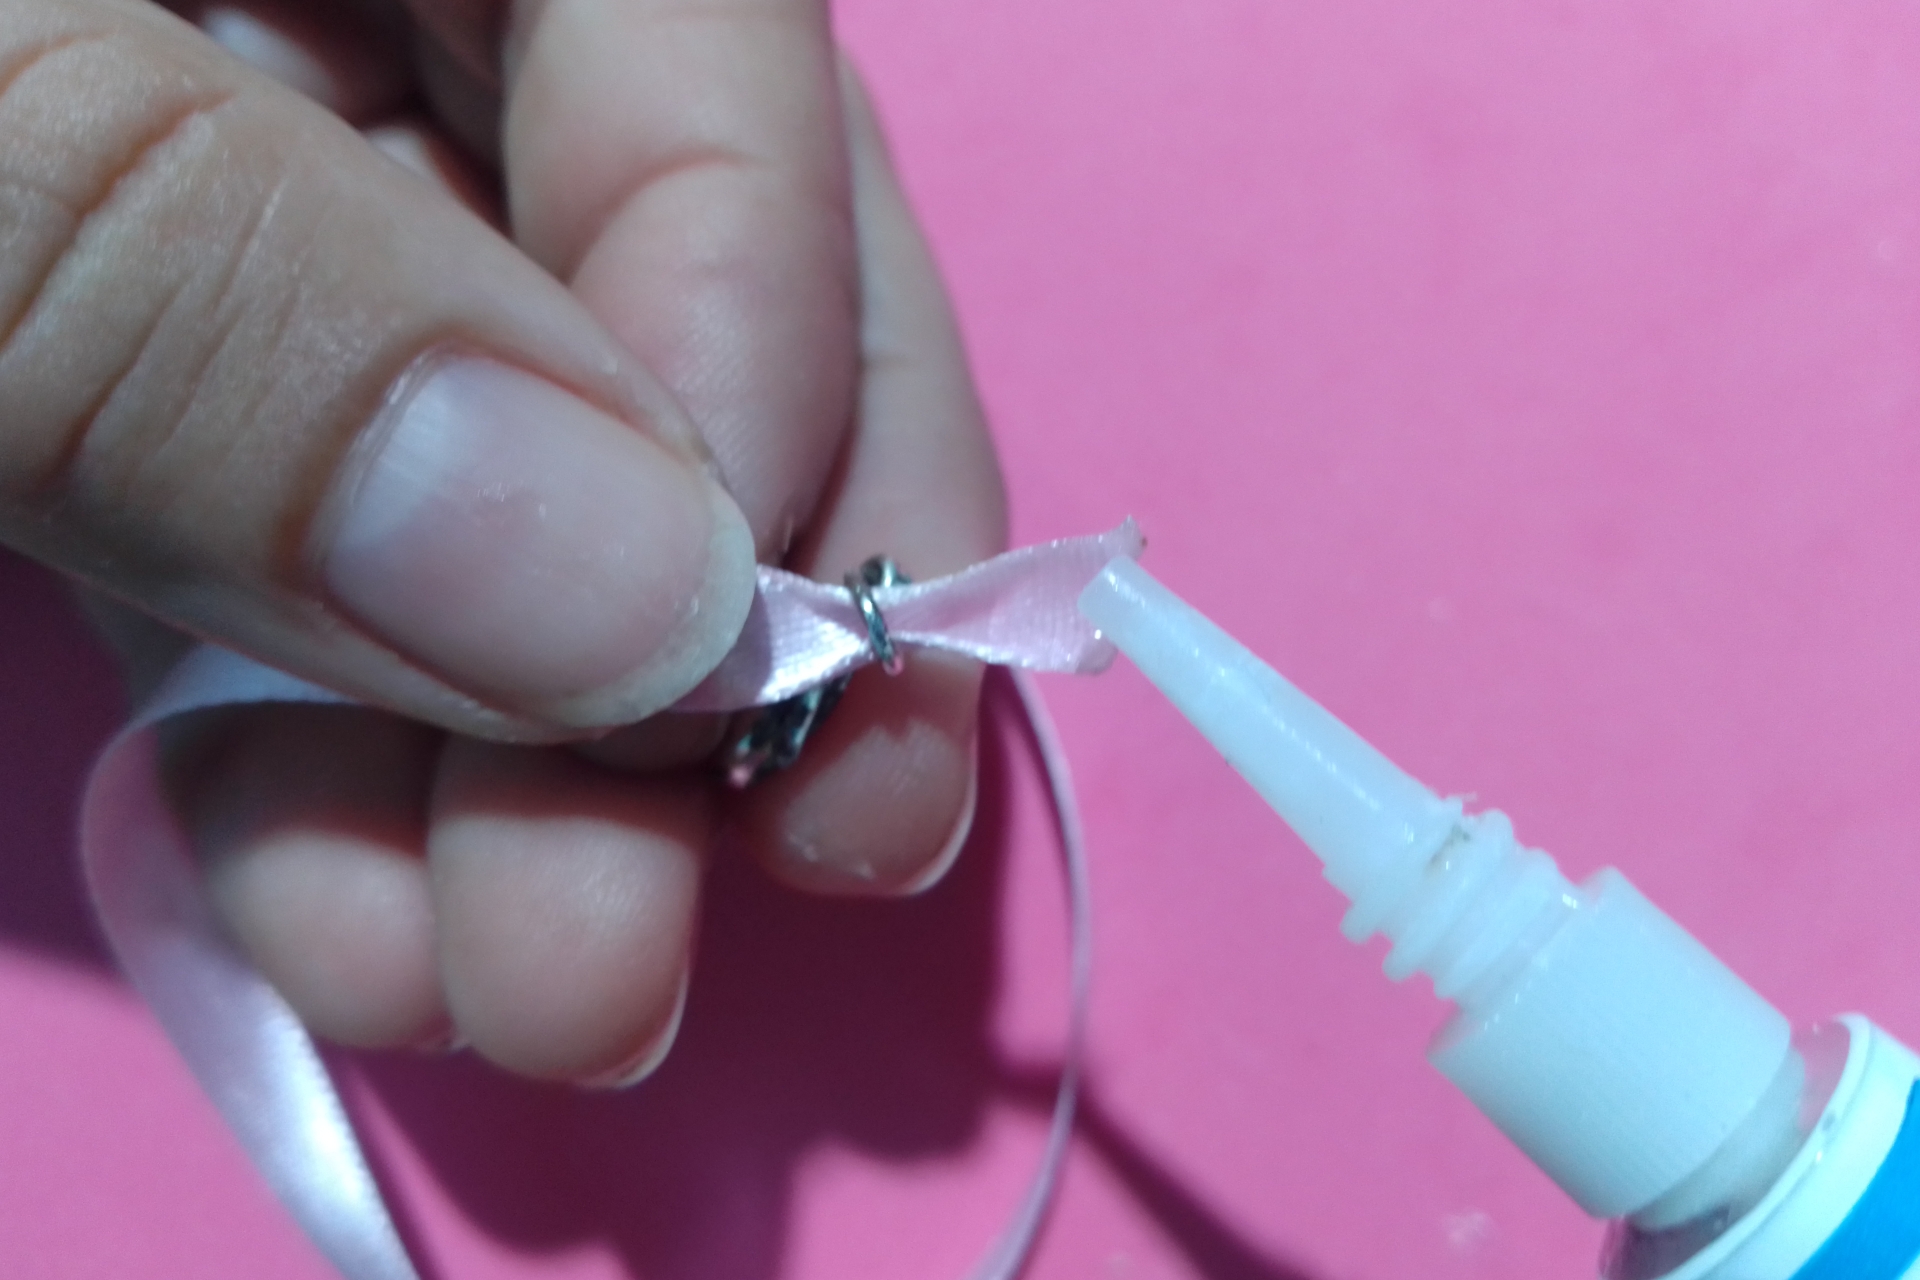
I measured the diameter of my neck to use an appropriate amount of ribbon. Place the ring on one end of the ribbon and carefully add the loka glue. Do the same process with the other end but attach the hook.
Medi el diámetro de mi cuello para usar una cantidad de cinta adecuada. Coloque la argolla en uno de los extremos de la cinta y agregue con cuidado pega loka. Realice el mismo proceso con el otro extremo pero colocando el ganchito.
Then I folded the ribbon in half to guide me and to be able to glue the center loop, and the other loops I glued them side by side leaving a distance of 1.5 cm.
Seguidamente doble la cinta a la mitad para guiarme y poder pegar el lazo del centro, y los otros los lazos los pegue de lado y lado dejando una distancia de 1.5 cm
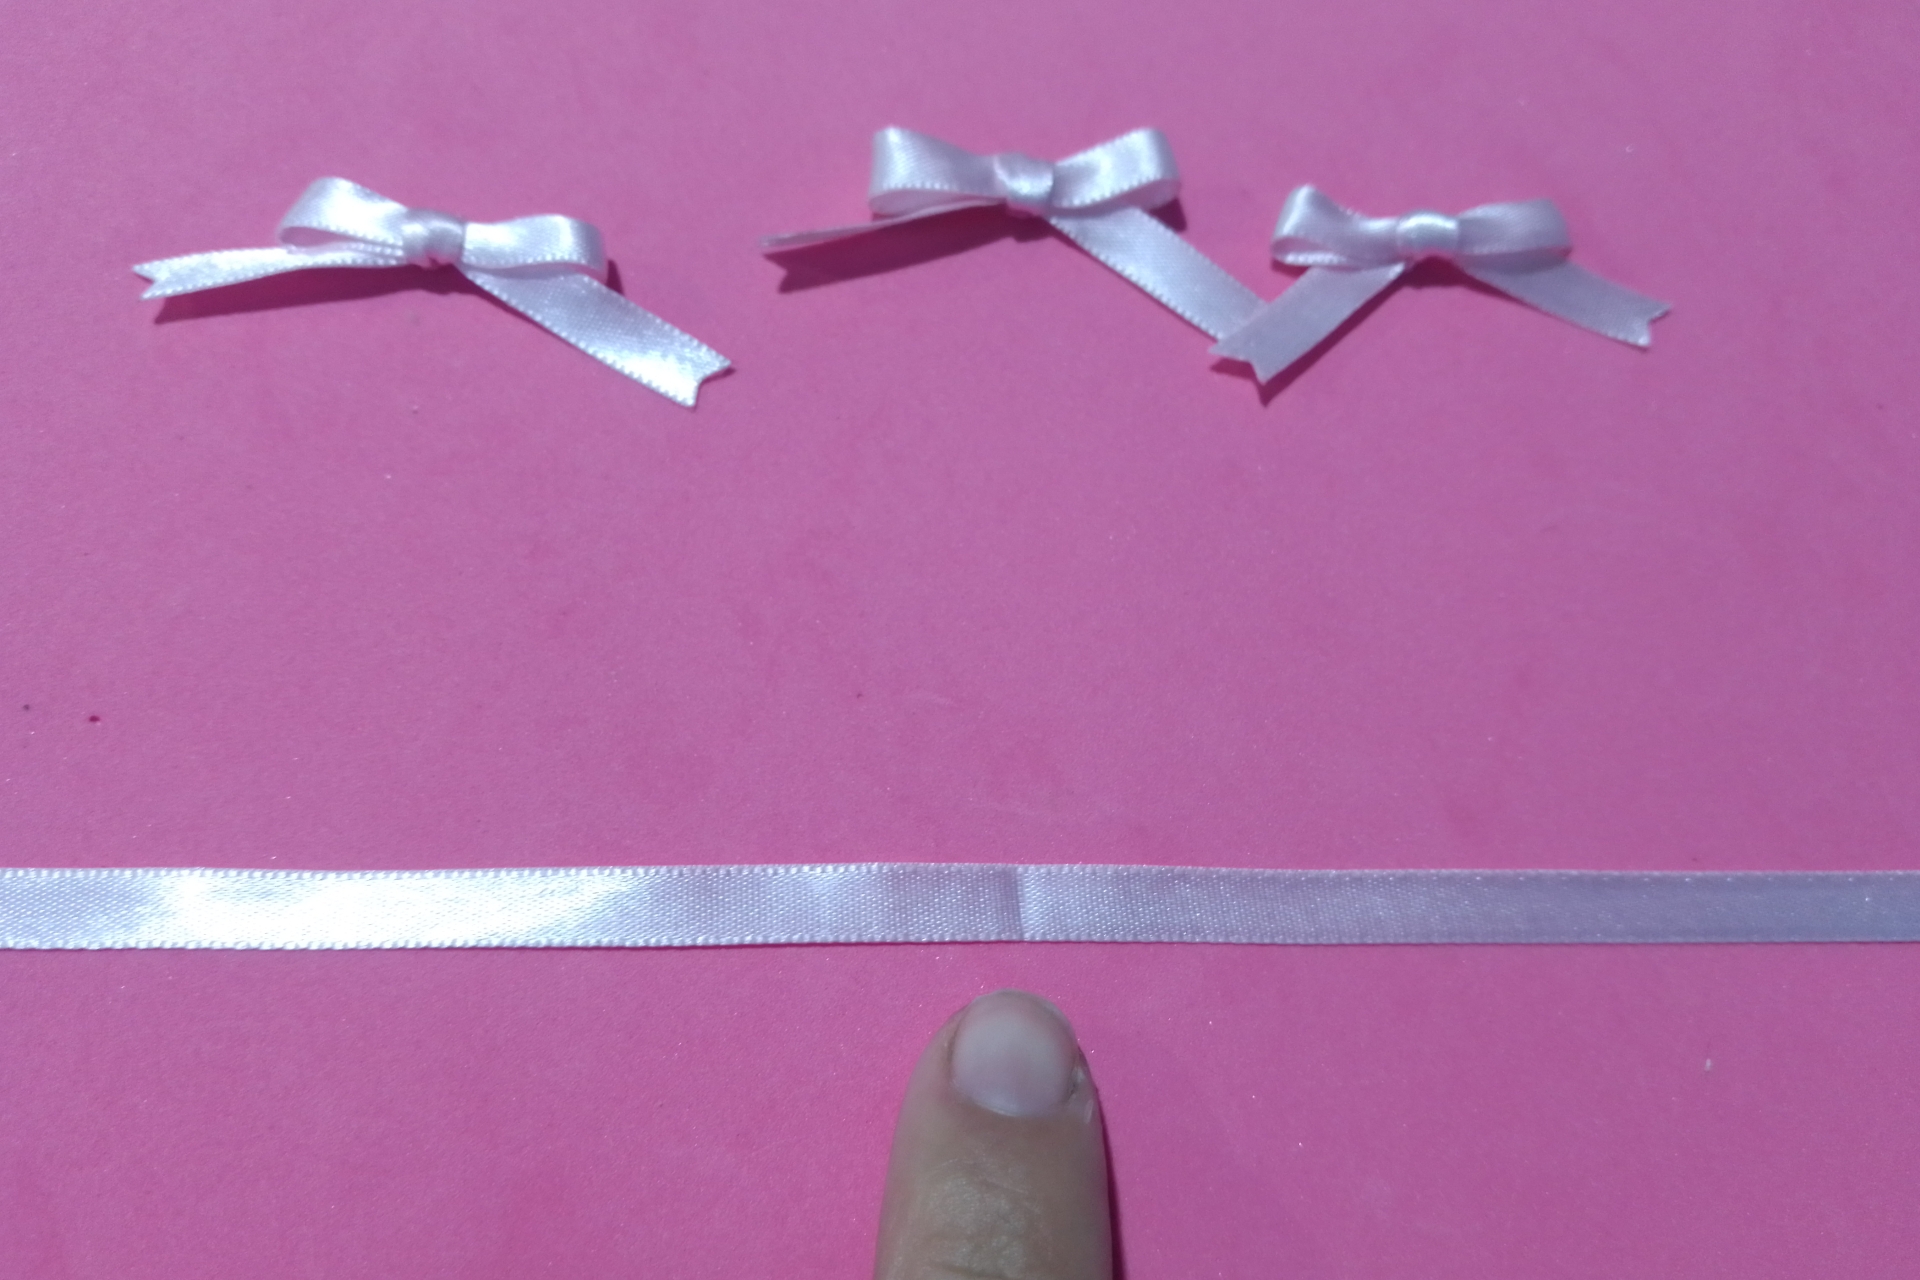
The loka glue dries instantly so I had the first necklace ready.
La pega loka se seca al instante así que ya tenía listo el primer collar.
🎀 Model 2 / Modelo 2 🎀
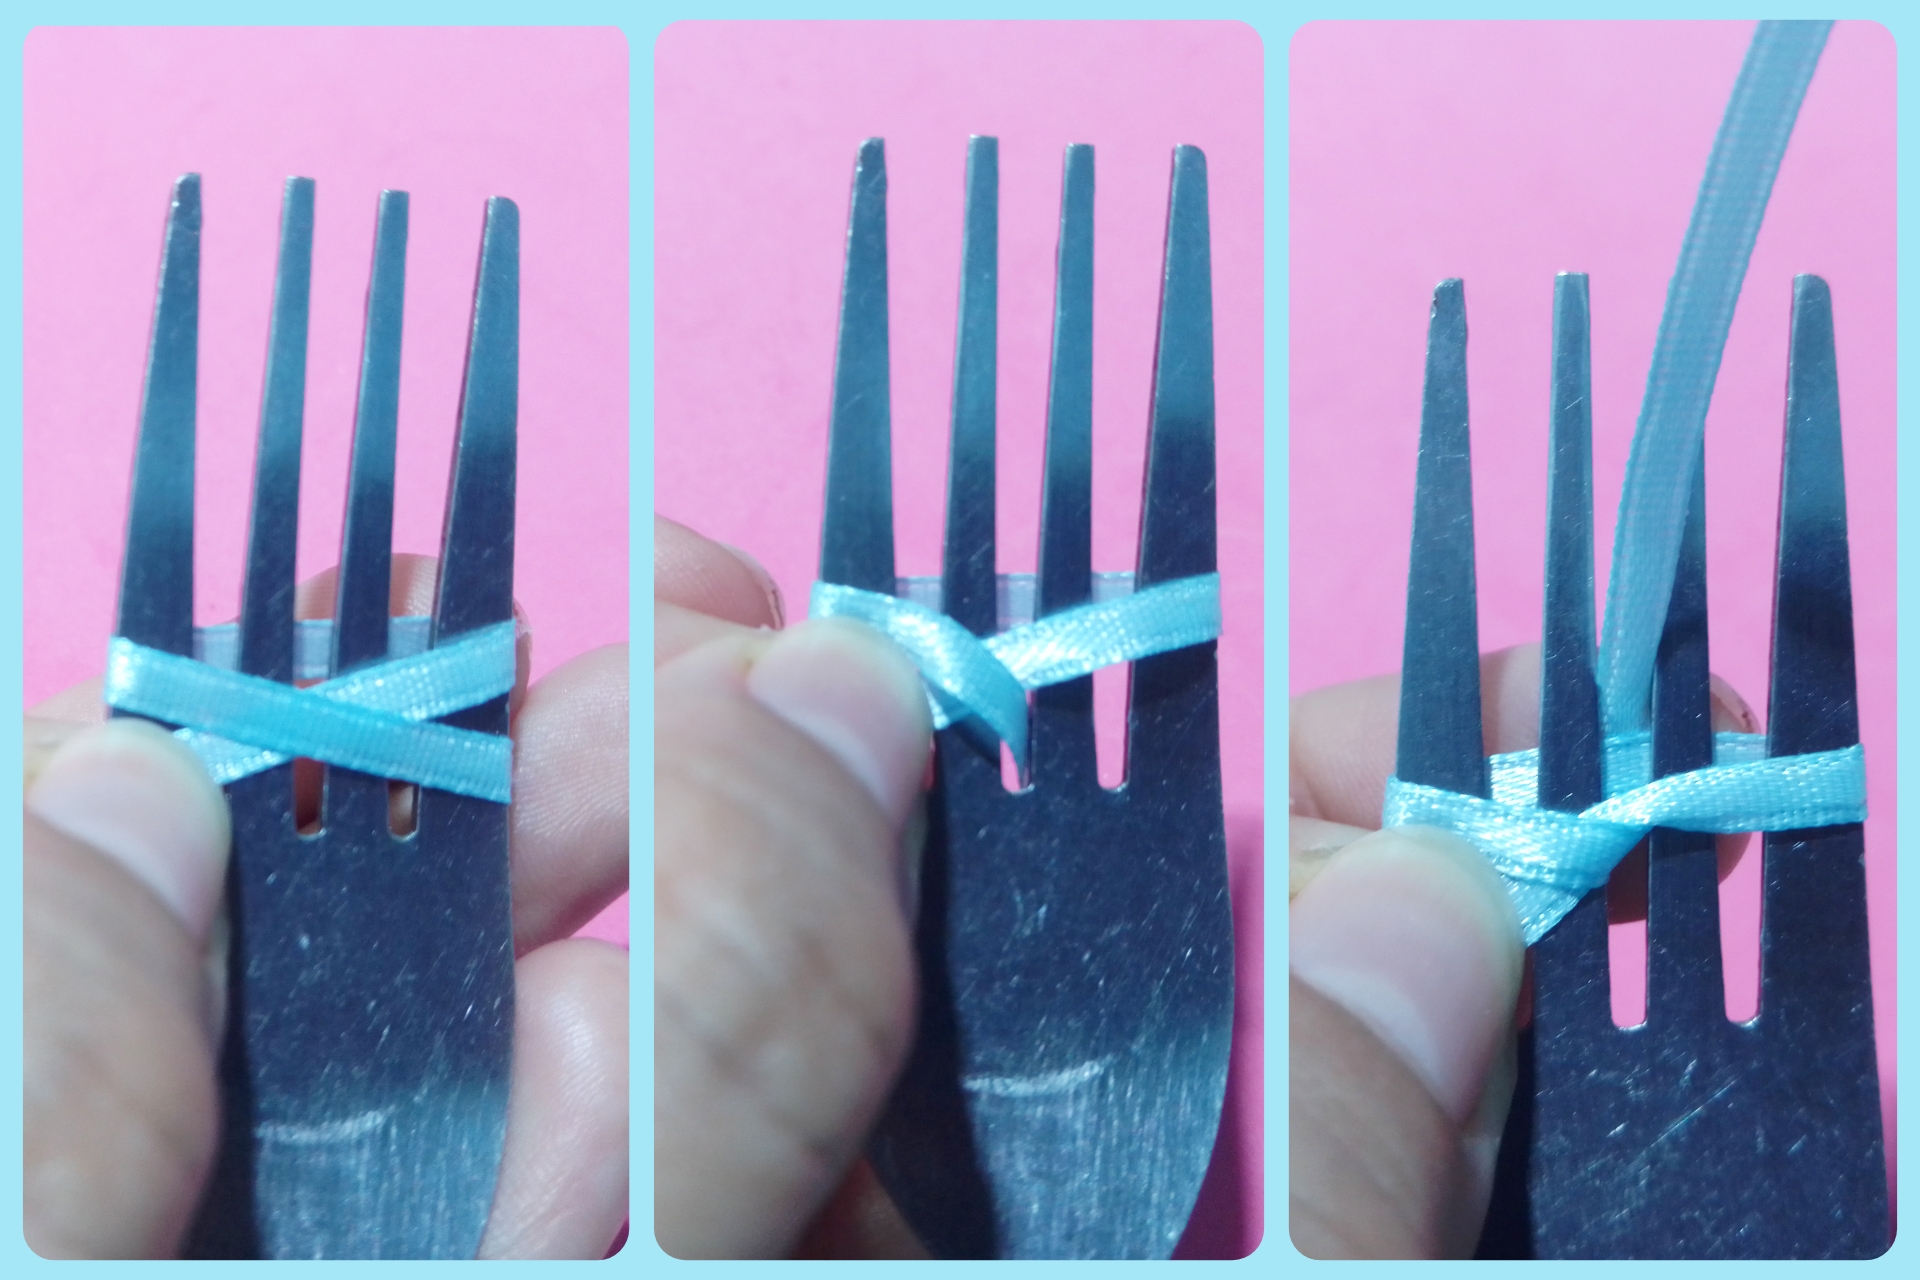
For the thinner ribbon, I used a fork to make it easier to make the loop, especially for the knots, I used a length of 15 cm in 0.4 cm ribbon and cut three of the same size.
Applying this technique was very useful to me because thanks to the sticks that the fork has, it was easier to visualize where I should pass the ribbon, plus I used less ribbon.
What I did was to border the fork with the ribbon, the strip that came to the right side, I put it through the middle of the fork and took the tip upwards, as shown in the following collage.
Para la cinta más finita, utilice un tenedor para que se me hiciera más fácil hacer el lazo, sobre todo por los nudos, utilice un largo de 15 cm en cinta de 0.4 cm y recorte tres del mismo tamaño.
Aplicar esta técnica me resultó muy útil ya que gracias a los palitos que tiene el tenedor, fue más fácil visualizar por dónde debía pasar la cinta, además que así utilice menos cantidad de cinta.
Lo que hice fue bordear el tenedor con la cinta, la tira que venía hacia el lado derecho, la metí por la endijita del medio del tenedor y lleve la punta hacia arriba, así como se aprecia en el siguiente collage
Next, I pulled it forward and down, holding it with my finger to tie the knot with the tip of the left end, i.e., the side opposite the tip.
To make the loop the same size, I rolled the ribbon to the base of the fork, stretched the ends and then pulled to make the knot.
Seguidamente la lleve hacia adelante y hacia abajo, sujete con mi dedo para hacer el nudo con la punta del extremo izquierdo, es decir, con el lado contrario de la punta.
Para que me quedara el lazo del mismo tamaño, rodé la cinta hasta la base de tenedor, estire las puntas y luego hale para hacer el nudo
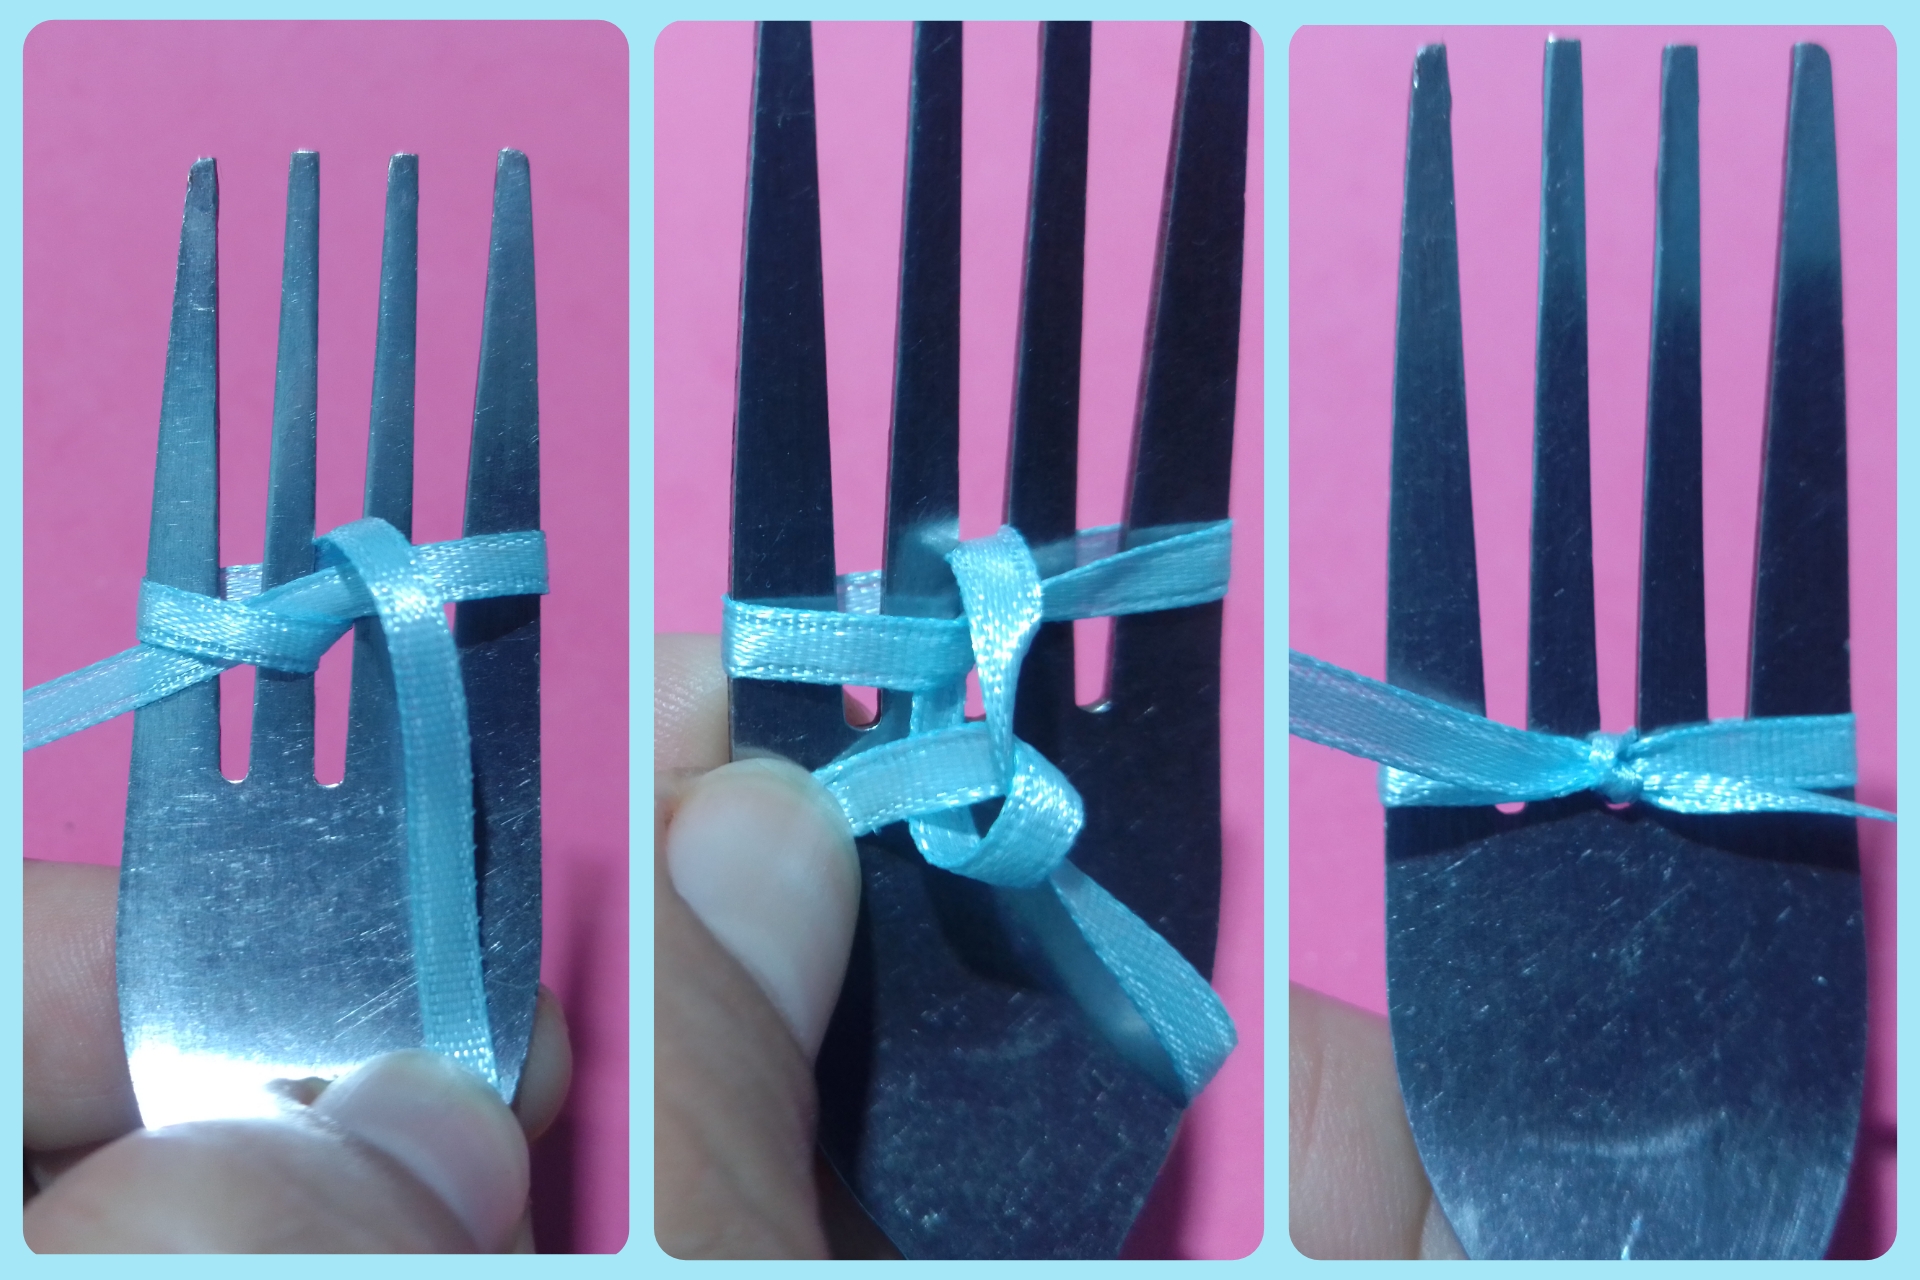
I aligned the ends of the loop to the ends of the fork, squeezed hard again and the loop was ready. I did this process three times in total.
Alinee las puntas del lazo hacia las puntas del tenedor, volví a apretar con fuerza y y el lazo estaba listo. Este proceso lo realice tres veces en total.

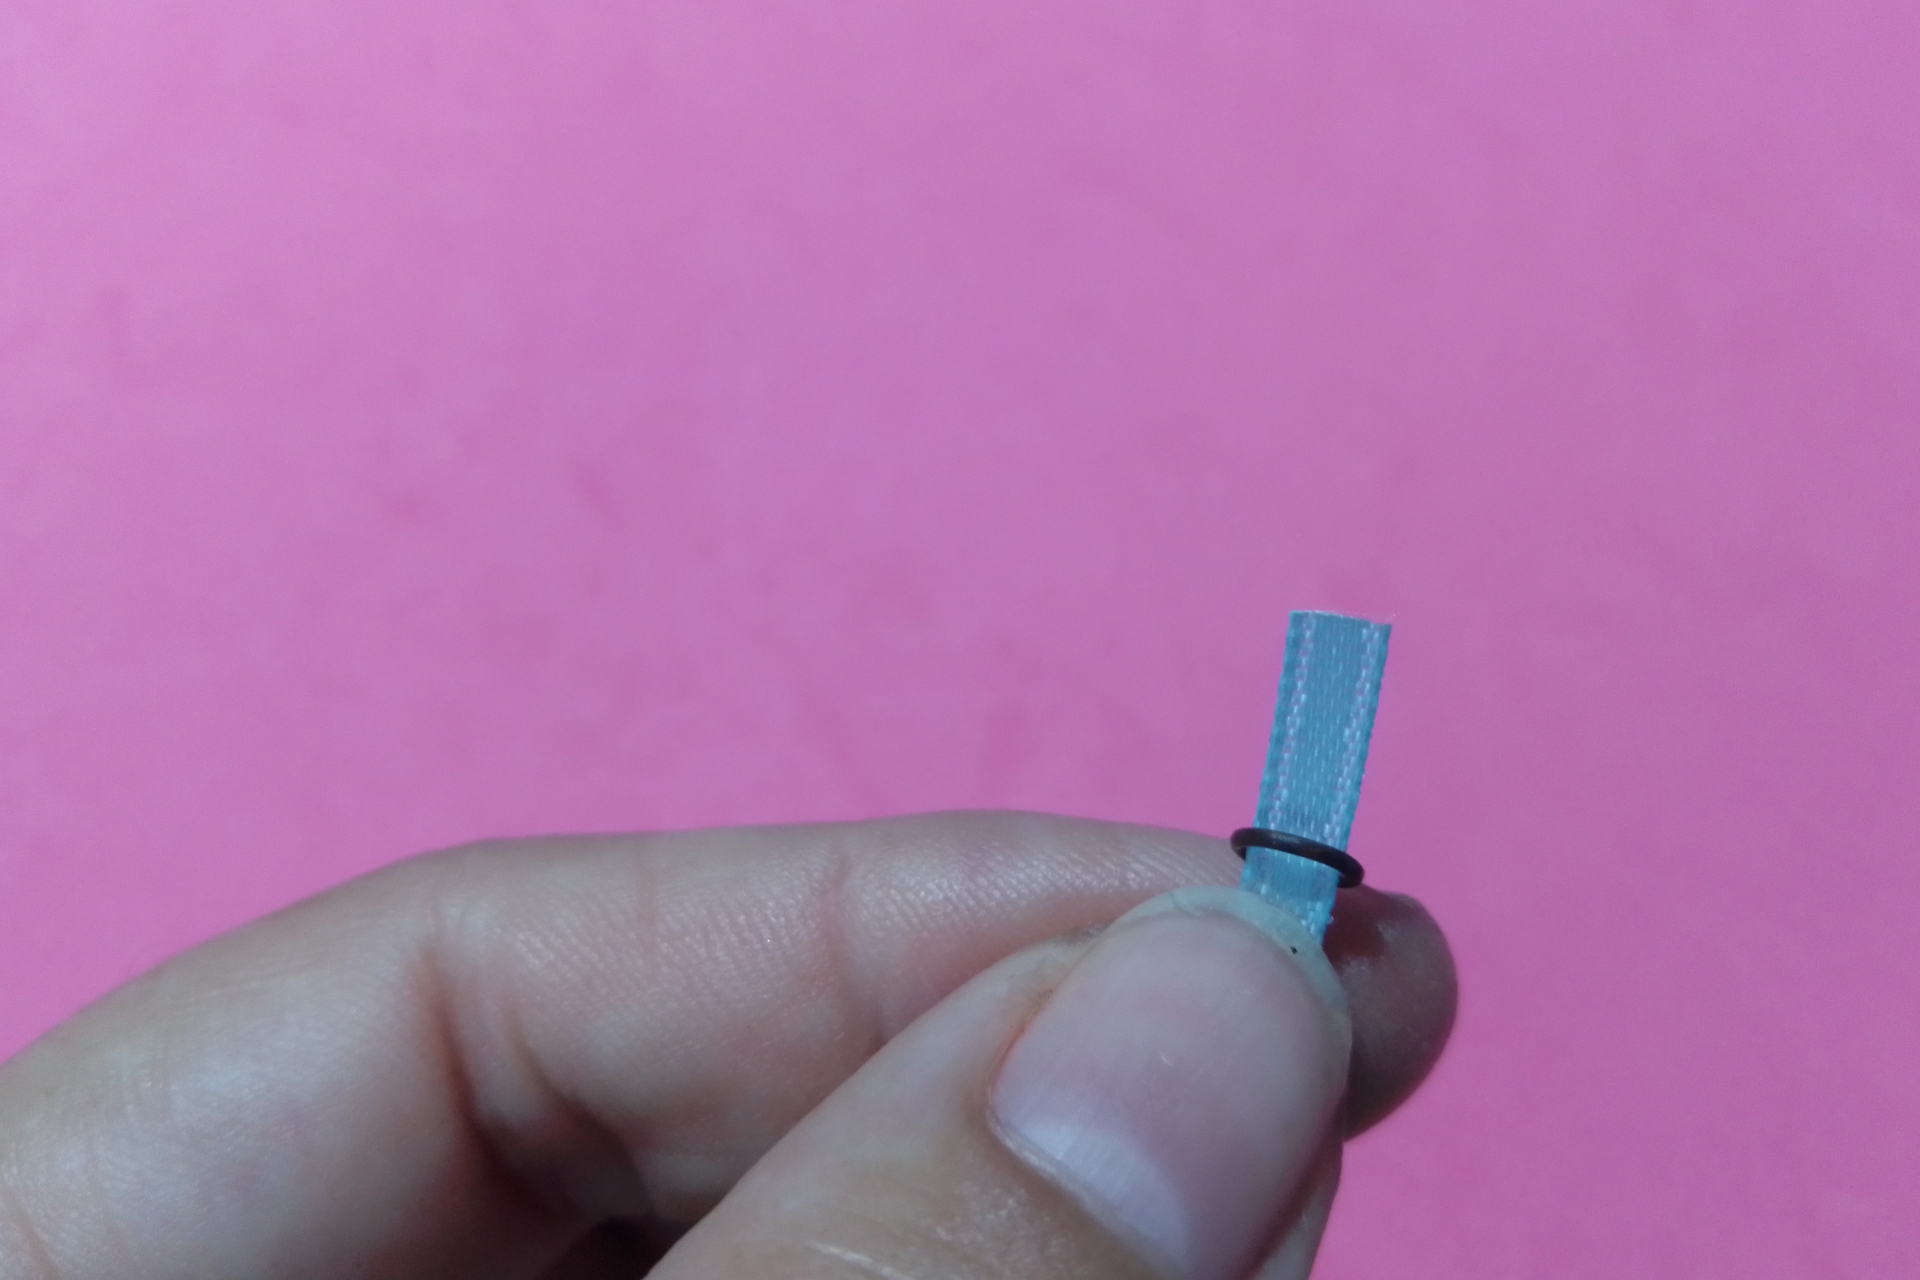
I measured the ribbon according to the thickness of my daughter's neck, placed the ring and the hook at each end.
Medi la cinta según el grosor del cuello de mi hija, coloque la argolla y el ganchito, en cada extremo.
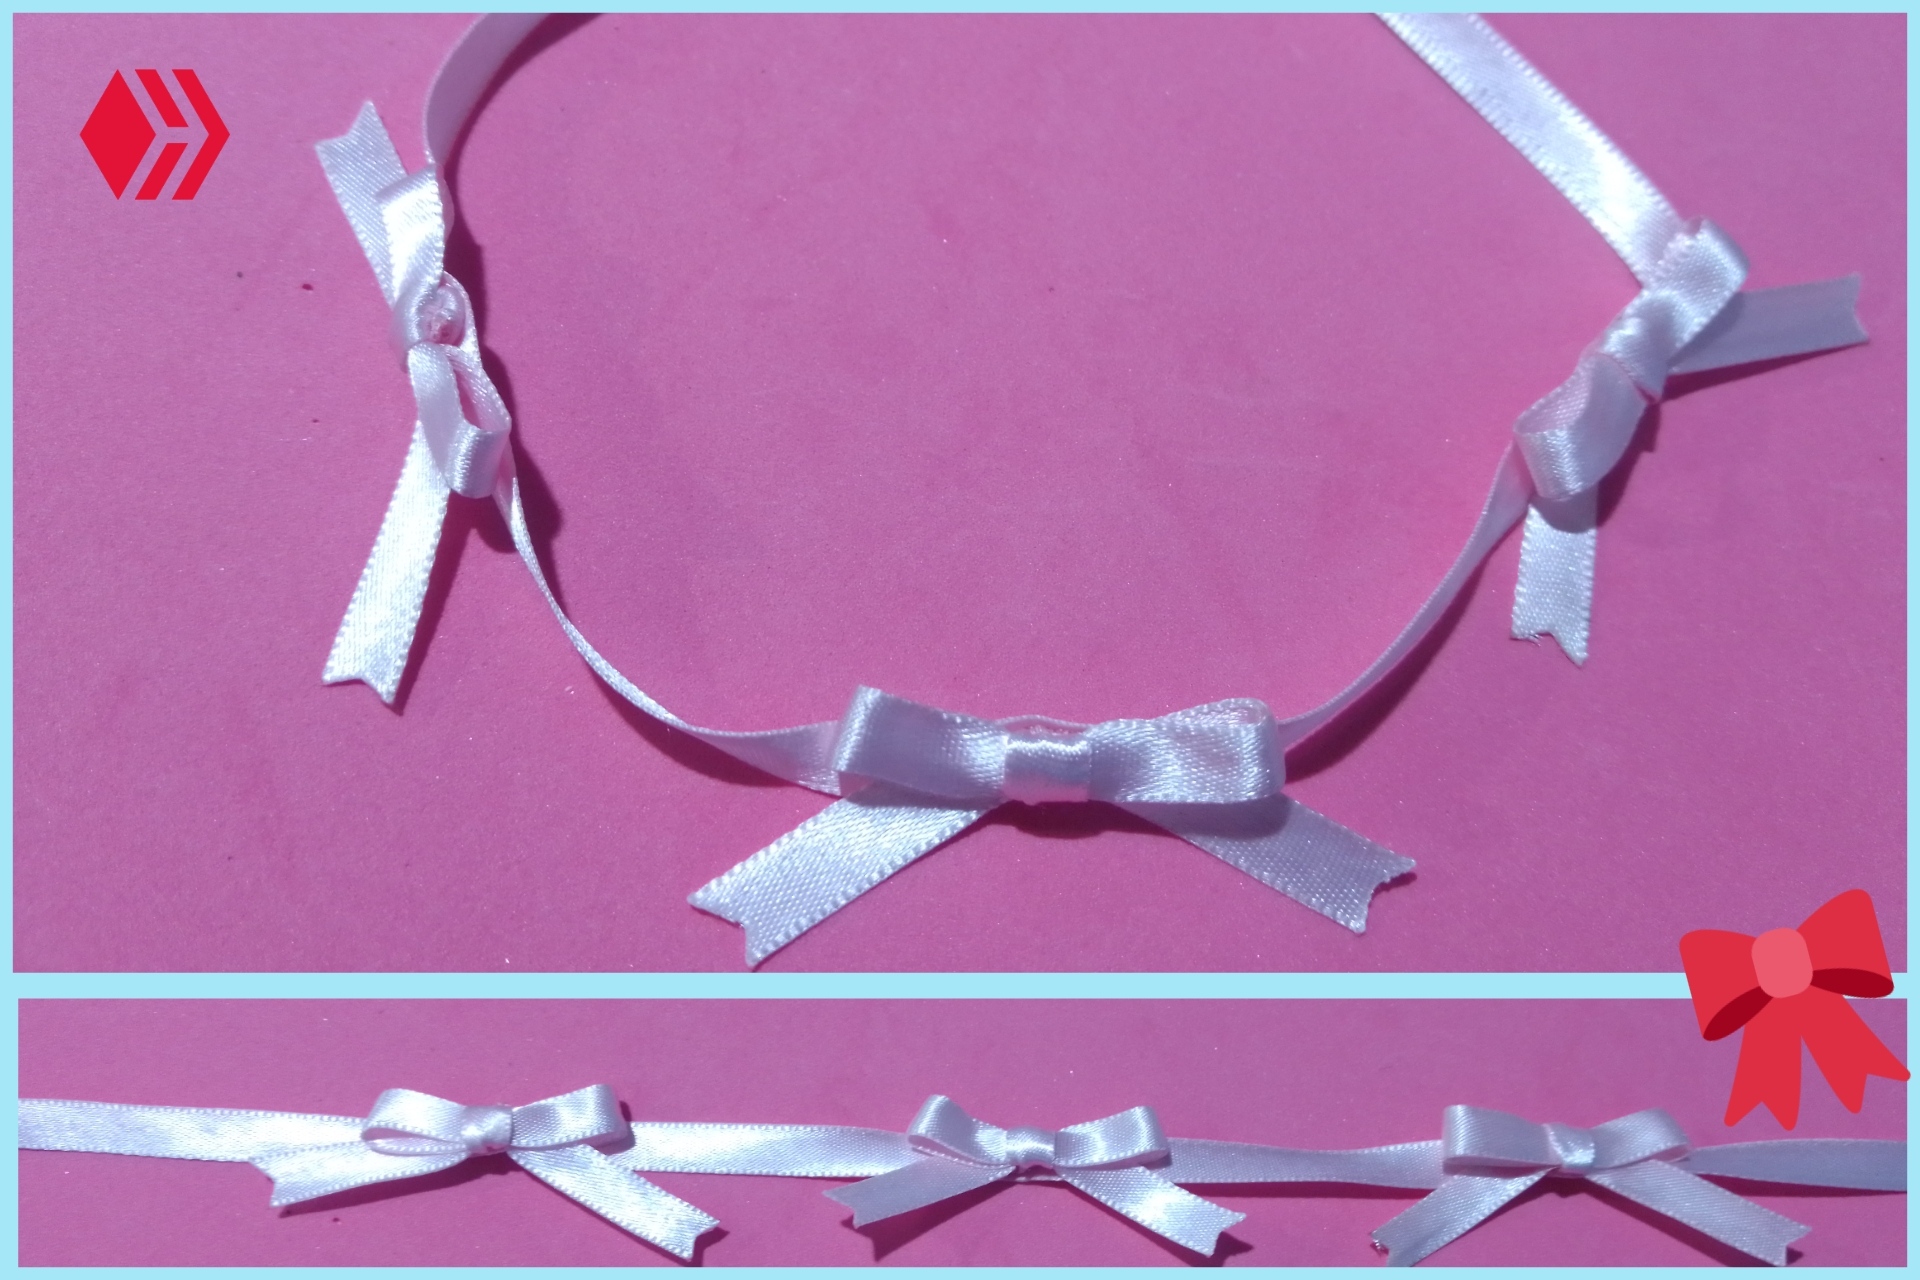
I folded the tape in half to mark the center and to serve as a guide to glue the first loop and glued the others at each end, but leaving 0.7 millimeters between each loop.
Doble la cinta por la mitad para marcar el centro y que me sirviera de guía para pegar el primer lazo y los otros los pegue en cada extremo, pero dejando 0.7 milimetros entre cada lazo.
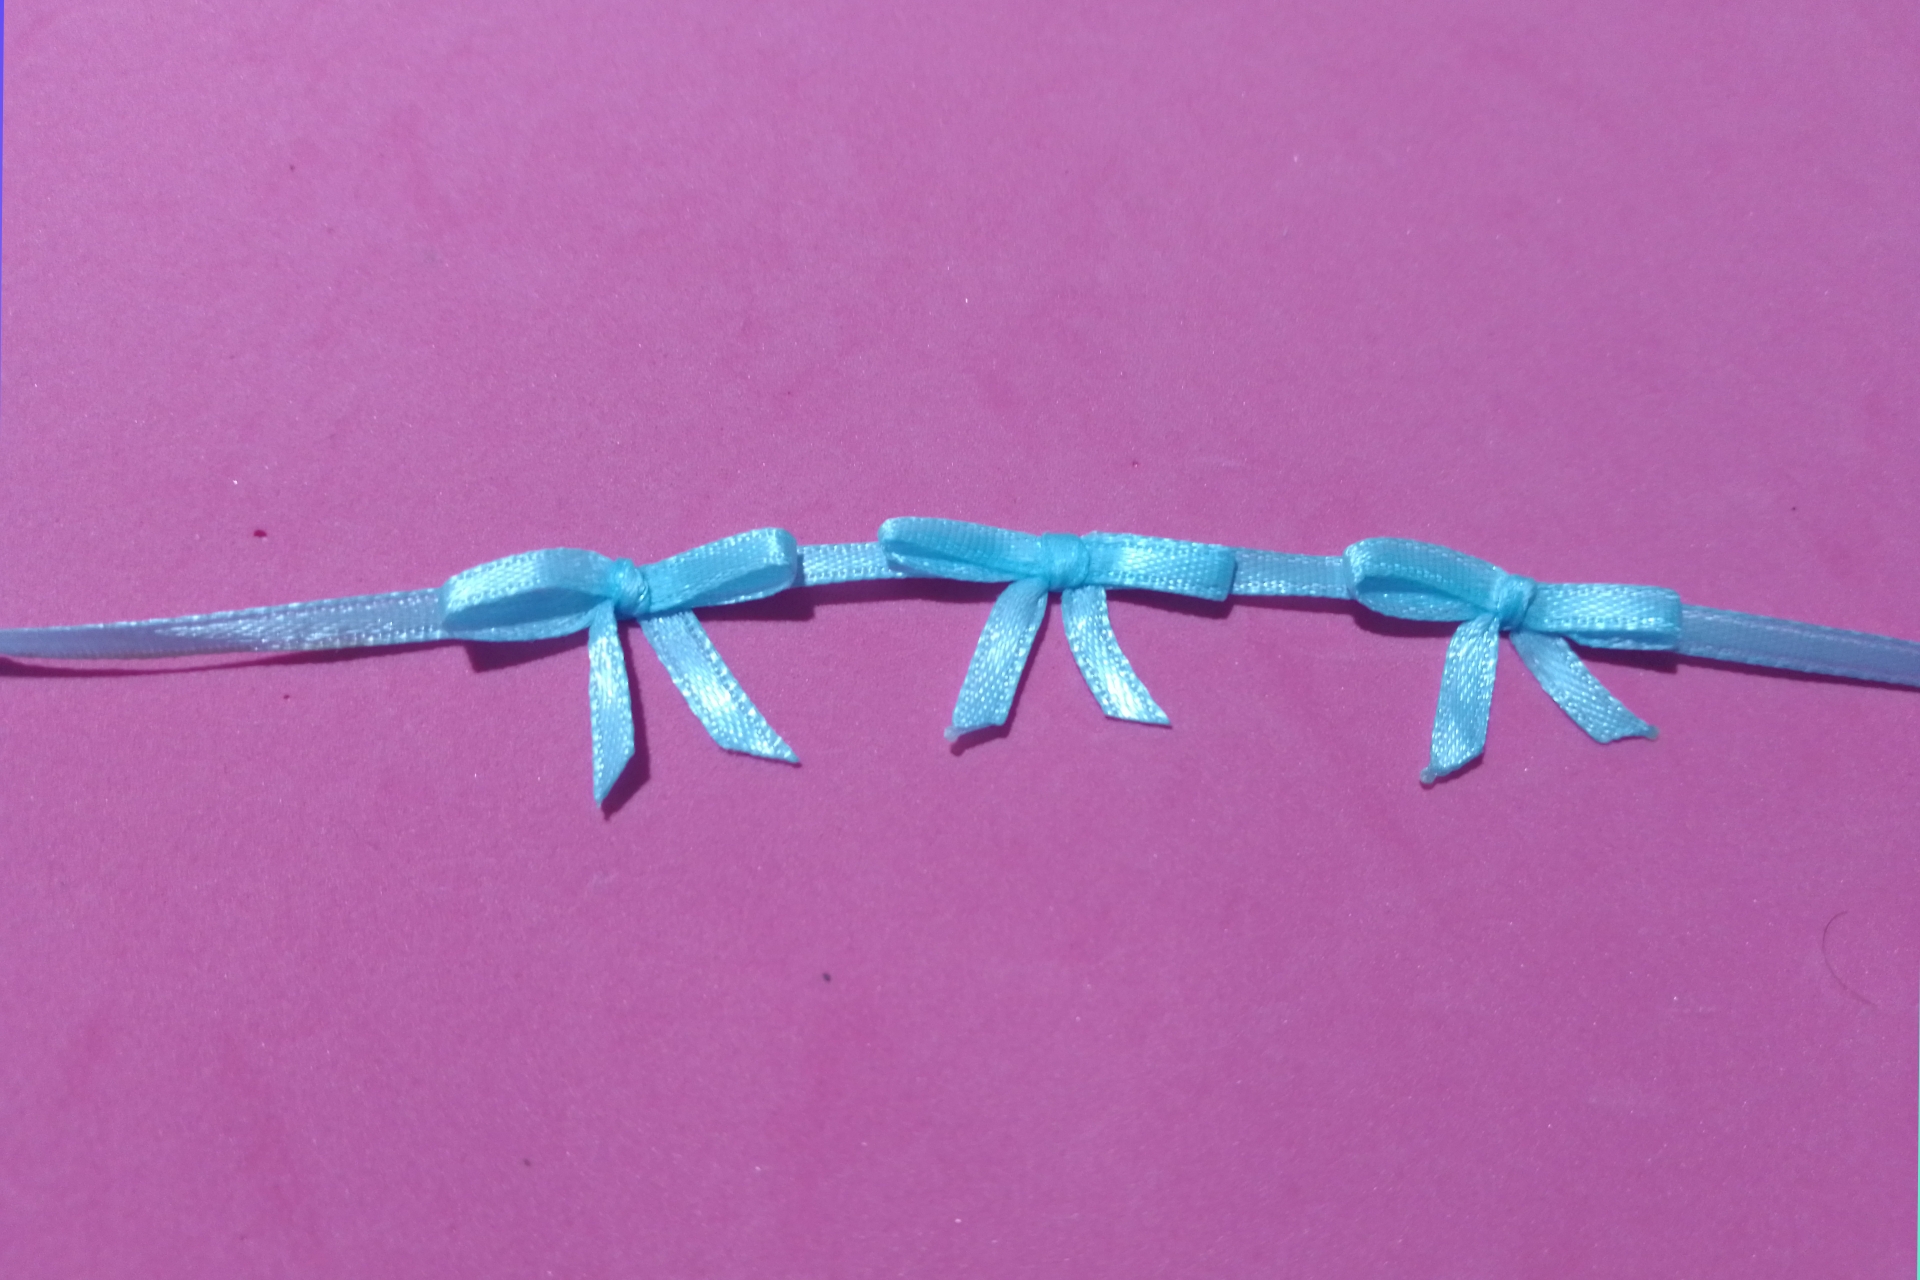
And now the second necklace was ready. It is worth mentioning that the ribbon for my daughter is blue since it is her favorite color for clothes and accessories.
Y ya el segundo collar ataba listo. Cabe destacar que el lazo para mi hija es de color azul ya que es su tono preferido para ropa y accesorios.
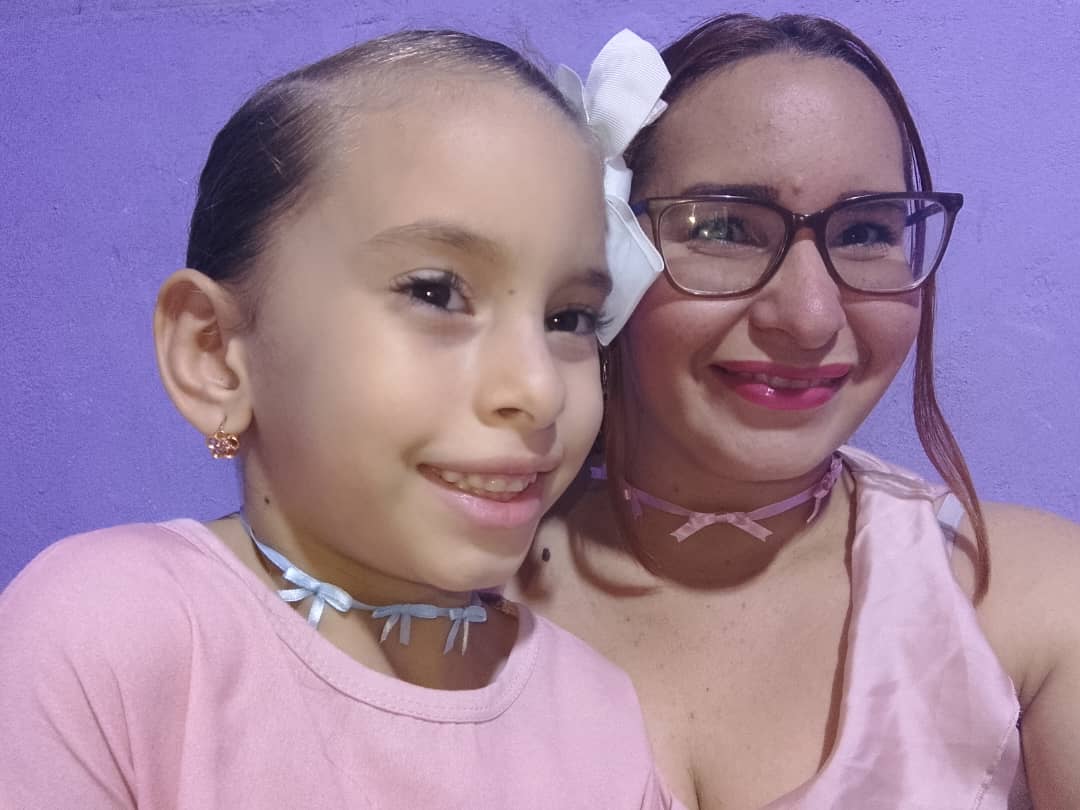
We complemented our outfit with cute pale pink blouses and took lots of pictures with our tiny bow necklaces as my daughter says hehehehe.
If you dare to make these necklaces, I recommend you to use the fork as a tool because this way it is easier 😉.
Complementamos nuestro outfit con lindas blusas color rosa palo y nos tomamos muchas fotos con nuestros collares de lazos pequeñitos como dice mi hija jejeje.
Si se animan a hacer estos collares, les recomiendo usar el tenedor como herramienta ya que de este modo es más fácil 😉

teléfono Blade A7s, Cantaura - Venezuela.
Original content for hiveblog, photographs of my authorship, edited in the incollage app, cover made in the canva app.
Blade A7s phone, Cantaura - Venezuela.
Separador Banner editado en Canva
Congratulations @nakaryr! You have completed the following achievement on the Hive blockchain And have been rewarded with New badge(s)
Your next target is to reach 1750 upvotes.
You can view your badges on your board and compare yourself to others in the Ranking
If you no longer want to receive notifications, reply to this comment with the word
STOPCheck out our last posts:
Me gusta 😻 están bellísimos ❤️🎀 la tendencia coquette está en todos lados ☺️ gracias por compartir la técnica con el tenedor es interesante.
Qué bonitos te han quedado. Y creo que estoy desactualizada, jeje. No sabía esto de la moda coquette.
So pretty and delicate!