Saludos comunidad HiveDiy.
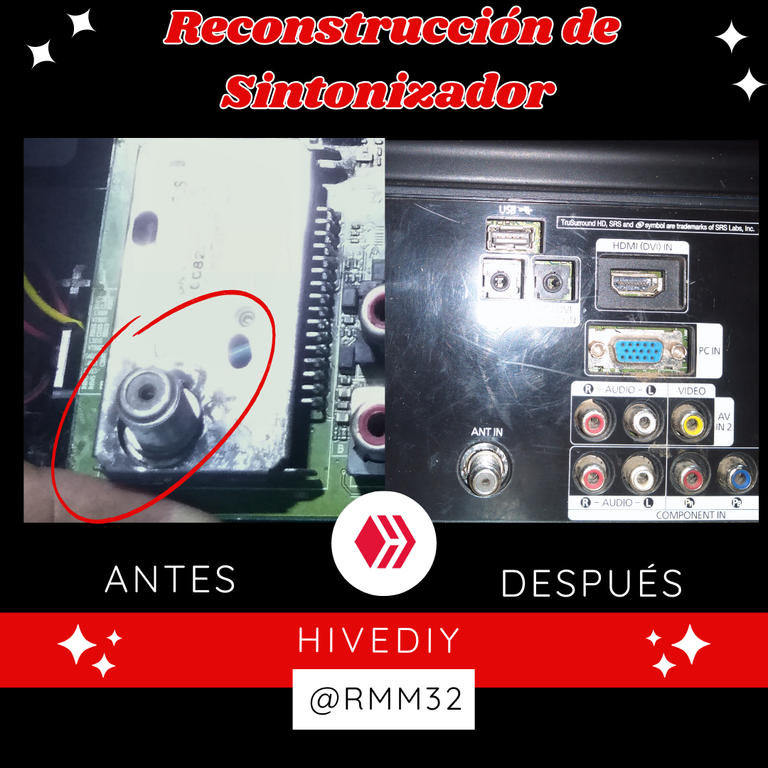
En esta ocasión les mostraré como reconstruir un sintonizador de TV, esta entrada de TV es la encargada de recibir la señal que vienes desde el cable coaxial.
Esta entrada es un poco difícil de dañarse y más aún en estos tiempos actuales donde las entradas para recibir señales de vídeos son el HDMI o el RCA, pero el de cable coaxial prácticamente no se utiliza.
Greetings HiveDiy community.
This time I will show you how to rebuild a TV tuner, this TV input is responsible for receiving the signal that comes from the coaxial cable.
This input is a little difficult to damage and even more in these times where the inputs to receive video signals are the HDMI or RCA, but the coaxial cable is practically not used.
Sin embargo el dueño de este televisor aún ve televisión por cable y supongo que la señal no ha sido muy favorable para él.
Tanto así que manipuló con mucha fuerza el sintonizador que poco a poco lo rompió, literalmente lo separó de la carcasa.
Así que tuve que destapar la cubierta para ver que encontraba en el interior y saber qué tan dañdo estaba.
However the owner of this TV still watches cable TV and I guess the signal has not been very favorable for him.
So much so that he manipulated the tuner with so much force that he gradually broke it, literally separated it from the housing.
So I had to uncover the cover to see what I found inside and find out how damaged it was.
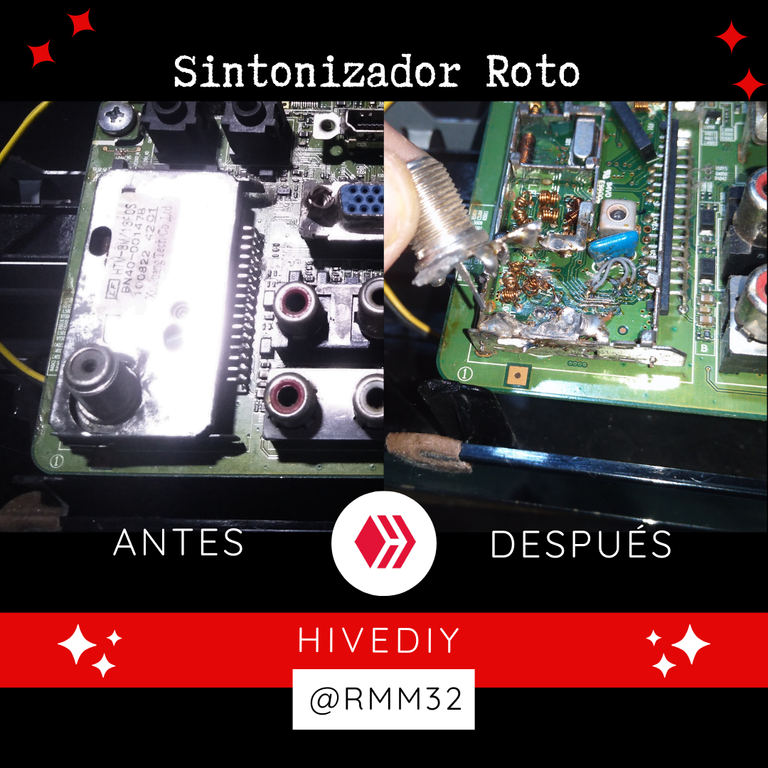
Les confieso que estaba bastante deteriorado, pero afortunadamente no había daño en la placa, solo la separación del pin positivo y el cuerpo negativo que viene siendo toda la cubierta.
Para empezar la reconstrucción tuve que buscar la forma de unir el punto positivo en la placa,para lograrlo con éxito utilicé un cable extensor que fuera flexible y cubierto para que no hiciera contacto con ningún elemento en el interior del sintonizador.
Luego solo tenía que posicionar en su sitio el cabezal del sintonizador para dejarlo lo más original posible.
I confess that it was quite deteriorated, but fortunately there was no damage on the board, only the separation of the positive pin and the negative body which is the whole cover.
To start the reconstruction I had to find a way to join the positive point on the board, to achieve it successfully I used an extender cable that was flexible and covered so that it did not make contact with any element inside the tuner.
Then I only had to position the tuner head in its place to leave it as original as possible.
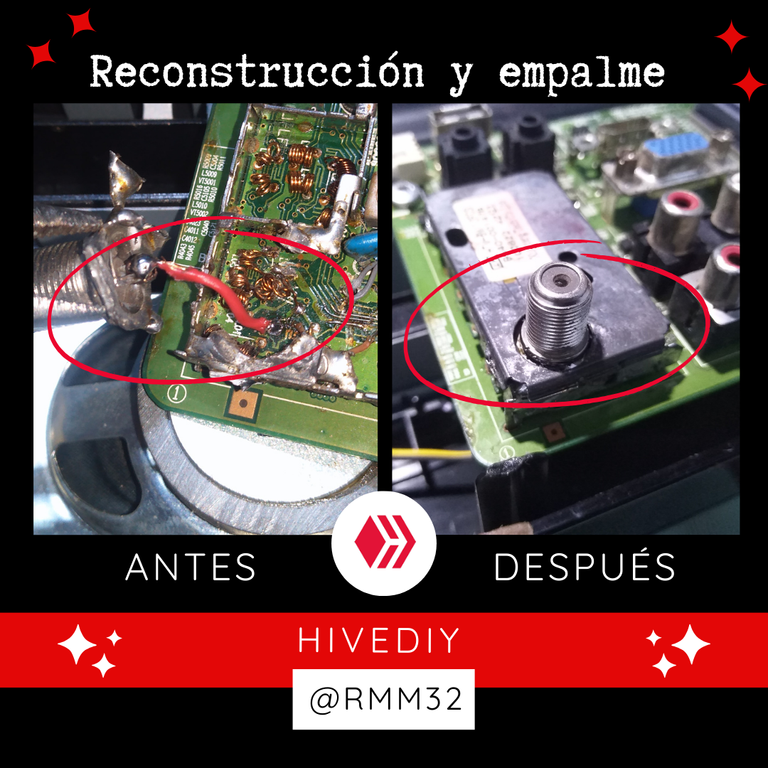
Lo bueno es que el material del que se compone la carcasa del sintonizador es ideal para trabajarlo con estaño.
El estaño de adhiere muy bien y podía moldear al derretir el estaño. Poco a poco lo fuí enderezando y dándole más rigidez con la ayuda de alambre de cobre, así como lo hice con el pin del protector de nevera.
Después de esto solo tuve que tapar el sintonizador con su cubierta metálica y luego colocarlo en el televisor para armarlo.
Hice una medición para probar que no exista contacto entre el polo positivo y el negativo, no había unión entre estos dos puntos.
Así que dí por culminada está reparación que fue algo sencilla y rápida.
Espero que el usuario pueda manipular se mejor manera el cable y el conector.
The good thing is that the material the tuner housing is made of is ideal for working with tin.
The tin adheres very well and I could mold it by melting the tin. Little by little I straightened it and made it more rigid with the help of copper wire, just as I did with the pin of the refrigerator protector.
After that I just had to cover the tuner with its metal cover and then place it on the TV to assemble it.
I made a measurement to test that there is no contact between the positive and negative poles, there was no connection between these two points.
So I finished this repair that was somewhat simple and fast.
I hope that the user can handle the cable and the connector in a better way.
Todas las fotografías fueron tomadas con mí Smartphone Huawei Dub-Al00.

Excelente trabajo amigo, de verdad que se te da muy bien la electrónica, este tipo de cosas no sabía que tenían reparación, ojalá lo hubiera sabido antes, le hubiera dicho a mi abuela que lo mandara a arreglar en vez de guardarlo como repuesto y no se hubiera comprado otro.
A veces creemos que los electrodomésticos no tienen reparación y sobre todo cuando vemos daños tan profundos como estos, pero un técnico con buen ojo o un dueño de artefacto decidido a reparar, puede lograr resultados como estos.
¡Asombroso trabajo!! Eres todo un experto en el área, gracias por compartirnos siempre tus conocimientos
Tu comunidad artesana ahora es testigo
