🌸Español🌸
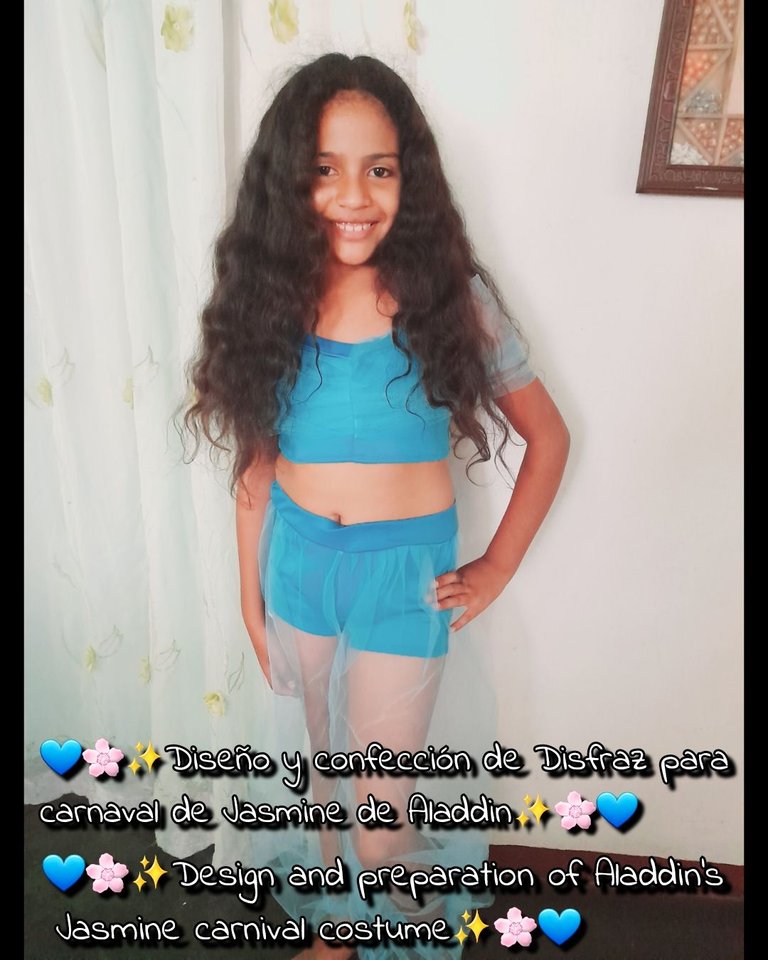
Hola muy buenas noches para todos gente linda de Hive 💕 muchos besos para todos en la creativa comunidad de #Diy 😘 estoy muy feliz por estar nuevamente acá para compartirles en esta noche algo muy bonito y especial como lo es el diseño y la confección de un bello disfraz para carnaval el cual está inspirado en Jasmine de la película de Aladdin ❤️ por eso los invito acompañarme en cada uno de los pasos a seguir 🤗.
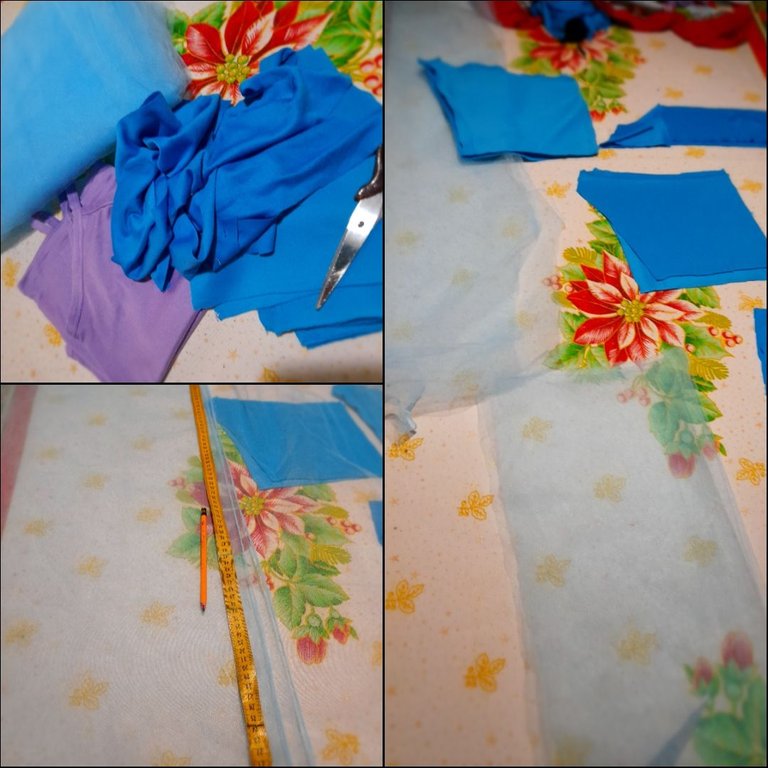
Estos fueron los materiales que use
• Máquina de coser
• Tijera
• Hilo de coser
• Tela
• Prenda de medida
• Elástica
✨️Pasos✨️
•✨️Voy a iniciar cortando todas las piezas de mi disfraz siendo estas.
Para la parte superior dos piezas delanteras, dos piezas traseras, dos mangas, dos tiros, orilla superior delantera y una valona cortada en dos piezas.
Para la parte de las piernas voy a cortar dos laterales delanteros y dos trasero, dos laterales aparte y la orilla superior o contorno de cintura.
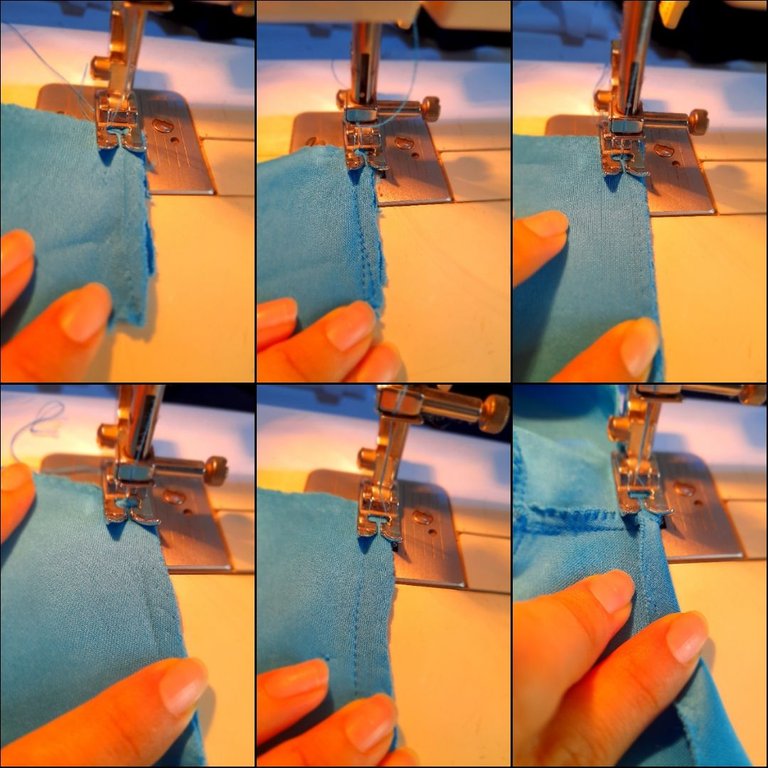
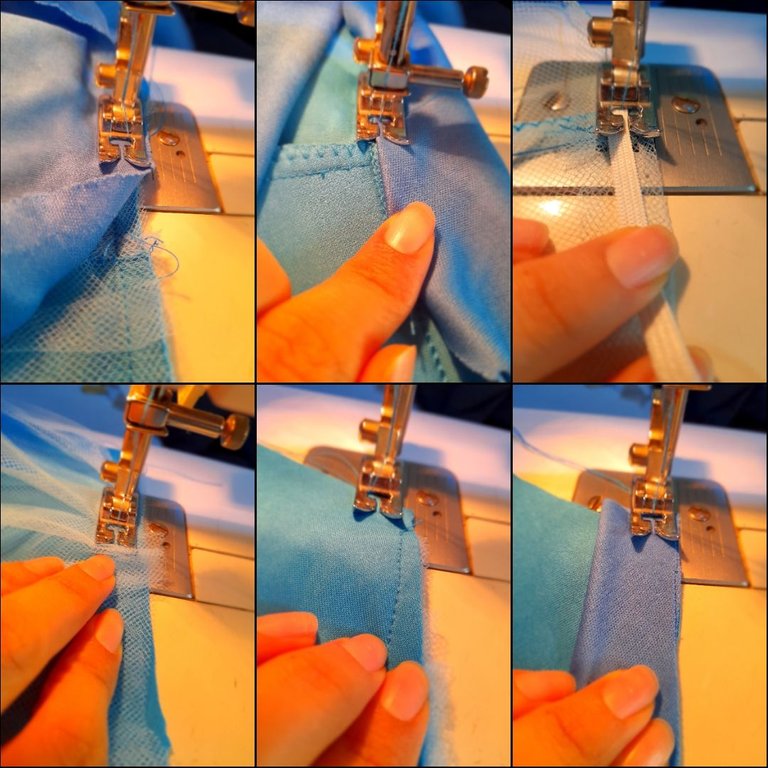
•✨️Continúo cosiendo la parte interna y externa de cada lateral con una costura recta y zigzag para asegurar luego voy a coser ambos laterales con costura recta y zigzag para asegurar y luego voy a coser con costura de zigzag el ruedo mientras voy doblando la tela.
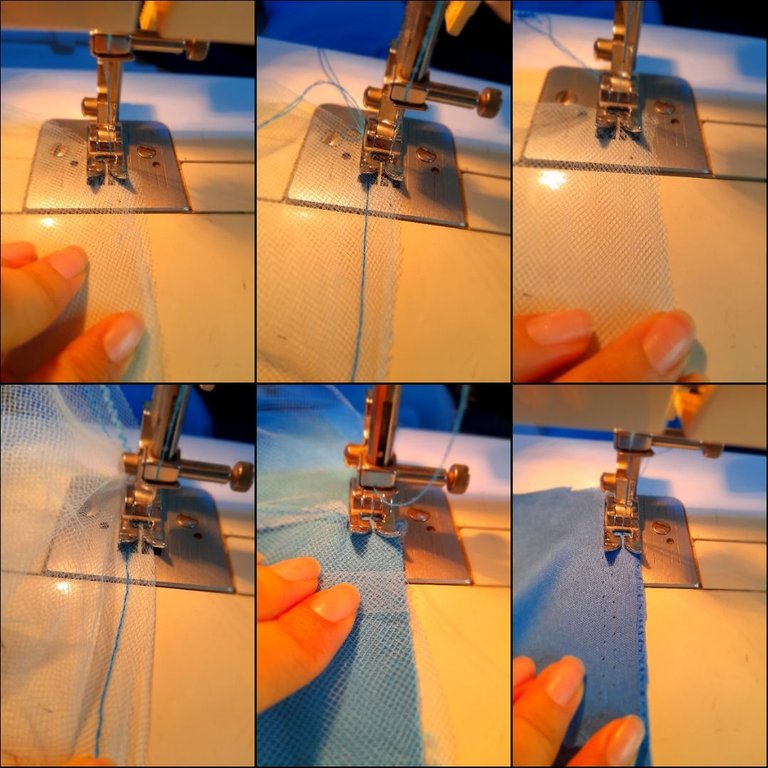
•✨️Luego voy a coser con costura recta y zigzag la parte interna de cada lateral de toll luego voy a unir ambos laterales con costura recta y zigzag para coser la parte del toll al short pequeño formando pequeños pliegues el contorno de cintura y luego unir ambos extremos del contorno de cintura con costura recta y zigzag.
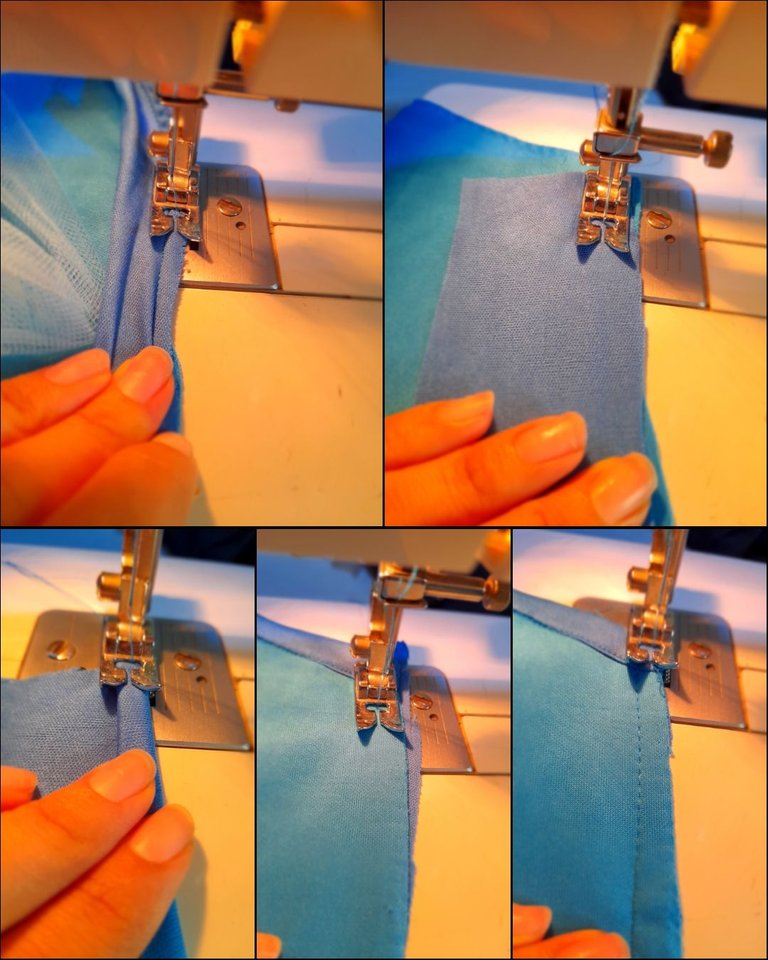
•✨️Luego voy a coser un extremo de la tela por el lado reverso de la tela con una costura recta para luego voltear y coser con costura recta nuevamente y luego voy a coser al final de cada pierna el ruedo dejando un pequeño espacio para introducir la elástica y asegurar ambos extremos de la elástica con costura recta y cerrar el espacio que había dejado.
Voy a coser un extremo de la valona justo en el medio de la pieza frontal formando pequeños pliegues y cosiendo con costura recta luego voy a coser ambos extremos justo en medio con costura recta y zigzag para luego coser la orilla superior frontal doblando la tela y cosiendo con costura recta y zigzag para asegurar.
•✨️Continúo cosiendo los tiros colocandolos por el lado derecho de la tela y cosiendo con costura recta para luego voltear y coser con costura recta nuevamente luego voy a coser con costura recta ambos extremos.
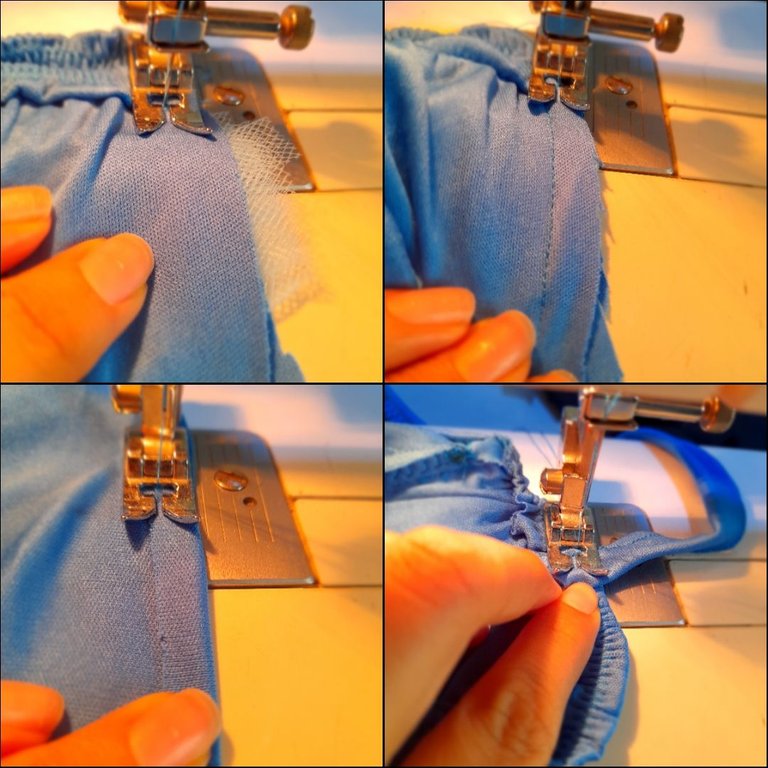
•✨️Luego voy a coser la valona de la parte trasera con costura recta y zigzag luego voy a coser la parte superior trasera doblando la tela y cosiendo con costura de zigzag con elástica incluida internamente y finalmente fijar los tiros en la parte trasera con una costura recta.
💙Resultados💙
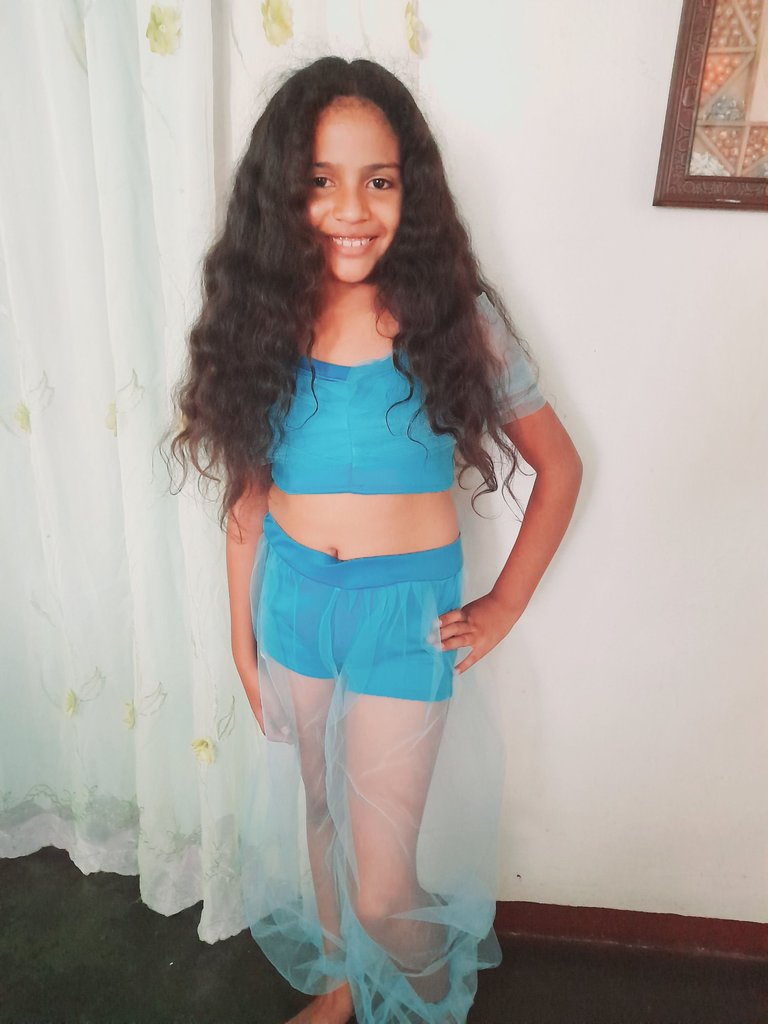
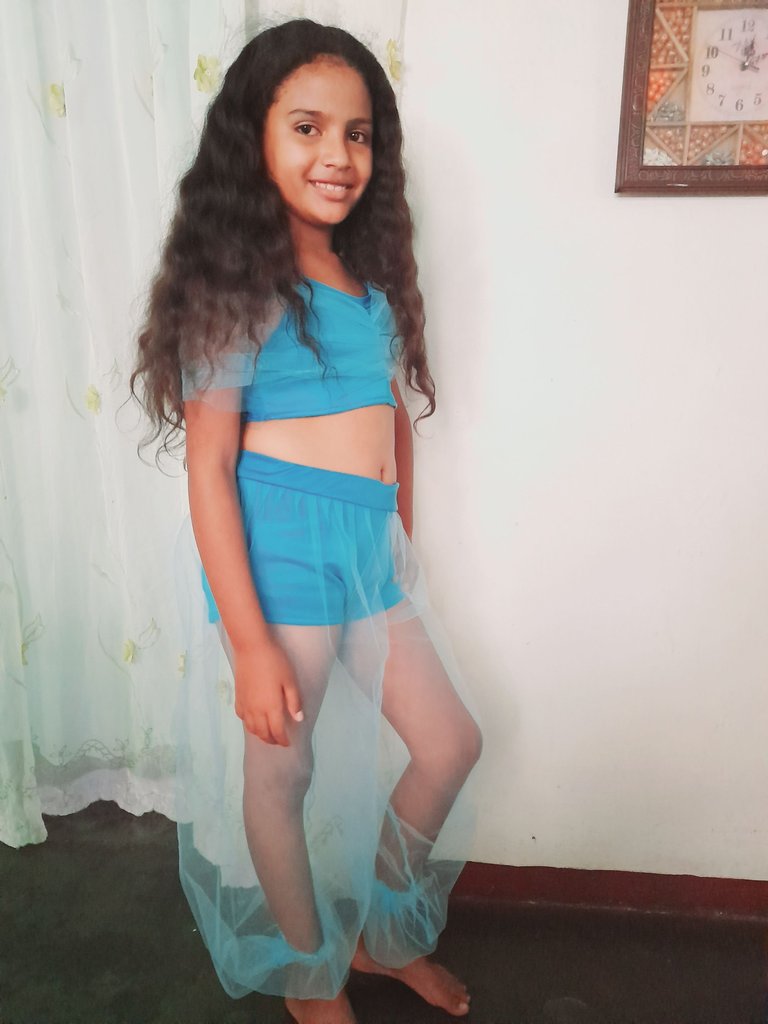
Es un disfraz muy bonito y fácil de realizar cabe resaltar que la mayoría de los materiales fueron reciclados así que puedes hacer de una prenda maravillosa a partir de la creatividad y la imaginación me alegro mucho haber compartido este pequeño aporte para el conocimiento de todos. Muy buenas noches y bendiciones para todos 🙏.
🌸English🌸
Hello, good evening to all the beautiful people of Hive 💕 many kisses to all in the creative community of #Diy 😘 I am very happy to be here again to share with you tonight something very beautiful and special such as the design and making of a beautiful carnival costume which is inspired by Jasmine from the Aladdin movie ❤️ that's why I invite you to accompany me in each of the steps to follow 🤗.
These were the materials I used
• Sewing machine
• Scissors
• Sewing thread
• Fabric
• Measurement garment
• Elastic
✨️Steps✨️
•✨️I'm going to start by cutting all the pieces of my costume with these being. For the upper part, two front pieces, two back pieces, two sleeves, two shots, upper front edge and a valance cut into two pieces. For the leg part I am going to cut two front sides and two back sides, two separate sides and the upper edge or waist contour.
•✨️I continue sewing the inside and outside of each side with a straight and zigzag seam to secure, then I am going to sew both sides with a straight and zigzag seam to secure and then I am going to sew the hem with a zigzag seam while I fold the fabric.
•✨️Then I am going to sew the inner part of each side of the toll with a straight and zigzag seam, then I am going to join both sides with a straight and zigzag seam to sew the part of the toll to the small shorts, forming small folds around the waist contour and then join both ends of the waist contour with straight and zigzag seams.
•✨️Then I am going to sew one end of the fabric on the reverse side of the fabric with a straight seam and then turn it over and sew with a straight seam again and then I am going to sew the hem at the end of each leg, leaving a small space to insert the elastic and secure both ends of the elastic with a straight seam and close the space you had left. I am going to sew one end of the valance right in the middle of the front piece, forming small pleats and sewing with a straight seam, then I am going to sew both ends right in the middle with a straight and zigzag seam and then sew the upper front edge, folding the fabric and sewing with straight and zigzag stitching to secure.
•✨️I continue sewing the shots by placing them on the right side of the fabric and sewing with a straight seam and then turn around and sew with a straight seam again, then I will sew both ends with a straight seam.
•✨️Then I am going to sew the valance on the back with a straight and zigzag seam, then I am going to sew the upper back part by folding the fabric and sewing with a zigzag seam with elastic included internally and finally fix the shots on the back with a seam. straight.
💙Results💙
It is a very beautiful and easy costume to make. It should be noted that most of the materials were recycled so you can make a wonderful garment based on creativity and imagination. I am very happy to have shared this small contribution for everyone's knowledge. Very good night and blessings to all 🙏.
💁♀️Todas las fotografías son de mi autoría capturadas con mi Samsung Galaxy A12 y editadas en GridArt.
El texto y resumen es totalmente de mi autoría.
Texto traducido en el traductor Google.💁♀️
💁♀️All the photographs are my own, captured with my Samsung Galaxy A12 and edited in GridArt.
The text and summary is entirely my own.
Translated text in Google translator.💁♀️
wow que hermoso te quedo
Vota por HIVEDIY como Witness en el siguiente Link:
https://vote.hive.uno/@hivediy
Thank you very much for giving me such a beautiful dress. Some of the wonderful sewing steps and the majesty of cutting the fabric are mesmerizing. I hope that the creator always has all the skills.