Hello 👋🏻
Feliz Inicio de Semana para todos ❤️
Les cuento que hace unos días atrás me tocó realizar mi primer lapbook que para mí fue todo un desafío, porque nunca antes había elaborado uno; así que lo primero que hice fue investigar ¿Que era un lapbook? para saber que necesitaría, ya que su nombre por si solo es complicado y ya me imaginaba lo peor 😂
Pero sorprendentemente un lapbook no es tan complicado de hacer, podemos usar los materiales que tengamos en casa y a la mano, como cartulina, foami, papel de colores, plastilinas, entre otros, el límite de la creatividad lo pone uno mismo. En cuanto a su contenido se realiza de lo que soliciten, en el caso de mi hija fue sobre :Los 5 sentidos en Inglés. dentro del lapbook pueden ir conceptos, características, tipos y muchas cosas más referente al tema que le corresponde, todo esto debe ir de manera creativa, usando diferentes formas, imágenes, flechas, conectores, formas geométricas, mini mapa mental, entre otros, todo esto ayuda a los estudiantes a entender mas fácilmente la información que lleva..
Les Muestro como realice un lapbook de los 5 Sentidos:
Materiales:
✓ Cartulina Escolar doble faz Morada
✓ Cartulina de Construcción de diferentes colores
✓ Papel Lustrillo
✓ Marcadores
✓ Silicón Frio
✓ Tijeras
✓ Regla
✓ Material sobre el tema impreso imágenes y textos

Realización:
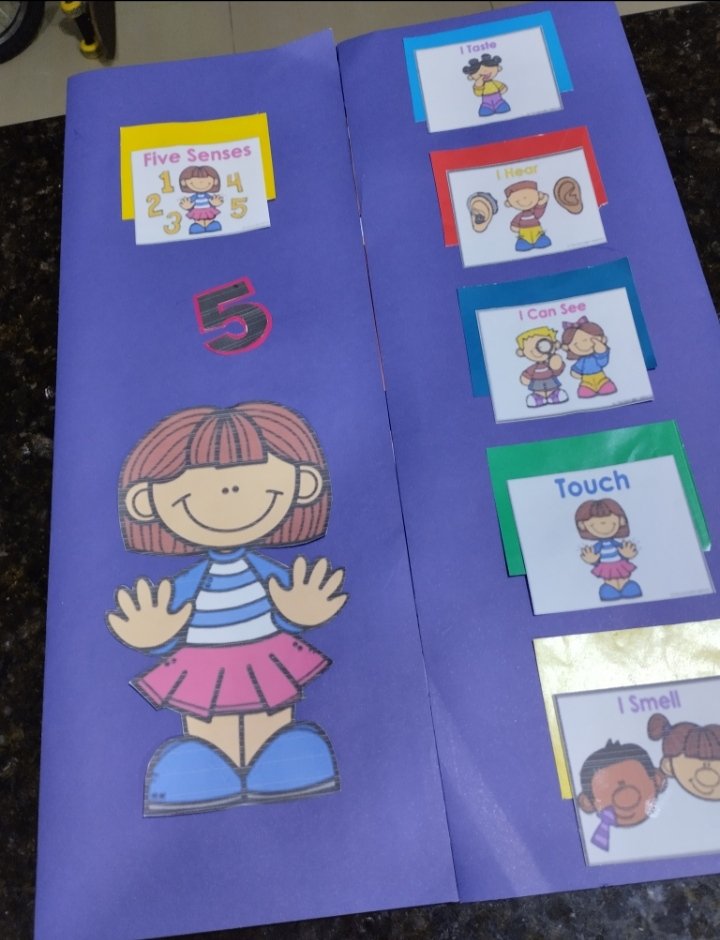
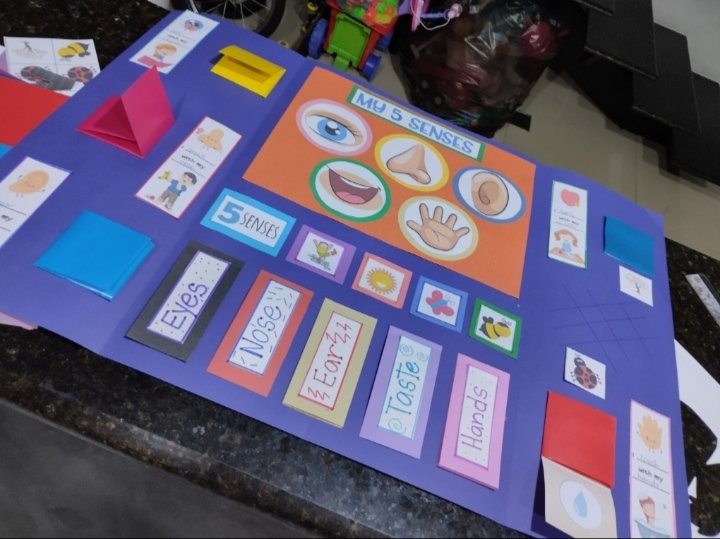
Lo Primero que hice fue doblar la cartulina escolar doble faz, para darle la forma que necesitaba que era especie de un folleto, ubique el centro de la cartulina y luego doble sus lados exteriores hacia dentro. Inicie ubicando en la parte interior el titulo principal e imágenes referente a los 5 sentidos, vista, oido, gusto olfato y tacto.
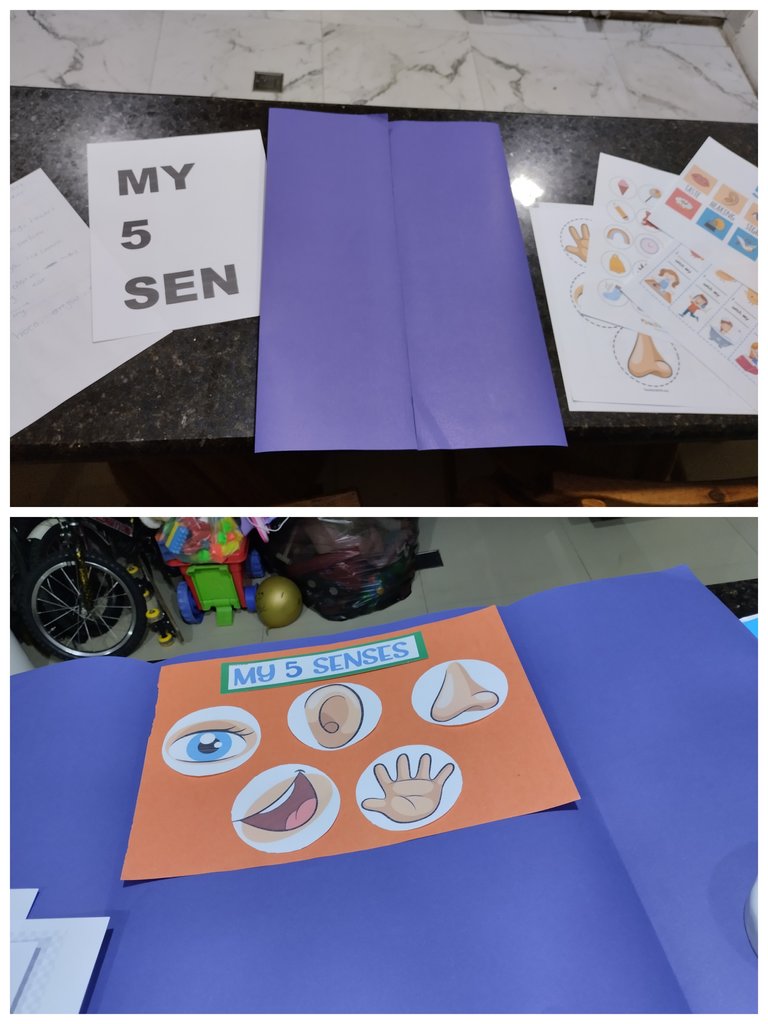
Tambien recorte cartulinas en forma circular de varios colores para colocarla como fondo debajo de cada imanen de cada sentido. En la parte inferior, realice una especie de libreta pegando solo la parte de arriba, aqui de manera gráfica se pueda explicar que podemos percibir con cada sentido.
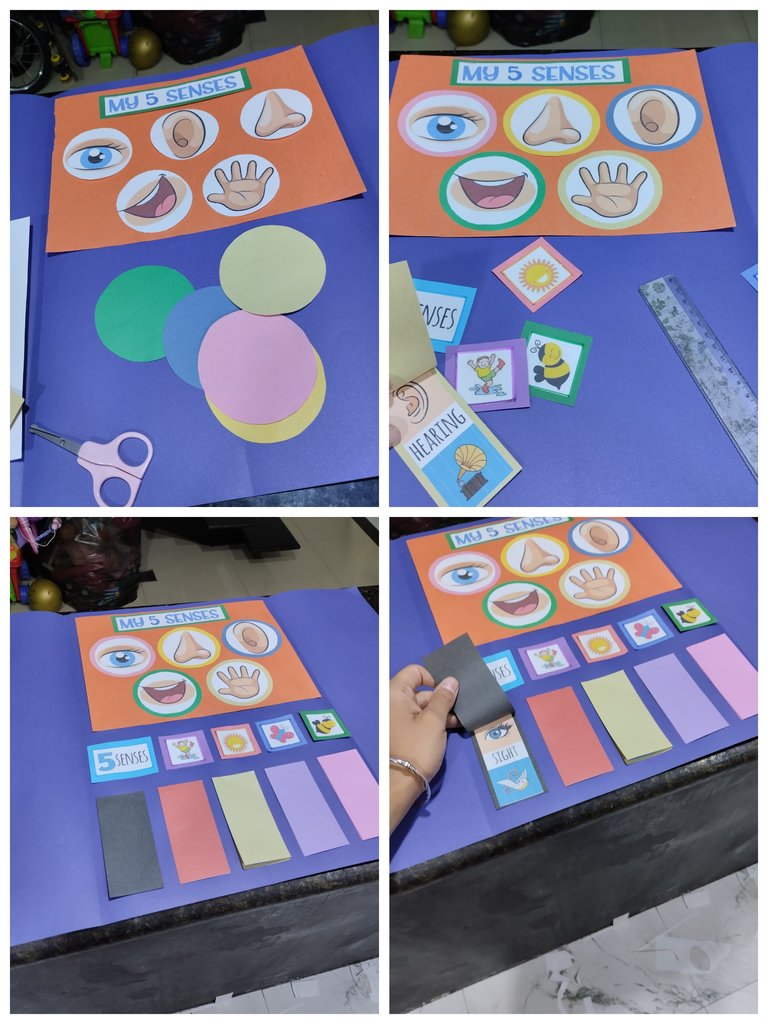
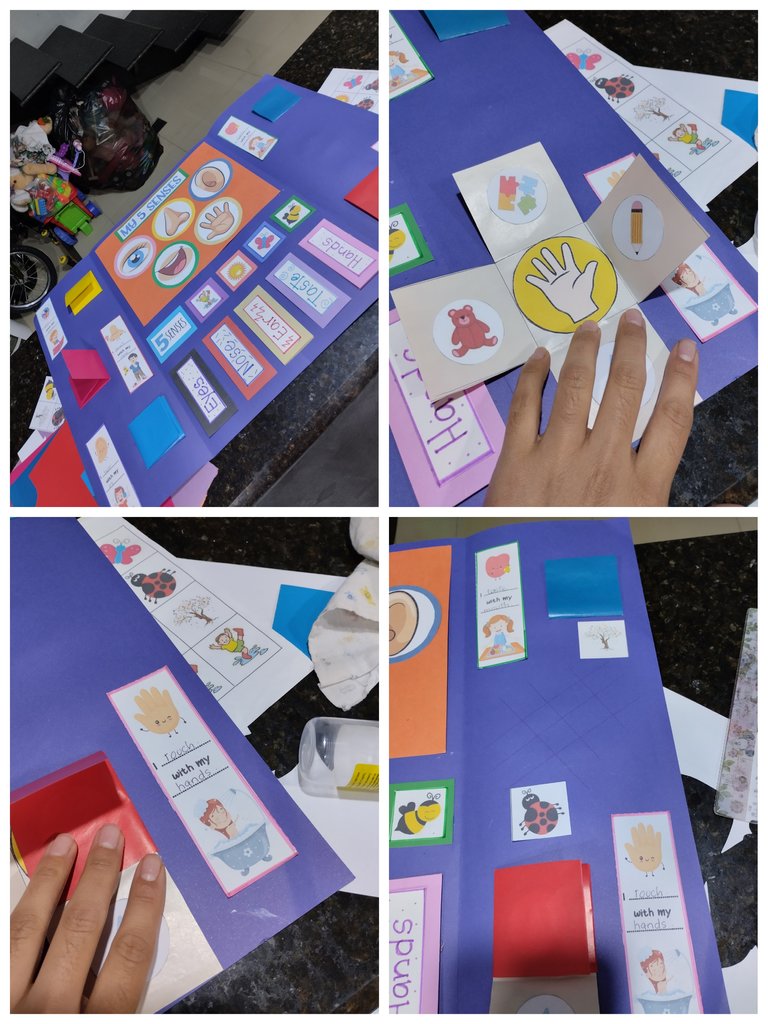
Realice 5 cubos con ayuda de un molde que hice, para utilizarlos en los extremos de la parte de adentro (es decir, las tapas del lapbook)

Con marcadores realice marcos de diferentes colores a algunas imágenes, para resaltarlas un poco mas. Fije las imagines en el cubo de cada sentido acompañados de imágenes de lo que podemos percibir con cada uno de ellos.

Ubique todo dentro del lapbook, luego pegue com silicon Frio.
Agregué detalles con marcadores, como marcos, títulos para decorar un poco mas y hacerlo mas llamativo.

Por ultimo realice la portada, utilizando mas imágenes referente a los 5 sentidos que acompañe con bordes en papel Lustrillo que me ayudaron a decorar.
Asi quedo la parte interior del lapbokk
Realizar este recurso se me hizo muy sencillo, hay que tener un poquito de creatividad para poder organizar todo dentro y fuera de una forma que el lapbook se vea organizado y sea fácil de entender, para que nuestros niños puedan llevar la información y explicarlo con facilidad. Utilice materiales que tenia en casa, retazos de cartulinas y papeles de colores, tambien use imagenes que tenia impresas que me quedaron y tenia guardada.
En internet encontramos muchas ideas que podemos adaptarlas a lo que necesitamos o queremos hacer. Espero que este pequeño tutorial pueda ser de mucha ayuda para ustedes...
Feliz Día para todos ❤️
Portada editada con Canva
Fotografías tomadas con mi teléfono Redmi 10
Traductor DeepL

Hello 👋🏻
Happy beginning of the week to all of you ❤️
I tell you that a few days ago I had to make my first lapbook, which for me was a challenge, because I had never made one before; so the first thing I did was to investigate what was a lapbook? to know what I would need, because its name alone is complicated and I imagined the worst 😂.
But surprisingly a lapbook is not so complicated to make, we can use the materials we have at home and at hand, such as cardboard, foami, colored paper, plasticine, among others, the limit of creativity is set by oneself. In the case of my daughter it was about: The 5 senses in English. Inside the lapbook can go concepts, characteristics, types and many more things related to the corresponding topic, all this should go in a creative way, using different forms, images, arrows, connectors, geometric shapes, mini mind map, among others, all this helps students to more easily understand the information it carries.
I show you how to make a lapbook of the 5 Senses:
Materials:
✓ Purple double-sided school poster board.
✓ Construction paper of different colors.
✓ Lustrillo Paper
✓ Markers
✓ Cold Silicone
✓ Scissors
✓ Ruler
✓ Material on the topic printed images and text.
Accomplishment:
The First thing I did was to fold the double sided school cardboard, to give it the shape I needed which was kind of a booklet, locate the center of the cardboard and then fold its outer sides inwards. I started by placing the main title and images referring to the 5 senses, sight, hearing, taste, smell and touch on the inside.
Also cut out cardboard in a circular shape in various colors to be placed as a background under each magnet of each sense. In the lower part, make a kind of notebook by gluing only the top part, here in a graphic way we can explain what we can perceive with each sense.
I made 5 cubes with the help of a mold I made, to use them at the ends of the inside part (that is, the lapbook covers).
With markers I made different colored frames for some of the images, to highlight them a little more. Fix the images in the cube of each sense accompanied by images of what we can perceive with each one of them.
Place everything inside the lapbook, then glue with cold silicone.
I added details with markers, such as frames, titles to decorate a little more and make it more eye-catching.
Finally I made the cover, using more images referring to the 5 senses that I accompanied with Lustrillo paper borders that helped me to decorate.
This is how the inside of the lapbokk looks like.
Making this resource was very simple, you have to have a little creativity to organize everything inside and outside in a way that the lapbook looks organized and easy to understand, so that our children can carry the information and explain it easily. I used materials that I had at home, scraps of cardboard and colored paper, I also used images that I had printed and that I had saved.
On the internet we find many ideas that we can adapt to what we need or want to do. I hope this little tutorial can be of much help to you....
Happy Holidays to all of you ❤️
Cover edited with Canva
Pictures taken with my Redmi 10 phone
Translator DeepL
Maravilloso trabajo educativo. Te quedó genial @yris89 ✨
!discovery 45
Gracias.. me gustó mucho realizar este lapbook.. para ser el primero quedó genial...
Gracias por el apoyo
This post was shared and voted inside the discord by the curators team of discovery-it
Join our Community and follow our Curation Trail
Discovery-it is also a Witness, vote for us here
Delegate to us for passive income. Check our 80% fee-back Program
Gracias por el apoyo
Bendiciones 🙏🏻
Gracias por el apoyo 😃
Bendiciones para todos 🙏🏻
Has sido curado por @visualblock / You've been curated by @visualblock
Bienvenidas delegaciones / Delegations welcome
Trail de Curación / Curation Trail
Vota por nuestro Testigo aliado - @hispapro / Vote for our allied Witness - @hispapro
Más información sobre el testigo aquí / More information about the witness here
Gracias Gracias..
Agradecida por todo el apoyo recibido.
Besos y Bendiciones 🙏🏻
Nos encanta el resultado de tu trabajo, el lapbook quedó muy bonito.
Un lapbook muy hermoso.
Hola.
Gracias.. Quedó lindo.
Me alegra que te gustará
Abrazos
Un lapbook muy hermoso y colorido, imagino que eso ayuda al proceso de enseñanza.Me encanto.
Hola amiga así es..ayudan mucho en el proceso de enseñanza aprendizajes. Disfrute mucho hacerlo...
Excelente trabajo amiga, yo nunca he echo uno y la verdad se ve maravilloso! Te felicito 😍 gracias por compartirlo con nosotros!
Gracias amiga me alegra que te gustará.
Es hermoso.
Besos y Bendiciones para ti