Hello everyone... 🌟
Hello to my dear Hivers and the dear community of Holozing, very pleased and excited to be here to show you a very simple work made with much love and especially for you.
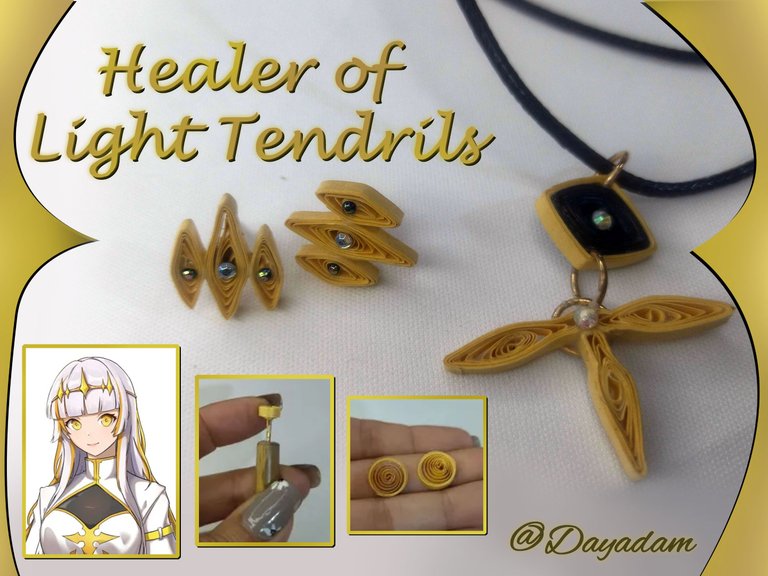
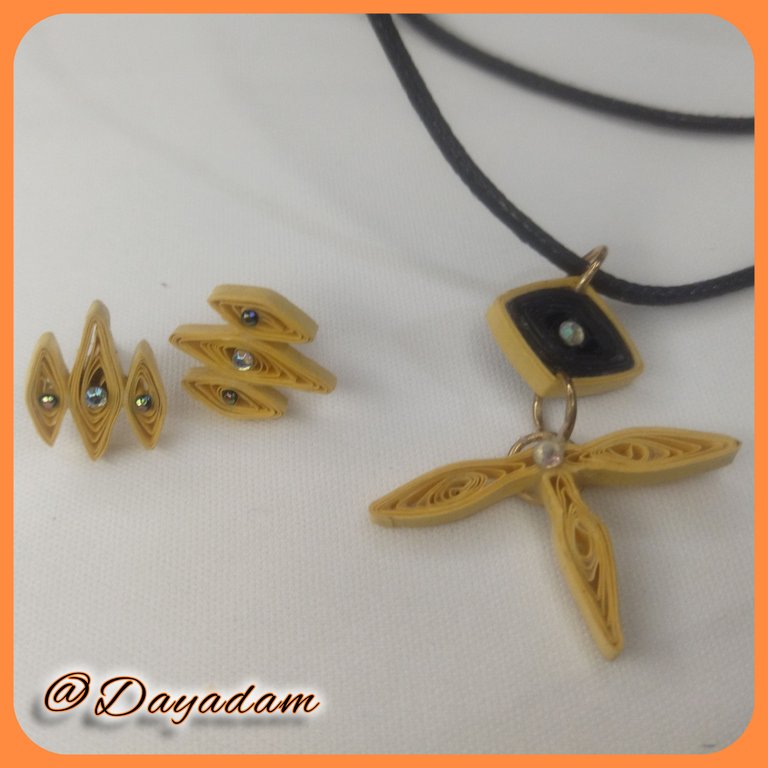
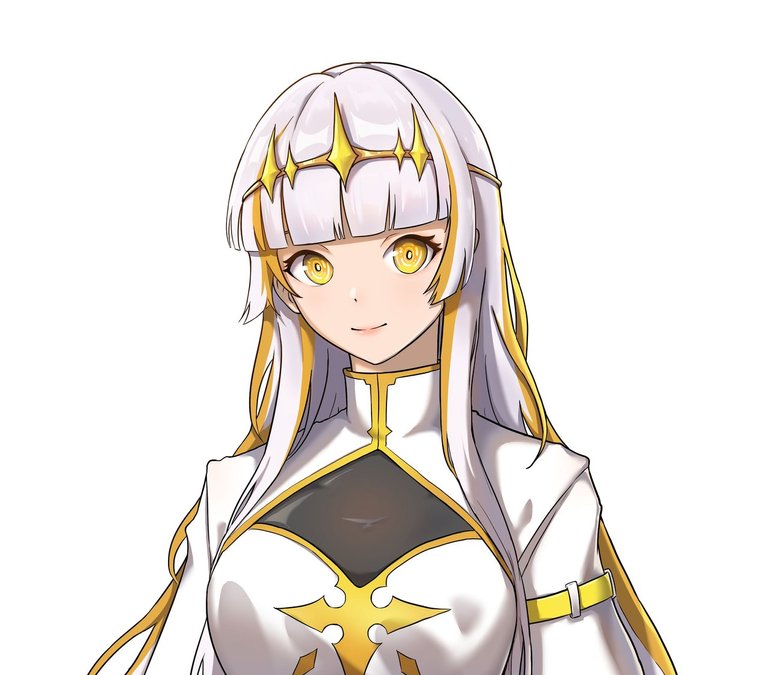
For today in this new rewards update, I bring you another detail with my art inspired by this great project and its characters, the previous week I materialized inspired by an element of the beautiful "Healer of Light” a pendant for necklace in the quilling technique (if you want to see the post where I carried out the pendant I invite you to visit by clicking on the following link), so for today I wanted to complete the set by making some very simple fixed tendrils in the quilling technique, based on another small element that this character carries with her in her hair.
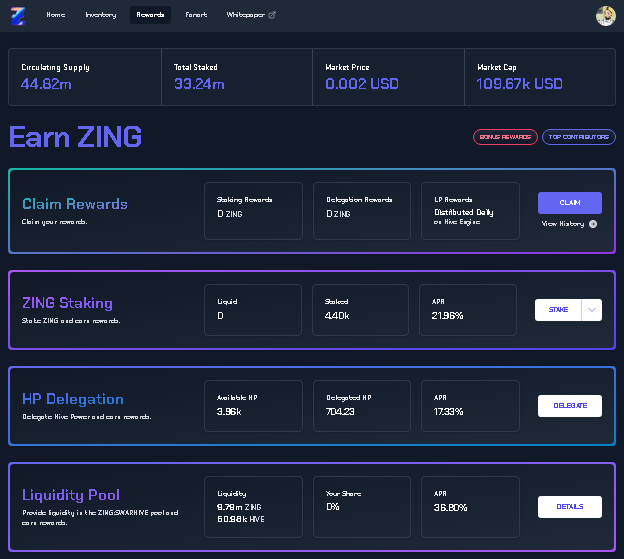
I attach images of my progress claiming the rewards for my delegation to Holozing that so far are 705.08HP, and I have an accumulated in Stake of 5,298.315 tokens $ZING..
I hope you like my work, join me in this short creative process.
Let's begin:😃

Hola a Todos... 🌟
Hola a mis queridos Hivers y a la querida comunidad de Holozing, muy complacida y emocionada de encontrarme por acá para mostrarles un trabajo muy sencillo hecho con mucho amor y especialmente para ustedes.
Para hoy en esta nueva actualización de recompensas, les traigo otro detalle con mi arte inspirado en este genial proyecto y sus personajes, la semana anterior materialice inspirado en un elemento de la hermosa "Sanadora de Luz" un dije para collar en la técnica de quilling (si quieren ver el post donde lleve a cabo el dije los invito a visitar haciendo clip en el siguiente link), pues para hoy quise completar el conjunto realizando unos muy sencillos zarcillos fijos en la técnica de quilling, basados en otro pequeño elemento que lleva consigo este personaje en su cabellera.
Les adjunto imágenes de lo que ha sido mi progreso reclamando las recompensas por mi delegación a Holozing que hasta ahora son 705.08HP, y llevo un acumulado en Stake de 5,298.315 tokens $ZING.
Espero sea de su agrado mi trabajo, acompáñenme en este corto proceso creativo.
Comencemos:😃


• Cintas de quilling de 3mm de ancho doradas.
• Aguja para quilling.
• Base fija para zarcillos y tapas.
• Cristales de bisutería.
• Pega blanca extra fuerte (de carpintería).
• Tijera.
• Pincel.
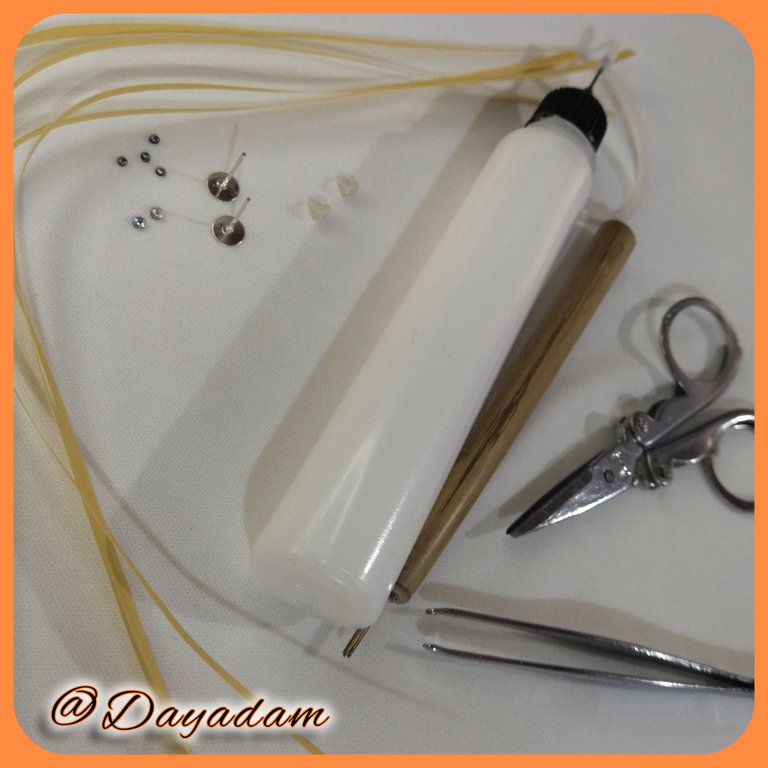
- Gold and black quilling ribbons 3mm wide.
- Quilling needle.
- Fixed base for tendrils and lids.
- Costume jewelry crystals.
- Extra strong white glue (carpentry glue).
- Scissors.
- Brush.

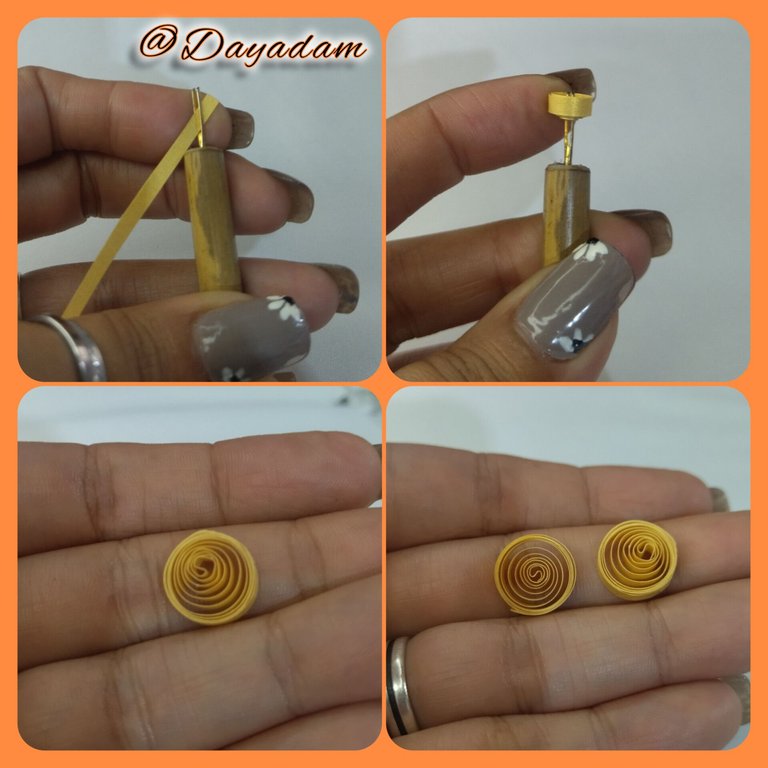
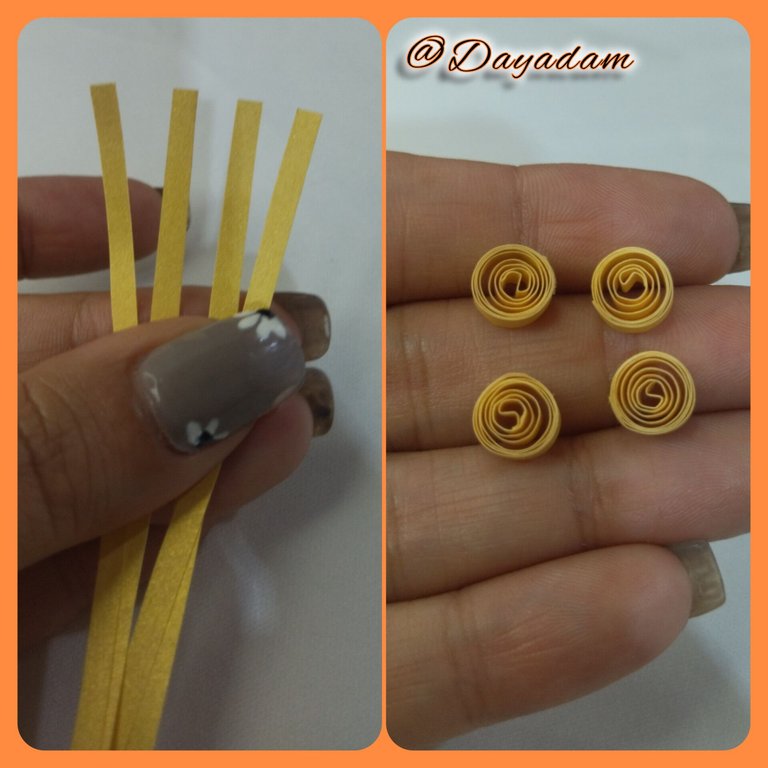
- We are going to begin by taking 3mm wide gold color quilling tape, with the quilling needle we proceed to roll up until we finish with all the tape, we take out the needle we will loosen a little until we get an open circle, we seal with extra strong white glue, we will need 2 circles of the same size.
- Under the same parameters we will take 4 golden color ribbons with them we will make 4 open circles a little smaller than the first ones we made.
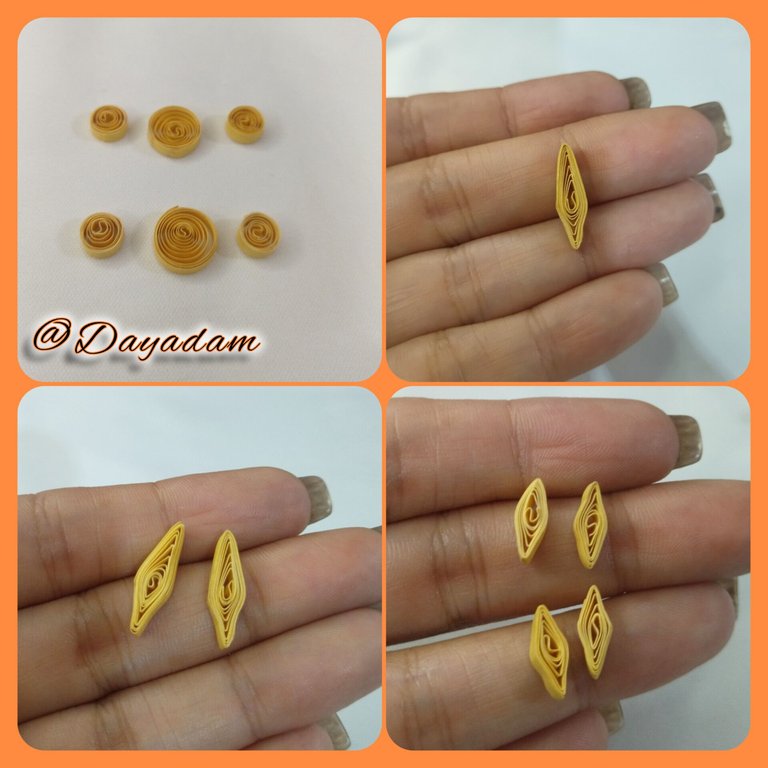
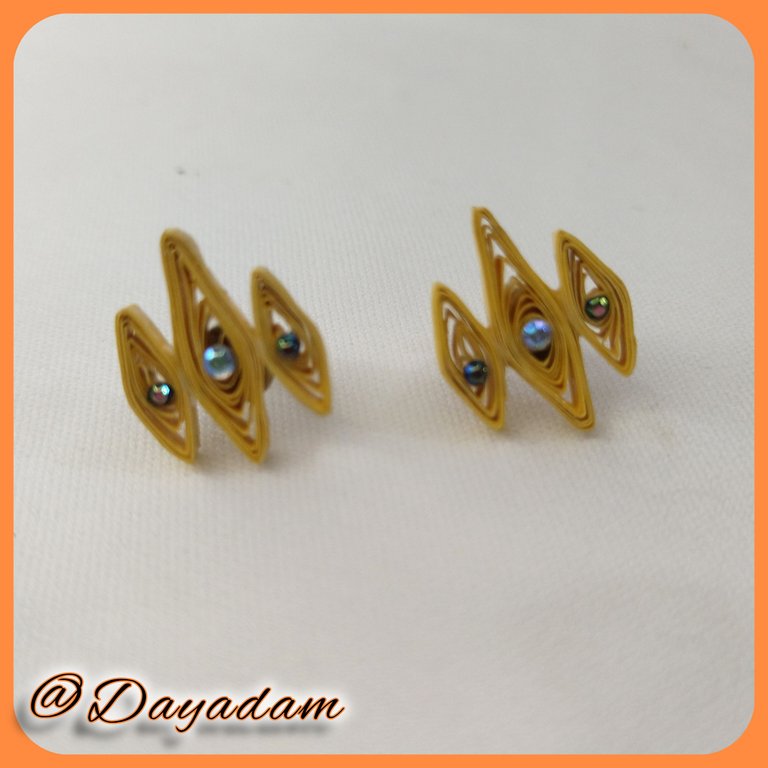
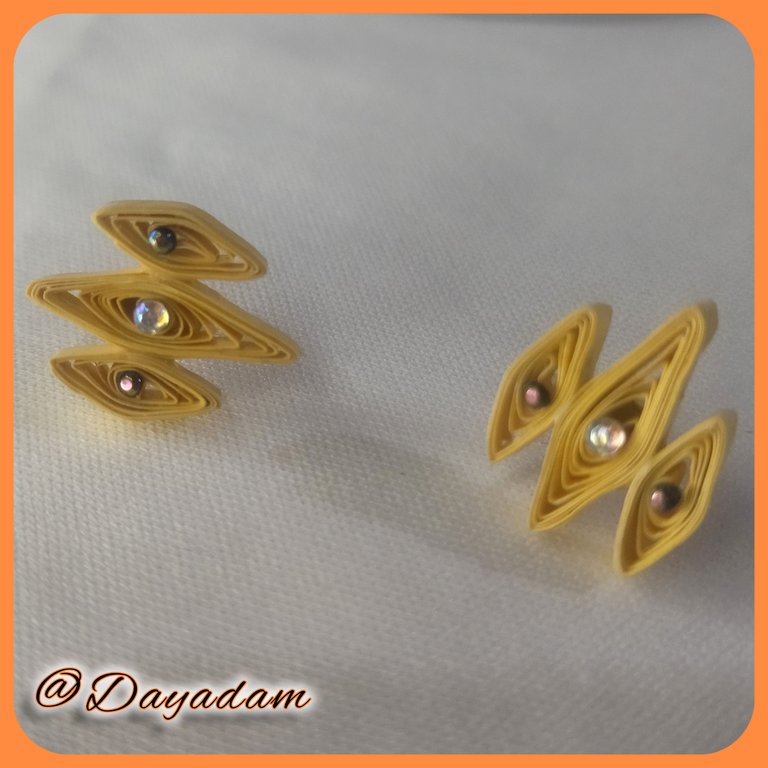
- Once the circles are ready, we will proceed to mold them in the shape of a diamond.
- We will proceed to join the resulting pieces, we will take one of the biggest diamonds this will go in the center, we will glue the smaller diamonds one on each side.
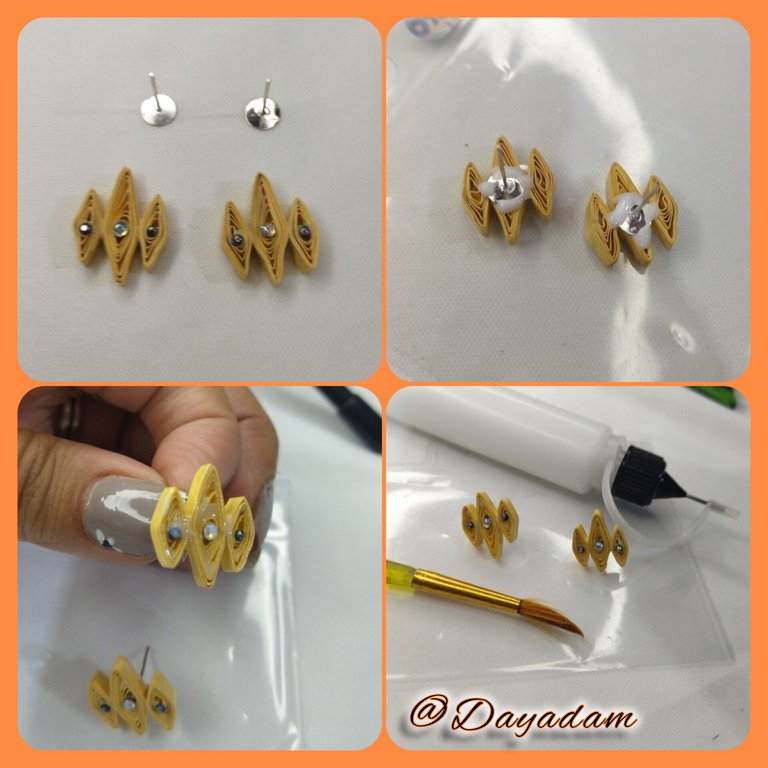
- I added some sunflower crystals to decorate, one medium-sized one in the center, 2 smaller ones on the sides.
- We are going to glue the fixed bases for tendrils on the back of the piece that we made previously, we will do this with extra strong white glue for carpentry, let it dry very well,
- Finally to protect the pendant apply several layers of extra strong white glue, to give plasticity and shine to it.
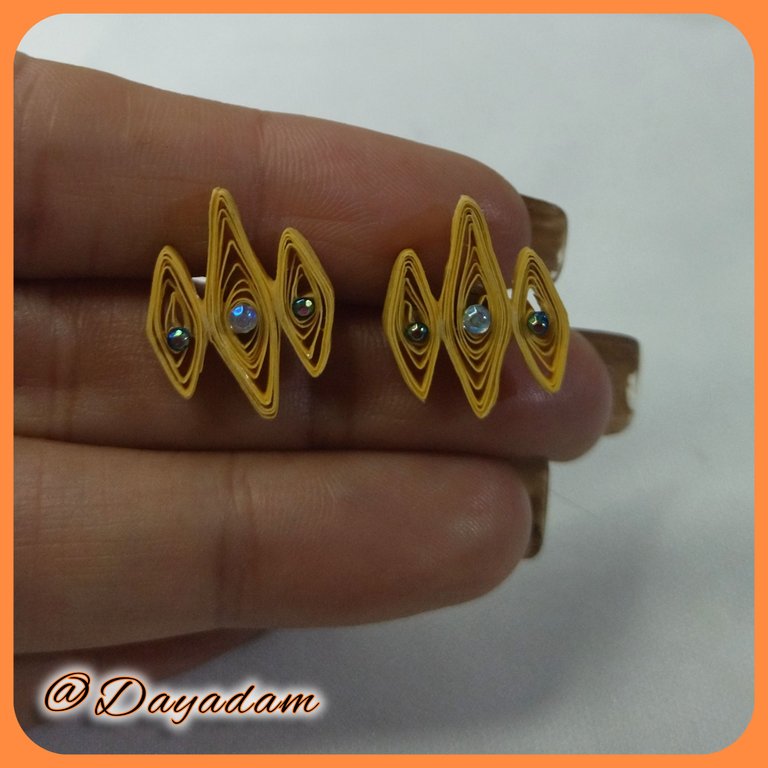
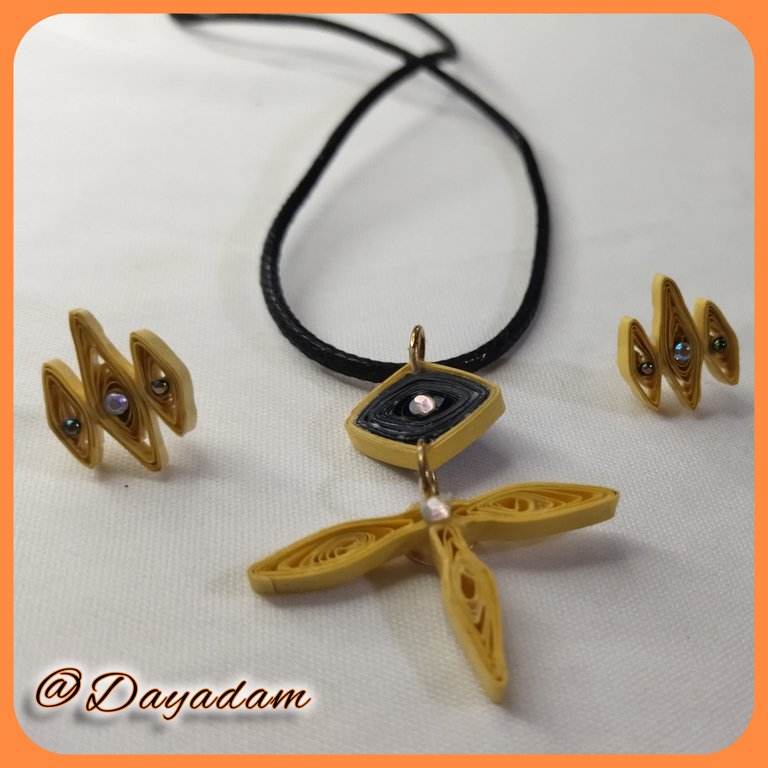
In this way we have ready these very simple tendrils fixed in the quilling technique, which I made inspired by the elements of the beautiful Healer of Light, to match the pendant for necklace that I made before.

• Vamos a comenzar tomando cinta para quilling de 3mm de ancho color dorado, con la aguja para quilling procedemos a enrollar hasta finalizar con toda la cinta, sacamos de la aguja soltaremos un poco hasta conseguir un circulo abierto, sellamos con pega blanca extra fuerte, necesitaremos 2 círculos del mismo tamaño.
• Bajo los mismos parámetros anteriores tomaremos 4 cintas de colo dorado con ellas realizaremos 4 círculos abiertos un poco mas pequeños que los primeros que realizamos.
• Listo los círculos procedemos a moldear en forma de diamante.
• Procederemos a unir las piezas resultantes, tomaremos uno de los diamantes mas grandes este ira en el centro, pegaremos los diamantes mas pequeños uno de cada lado.
• Unidas las 3 piezas, añadí unos cristales tornasoles para decorar,uno mediano en el centro, 2 mas pequeños a los lados.
• Vamos a pegar las bases fijas para zarcillos en la parte de atrás de la pieza que realizamos previamente, esto lo haremos con pega blanca extra fuerte de carpintería, dejamos secar muy bien,
• Por ultimo para proteger el dije aplique varias capas de pega blanca extra fuerte, para darle plasticidad y brillo a la misma.
De esta manera tenemos listo estos muy sencillos zarcillos fijos en la técnica de quilling, que elabore inspirado en los elementos de la hermosa Sanadora de Luz, para hacer juego con el dije para collar que realice con anteriordidad.


What did you think, did you like it?
I hope you did, I hope you liked my explanation, procedure and photos, I made them with love for you.
"Let out that muse that inspires you, and let your imagination fly".
Thank you all, see you next time.🐱

¿Qué les pareció, les gustó?
Espero que sí, que les haya gustado mi explicación, procedimiento y fotos, los hice con mucho cariño por y para ustedes.
"Deja salir esa musa que te inspira, y deja volar tu imaginación".
Gracias a todos, nos vemos en la próxima.🐱


Va bien el stake del token no?? Excelente trabajo, recreando accesorios de los personajes, este ya es otro nivel!
Creo que hasta ahora voy bien. Vamos a ver qué nos trae este nuevo proyecto cuando se materialice al 100% y comience a ejecutarse el juego.
Gracias mi bella @ninaeatshere siempre es grato recibir tu visita y tus bellos comentarios. Se va haciendo lo que se puede y viene a mi mente jajajaja
Abrazos cariño 💖
Gracias por el apoyo amigo @edwing357 ✨
Saluditos y bendiciones ☺️
🤗🤗😊✨
Un trabajo muy bonito, el detalle del cristal le dio un toque muy bonito🥰🥰
Gracias mi linda un gusto que te agradara mi trabajo. Saluditos @yagelybr