The article in Japanese is in the second half.★日本語の記事は後半に。
I am finally posting an article about balcony vegetable gardens and indoor vegetable gardens.
Actually, it has been almost a month since I last posted about my balcony garden and indoor vegetable garden.
I had other things I wanted to post, or I tried to post after the vegetables were grown and it got late....
I would like to run through it a bit and divide it into three or four articles.
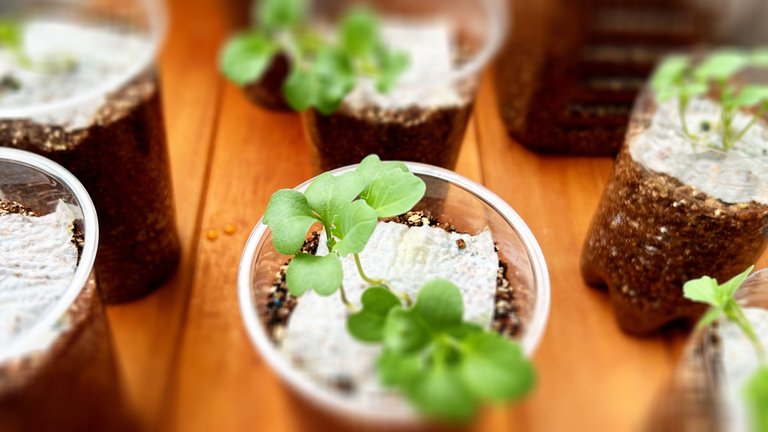
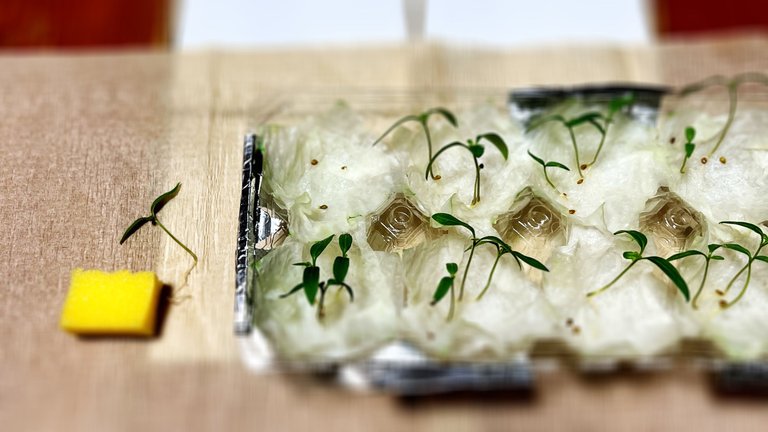
Utilizing egg cartons, I sowed tomato seeds, stem broccoli seeds and radish seeds.
The stem broccoli was transplanted in the following article.
Gardening & Microgreen Curry/ガーデニング&マイクログリーンカレー/[ENG/JPN]
↑
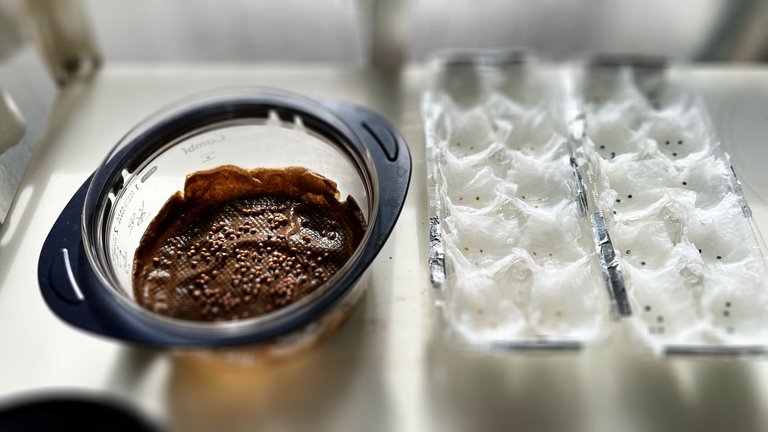
I wrote an article about how I found this method convenient for growing seedlings on kitchen paper and then transplanting them to vermiculite.
This is a picture of the seedlings growing at that time.
As a result, it worked out well, and if I have enough time to transplant another stem broccoli this year, I hope to grow seedlings in summer and transplant them a second time by fall.
↑
Growing tomato seeds, stem broccoli seeds and radish seeds
↑
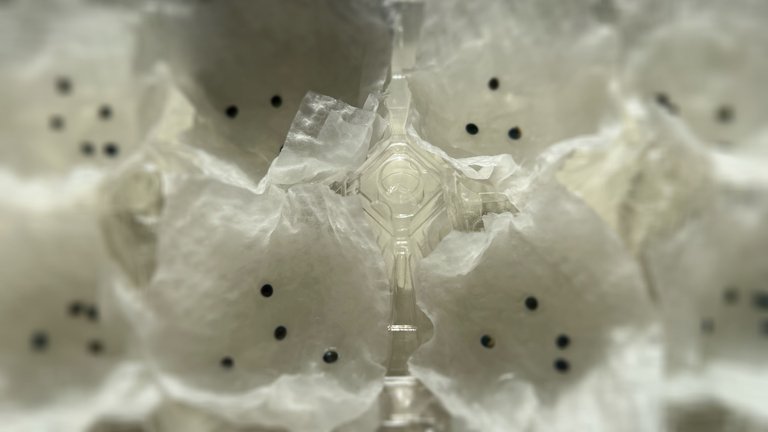
These blackish ones are stem broccoli seeds.
↑
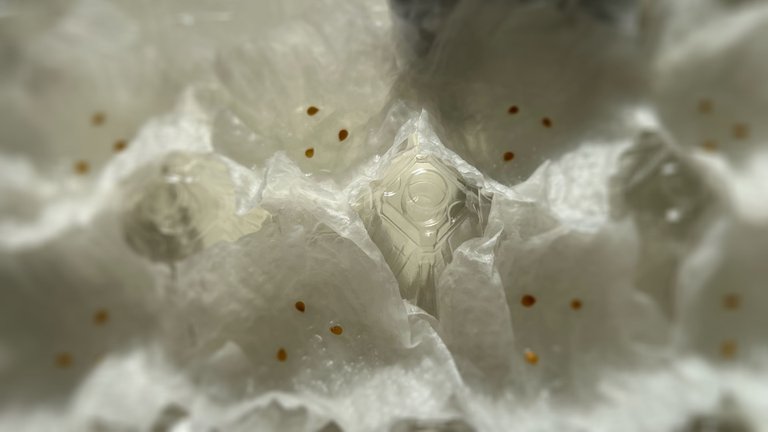
These are tomato seeds (the variety is mini-tomatoes)
I grew them in the window of an east room like this in firm sunlight. I transplanted the stem broccoli into vermiculite, but I wanted to try hydroponics for the mini-tomatoes, so I kept plastic bottles at home after I finished drinking and made use of them.
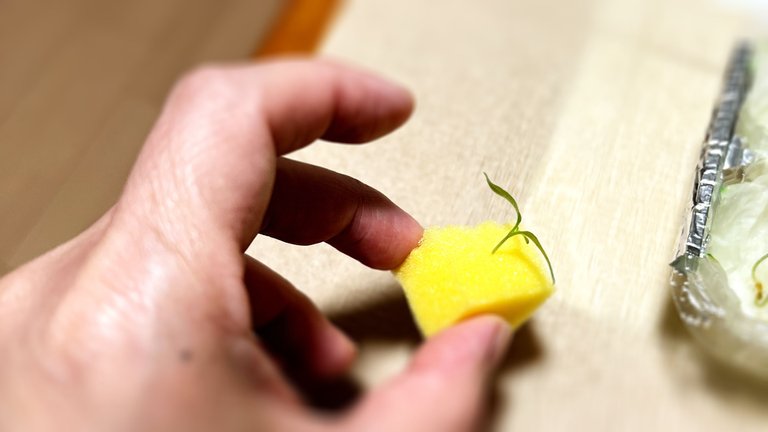
I use mini-tomato seedlings that have grown to this size.
The seedlings are transplanted between sponges, and this method is exactly the same as when I was doing experiments for my graduation thesis in the Faculty of Agriculture at my university.
At that time, I was doing hydroponics to investigate things like the "upper limit of ion concentration given to plants" when farming in arid areas, especially salt-accumulated soils.
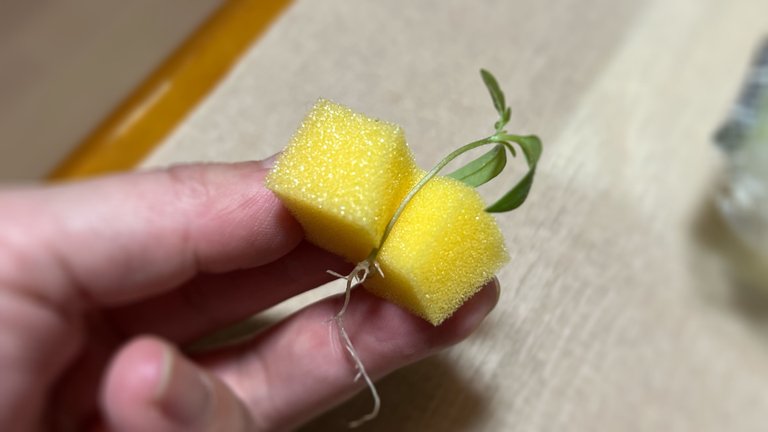
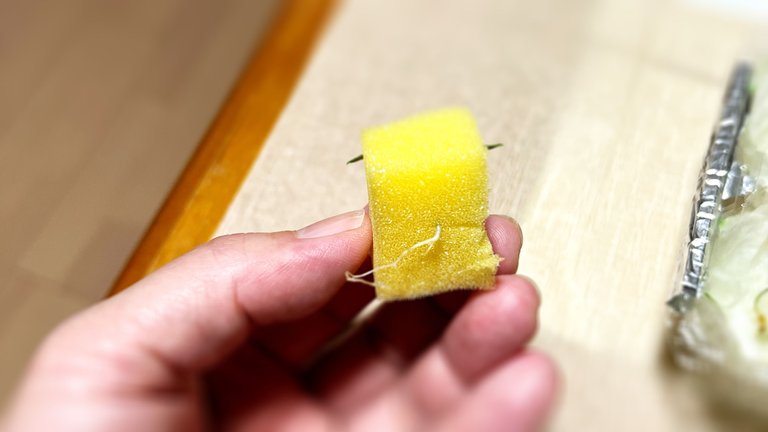
Cut a slit in the sponge and pinch the seedling.
Weak seedlings that break off at this point are immediately edible as Micro Green.
When the seedlings have grown enough to show roots on the underside, they are set in the sponge and attached to a PET bottle. The PET bottle is cut at the top in advance with scissors, and the sponge is fitted into the drinking spout so that it will not move.
Cut the sponge to just the right size after trying several sizes.
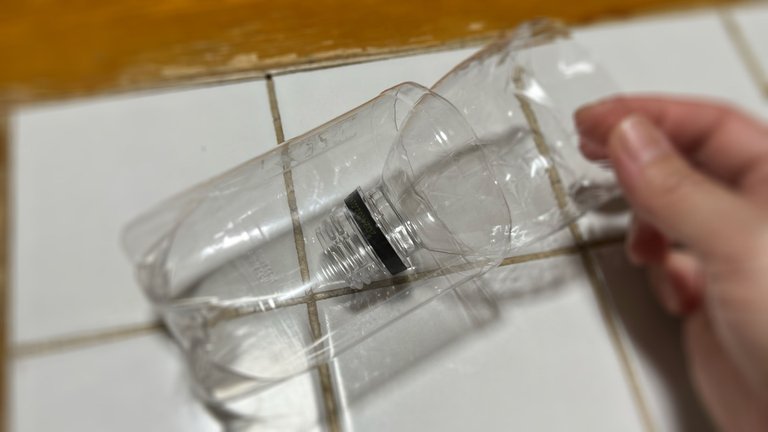
Here is a photo of a plastic bottle cut open.
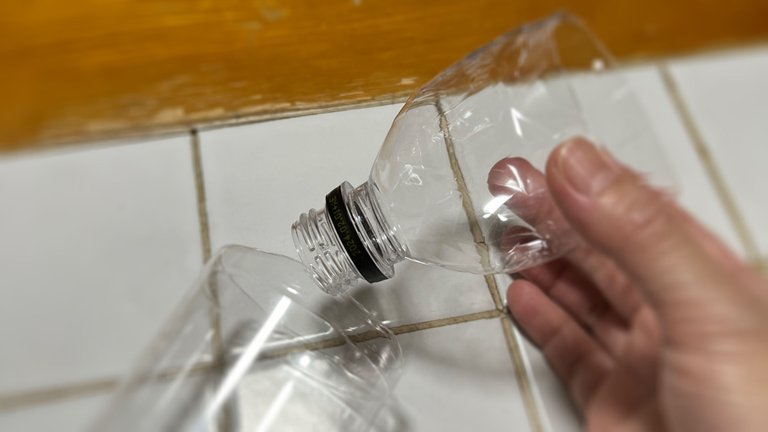
Grow tomatoes by adjusting the sponge so that they are submerged in water up to the depth to which it is attached.
As for the position to cut the PET bottle, it is a good idea to try this out several times and devise your own height that is easy to grow.
It is good to keep the height so that the roots are not cramped, or you can cut it so that it is lower, since it will be more stable if the top from the stem is placed inside the PET bottle.
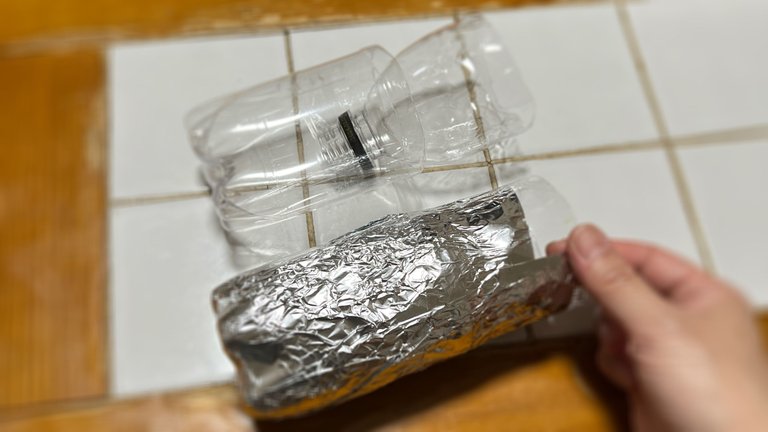
When growing, you can also add liquid fertilizer along the way.
Then, since it is full of nutrients, it will inevitably be prone to algae formation when exposed to sunlight.
So, to control it, I cover the area where water enters with aluminum foil.
This alone makes management much easier.
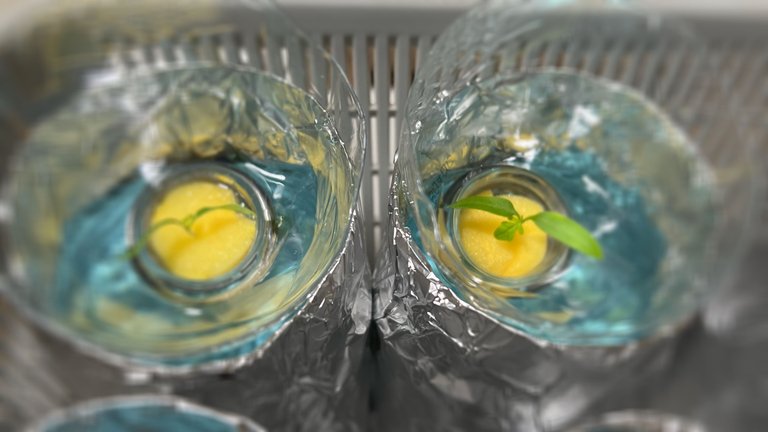
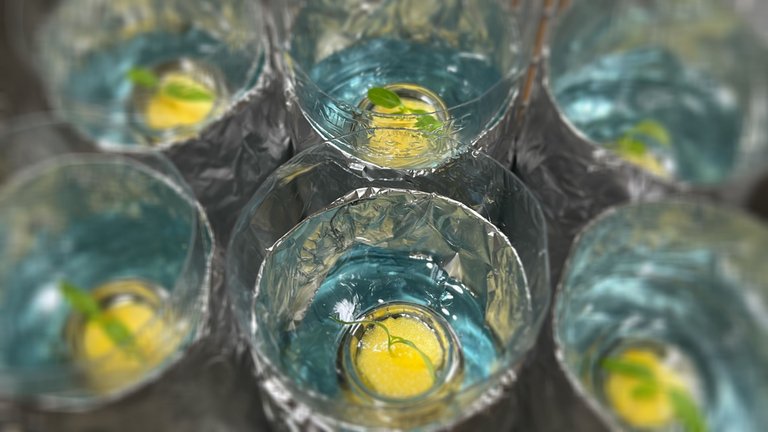
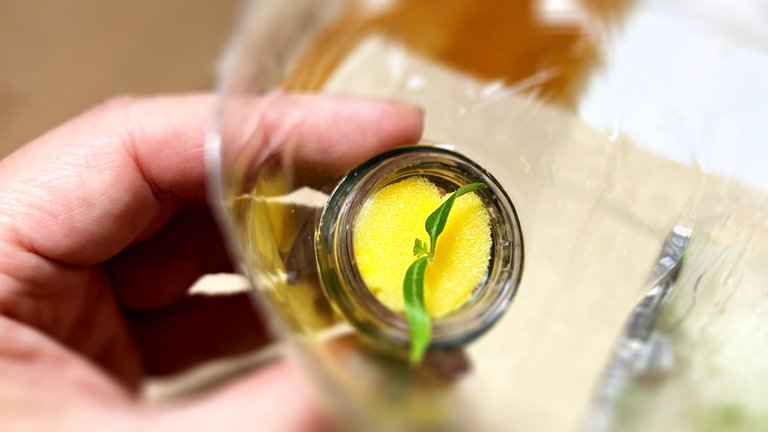
This is what it looks like when tomato seedlings are set in PET bottles filled with liquid fertilizer.
We prepared 12 PET bottles in this condition.
The seedlings and sponges are set in the PET bottles and then placed on the bottles.
The color of the liquid fertilizer looks very dark, but this is due to the photo.
In reality, the color is a little lighter.
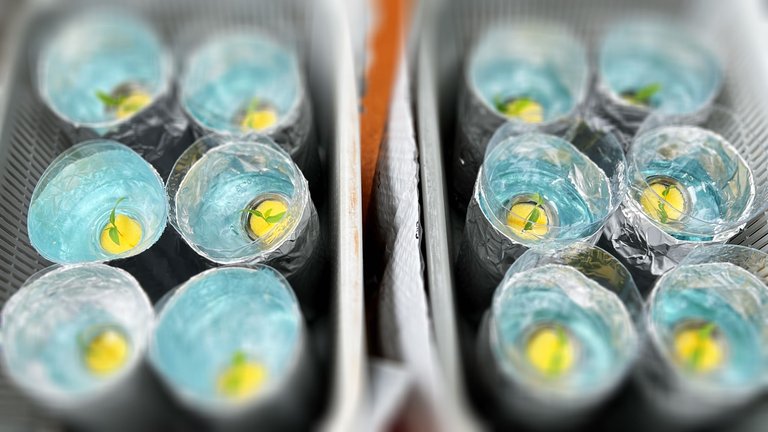
This is a picture taken right after the start of hydroponics.
They are growing a little bigger now, but I will post a picture of that later.
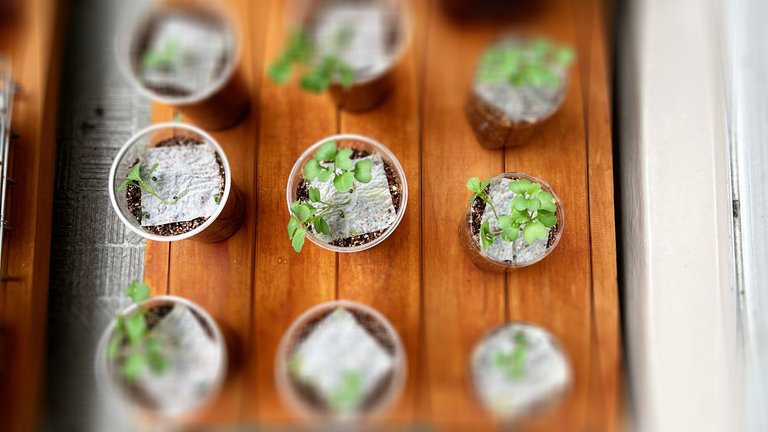
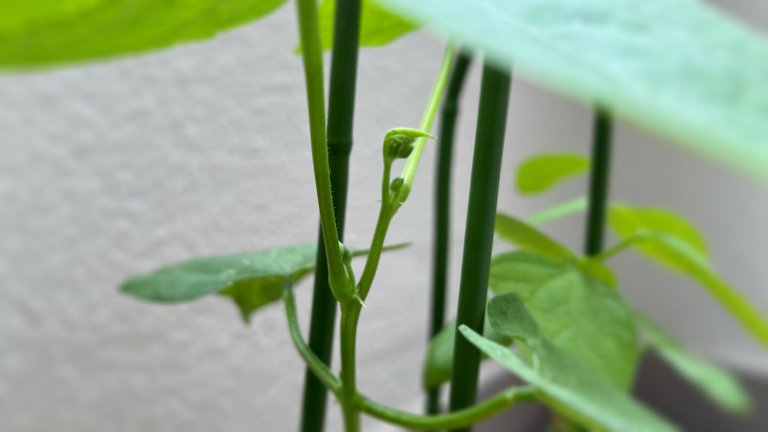
And this photo shows the stem broccoli about a week after transplanting into vermiculite.
The other picture shows the vine-less peas at that time.
The vine-less peas were put up on low supports. This is to prevent the plant itself from growing taller.
As I have mentioned in several articles, the risk of the plant falling down is very high when it grows tall because of the strong wind on this balcony, and in fact, the whole pot fell down many times when it grew a little taller after this.
I will continue to post about how the balcony vegetable garden is going.

■diary with a few words
I had accumulated so many photos of my balcony vegetable garden that it became difficult to organize them and write an article about them, even though I took them myself. I usually try to take more photos to record how things are going, and I take the time to organize them, but when I use them for an article, I have to think while arranging them, so it takes time.

Japanese★ここから日本語でお送りいたします。
ベランダ菜園と室内菜園についての記事をやっと投稿します。
実は前回、ベランダ菜園と室内菜園について投稿してから1ヶ月近く経ってしまっています。
他に投稿したいことがあったり、野菜が育ってから投稿しようとして遅くなったり…。
少し駆け足で、3回か4回に分けて記事にしたいと思います。
卵のパックを活用して、トマトの種と茎ブロッコリーの種とラディッシュの種を蒔きました。
茎ブロッコリーは、以下の記事で移植したものです。
Gardening & Microgreen Curry/ガーデニング&マイクログリーンカレー/[ENG/JPN]
↑
「キッチンペーパーを使って育苗して、その後バーミキュライトへ移植する場合この方法が便利だと感じたという件を記事にしました。
その時の育苗の様子がこの写真です。
結果的にうまく行って、もし、今年もう1回茎ブロッコリーを移植するくらい余裕があれば、夏に育苗して秋頃までに2回目の移植ができたらいいなと考えています。
↑
トマトの種と茎ブロッコリーの種とラディッシュの種を育てている様子
↑
この黒っぽいのが茎ブロッコリーの種
↑
これがトマトの種(品種はミニトマトです)
こんな感じで東側の部屋の窓際でしっかり日光に当てながら育てました。
茎ブロッコリーはバーミキュライトに移植したのですが、ミニトマトは水耕栽培に挑戦したく、飲み終わった後のペットボトルを自宅に保管しておいて、それを活用してみました。
これくらいまで育ったミニトマトの苗を使います。
スポンジに苗を挟んで移植するのですが、この方法は、私が大学の農学部で卒業論文のための実験をしていたときと全く同じ方法です。
そのときは乾燥地、特に塩類集積土壌で農業を行うときの「植物に与えられるイオン濃度の上限」のようなことを調べるための水耕栽培をしていました。
スポンジに切り込みを入れて苗を挟みます。
この時点で折れてしまうような弱々しい苗は、Micro Greenとしてすぐに食用です。
裏側に十分根っこが出るくらい育ったものをこうしてスポンジにセットして、ペットボトルに取り付けるのですが、ペットボトルは上部をあらかじめハサミでカットしておいて、飲み口の部分にスポンジを嵌め込むようにして動かないようにします。
スポンジの大きさは、いくつか試してみてちょうど良い大きさにカットします。
ペットボトルをカットした状態の写真はこちら。
スポンジを取り付けた深さのところまで水に浸るように調整しながらトマトを育てます。
ペットボトルをカットする位置は、これもいくつか試してみて、育て易い高さを自分で工夫するのが良いでしょう。
根っこが窮屈にならないように高さを確保するのも良いし、茎から上をペットボトルの内側に入れると安定するので、低めになるようにカットするのも良いと思います。
育てるときは途中から液体肥料も追加します。
そうなると栄養満点なので、どうしても太陽光に当たると藻が発生しやすくなります。
なので、それを抑制するために水が入るところはアルミホイルで覆います。
これだけで管理がかなり楽になります。
液体肥料をいれたペットボトルにトマトの苗をセットするとこんな感じ。
この状態のペットボトルを12個用意しました。
ペットボトルに苗とスポンジをセットしてはボトルに乗せていく、という感じです。
液体肥料の色が非常に濃く見えますが、これは写真によるものです。
実際はもう少し薄い色をしています。
これは水耕栽培開始直後の写真です。
今はもう少し大きく育っていますが、その写真は後日投稿します。
そしてこの写真は、バーミキュライトに移植後約1週間経過した時の茎ブロッコリーの写真。
もう1枚はその時の蔓なしえんどうの様子。
蔓なしえんどうは、低めの支柱を立てました。植物自体の背丈が高くなるのを防ぎたいからです。
何度か記事に記載していますが、このベランダは風が強いため背が伸びると倒れるリスクがとても高くなり、実際この後少し背丈が伸びると何度も鉢ごと転びました。
ベランダ菜園の様子はまた継続して投稿したいと思います。
■ひとこと日記
ベランダ菜園の写真はすんごいたくさん撮り溜めていたので、自分で撮影した写真なのに、整理して記事にするのが大変になってしまいました。
普段から自分でも様子を記録するために写真を多めに撮るようにしていて、ちゃんと時間をとって整理しているのですが、記事に使用するとなると、考えながら並べるので時間が必要ですね。

Google Translate & DeepL, thank you as always.
I am glad that you read it :-)
今日も読んでくださってありがとうございます😊
Congratulations, you received an ecency upvote through the curator @sahi1. Keep spreading love through ecency
Thank you so much!
とても丁寧な作業!スクスク育っていますね。スポンジに植えるアイディアは面白いですね。
私も時系列などを考えて写真を保管しておかないと、いざ記事を書くときに写真を選ぶのが大変な時が多いです。なるべく時の流れがつながるように保管しておくと記事を書きやすいですよね〜。それからアップする時はサイズ変換もしなければならないので結構手間がかかります。
ベランダ菜園楽しみに見ています。
スポンジを使って苗を植え込んでいくのは面白いアイディアですよね。完全にこれは大学の時にやった手順をそのまま真似して導入しました。黙々とこういう作業をするのは好きです。
コトさんも写真をたくさん撮影しておられますよね!そして数枚の写真を1枚にコラージュされている時があって、これはワクワクするなぁと思っていつも見せていただいています。
自分のための記録という側面もあり、私も写真をたくさん撮っているのですが、これだけ撮影していても、記事のストーリーにそって写真を整理するときに「あー別の角度からも撮影しておけばよかった」ということがあります。
ブログ記事にすることでより整理されて、HIVEのおかげです(笑)
You seem to be off to a good start and it also sounds like you may have prevented some recurring problems in the interim. Our son recently visited us and he was talking about a buddy who was also growing hydroponically. He asked me if I would ever consider doing the same. With the setup I have changing what I do would take more than I could give, but I love the whole idea.
Good luck with your new adventure and I'll be looking for updates.
Thank you for your comments. I see that there are others around you who are working on hydroponics. That is wonderful. In my case, I am trying hydroponics because I have a small farm on my balcony and don't have a large garden. I can concentrate on both soil-based farming and hydroponics by trying both on a small scale!
It will be interesting to see how each method works out.
I'm going to investigate more about it, it catches my attention.
Curiously, I did better when I put the seeds to germinate on a table in the garage. They didn't get direct sun so it was perfect. But since I put them to germinate directly in the soil, I run into many problems.
I want to try what you say because it is very interesting.
I am very late in replying! Sorry!
It's strange. Maybe soft sunlight works better during "germination." My success this time was certainly not in direct sunlight, but germination through glass and in a container. Even in my few attempts to germinate in soil, the germination rate is very different. It is hard to pinpoint the difference in conditions when it works and when it doesn't. I am still in the process of learning too.