Ok so we heard about the idea of humanure composting, know why we would want to do it and understand the basic process behind it.
I want to build a thermophilic composting toilet system!
Alright! Now how does that look in practice?
The parts
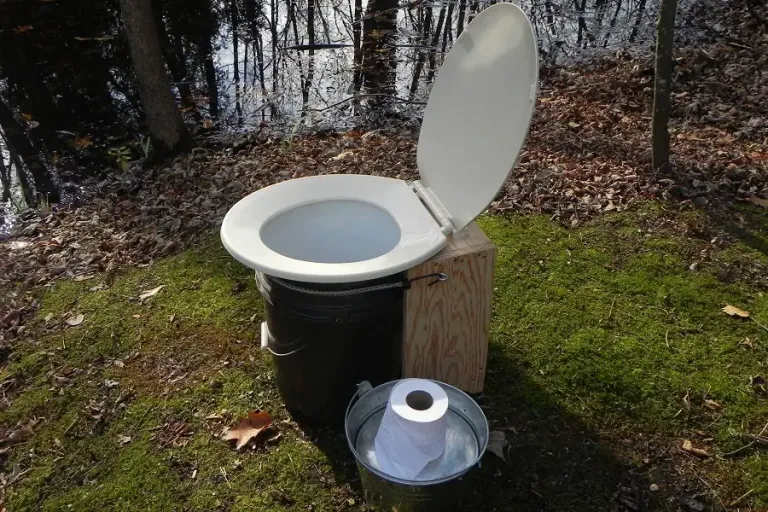
First of all, we need a toilet of some sort. This will be where we collect all of our human refuse on a daily basis.
This can be as simple as having a bucket, filled with a few inches of sawdust. Most commonly a toilet seat is mounted on a wooden box of sorts where the bucket will fit in nicely. It has to be easy to swap it out when it is full.
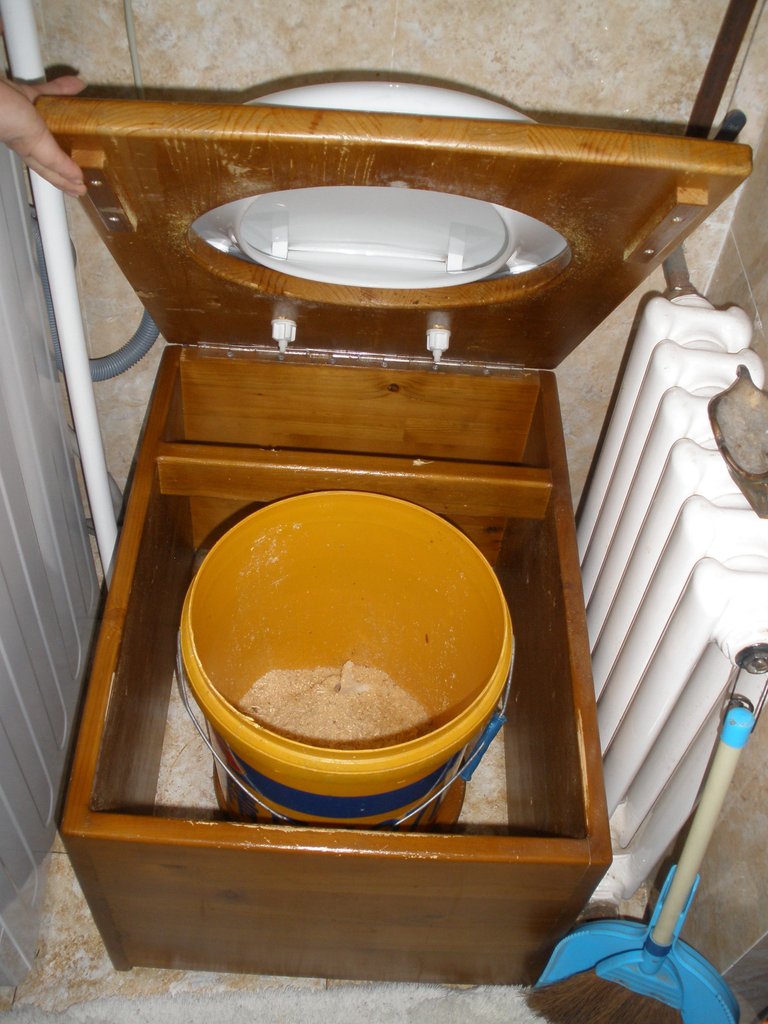
Instead of flushing you simply cover everything with sawdust after you are done. This will prevent any and all odors from rising, and it will already add some of the necessary carbon the compost will make use of later on.
It is suggested you get several buckets of exactly the same size and build, so the toilet system can fit their dimensions nicely.
Sawdust is a great way to cover up with, but people have used all sorts of carbon material for this: peatmoss, rice hulls, leaf mould, dried grass clippings, reeds, even old shredded paper... Basically you want organic material that is dry and devoid of moisture. What you use will depend on what is available in your area.
For most people in the western world, sawdust is a great way to go.
You can often find sawdust as a "waste" product in sawmills - they have tons of the stuff and some sawmills are quite happy to part with it for free because you are literally taking work of their hands. When you find the sawdust, you can usually just dump it outside somewhere and let it rot (which will aid the composting process later). Rotted sawdust has a sweet and delightful smell about it and is a fabulous resource for organic gardening overall. Using old sawdust as cover material is better than using fresh sawdust as it will decompose quicker, i.e. making its carbon more accessible to microorganisms.
So that's the basics: A toilet bucket system, and a pile of sawdust to cover up with after each use. Check.
The toilet will not smell when covered and because it is ultimately just a bucket: you can put it anywhere.
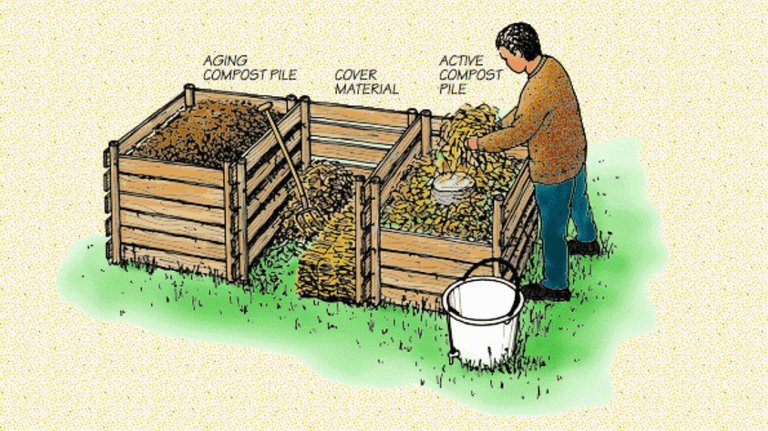
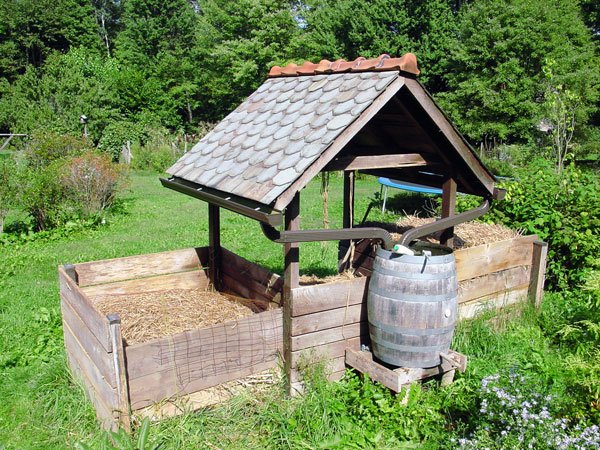
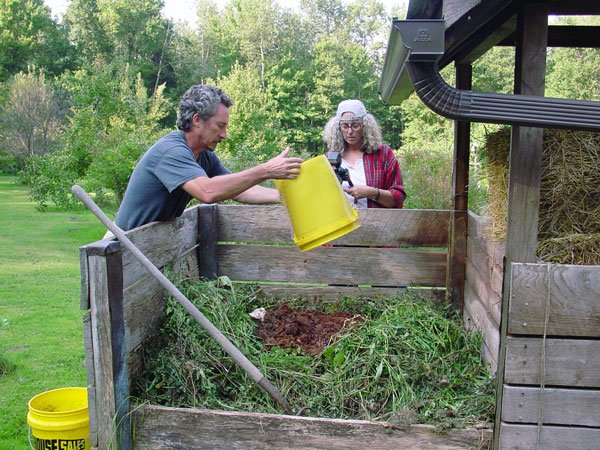
The compost bin
We will also need a compost pile that is properly constructed for the designated job it has to do. Ideally you have three of these.
This can be as easy as creating some sort of boxed-in area above ground, where the sides are pretty much closed off. You can construct the walls from old wooden pallets, junk wood, some people have used wooden stakes, reeds. Be creative! You can also use natural building materials or even concrete. Just keep in mind this will be the place of transformation so for the walls we want to avoid using metals that can corrode.
The walls help to keep the pile upright and stop it from spreading out too far. They can also help to keep animals away from the pile (though if properly managed and covered you will probably not have any issues with stray animals getting into your compost pile - they don't like the heat!). If you are still concerned you can put a wire mesh over the compost to prevent anything from getting in there.
To do this smartly we need two of these compost bins: one that we fill up and another we fill up while the first one matures for a year. Jenkins uses three such bins, where the middle one always holds dry cover material that can easily be added to either pile when needed. He has built a roof on it in order to prevent rain from making the cover material too wet. But this can be constructed any way you prefer.
It is important that the bottom of the pile remains open, meaning that it will be possible for creatures like earthworms to bury into the compost from underneath while it matures. If you are very concerned about the pile leaking you can use an isolation layer of plastic but generally this is not needed and can slow the composting process. If you add this liquid barrier make sure that it can drain away into some sort of container. We do not want standing liquid at the bottom of the pile - we want it to be wet, but not soaking.
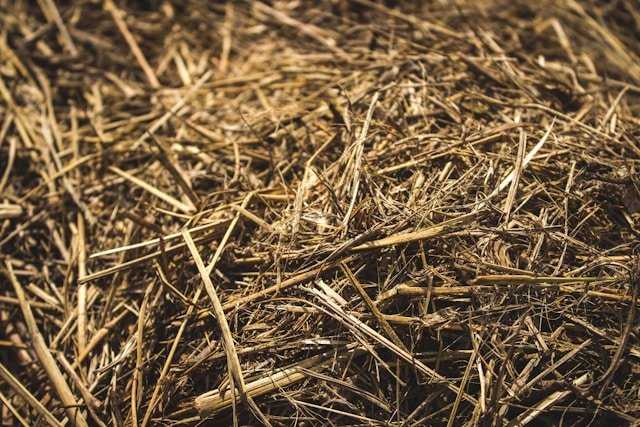
Next we want to create some sort of biological sponge at the bottom of the compost bin - this can be all sorts of dried organic material again: Weeds, hay, grass. Things that can absorb moisture and hold it. This sponge will soak up all excess liquid in the pile rather than letting it seep into the ground.
This sponge layer should be pretty thick, 18 inches or more and not be pressed down on. Remember, we need oxygen in the pile so it is good if there are many pockets with air, or if we have dry plants with hollow stems in the pile. Hay is perfect for this.
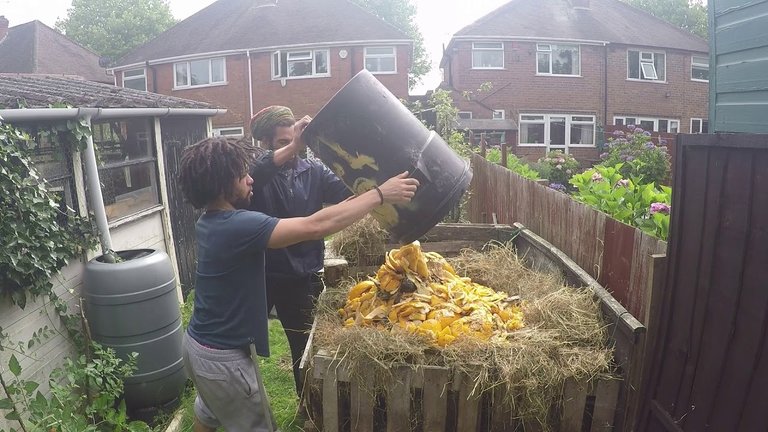
It is on top of this sponge that your first bucket contents will go!
And voila, you now have a place to put ALL the organic material from your household on a regular basis for continuous composting. Including toilet stuff!!!
Cover material
The last thing we need to do is having proper cover materials at the ready. The compost pile needs to be covered with hay, leaves or other dry carbon material AT ALL TIMES. The cover will take smells away and it will keep the pile from drying out too much.
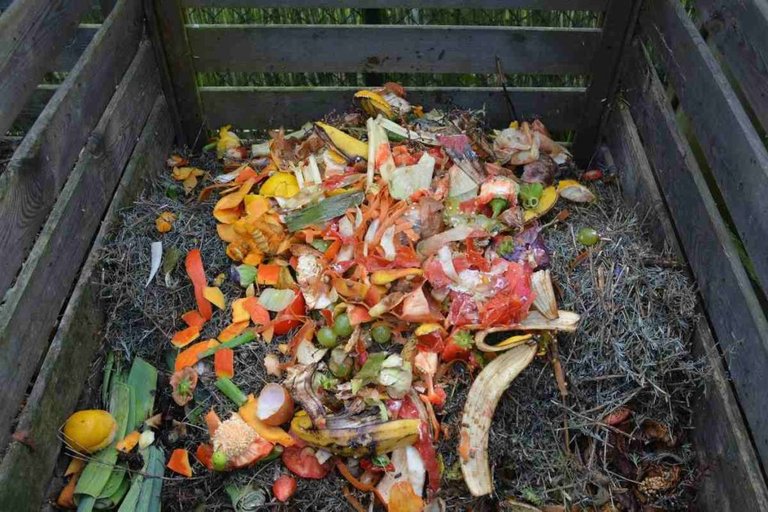
Everytime we want to add something to our compost pile we simply rake back the cover (use a designated pitchfork for this and only for this). We create a small indentation in the pile this way, sort of a small hole in the middle on the top. This is where the toilet buckets' contents go. Then you can add kitchen scraps and any other organic material you have from household, kitchen or your garden to this pile and rake the cover back on so that it is fully covered again. It' always a good idea to add additional covering so that it slowly becomes part of the pile.
After you dumped a bucket on the pile make sure you rinse it out and clean it periodically (any toilet needs cleaning sometimes). The contents from this cleaning and washing of the buckets go straight onto the pile and nowhere else!
Please also consider that anything you put into that compost will end up in your garden in one way or another. Although thermophilic compost can destroy and transform many types of harmful agents, we can exercise caution and try to keep its contents organic. Plastics for instance will not be eaten and will show up again in your finished humus. It is not a good idea to use chemical soaps or highly petrol-based cleaning agents as you might run the risk of tainting your beautiful organic humus with chemical residues.
A rule of thumb is: Anything that was alive or came from something that was once alive... can go on the pile.
That's really all there is to it.
As you keep adding material, the pile grows. It will also shrink because of the transformation process inside. It slowly falls in on itself, but since you have added straw, hay or other air-pockety things to the pile there will always be enough oxygen for the pile to go thermophilic where and when it needs to.
Composting this way is called "continuous composting" as opposed to "batch composting" where a lot of material is added at the same time like in industrial applications.
Do not turn the pile!
Turning the compost pile has been shown to slow down decomposition and you would risk losing too much moisture. It is also considerably more work.
Speaking of moisture: Your urine in the bucket will be quite enough moisture for the pile in general.
You want the pile to be moist. The book mentions that the compost pile should ideally be as wet as a squeezed out sponge at all times. If you feel you want to add moisture, do so. Jenkins mentions that most of the time these piles run the risk of having too little moisture in them, rather than too much.
If on the other hand you live in an area where it rains a lot, you have to take that into account. Either cover the pile before hard rain, build a roof on top of it or consider not adding your urine to the pile; though this might make the compost less fertile than it could be. You may have to make up the loss in nitrogen from other sources but nature will pretty much use what it finds so it's best not to make this too complicated. Use your common sense and watch the pile when you interact with it.
It is suggested to use a ratio of 30:1 carbon to nitrogen, though Jenkins warns not to overthink it too much. If you cover your toilet contents after every use with sawdust that's a majority of the carbon already. The rest will come from cover materials you work into the pile slowly as cover material.
Remember thermophilic compost piles need a combination of water, oxygen, carbon and nitrogen in order to do their work properly. If one of them is missing this process will not go as well as it could and it may take a lot longer.
So to recap, we need:
Water: Comes from your pee, or can be added manually to the compost pile.
Oxygen: Comes from the air pockets we have worked into the pile by using things like hay, straw or other hollow and light materials. The trapped air can later be used for fueling the reactions inside the pile.
Carbon: Any dried organic plant material. Ideally use hollow stemmed weeds, reeds, hay or straw. Any old plant that has dried will be a good source of carbon. You can also use cardboard or paper if you are sure that it doesn't contain any problematic inks or polymers. Cardboard toilet roll cores are a good idea for example.
Nitrogen: Basically anything that is still green or "recently" used. These can be kitchen & food scraps, fresh grass clippings and other cuttings from the garden, pee, animal manure, grease, frying oils, banana peels... you can find more about this online if you are curious about a good solution for your local area.
By the way, toilet paper can also go on into the buckets and compost piles. As can many other things: hair cuttings, fingernails, and even whole animals. The nature of thermophilic composting is that basically eats everything organic. Jenkins mentions that he has put entire corpses of animals into humanure piles that were completely gone a year later.
Talk about magic!
Just remember: These things take time to mature. As does anything else worth having or attempting on Earth ;)
To be concluded in
Part 4 - Spiritual Considerations
Img srcs: unsplash.com tinyhouseblog.com enviroinc.com humanurehandbook.com de12ambachten.nl youtube.com agrifarming.in etsus.co humanurehandbook.com
Thanks for stopping by <3
Part 4 - Spiritual Considerations
Once a compost pile is functioning well earthworms should start appearing, if not naturally, try find some to introduce to the pile this assists the process.
Going back to basics, very good reading to implement.
@tipu curate
Upvoted 👌 (Mana: 55/75) Liquid rewards.
yes! there will be an enormous amount of them in the pile the more time goes on and some people have used the worms to set up additional worm bins or as bait for fishing. thanks
Knowledge offering solutions to problems people don't consider of late, acceptable over the years now frowned upon, how spoiled city life has made many.
and therein i feel lies the great divide of our time. people moving in diametrically different directions.
curious to see how it will continue and where it will lead.
thanks for sharing your thoughts
Worst case scenario is everyone is going to come up with a short end of stick, greed with no logical thinking, building bigger/higher establishments thinking they will be all right. Old knowledge tossed aside, many systems built over fifty years plus are no longer maintained, all spells disaster coming down the line.
Don't mention
Great work from great minds
aye
this idea is fairly old and has merely been rediscovered. the book is from the late 1990s i believe
Oh yes
I should commend you for reviewing it
Without your post I wouldn't have known this
Love all the images of differnt people using this system. so inspiring!!
Hiii