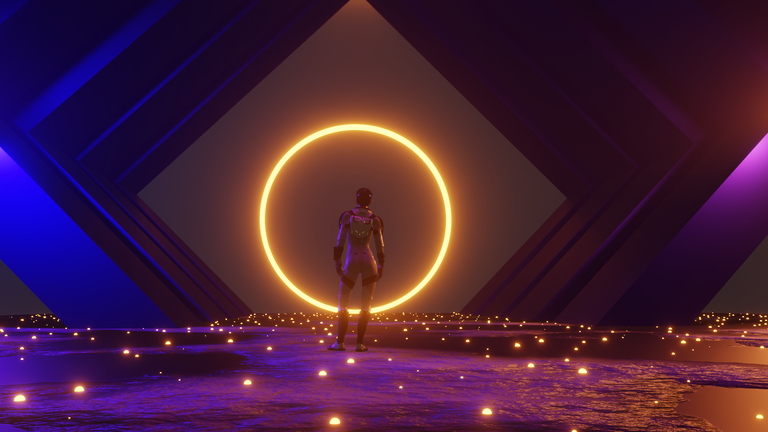
Hola a todos hoy quiero compartir con ustedes estos diseños que hice en blender que es el programa que estoy aprendiendo a utilizar, en verdad que esta nueva etapa me tiene emocionado, poder aprender a hacer este tipo de diseños. Al aprender mas espero poder compartir ese conocimiento con mas personas eh hecho el diseño de futurista como yo le llamo en mi stream en vimm.tv a continuacion les dejo el diseño terminado y capturas a grandes rasgos de las fases que relice para hacer la escena espero les guste.
Hello everyone today I want to share with you these designs that I made in blender which is the program I'm learning to use, in truth that this new stage has me excited, to learn to make this kind of designs. By learning more I hope to share that knowledge with more people I made the futuristic design as I call it in my stream on vimm.tv below I leave you the finished design and screenshots of the phases that relice to make the scene I hope you like it.

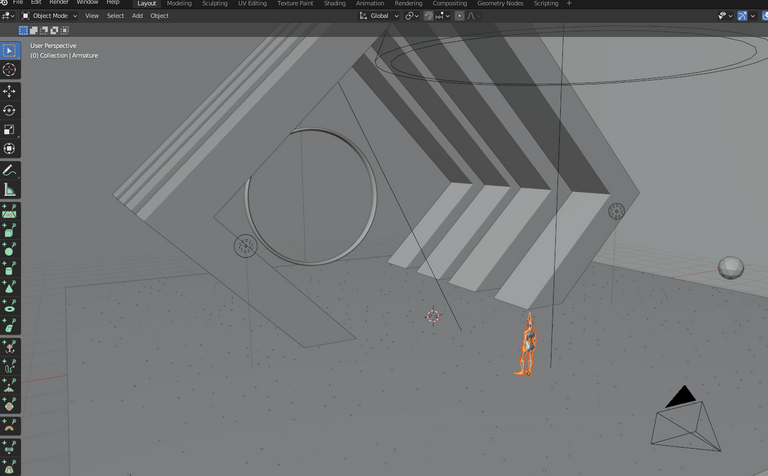
Esta es la primera parte la vista de objetos, en esta escena utilice un cubo rotandolo para formar un rombo y borrando sus caras de enfrente y atras y escalandolo para hacerlo mas delgado y copiandolo 3 veces, tambien utilice un circulo para crear un aro de luz, un plano para hacer la superficie y una ico esfera para crear las piedras brillantes del suelo
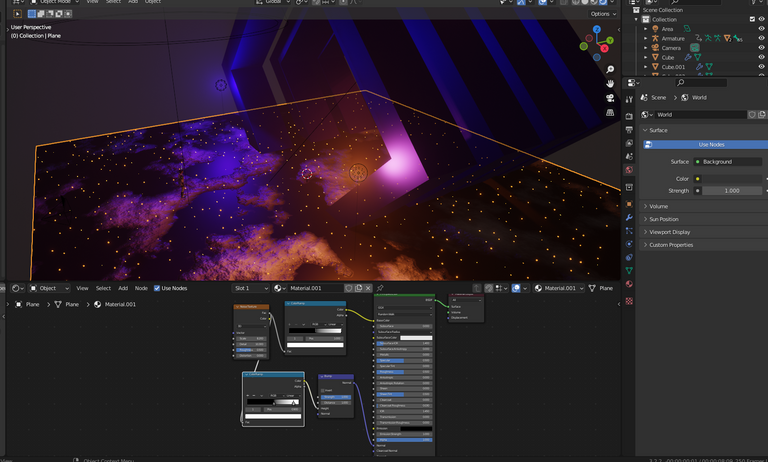
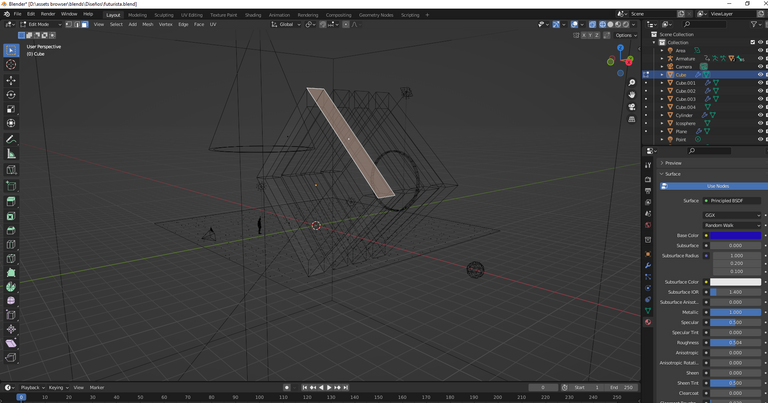
En esta siguiente parte te muestro la vista de shading y los nodos que utilice fueron un noise texture, un color ramp, un bump y el de color base la combinacion de estos nos ayuda poder crear la sensacion visual de estar sobre un terreno rocoso o tierra espacial con la mezcla de tonos de negro y blanco otorgando partes rugosas y partes lisas a nuestro plano tambien utilice lamparas de punto, de area y una de cono sobre el personaje y en el aro del fondo utilice un nodo de emision para poder reflejar luz asi mismo utilice el mismo nodo para la ico esfera para crear las piedras brillantes en el suelo
In this next part I show you the shading view and the nodes I used were a noise texture, a color ramp, a bump and the base color node. The combination of these help us to create the visual sensation of being on a rocky terrain or space land with the mix of black and white tones giving rough and smooth parts to our plane also use point lamps, area lamps and a cone lamp on the character and in the background ring I used an emission node to reflect light and I used the same node for the ico sphere to create the glowing stones on the ground.
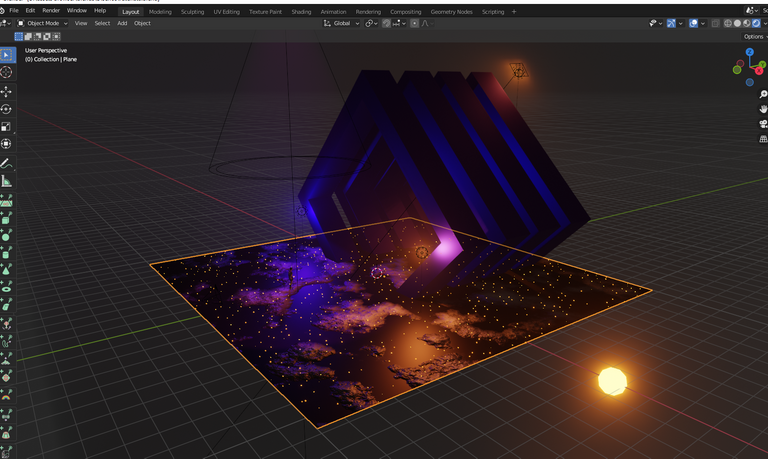
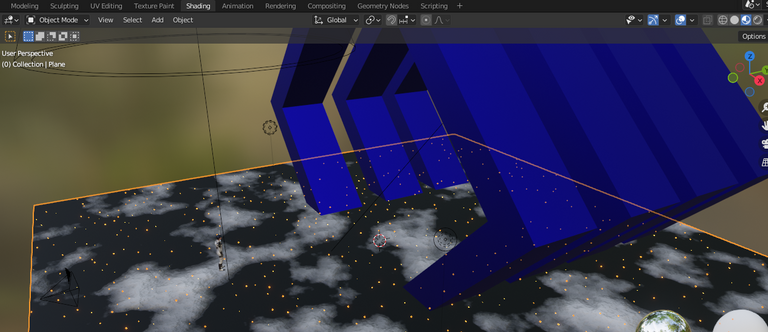
En esta imagen te muestro una vista alejada lateral de como se ve el resultado de la escena en vista de render la esfera brillante que parece sol es la ico esfera con el nodo de emision y la cual esta siendo utilizada para crear las piedras brillantes del suelo utilizando la herramienta particulas, esta herramienta lo que nos ayuda es a conseguir una clonacion de la ico esfera sobre nuestro suelo con las opciones que nos brinda de poder manejar los valores que mejor se ajusten a lo que necesitamos como lo son el poder posicionar de manera aleatorea las ico esferas clonadas en este caso y tambien elegir la cantidad de copias que se haran y se dispersaran sobre todo el suelo de manera aleatoria pero tambien uniforme sin salirse del plano seleccionado. Tambien podemos ver claramente la cantidad de luces o lamparas que utilice para conseguir a mi gusto el mejor resultado de iluminacion, basandome en colores que eh visto son comunes al representar escenas del espacio como lo son el color morado, el naranja y el azul con tonos calidos o obscuros.
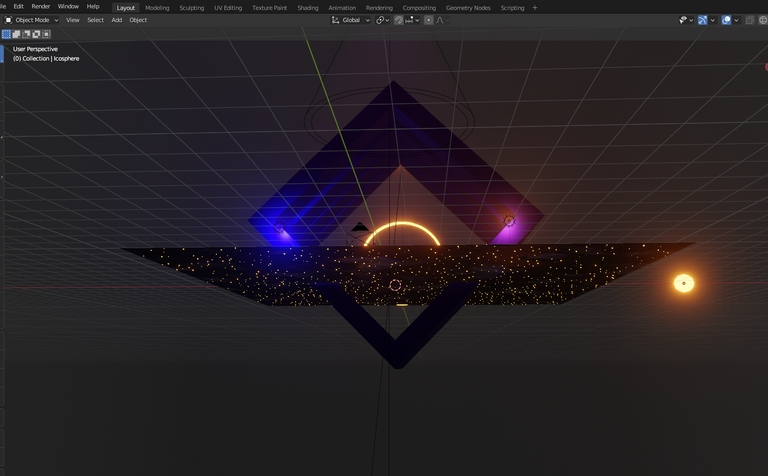
Para finalizar te dejo esta imagen para que puedas ver la escena tando de abajo como de arriba como podemos ver los mini clones de la ico esfera estan por todo el plano si lo vemos desde abajo pero en la vista de arriba o de camara no se veran todas sino que se veran disperzas esta parte de abajo no se vera nunca debido a que nuestra camara no la enfocara pero la muestro para que vean como nustro rombo traspasa el plano y nos ahorramos hacer cortes y mas proceso de edicion y podemos ver mejor la colocacion de las dos luces de punto colocadas frente a nuestro rombo para lograr un efecto de reflejo sobre el rombo y de iluminacion hacia dentro del mismo de igual manera seguimos viendo la luz de cono que esta posicionada justo sobre el personaje para lograr su iluminacion y darle mas protagonismo, de igual forma vemos la ico esfera que brilla como el sol, eso es todo el proceso que realice al principio parece complicado pero al aprender y practicar los pasos y las herramientas solo nos tomara el tiempo que nuestra imaginacion necesite para plasmar nuestra idea y el tiempo que nos tome darle los acabados que deseamos, espero les guste y haberme podido explicar de una buena manera en proximos dias les compartire mas escenas que vaya creando, que esten muy bien gracias por su tiempo de leer y ver mi post.
The rewards earned on this comment will go directly to the people( @kingdannys ) sharing the post on Twitter as long as they are registered with @poshtoken. Sign up at https://hiveposh.com.
This is a very complex drawing!! I like it!! It’s strange in a good way!
Hi thanks for your comment, yes it looks a complex drawing but more is the time to make the details I'm glad you like it.
This turned out really nice! I find that the 3D development in Blender has come a long way. Great job.
Hello, thank you, yes, since I discovered the 3D world with blender, I have been able to see what has been around for a long time and is constantly being updated with more and better tools.
Really dope creation bro! I mess with the colors and overall vibe a lot!
Thanks for the follow a few minutes ago. Definitely like your style and will be sticking around to check out more of your work in the future. Also looks like we both are Pokémon fans. My belly tattoo says it all. #Legendary
Hi yes i'm fan of Pokémon I Love it 😍❤️,your tattoo looks amazing bro the Best Legendary pokemons to me, and thanks for Your follow and your commemt about My work I reallly apreciate and I Will continue learning and posting My work and will be checking your post too
I agree that these are the 3 best Pokémon, that’s why I had to get them tattooed.
I’m happy you found me. Look forward to connecting again soon.
Of course, it was a pleasure to have met you and I am sure we will keep in touch.
phew - alot of work! really nice
Thanks Friend you have amazing works too
😎