¡Hola mis queridos amigos! Hoy vengo con un nuevo dibujo y por supuesto, todo el proceso para su creación, que es lo que me parece más divertido, ver como todo inicia con nada y termina siendo algo bonito y hasta con significado depende la ocasión, así que sin más ¡iniciemos!
English Version
Drawing a cute cat girl
Hello my dear friends! Today I come with a new drawing and of course, the whole process for its creation, which is what I find most fun, to see how everything starts with nothing and ends up being something nice and even meaningful depending on the occasion, so without further ado, let's start!

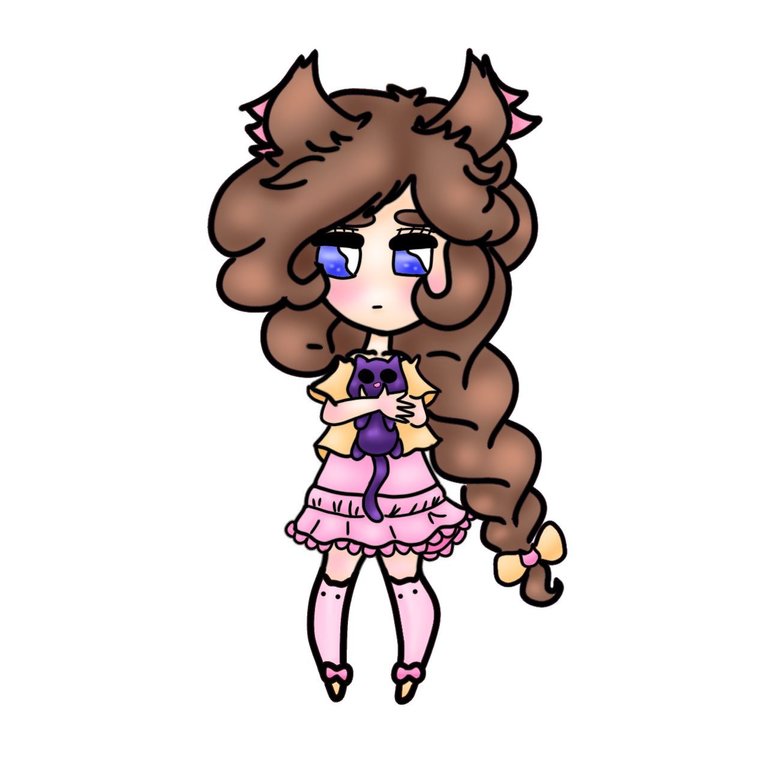
Imagen creada por mí en Canva / Image created by me in Canva
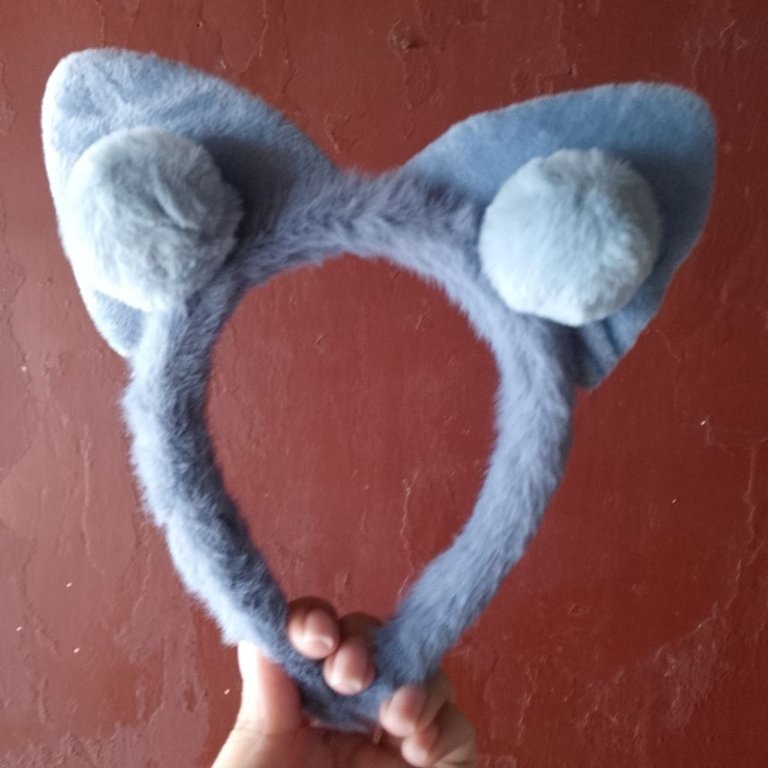
Empecemos con ¿cómo se me ocurrió este dibujo? Bueno, estaba yo en el abasto del chino más cercano a mi casa y me he encontrado unos preciosos cintillos con orejitas de gato en tela de peluche y sí, se imaginarán que compré uno ¿no? Obvio, lo compré, color azul grisáceo, lo traigo puesto mientras escribo este post (risas). Al enfrentarme a la hoja de papel vacía, a excepción de las líneas propias del cuaderno, se me ocurrió que las orejas de gato eran un buen tema para dibujar y así, empezó a tomar forma mi boceto.
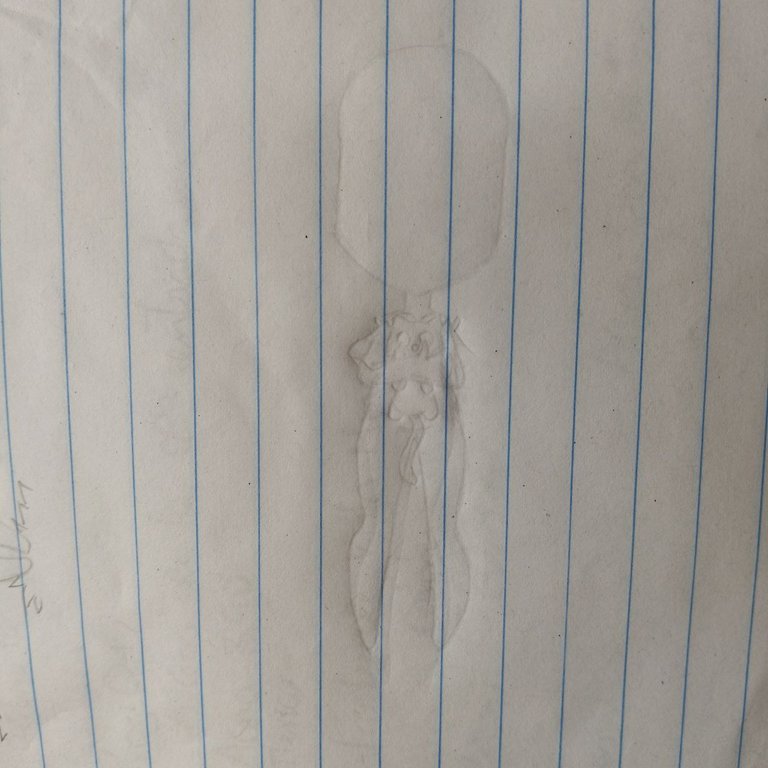
Como de costumbre, con un lápiz de grafito en un tono bastante claro, tracé lo que sería la figura base de mi personaje, con ello puedo establecer más o menos dónde irán colocadas las manos, por ejemplo, la postura, la dirección hacia dónde mirará el personaje y también si quiero agregar algún complemento, como en este caso, que decidí añadir a un compañero, un pequeño gato de peluche que nuestra pequeña sostiene en brazos. Luego, con un lápiz de grafito en un tono más oscuro, realicé las líneas definitivas del dibujo, colocando los detalles, como el cabello, su ropa y las facciones en su rostro.
English Version
Let's start with how did I come up with this drawing? Well, I was at the Chinese grocery store closest to my house and I found some beautiful little headbands with cat ears in plush fabric and yes, you can imagine that I bought one, right? Of course I bought it, it's grayish blue, I'm wearing it while I'm writing this post (laughs). Facing the empty sheet of paper, except for the lines of the notebook, it occurred to me that cat ears were a good subject to draw and so, my sketch began to take shape.
As usual, with a graphite pencil in a fairly light tone, I traced what would be the base figure of my character, with this I can establish more or less where the hands will be placed, for example, the posture, the direction in which the character will look and also if I want to add some complement, as in this case, I decided to add a companion, a small stuffed cat that our little girl holds in her arms. Then, with a graphite pencil in a darker tone, I made the final lines of the drawing, placing the details, such as the hair, her clothes and the features on her face.
 |  |  |
|---|
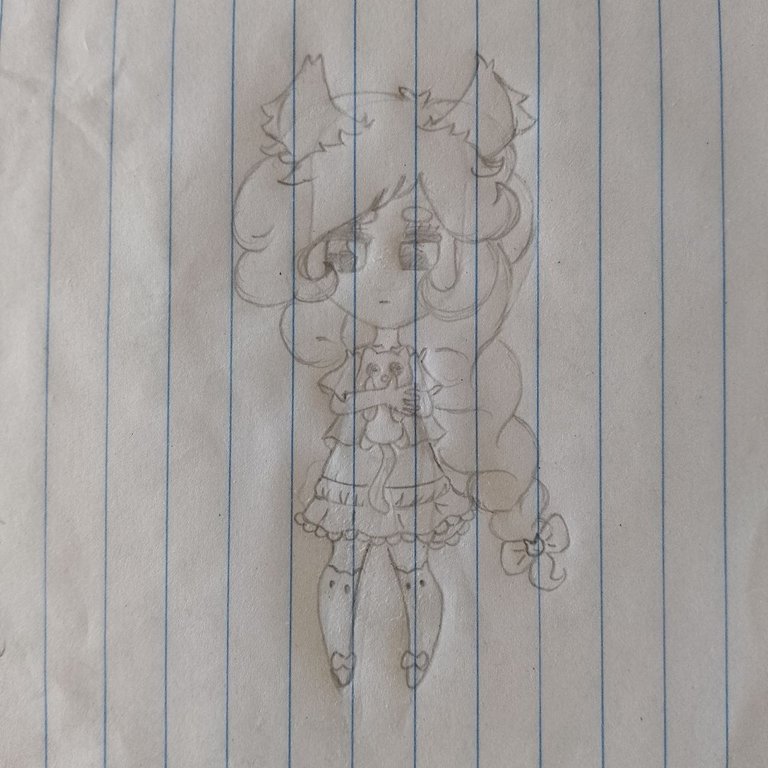
Es tiempo del line art, sí, porque este dibujo en realidad será digital, es por ello que la foto que le he tomado al dibujo en el cuaderno, la importo a la aplicación Ibis Paint X que tengo en mi teléfono y ya teniendo listo mi lienzo, con la imagen del boceto ajustada al tamaño deseado, comienzo a hacer el delineado con el pincel tipo pluma en color negro. Este paso debe hacerse en una capa por encima de la capa donde se encuentra la foto del boceto y la misma debe estar en modo normal.
English Version
It is time for the line art, yes, because this drawing will actually be digital, that is why the photo I have taken of the drawing in the notebook, I import it to the Ibis Paint X application that I have on my phone and having my canvas ready, with the image of the sketch adjusted to the desired size, I start to make the outline with the pen brush in black color. This step must be done in a layer above the layer where the sketch photo is and it must be in normal mode.
Line art
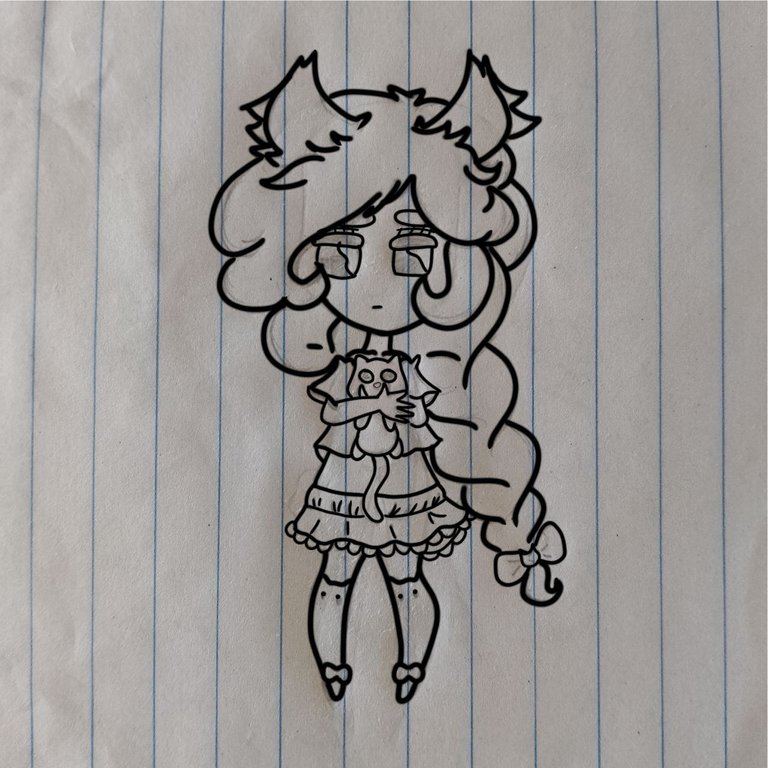
Ha llegado el turno de los colores base y he implementado una paleta de colores pastel en su mayoría, puesto que esta es una chica tierna, así que estos colores le van bastante bien. El peluche es un gatito negro, pero no por eso usé color negro puro para su base, más bien fue un color morado bastante oscuro, esto me permitirá hacer sombras más fácilmente y luces más bonitas. He usado una nueva capa en modo multiplicar para los colores base y este coloreado lo hice con la herramienta de relleno.
English Version
It's time for the base colors and I have implemented a palette of pastel colors for the most part, since this is a cuddly girl, so these colors suit her quite well. The teddy is a black kitty, but that's not why I used pure black for her base color, rather it was a rather dark purple color, this will allow me to make easier shadows and nicer highlights. I used a new layer in multiply mode for the base colors and this coloring was done with the fill tool.

Colores base / Flat colors
Ahora el sombreado, por lo que necesito una nueva capa, también en modo multiplicar, así, solo debemos escoger los mismos colores de la base y al hacer los nuevos trazos, estos quedarán automáticamente más oscuros. En el caso de colores muy claros, como la piel o las medias, es recomendable tomar un color apenas un poco más oscuro que la base, para que se note mejor el sombreado. El pincel tipo aerógrafo es excelente para este paso.
English Version
Now the shading, so I need a new layer, also in multiply mode, so we only need to choose the same colors of the base and when we make the new strokes, they will automatically be darker. In the case of very light colors, such as skin or socks, it is advisable to take a color just a little darker than the base, so that the shading is more noticeable. The airbrush is excellent for this step.

Sombras / Shadows
Para las luces, seguimos un proceso muy parecido al paso anterior, solo que la capa debe estar en modo normal y tomaremos colores más claros que los de la base, sin embargo, la herramienta a utilizar es el mismo pincel tipo aerógrafo.
English Version
For the lights, we follow a process very similar to the previous step, only that the layer must be in normal mode and we will take lighter colors than those of the base, however, the tool to use is the same airbrush.

Luces / Lights
Por supuesto, no puede faltar algo de rubor en esta chica, lo he hecho en una nueva capa en modo normal, con el pincel aerógrafo. Tomé un tono rosa con un subtono un tanto naranja. Agregué rubor en sus mejillas, manos, codos y el área expuesta de sus piernas.
English Version
Of course, you can't miss some blush on this girl, I did it in a new layer in normal mode, with the airbrush brush. I took a pink shade with a bit of an orange undertone. I added blush on her cheeks, hands, elbows and the exposed area of her legs.
Rubor / Blush
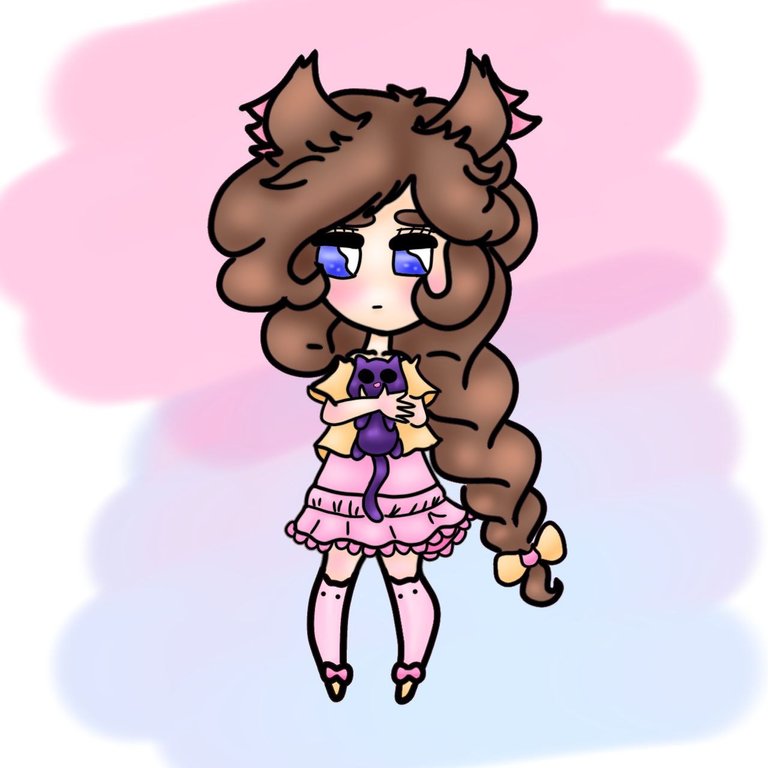
Es momento del fondo y para ello, he creado una nueva capa que coloqué hasta debajo del line art, con la herramienta de selección, limito el área que puede ser pintada a la que está alrededor del personaje, de modo que no se “manche” lo que ya he hecho hasta ahora y con el pincel acuarela, trazo pinceladas libres en un color celeste. Bajo la chica, coloco una especie de sombra en color rosado y añado adornitos por todo el fondo, en colores blanco y rosados. Pero no se sentía suficiente, así que decidí experimentar (risas).
English Version
It's time for the background and for this, I created a new layer that I placed even below the line art, with the selection tool, I limit the area that can be painted to the area around the character, so that it does not “stain” what I have done so far and with the watercolor brush, I draw free brushstrokes in a light blue color. Under the girl, I place a kind of shadow in pink and add little ornaments all over the background, in white and pink colors. But it didn't feel enough, so I decided to experiment (laughs).
Fondo primer intento / Background first attempt
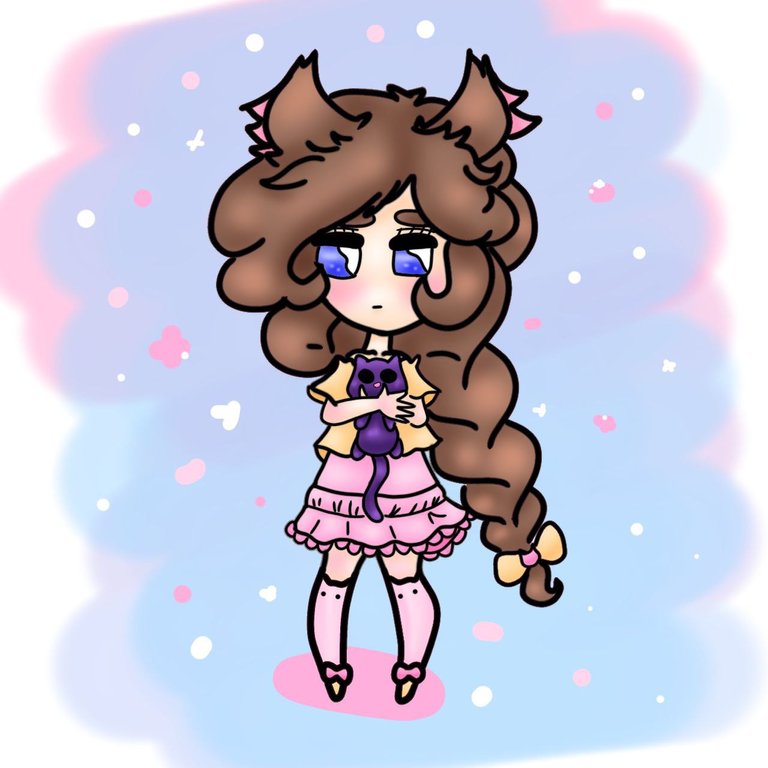
Apagué esta capa y creé otra debajo de esta, y con el mismo pincel tomé color rosado y lancé mis trazos hasta la mitad, allí, con el mismo pincel, tomé el azul celeste y uní con el último trazo de rosa, mezclando y arrastrando el color en esa zona, hasta que llegué a la parte de abajo donde ya esa azul. Y estaba bonito… Pero ¡aún no era suficiente! (risas {¿ya ven que mi proceso está divertido? Una artista inconforme más}).
English Version
I turned off this layer and created another one under this one, and with the same brush I took pink color and threw my strokes to the middle, there, with the same brush, I took the sky blue and joined with the last stroke of pink, mixing and dragging the color in that area, until I got to the bottom where that blue was already there. And it was nice... But it still wasn't enough! (laughs {can you see my process is fun? One more non-conformist artist}).
Fondo segundo intento / Background second attempt
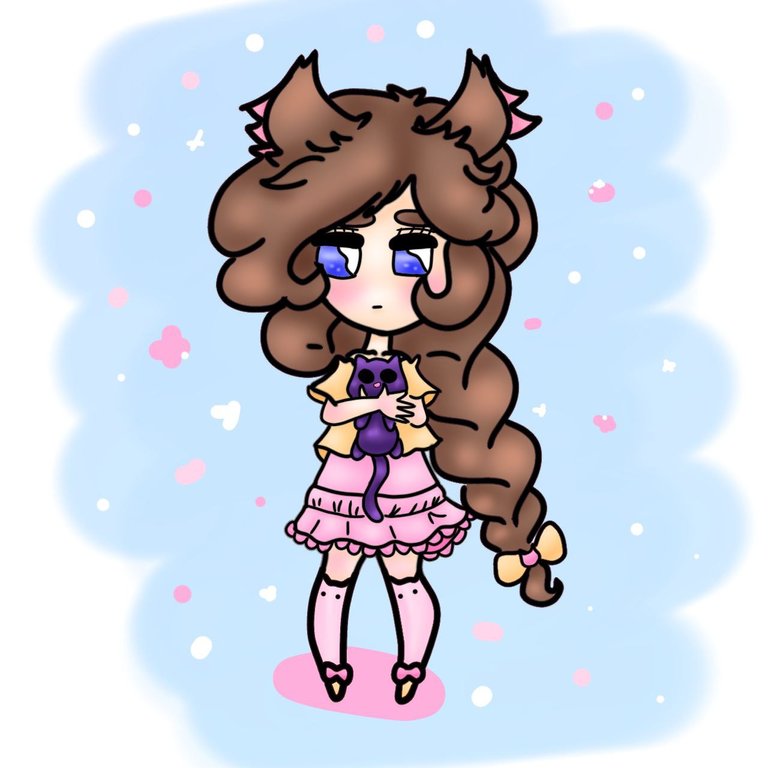
Así que se me ocurrió que si encendía la primera capa que hice de fondo, sin apagar la segunda podría tener algo muy bueno o algo muy raro y la encendí y lo amé (risas otra vez). Me gusta mucho cómo se ve, es que da un efecto como de transparencia en los bordes de los trazos y de más oscuridad al centro, como cuando superpones dos telas que se transparentan, así que este fue el fondo elegido (¡al fin!).
English Version
So it occurred to me that if I turned on the first layer that I made as a background, without turning off the second one I could have something very good or something very weird and I turned it on and I loved it (laughs again). I really like how it looks, it just gives an effect like transparency on the edges of the strokes and more darkness in the center, like when you overlap two fabrics that are transparent, so this was the background I chose (finally!).
Fondo final / Final background
Y por último, mi momento favorito, “el blanco mágico”. En una nueva capa en modo normal y con el pincel tipo rotulador, le damos toques de blanco a todo el dibujo para que tenga ese brillo extra que le aporta mucha vida.
English Version
And finally, my favorite moment, “the magic white”. In a new layer in normal mode and with the marker brush, we give touches of white to the whole drawing so that it has that extra brightness that gives it a lot of life.
El blanco mágico / Magic white
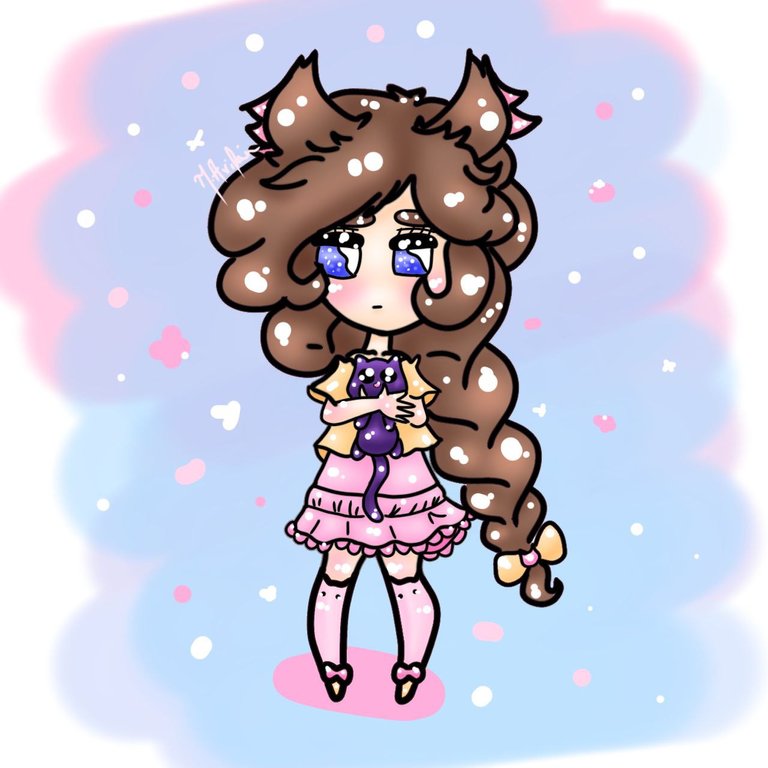
Por cierto que quise darle un aire como de timidez, de allí esa mirada que se desvía un tanto hacia abajo y hacia un lateral, los brazos en posición de abrazo y aferrados al peluche, haciendo una especie de barrera protectora entre el exterior y ella, así como también deseaba que se viera muy femenina, por ello, lleva esa falda con terminaciones delicadas y su atuendo en general, es de colores pasteles, además de todos los lazos que la hacen algo “coquette”.
¡Muchas gracias por leerme!
English Version
By the way I wanted to give her an air of shyness, hence that look that deviates somewhat down and to the side, the arms in a hugging position and clinging to the teddy, making a kind of protective barrier between the outside and her, as well as I also wanted her to look very feminine, so she wears that skirt with delicate finishes and her outfit in general, is in pastel colors, plus all the bows that make her something “coquette”.
Thanks so much for reading me!
Fotografías propias, tomadas con mi Tecno Spark 10C.
Dibujo creado por mí en Ibis Paint X.
Traducido al inglés con DeepL.
English Version
Own photographs, taken with my Tecno Spark 10C.
Drawing created by me in Ibis Paint X.
Translated to English with DeepL.
Ooow! 😍🥰 Me encantó este dibujo y además yo amo los colores pastel son mis preferidos 😍 me gustó el fondo también y tú forma de explicar el proceso es genial. Excelente como siempre Mavi 😘
P.D: me encantó el cintillo de orejitas ❤️🤭
¡Hola linda Sarang!🤗
Muchas gracias, me alegra mucho que te gustara mi dibujo y la explicación☺️ los colores pasteles siempre se ven tan bonitos y delicados✨
Jeje el cintillo de orejitas es lo máximo🤭
Saluditos✨
Está muy lindo! Tenía tiempo sin ver tus dibujos, siempre le das un aire muy original, saludos! Te deseo mucho éxito por acá ❤️
¡Hola amigo!
Muchas gracias☺️ me contenta tu visita✨ gracias también por tus buenos deseos🤗
Congratulations @mavilan30! You have completed the following achievement on the Hive blockchain And have been rewarded with New badge(s)
Your next target is to reach 500 upvotes.
You can view your badges on your board and compare yourself to others in the Ranking
If you no longer want to receive notifications, reply to this comment with the word
STOPcomo siempre tus dibujos con ese estilo tan cute. yeahhh!!
Mostro saludando por aquí
Mostroooooooo... Muchas gracias 🫂 me alegra mucho verte por acá y también que te gustara mi dibujo✨