Keicy Nieves

English
Greetings Cowboys!
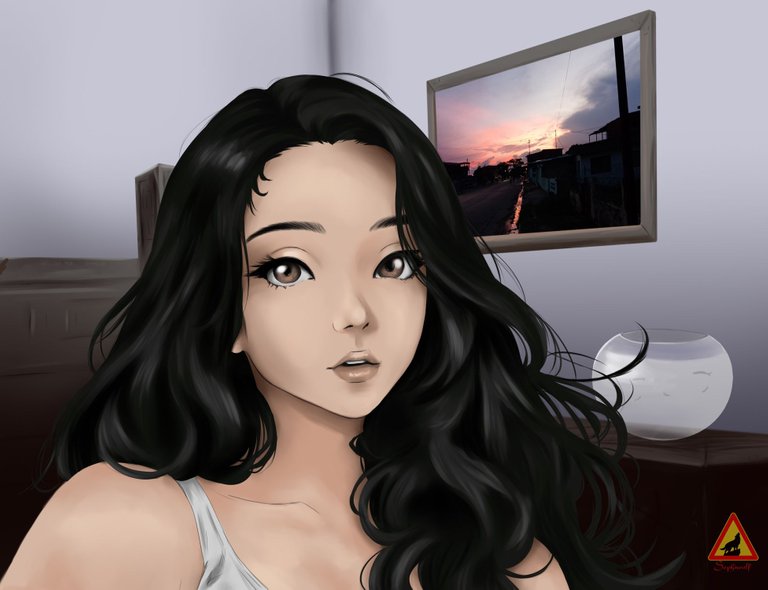
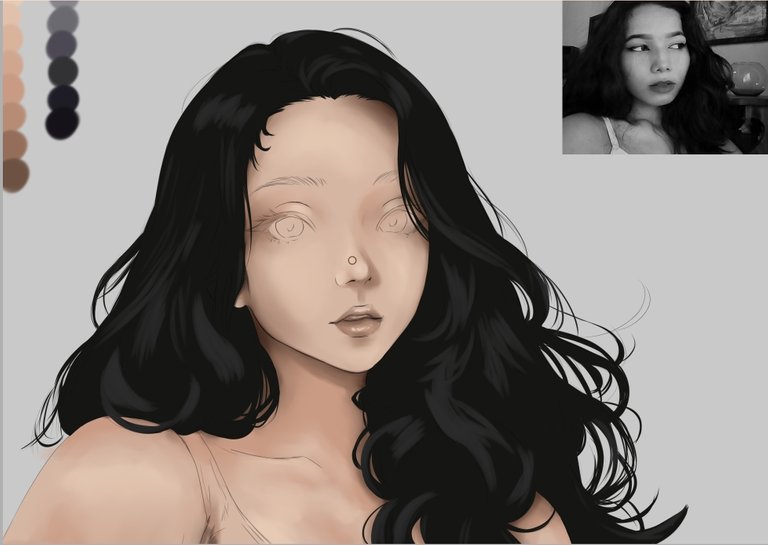
Today I want to share with you a digital caricature I made inspired by our friend Keicy Nieves @keicynieves.art .
Yes I know I know, we didn't tell her before, so this will be a surprise for her.
I just met Keicy at a talk our friends in the @hivearte community gave her too and she makes really cool content for hive.
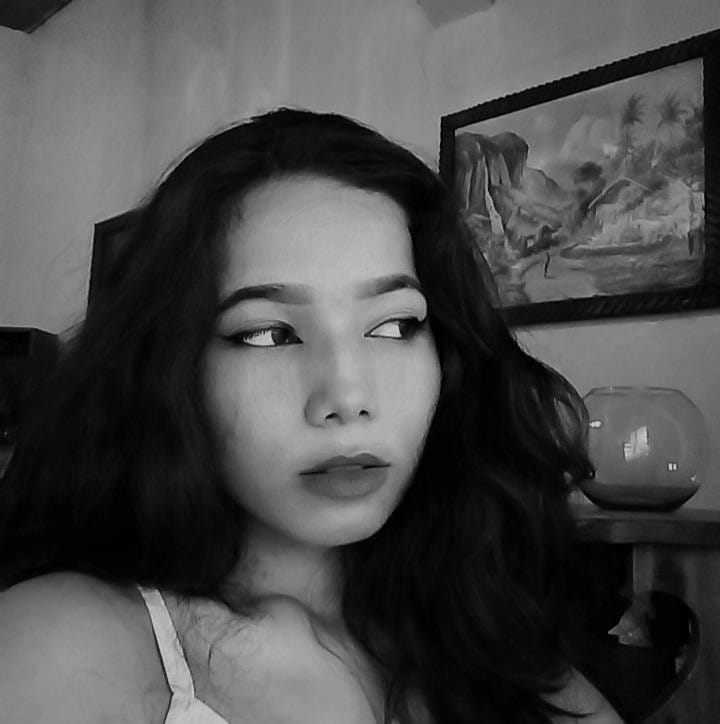
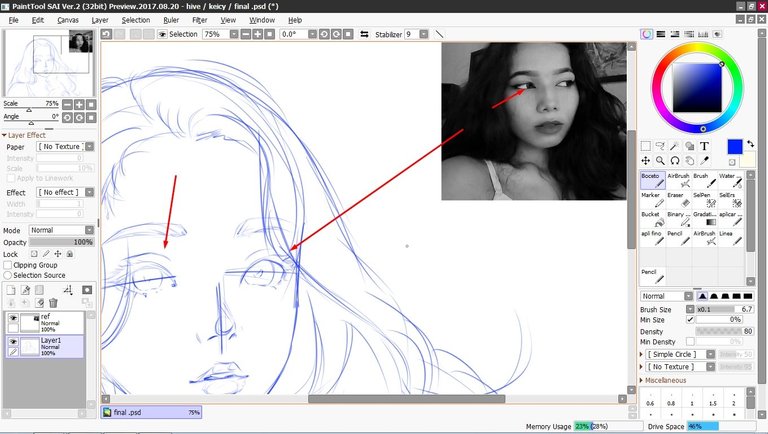
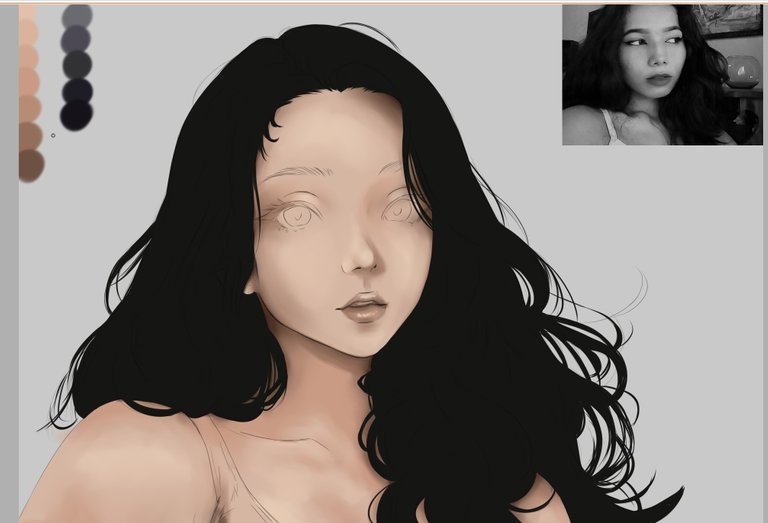
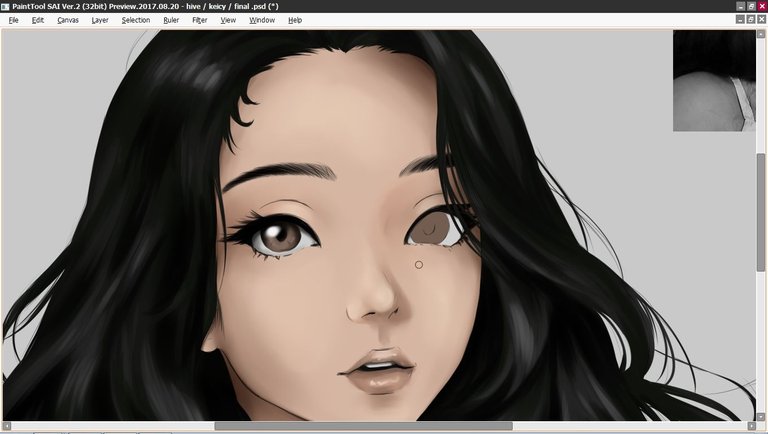
Talking about the drawing it's a reinterpretation of a cartoon photo of her, it has several details that I want to highlight like the fact that in the drawing she looks at the camera unlike the photo.
I did this with the intention of connecting more with the people who look at the drawing, it is as if it were a version seconds after taking the picture and she turns to look at the camera.... "I think I made myself clear" .
I am very happy with the final result, especially the hair and the look.
Español
Saludo Vaqueros!
Hoy quiero compartir con ustedes una caricatura digital que hice inspirada en nuestra amiga Keicy Nieves @keicynieves.art .
Si lo se lo se, no le dijimos antes, por lo que esto será una sorpresa para ella.
Recién conocí a Keicy en una charla que dieron nuestros amigos de la comunidad de @hivearte ella también y hace contenido muy genial para hive.
Hablando del dibujo es una reinterpretación de una foto de ella en caricatura, tiene varios detalles que quiero resaltar como el hecho de que en el dibujo mira a la cámara a diferencia de la foto.
Esto lo hice con la intención de conectar más con las personas que miren el dibujo, es como si fuera una versión segundos después de tomar la foto y voltea a mirar a la cámara... "Creo que me explique bien" .
Estoy muy feliz con el resultado final, en especial el cabello y la mirada.
Reference
Process / Proceso
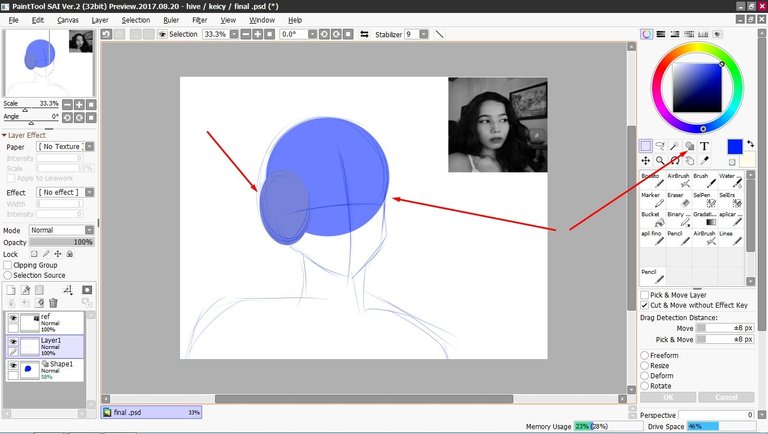
First we make the basic shape of the character, as usual I usually make two circles for the skull, but for a change we will use this tool of the drawing program that allows you to create basic shapes like circles, squares and triangles.
It is really very useful, and even more in those days when for some strange reason you don't get the circles right.
Primero hacemos la forma básica del personaje, como es de costumbre suelo hacer dos círculos para el cráneo, pero para variar un poco usaremos esta herramienta del programa de dibujo que te permite crear figuras básicas como círculos cuadros y triángulos.
Realmente es muy util, y aun mas en esos dias donde por algún extraño motivo no te salen bien los círculos.
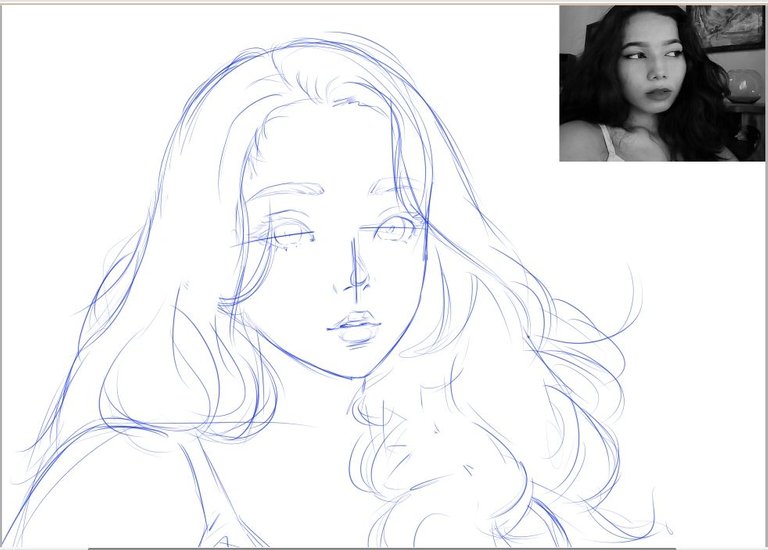
After a while and some corrections, our character is taking shape. The reference is merely to make the character look similar, I didn't want to make such an exact copy of the photo.
Después de un rato y algunas correcciones, nuestro personaje va tomando forma. La referencia es meramente para que el personaje sea parecido, no quise hacer una copia tan exacta de la foto.
The detail of the eyes that I mentioned before, one of several details that I applied in the drawing.
El detalle de los ojos que les mencione antes, uno de varios detalles que aplique en el dibujo.
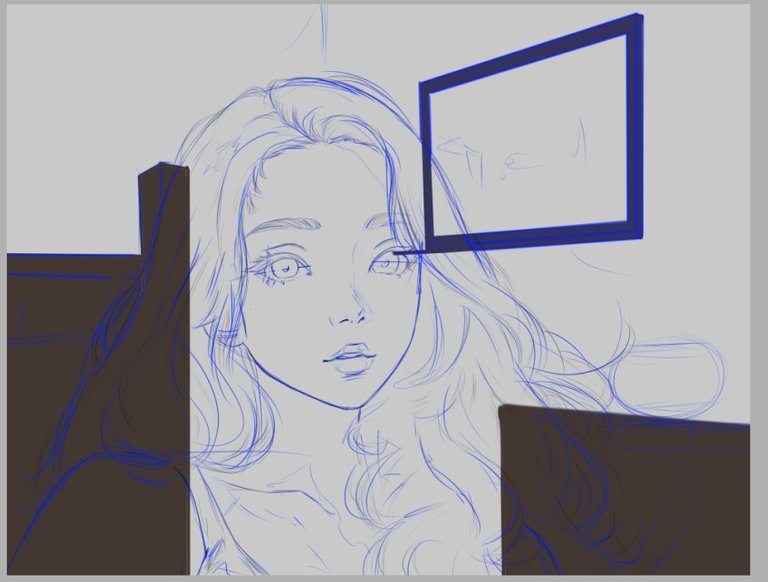
We add some objects for the background, I know they are not all the same, but this is when we use creativity.
Agregamos algunos objetos para el fondo, se que no son todos iguales, pero es aquí cuando usamos la creatividad.
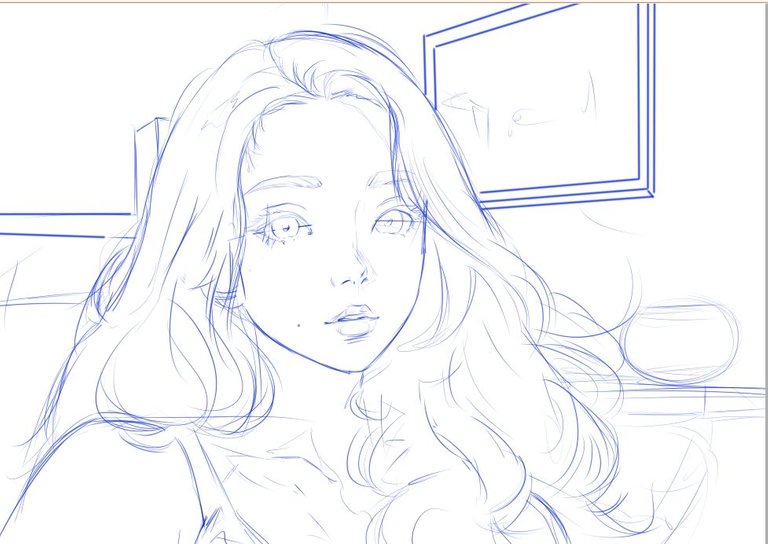
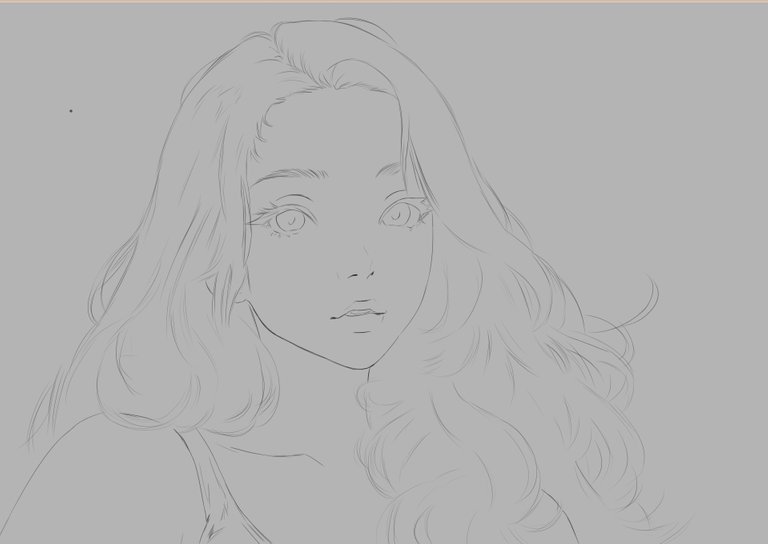
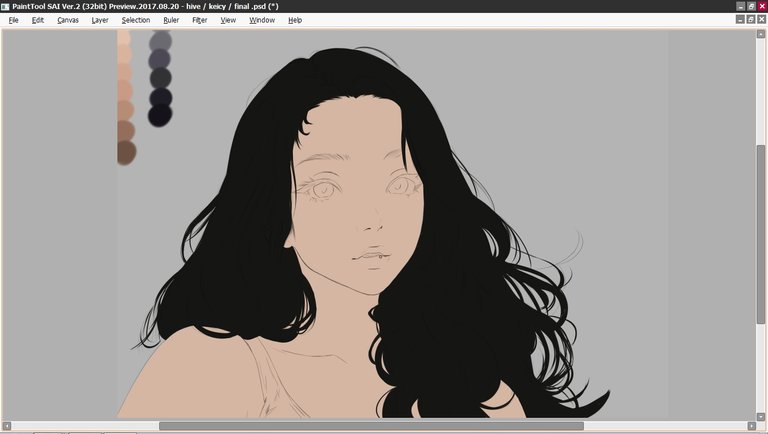
We move on to the lineart, this takes some time because I wanted to make it with very thin lines as I am used to.
Pasamos al lineart, esto lleva su tiempo pues quise hacerla con lineas muy delgadas como estoy acostumbrado.
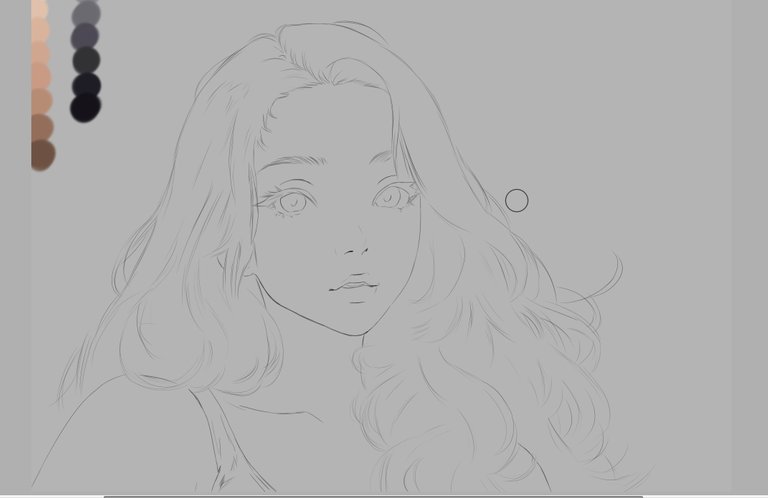
Now it's time for the color, on one side I placed the palette of colors that I will use in hair and skin, although as usual sometimes I use some extra colors to correct certain areas.
Bien es momento del color, de un lado coloqué la paleta de colores que usaré en cabello y piel, aunque como es normal, a veces uso algunos colores extra para corregir ciertas zonas.
We apply the base color all over the character, in the hair I used a brush with a fine tip, this to give the effect of locks of hair. This part took some time, so I summarized it for you.
Aplicamos el color base en todo el personaje, en el cabello usé un pincel con punta fina, esto para dar el efecto de mechones de cabello. Esta parte tomo su tiempo, así que la resumí para ustedes.
We apply the shadows with the different shades of the palette, we also add highlights before blending.
Aplicamos las sombras con los diferentes tonos de la paleta, también agregamos luces antes de mezclar.
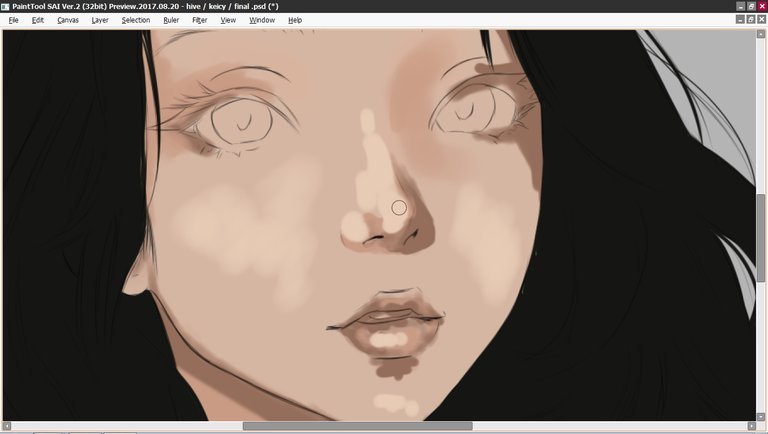
With the blending brush we soften and integrate the shadows and highlights we apply.
Con el pincel de difuminado suavizamos e integramos las sombras y luces que aplicamos.
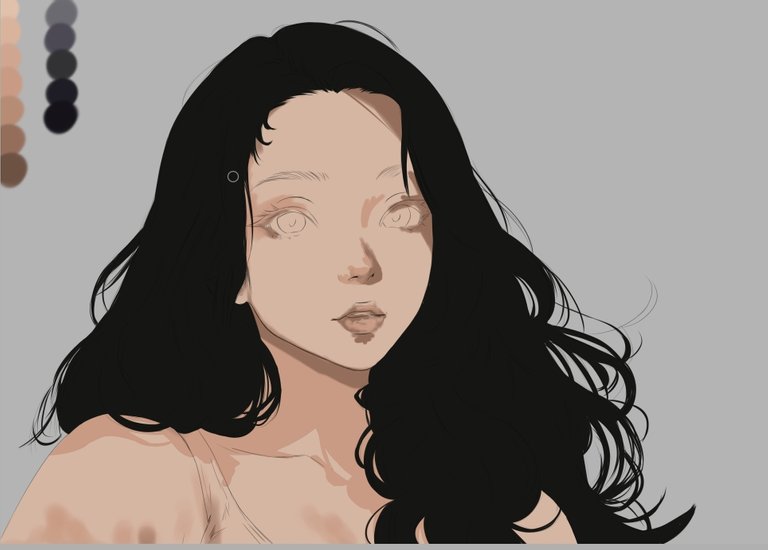
We apply highlights at the base of the hair color, giving depth and volume to the hair.
Aplicamos luces en la base del color del cabello, con esto vamos dando profundidad al cabello y volumen.
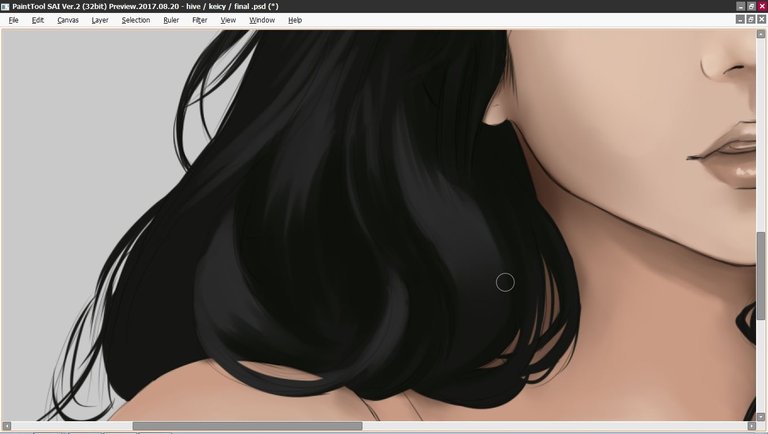
to finish with the hair we apply a dark tone in certain areas to enhance the depth.
para terminar con el cabello aplicamos un tono oscuro en ciertas zonas, con eso realzamos la profundidad.
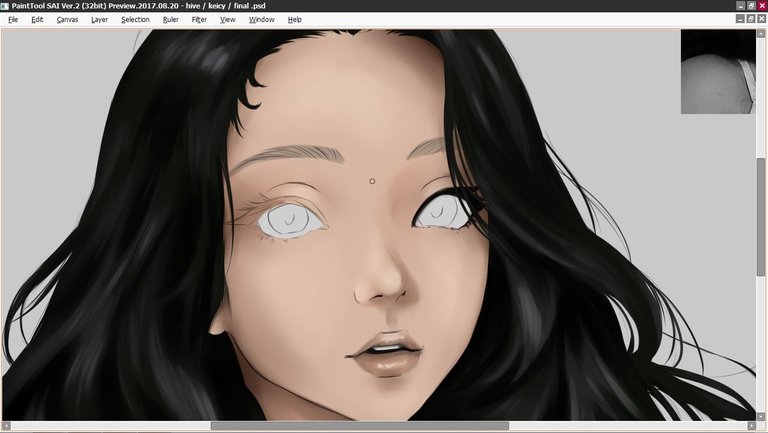
Time to give shape and detail to the eyes, if I remember correctly Keicy's eyes are a not too dark shade of brown.
Tiempo de darle forma y detalles a los ojos, si mal no recuerdo los ojos de Keicy son de un tono marrón no muy oscuros.
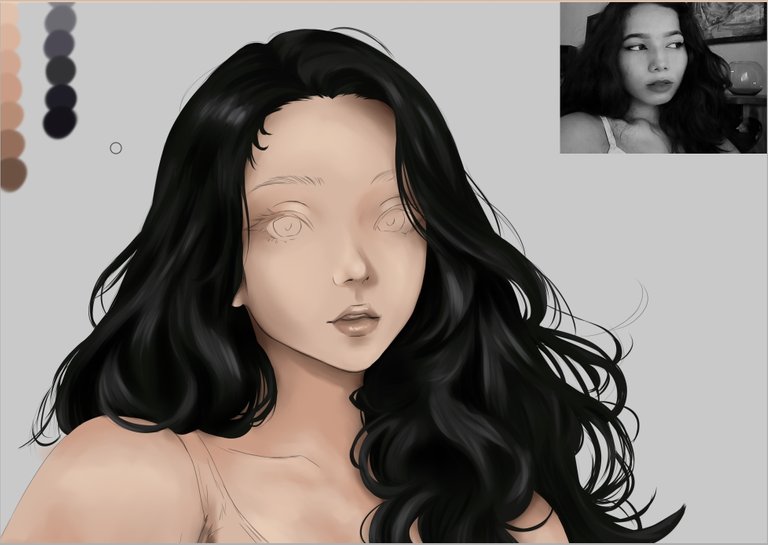
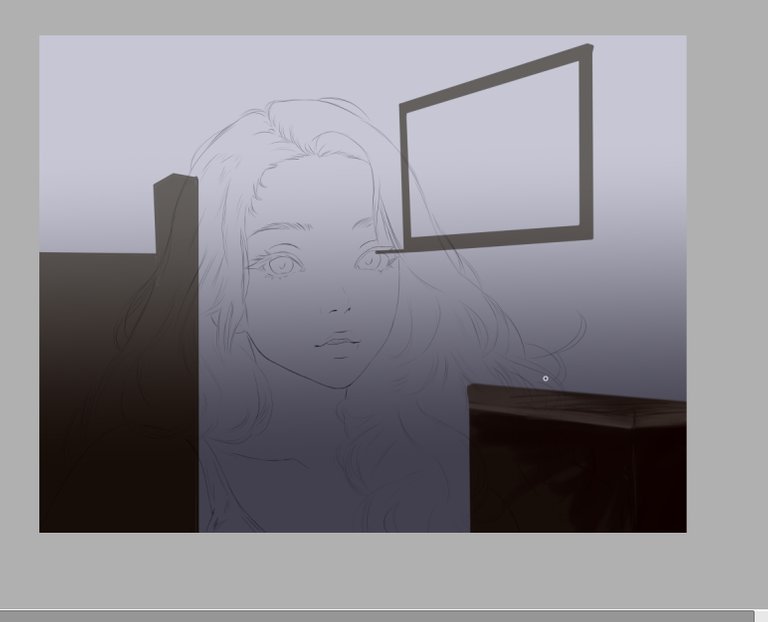
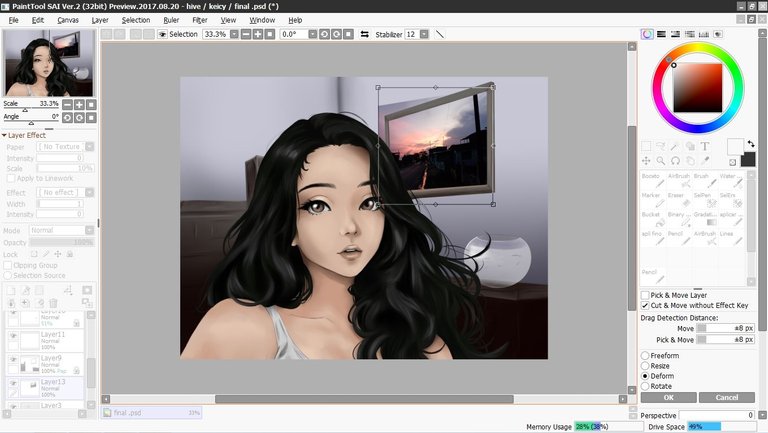
It is time to draw the background, here there are several details I want to mention, the objects in the background are not 100% accurate as in the reference photo.
Es momento de dibujar el fondo, aqui hay varios detalles que quiero mencionar, los objetos del fondo no son 100% exactos como en la foto de referencia.
With different shades of brown we make the wood effect.
Con diferentes tonos de marron hacemos el efecto de madera.
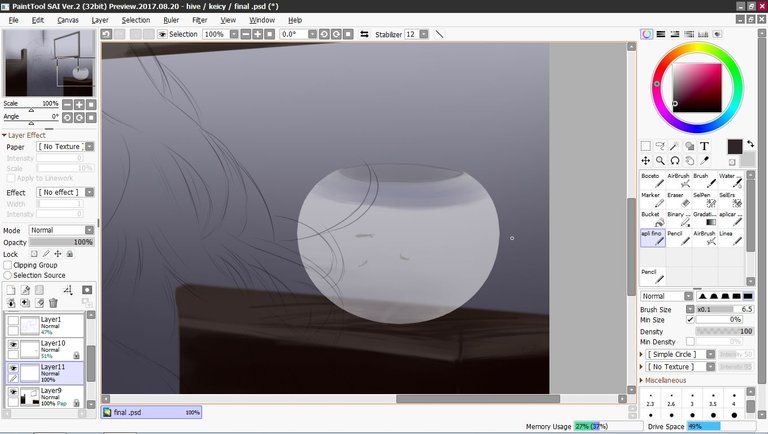
The detail of the fish tank was made using the circles tool for the base and then I drew it in a normal way. With several layers and transparency the glass effect is achieved.
El detalle de la pecera lo hice usando la herramienta de círculos para la base y luego lo dibuje de forma normal. con varias capas y transparencia se consigue el efecto de vidrio.
For the picture I used a photo I took a few days ago, it is a view from my house, later I will show you the complete photo, I feel it looks very nice to integrate it here.
Para el cuadro use una foto que tome hace dias, es una vista desde mi casa mas adelante les mostraré la foto completa, siento que queda muy bonita integrarla aquí.
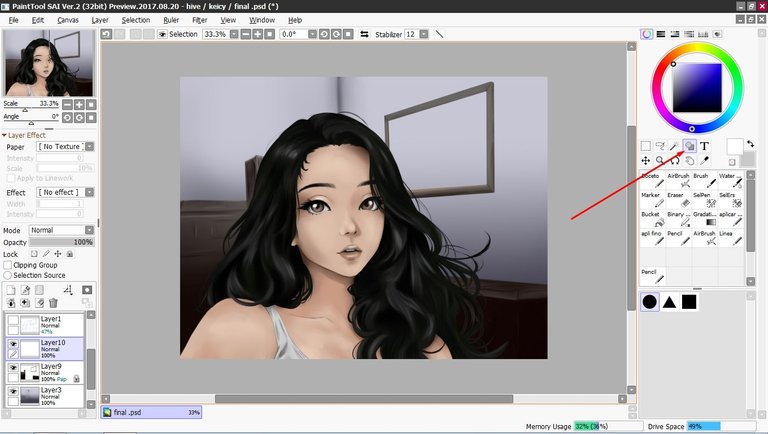
We're finally done!
¡Finalmente terminamos!
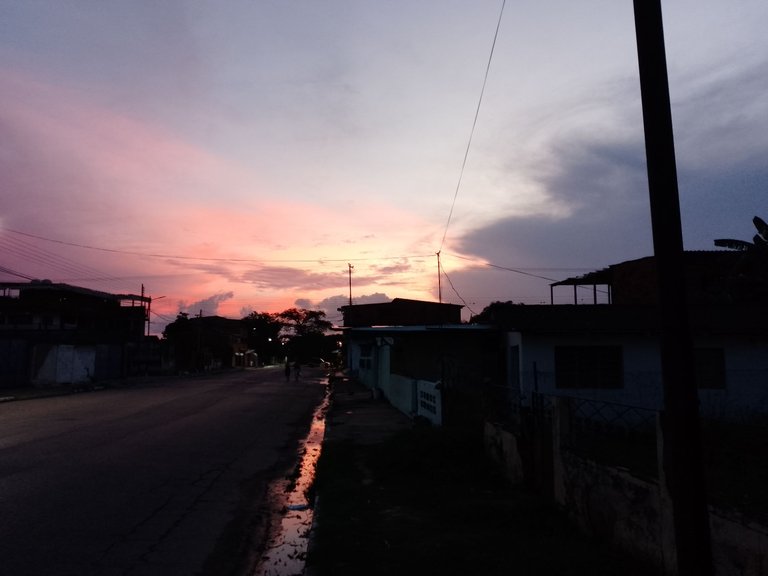
This was the photo I used for the painting, I took it from the street in front of my house, it was a beautiful sunset.
Esta fue la foto que use para el cuadro, la tome desde la calle frente de mi casa, fue un hermoso atardecer.
Tools:
- PaintTool SAI 2
- Inspiroy H640 Pen Tablets

Ame el proceso, cómo has mejorado de verdad ella debe estar muy contenta con el resultado!
Te quedó genial. Te felicito!! ✨👏
Me encanto este retrato y los colores que usaste
Un excelente trabajo de mucha dedicación.
Saludos
OMG @sephiwolf de verdad me sorprendiste. Claro que Me encantó mucho el resultado, es el primer dibujo que alguien mas hace de mi y lo poco que he visto de tu trabajo si he observado mejoría. Sin duda Hive me ha dado bonitos amigos. Sigamos creciendo 🙌
-..-
OMG @sephiwolf you really surprised me. Of course I loved the result, it's the first drawing that someone else has done of me and the little I have seen of your work I have noticed improvement. No doubt Hive has given me nice friends. Let's keep growing 🙌
Wow que hermoso te quedo, tienes muchísimo talento sin duda alguna ✨
Excelente trabajo sephiwowwowowow