Hello everyone... ✨
Hello to my dear Hivers and the dear community of artists Jewelry, as always very pleased and excited to be here again, showing you my work made with love and especially for you...
In a publication of some months ago I made a couple of fixed tendrils alluding to the animated series Ladybugs, recreating in them the oracle that carries the main character, if you want to see this work here I leave the link so you can appreciate it.
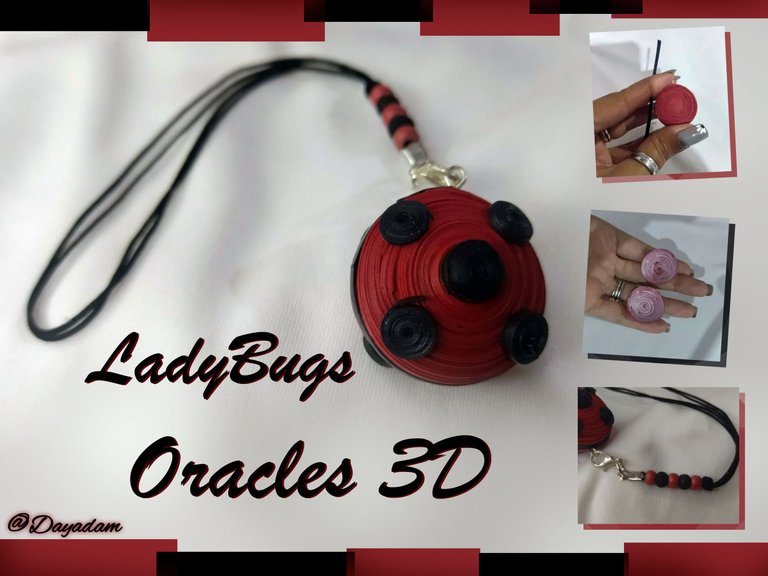
This time I wanted to give a gift for a friend who just had a birthday, and for her I materialized the oracle in the form of a 3D pendant, in the quilling technique.
Hoping that you like this little present, without further ado I leave here my creative process....
Let's get started:😃

Hola a Todos... ✨
Hola a mis queridos Hivers y a la querida comunidad de artistas Jewelry, como siempre muy complacida y emocionada de encontrarme por acá nuevamente, mostrándole mi trabajo hecho con mucho amor y especialmente para ustedes.
En una publicación de hace algunos meses lleve a cabo por petición de mi hija, un par de zarcillos fijos alusivos a la serie animada de Ladybugs, recreando en los mismos el oráculo que lleva consigo el personaje principal, si desean ver este trabajo por acá les dejo el link para que lo puedan apreciar.
En esta oportunidad quise dar un obsequio para una amiguita que recién estuvo de cumpleaños, y para ella materialice el oráculo en forma de colgante en 3D, en la técnica de quilling.
Esperando que sea de su agrado este pequeño presente, sin más preámbulos les dejo por acá mi proceso creativo.
Comencemos:😃

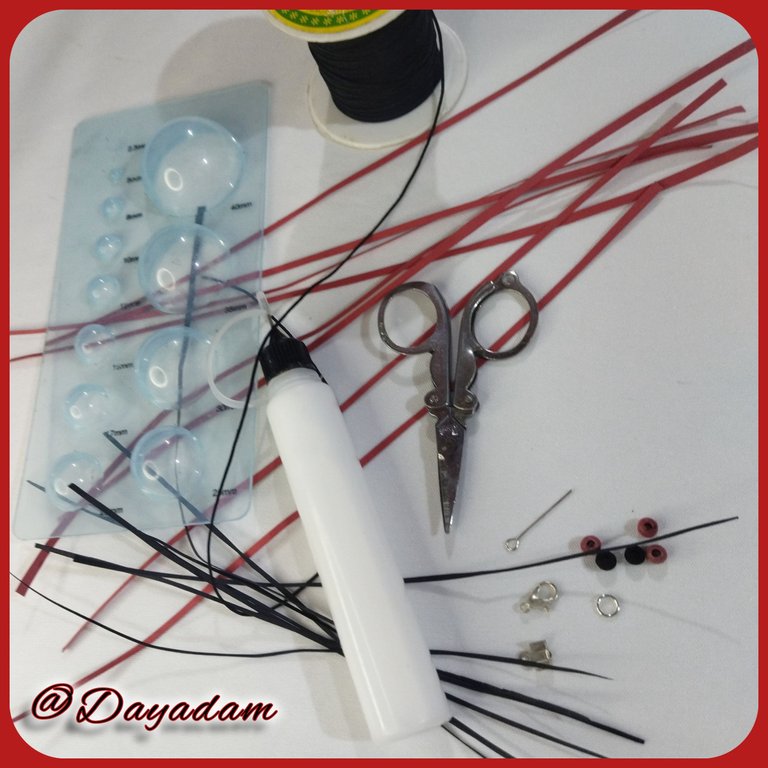
• Cintas de quilling de diversos mm de ancho negras y rojas.
• Aguja para quilling.
• Pega blanca extra fuerte (de carpintería).
• Tijera.
• Alfiler de bisutería.
• Hilo chino negro fino.
• Perlas de madera negras y rojas.
• Tapa nudos.
• Argollas de bisutería.
• Trancadero pico de loro.
• Pincel.
• Alicate punta fina.
- Black and red quilling ribbons of different widths.
- Quilling needle.
- Extra strong white glue (carpentry glue).
- Scissors.
- Jewelry pin.
- Fine black Chinese thread.
- Black and red wooden beads.
- Knot cover.
- Jewelry earrings.
- Parrot's beak whip.
- Paintbrush.
- Fine point pliers.

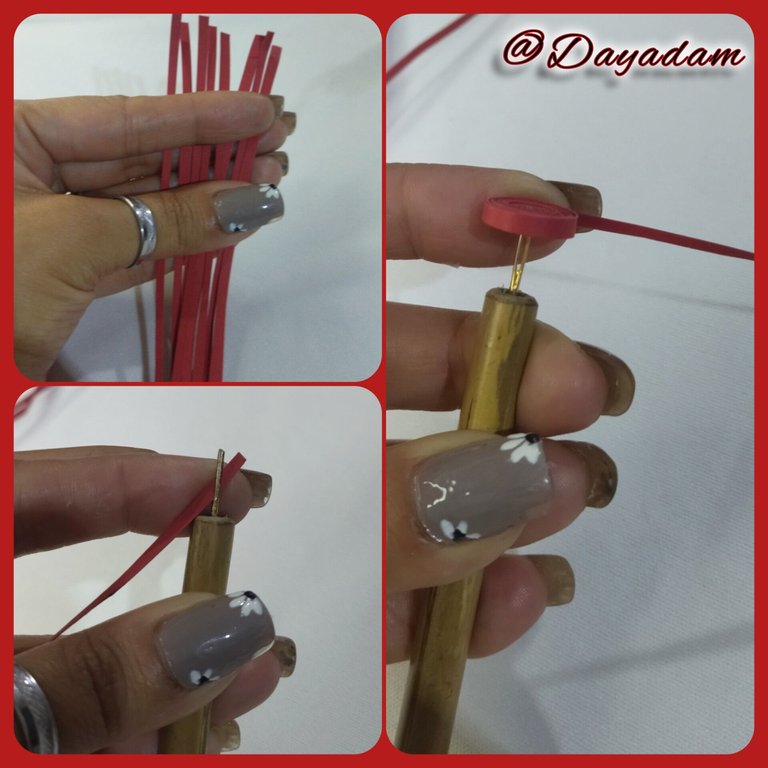
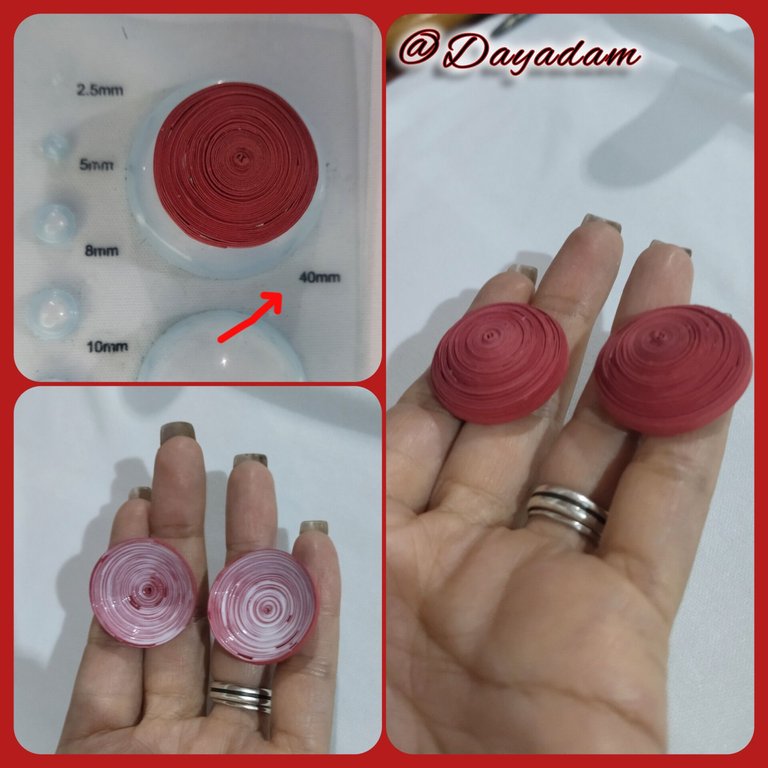
- We take 3mm wide red quilling tape, we will roll it with the help of the quilling needle until we reach the end of the tape, we seal it with extra strong white glue, we take it out of the needle, we will obtain a closed circle. We will make 2 equal circles.
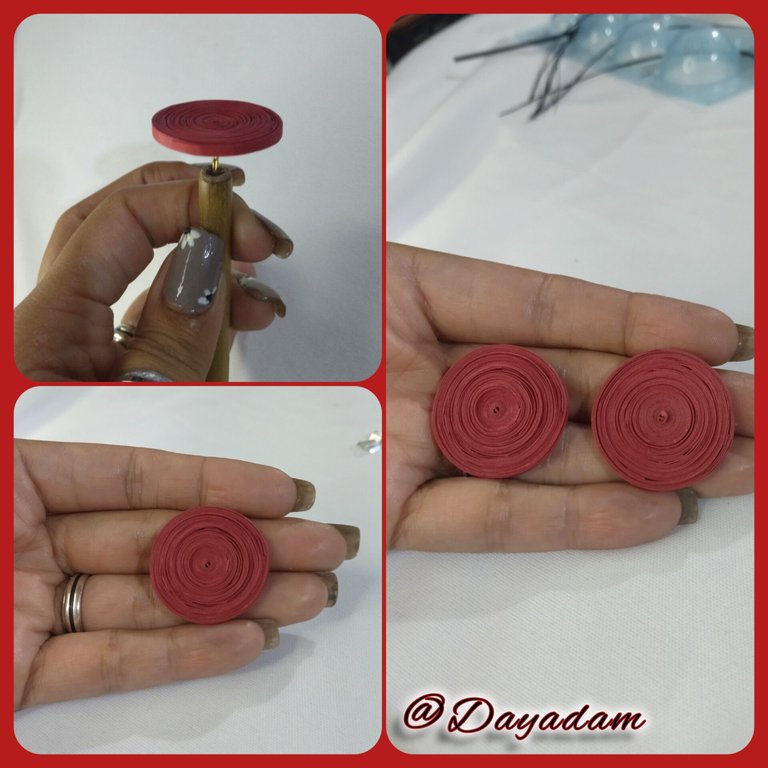
- We are going to mold both circles, we place in the template of circles in the measure 40mm, (take into account that I placed it in a much larger measure than the circle since I only want a light 3D effect), once molded we take out of the template and in the inner part we add a little glue so that the pieces do not move or deform, let dry very well.
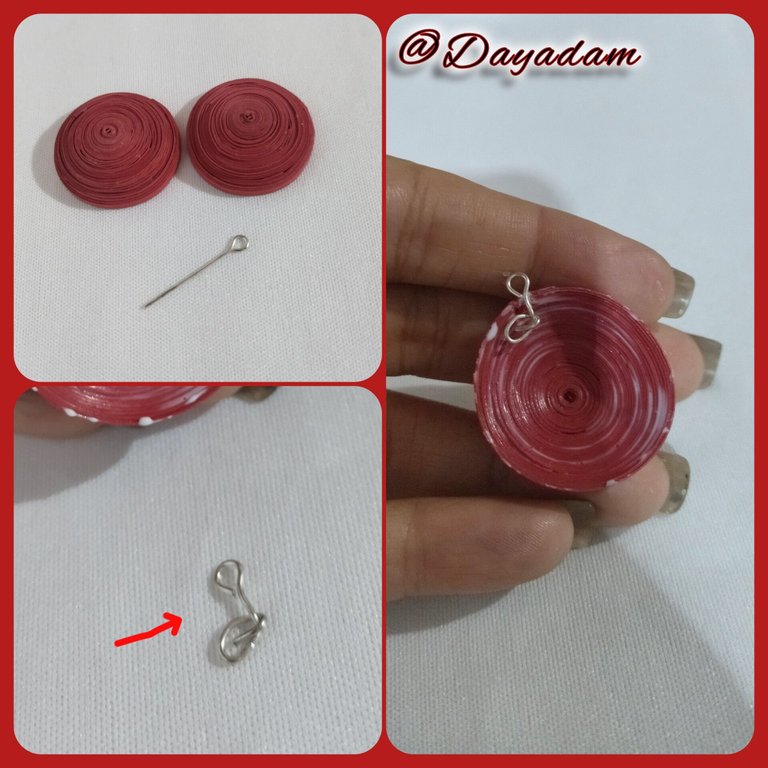
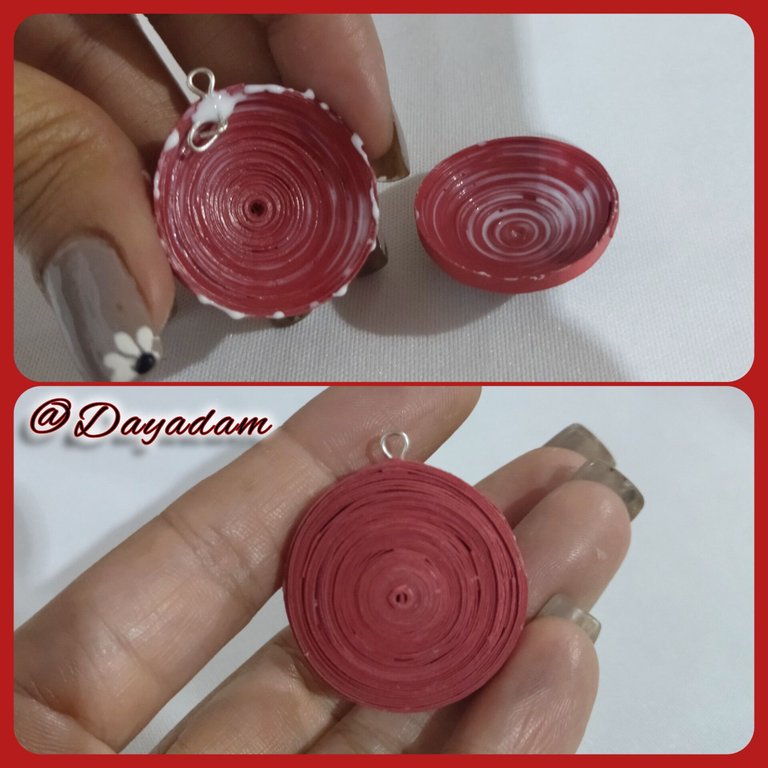
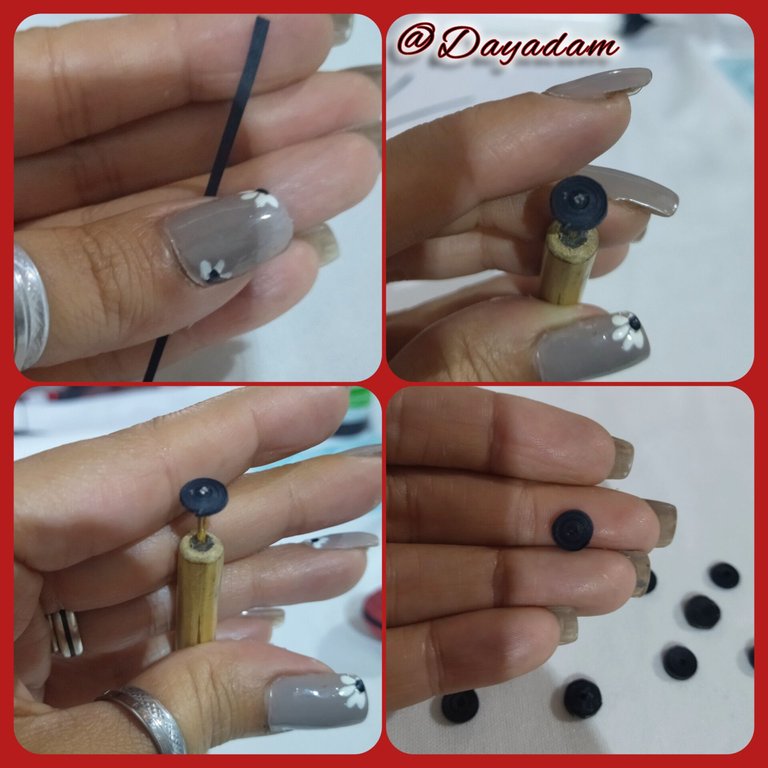
- At this point we have to join the 2 flattened circles, before this, we will take a hollow jewelery pin, with a tweezers we will bend the bottom, the resulting piece we will place it on top of one of the circles applied a generous amount of white glue extra strong, proceed to join both circles.

• Comenzamos tomando cinta para quilling de color rojo de 3mm de ancho, enrollaremos con la ayuda de la aguja para quilling hasta llegar al final de la cinta, sellamos con pega blanca extra fuerte, sacamos de la aguja, obtendremos un círculo cerrado. Realizaremos 2 círculos iguales.
• Vamos a moldear ambos círculos, colocamos en la plantilla de círculos en la medida 40mm, (tomemos en cuenta que lo coloque en una medida mucho mas grande que el circulo ya que solo deseo un efecto 3D ligero), una vez moldeados sacamos de la plantilla y en la parte interna agregamos un poco de pega para que las piezas no se muevan o deformen, dejamos secar muy bien.
• En este punto nos toca unir los 2 círculos aplanados, antes de esto, vamos a tomar un alfiler hueco de bisutería, con una pinza vamos a doblar en la parte de abajo, la pieza resultante la vamos a colocar en la parte de arriba de uno de los círculos aplicado una cantidad generosa de pega blanca extra fuerte, procederemos a unir ambos círculos.
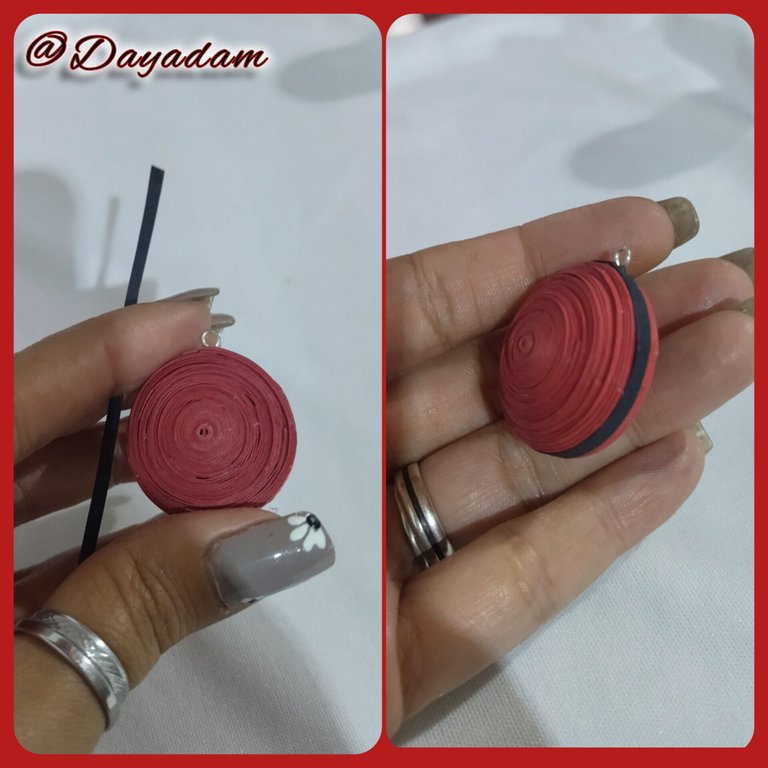
- When we have the base of the pendant together, which in this case are the 2 flattened circles next to the costume jewelry pin, we will take a 3mm wide black ribbon and we will pass around it with white glue.
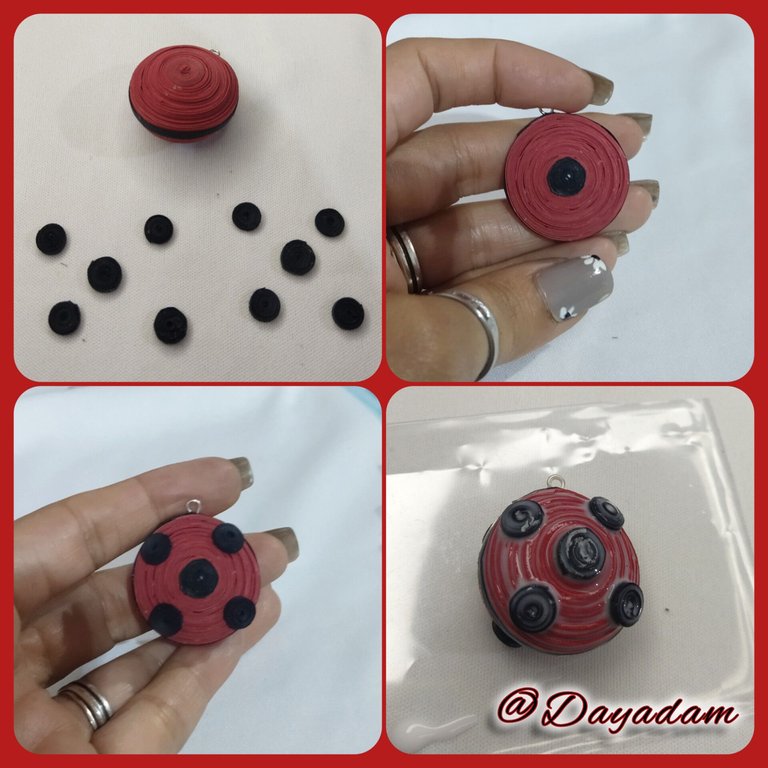
- At this point we will make the pendant decoration, we will take a 1mm wide black quilling ribbon and we will make with the help of the quilling needle 10 small closed circles, 2 of which will be a little bigger than the rest.
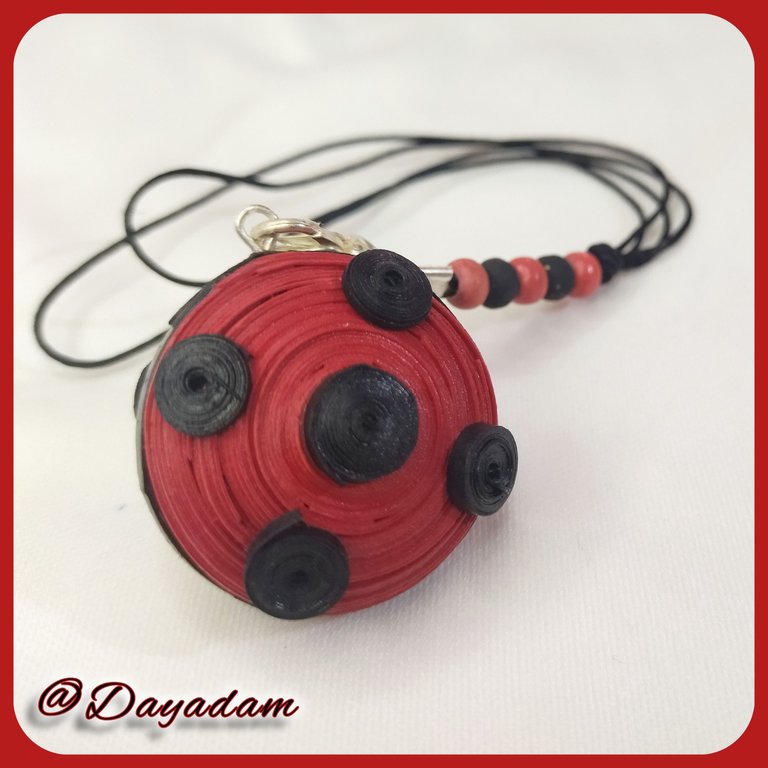
- We proceed to glue the circles on the pendant, the 2 larger ones will go in the center of the circle, one on each side, and the smaller ones will be placed as shown in the image, 2 on the top and 2 on the bottom, on each side of the pendant.
- When I finished assembling all the pieces of the pendant, I decided to give it its liquid protection to plasticize and give it shine.
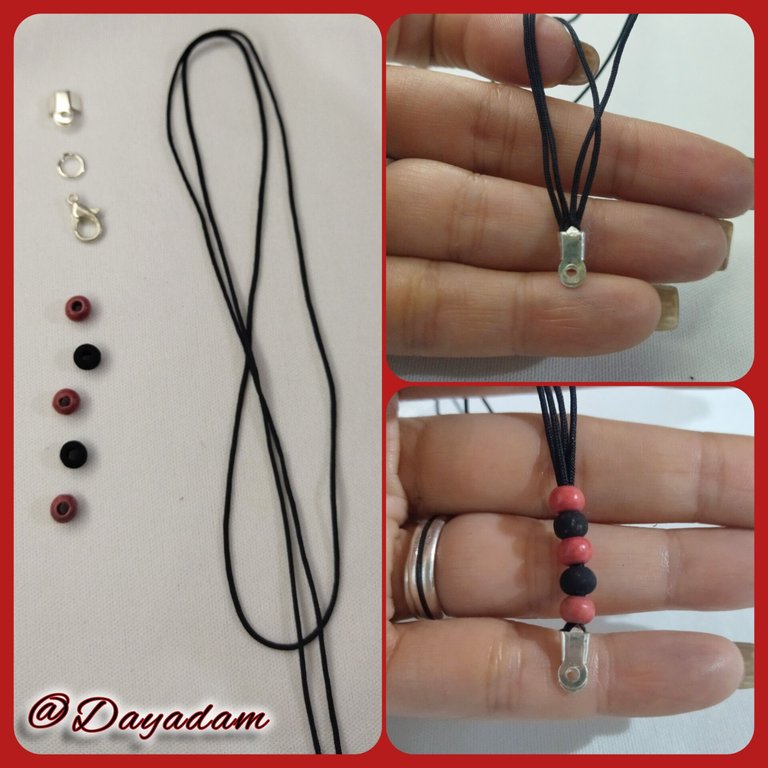
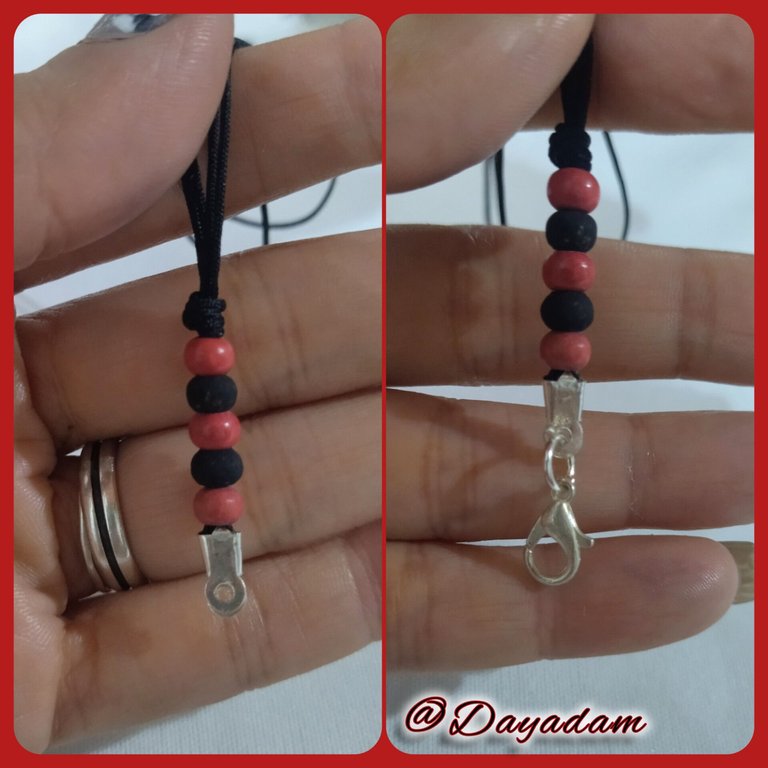
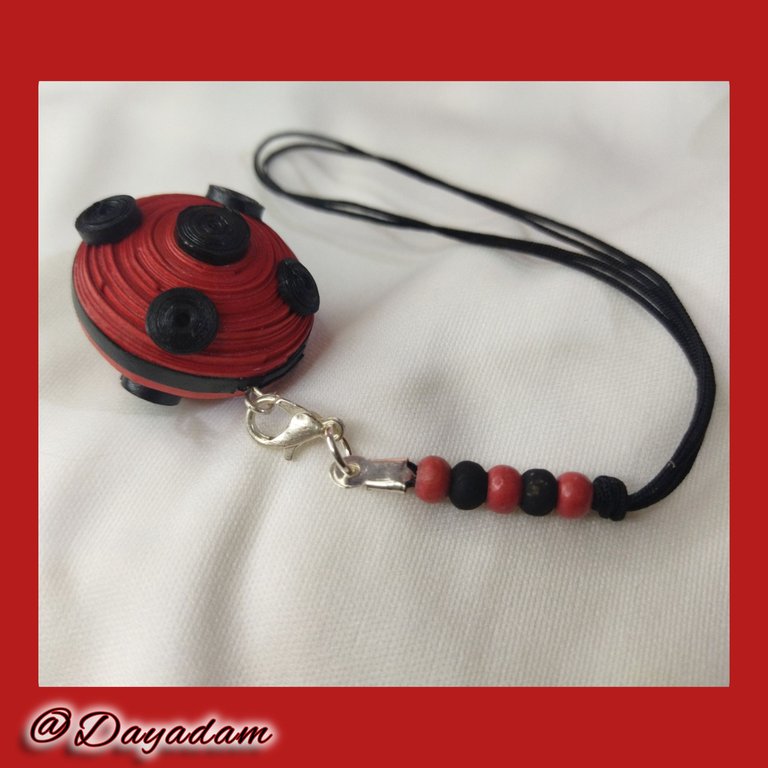
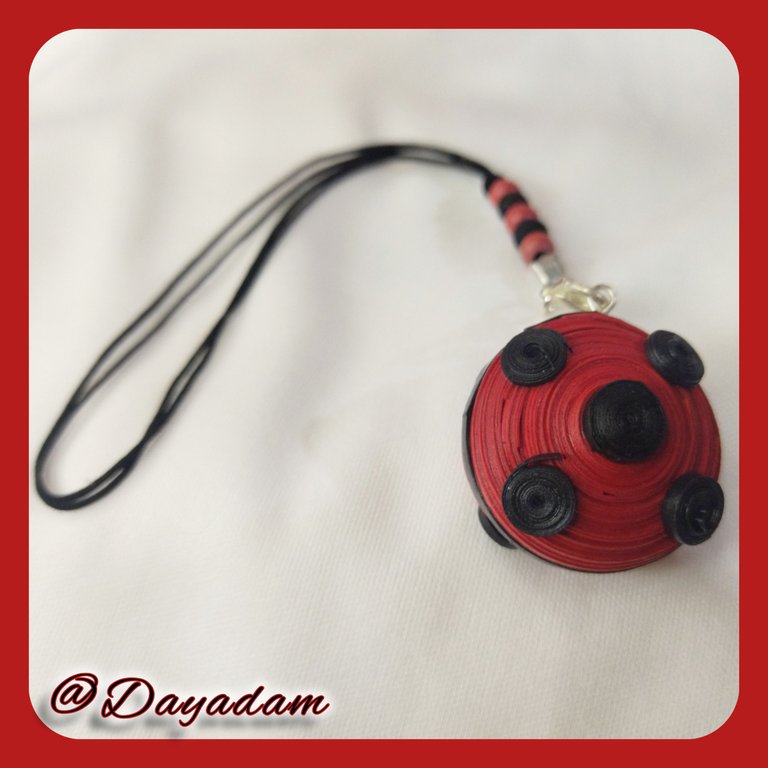
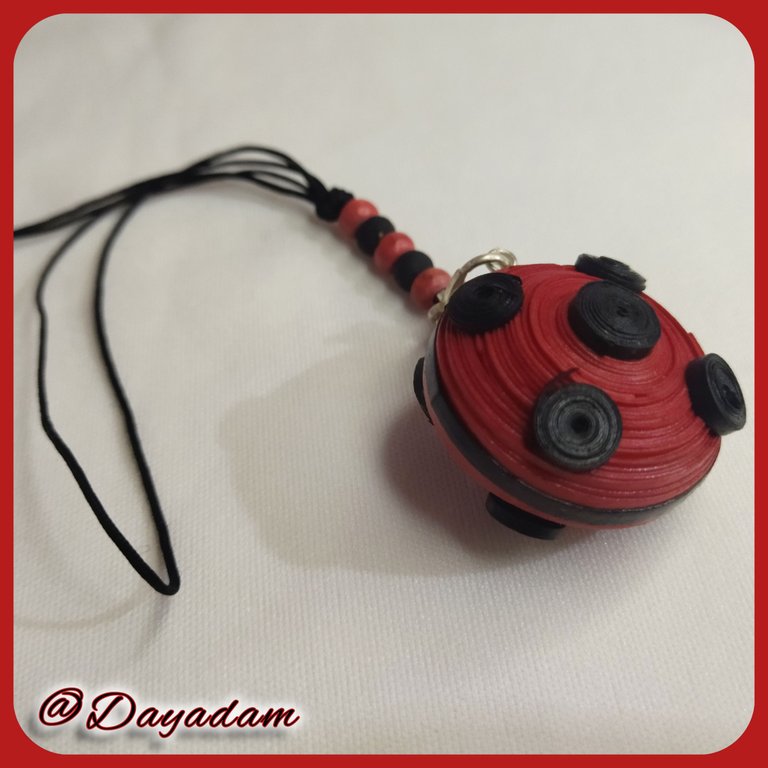
- To finish, I made a strip decorated with black Chinese thread, some red and black wooden beads, its respective costume jewelry ring and a parrot's beak to place the pendant and make it pendant.
This way we have ready this Ladybugs oracle pendant.
• Al tener la base del colgante unida que en este caso son los 2 círculos aplanados junto al alfiler de bisutería, tomaremos una cinta de color negro de 3mm de ancho y pasaremos alrededor del mismo con pega blanca.
• En este punto realizaremos la decoración de colgante, tomaremos cinta para quilling de color negro de 1mm de ancho realizaremos con ayuda d la aguja para quilling 10 pequeños círculos cerrados, de los cuales 2 de ellos serán un poco mas grande que el resto.
• Procedemos a pegar los círculos en el colgante, los 2 mas grandes irán en el centro del circulo uno en cada lado, y los mas pequeños los colocaremos tal como lo muestra la imagen 2 en la parte de arriba y 2 en la parte de abajo, en cada lado del colgante.
• Al terminar de ensamblar todas las piezas del colgante, decidí darle su protección liquida para plastificar y darle brillo.
• Para finalizar realice una tira decorada con hilo chino negro, algunas perlas de madera rojas y negras, su respectiva argolla de bisutería y un trancadero pico de loro,para colocar el dije y hacerlo colgante.
De esta manera tenemos listo este colgante del oráculo de Ladybugs.


What did you think, did you like it?
I hope you did, I hope you liked my explanation, procedure and photos, I made them with love for you.
"Let out that muse that inspires you, and let your imagination fly".
Thank you all, see you next time.
¿Que les pareció, les gustó?
Espero que sí, que les haya gustado mi explicación, procedimiento y fotos, los hice con mucho cariño por y para ustedes.
"Deja salir esa musa que te inspira, y deja volar tu imaginación".
Gracias a todos, nos vemos en la próxima.
Todas las fotos usadas en este post son de mi autoría y han sido sacadas en mi celular personal un Redmi 9T y editadas en Canva y en Inshot Banner y separador hecho por mí en Canva Traducido con la ayuda de DeepL

This post was shared and voted inside the discord by the curators team of discovery-it
Join our Community and follow our Curation Trail
Discovery-it is also a Witness, vote for us here
Delegate to us for passive income. Check our 80% fee-back Program
Thanks for the support @discovery-it ✨
A beautiful pendant, no doubt the girl you gave it to must have loved it, a very nice piece of work, thank you for bringing it to the community
Thank you for your words, I am very happy that you liked it, it is a pleasure for me to present it to this community ✨
Veo este trabajo y no puedo evitar cantar la canción 🤭..que hermoso te quedó. Muy original y creativo 😊👍🏽...un abrazo infinito 😘💜
!discovery 45
!VSC
@chacald.dcymt has sent VSC to @dayadam
This post was rewarded with 0.1 VSC to support your work.
Join our photography communityVisual Shots
Check here to view or trade VSC Tokens
Be part of our Curation Trail
@chacald.dcymt ha enviado VSC a @dayadam
Éste post fue recompensado con 0.1 VSC para apoyar tu trabajo.
Únete a nuestra comunidad de fotografía Visual Shots
Consulte aquí para ver o intercambiar VSC Tokens
Se parte de nuestro Trail de Curación
Veo que conoces el personaje y sus temas, me alegra mucho y más aún que te haya gustado el trabajo que materialice mi bella.
Un abrazo y bendiciones @chacald.dcymt 💗
Gracias por el apoyo ✨
Feliz noche 🤗
Los accesorios con este material quedan muy bonitos, me gusta ver cómo elaboras estos accesorios ya que haces un trabajo impecable y siempre el resultado es encantador, saludos 😉💜
Te agradezco mucho tus calidas palabras hacia mi trabajo, un placer que te agrade lo que hago. Saludos y bendiciones...
👏 Keep Up the good work on Hive ♦️ 👏
❤️ @bhattg suggested sagarkothari88 to upvote your post ❤️
Gracias por el apoyo ✨
@dayadam, you are most welcome!
Congratulations @dayadam! You have completed the following achievement on the Hive blockchain And have been rewarded with New badge(s)
Your next target is to reach 13000 replies.
You can view your badges on your board and compare yourself to others in the Ranking
If you no longer want to receive notifications, reply to this comment with the word
STOPGracias @hivebuzz ✨
¡Eso es genial @dayadam! ¡Estamos emocionados de ver tus logros en Hive! ¡Sigue adelante y logra este nuevo objetivo!
Me encantó el resultado, saludos @dayadam.
Muchísimas gracias cariño. Saludos @blanca56 ✨
Awww...Nice work, and also a very well explained step by step post with good shots... 💯🤗🔝
!discovery 30
!VSC
!PIZZA
Thank you friend, I am very happy to read your words about my work. Greetings ✨
!PIZZA
Another quiling perfection. A true virtuoso you are.
Thank you very much for your words and for your support @diyhub ✨
Que bonito resultado. A mi nieta le encanta este personaje.
Me alegra que te haya gustado. Espero que puedas hacerle algo así a tu nieta. Saludos ✨
Hermosa creación😃
Muchas gracias ✨
$PIZZA slices delivered:
@dayadam(1/5) tipped @jlinaresp