WELCOME TO MY BLOG
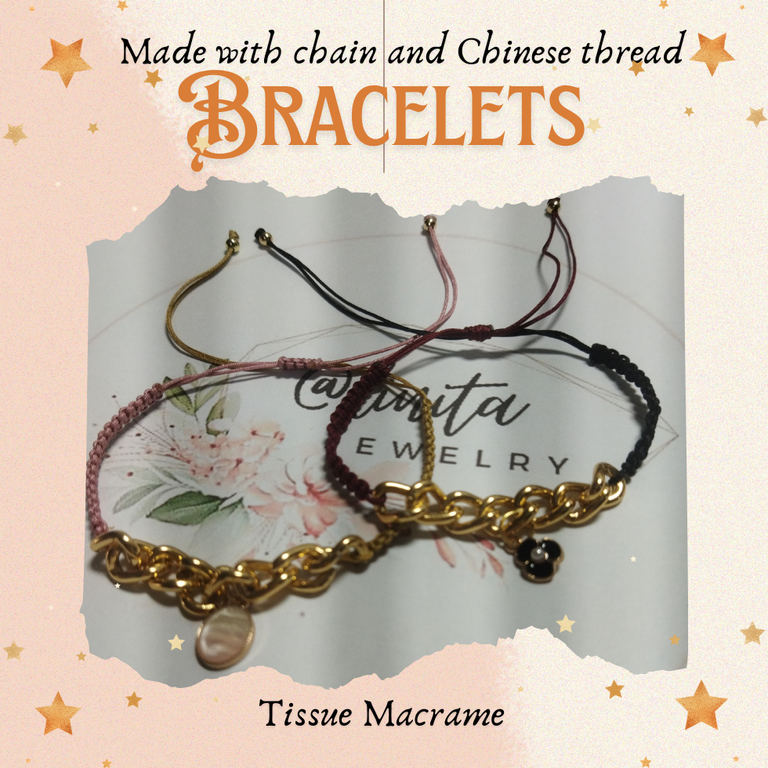
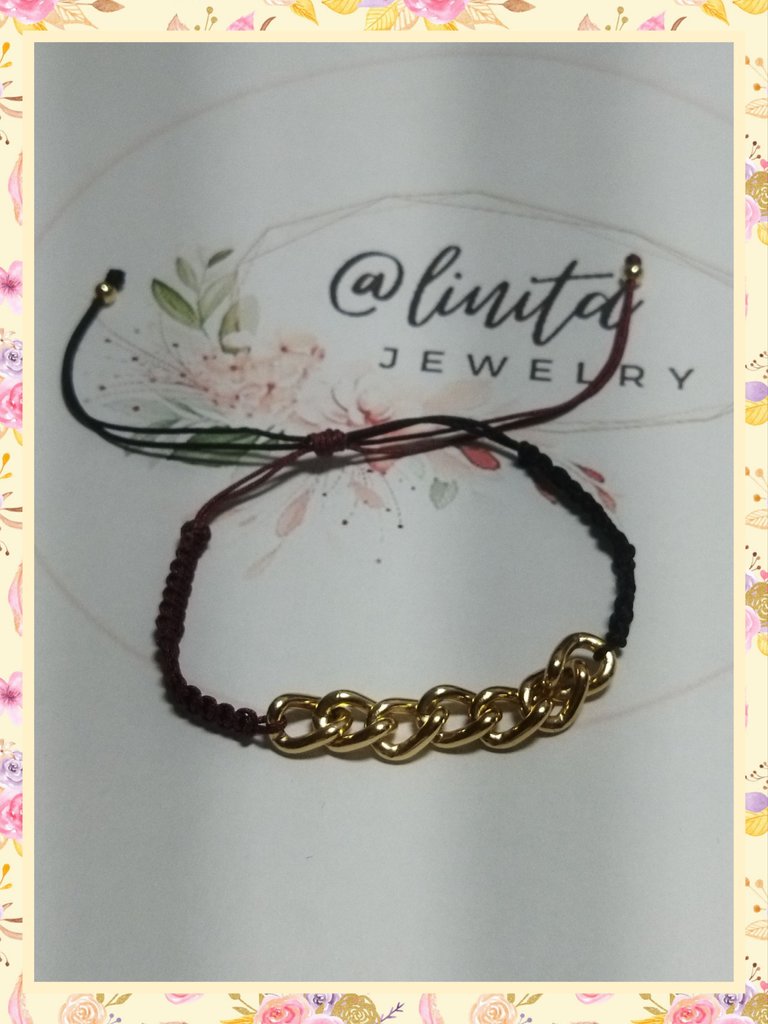
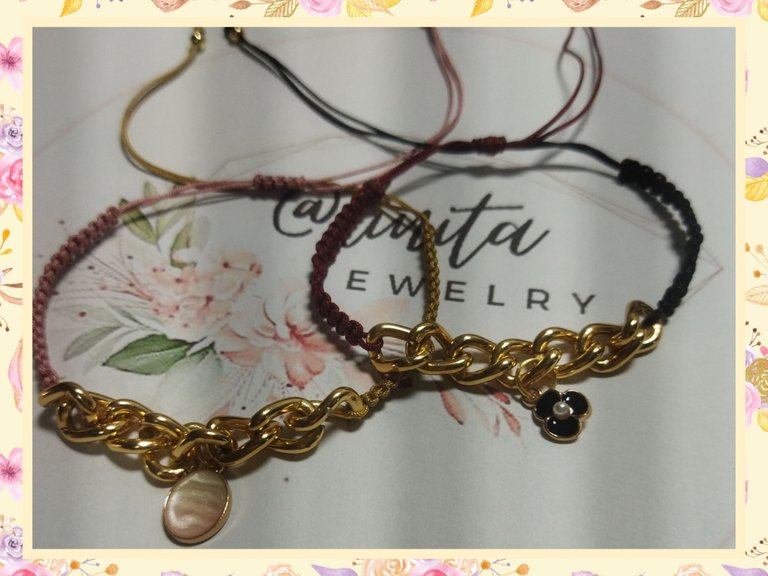
Hellooooo, hellooooooo! Greetings my appreciated jewelry creators. Combining macramé fabric with any object or material has become one of the most sought-after crafts in the jewelry industry. A few days ago, looking through my materials that I save to reuse, I found a chain that I removed from a handbag that my older sister gave me many years ago and over time the bag deteriorated but the chain remained in good condition. I used this as a belt on many occasions and this time I will give it another use, making some simple but very elegant and striking bracelets made with macramé fabric. I hope you like it. Let's get started.
BIENVENIDOS A MI BLOG
¡Holaaaa, holaaaaa! Saludos mis apreciados creadores de bisutería. Combinar tejido macramé con cualquier objeto o material se ha convertido en una de las artesanía más buscadas en el ramo de la bisutería. Hace unos días revisando entre mis materiales que guardo para reutilizar, conseguí una cadena que quité de un bolso de mano que me regaló mi hermana mayor hace muchos años y que con el tiempo se deterioró el bolso pero la cadena permaneció en buen estado. Ésta la usé de cinturón en muchas ocasiones y en esta oportunidad le daré otro uso, realizando unas pulseras sencillas pero muy elegantes y llamativas elaboradas con el tejido macramé. Espero les guste. Comencemos.
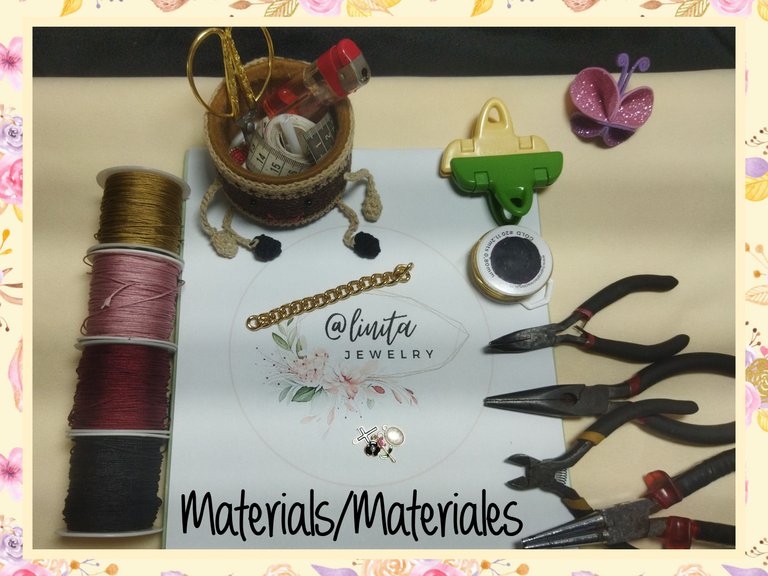
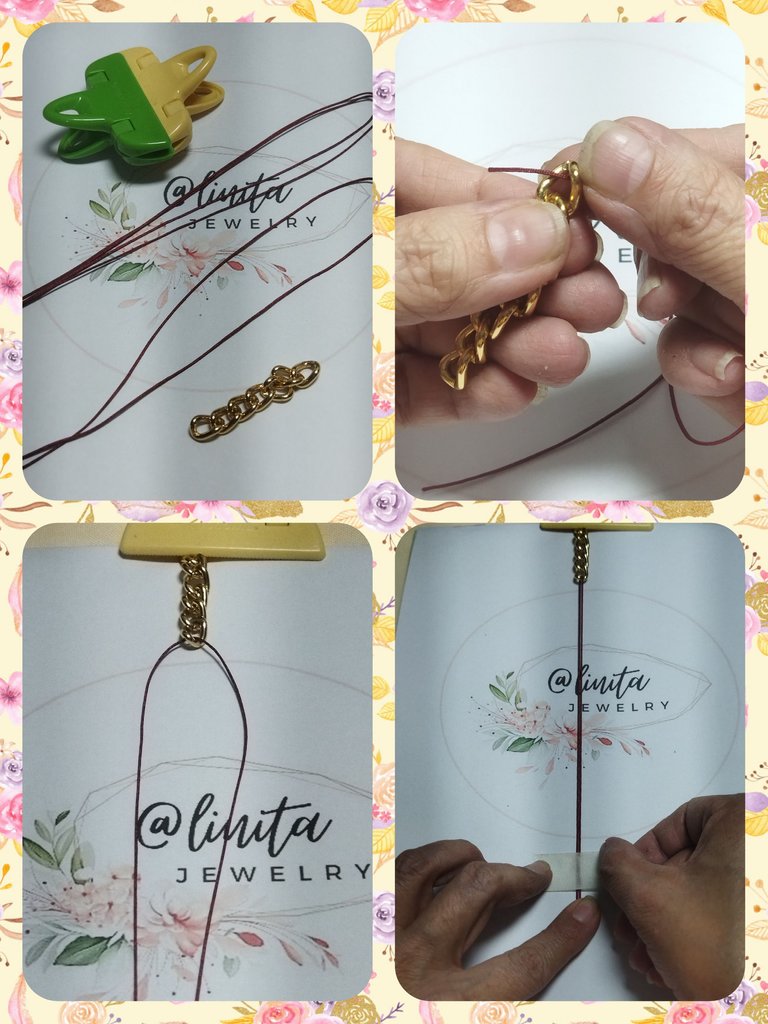
MATERIALS
- Link chain of approximately 1 cm
- Black, red wine, gold and old rose Chinese threads
- Charms
- 4 mm pellets
- Wire #20
- Scissors
- Lighter
- Measuring tape
- Board and hooks
- Jewelry tweezers
MATERIALES
- Cadena de eslabones de 1 cm aproximadamente
- Hilos chinos negro, vino tinto, dorado y rosa vieja
- Dijes
- Balines de 4 mm
- Alambre #20
- Tijera
- Encendedor
- Cinta métrica
- Tabla y ganchos
- Pinzas de bisutería
STEP BY STEP // PASO A PASO
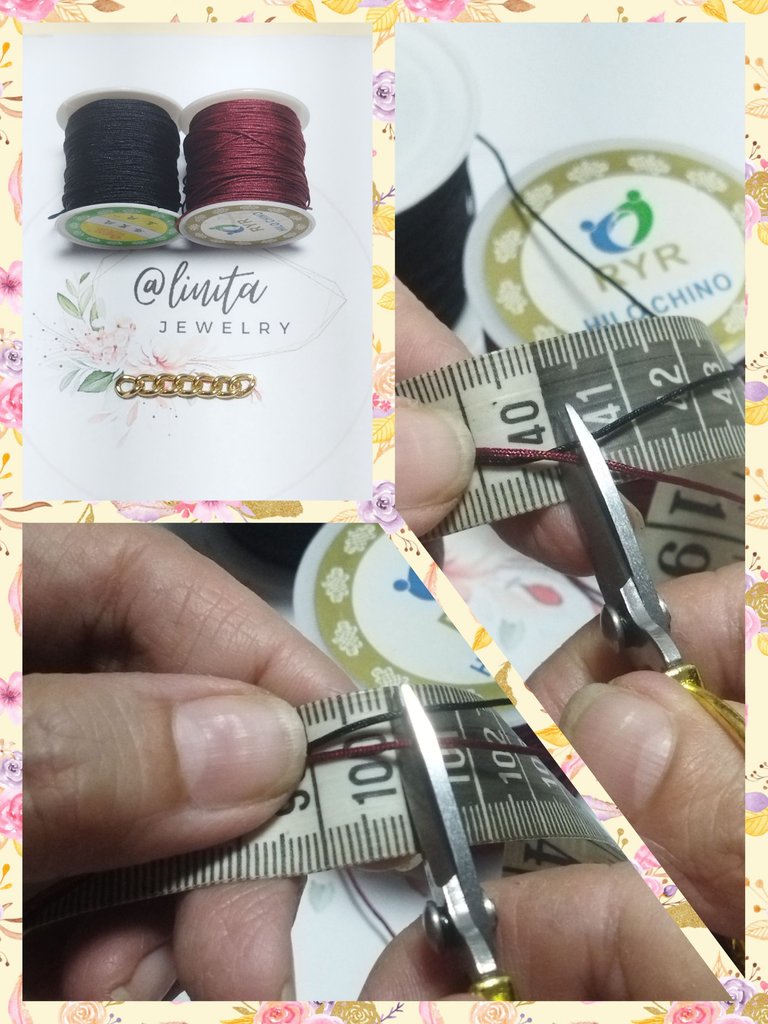
STEP #01
We start by cutting the strands of thread we need. For the base threads we will need two 40 cm strands, one black and one red wine color. And to make the weave, two 100 cm strands, also one black and one red wine.
PASO #01
Comenzamos cortando las hebras de hilo que necesitamos. Para los hilos base vamos a necesitar dos hebras de 40 cm, una de color negro y otra de color vino tinto. Y para realizar el tejido, dos hebras de 100 cm, igualmente una negra y otra vino tinto.
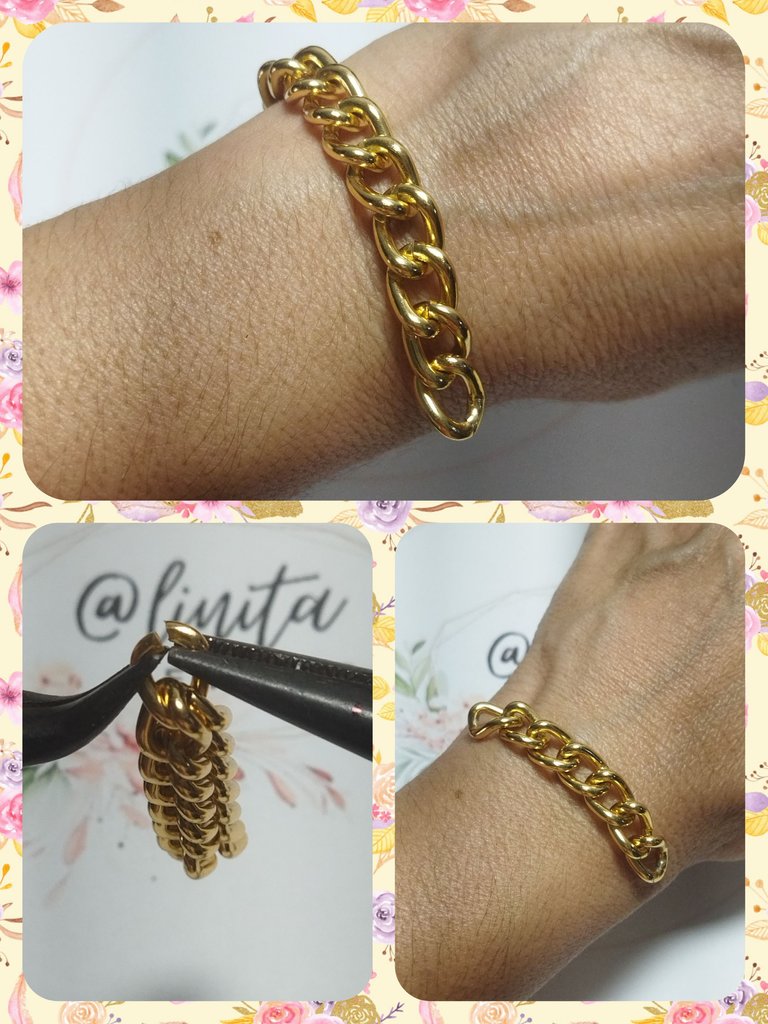
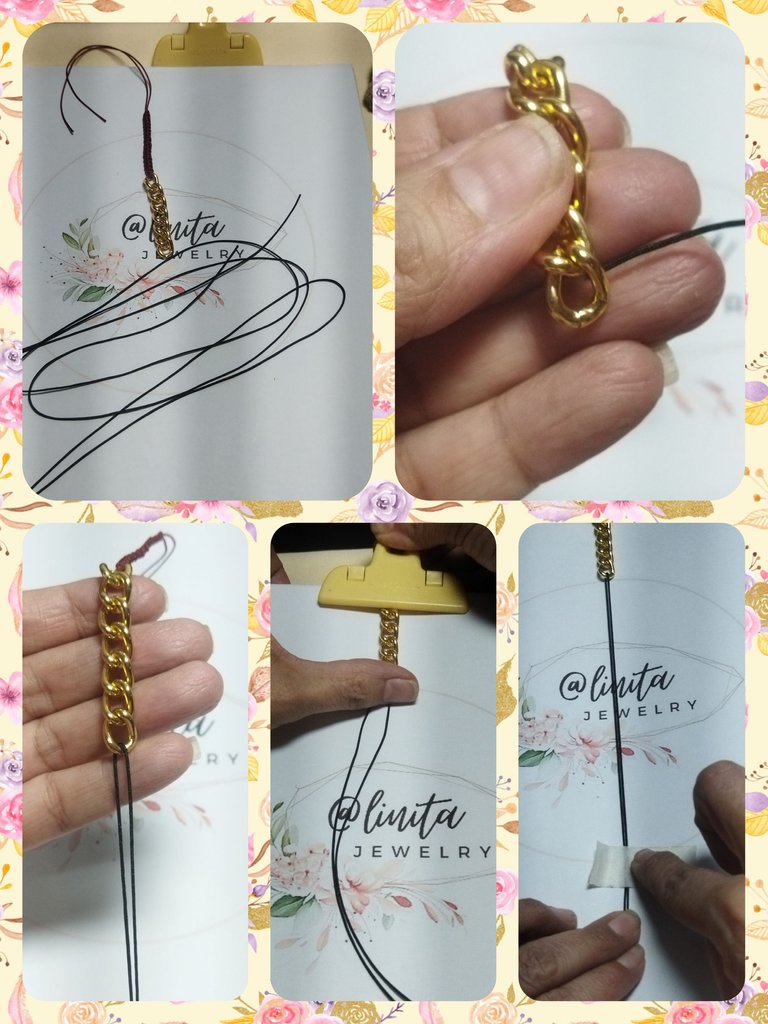
STEP #02
We take the chain and measure the measurement of the back on the wrist, we count the links and with the tweezers we open and remove the links that we will use. This chain has approximately 1cm links and I will use 7 links.
PASO #02
Tomamos la cadena y medimos en la muñeca la medida de la parte posterior, contamos los eslabones y con las pinzas abrimos y retiramos los eslabones que usaremos. Esta cadena tiene eslabones de aproximadamente 1 cm y usaré 7 eslabones.
STEP #03
We begin the macramé weaving with two strands of thread of the same color, one of 40 cm and one of 10 cm. We introduce the 40 cm strand through the first link of the chain and equalize the ends. Then we hold it on the board with the clamps at the top and with a strip of paper at the bottom.
PASO #03
Comenzamos el tejido macramé con dos hebras de hilo del mismo color, una de 40 cm y una de 10 cm. Introducimos la hebra de 40 cm por el primer eslabón de la cadena e igualamos las puntas. Luego la sujetamos en la tabla con las pinzas en la parte superior y con tirro de papel en la parte inferior.
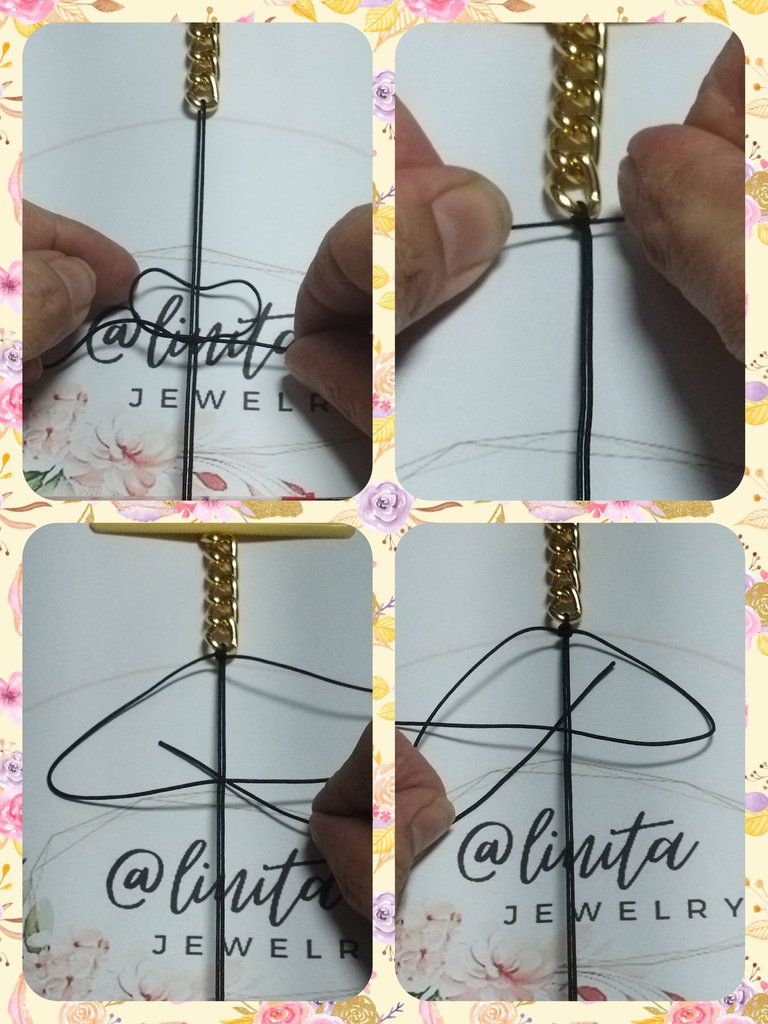
STEP #04
We take the 100 cm strand and pass it under the base thread, which would be the one we attach to the board. We make a normal knot and adjust the tightly glued upper part of the chain.
PASO #04
Tomamos la hebra de 100 cm y pasamos por debajo de hilo base, que sería el que sujetamos a la tabla. Realizamos un nudo normal y ajustamos en la parte superior bien pegado de la cadena.
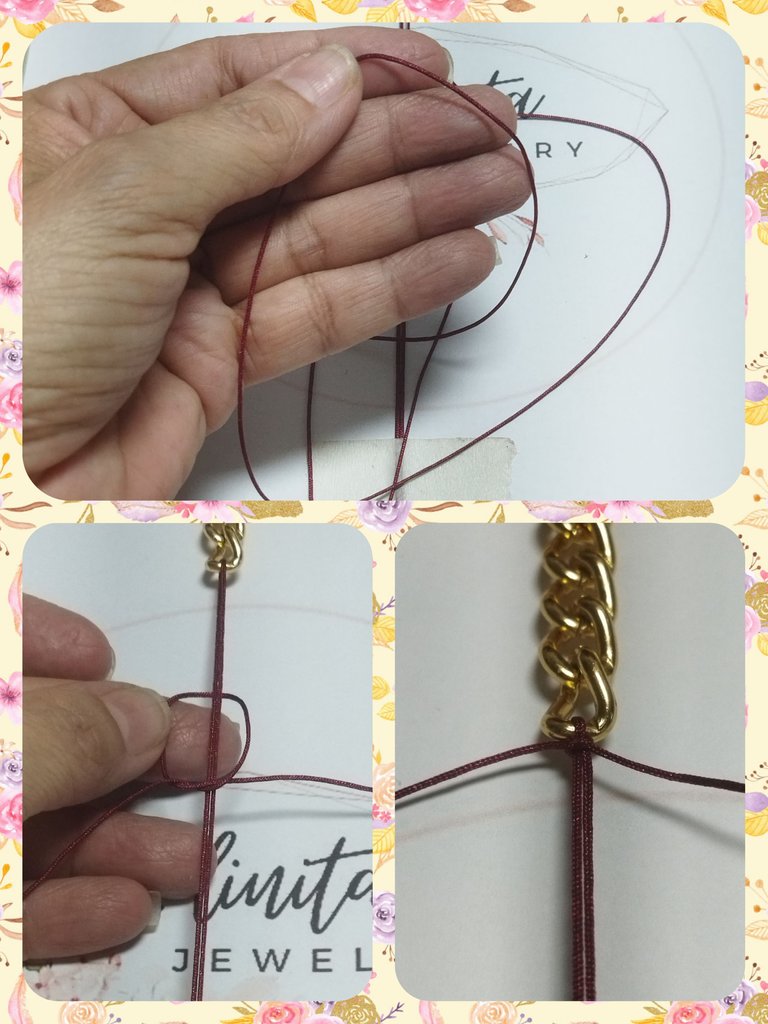
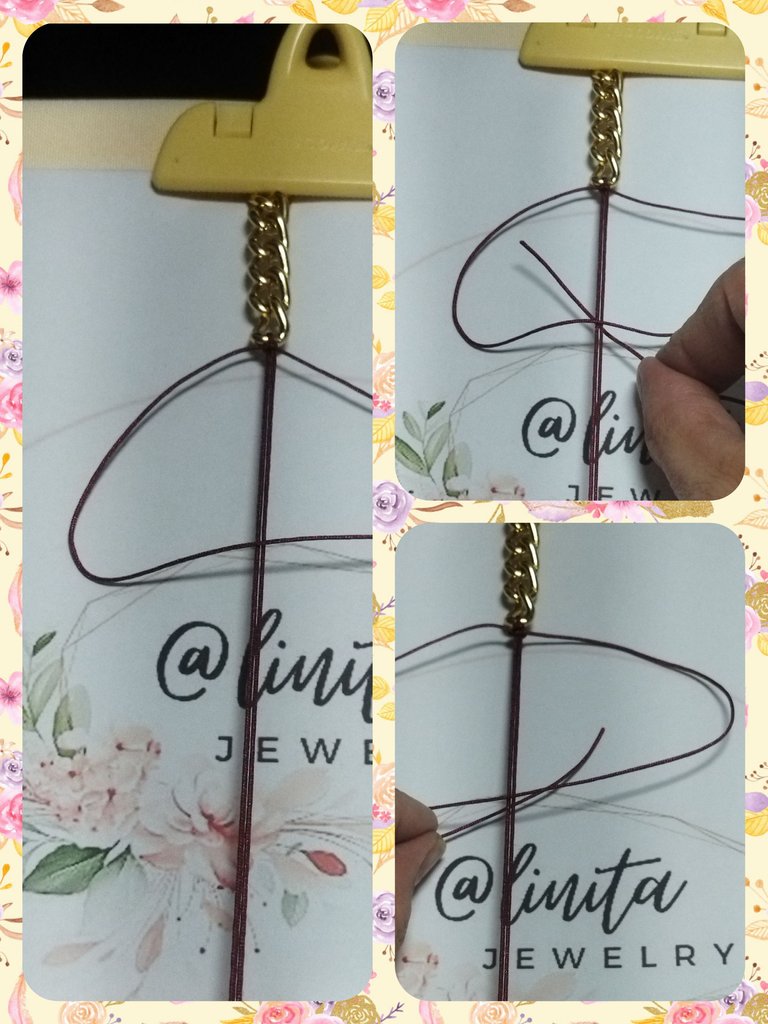
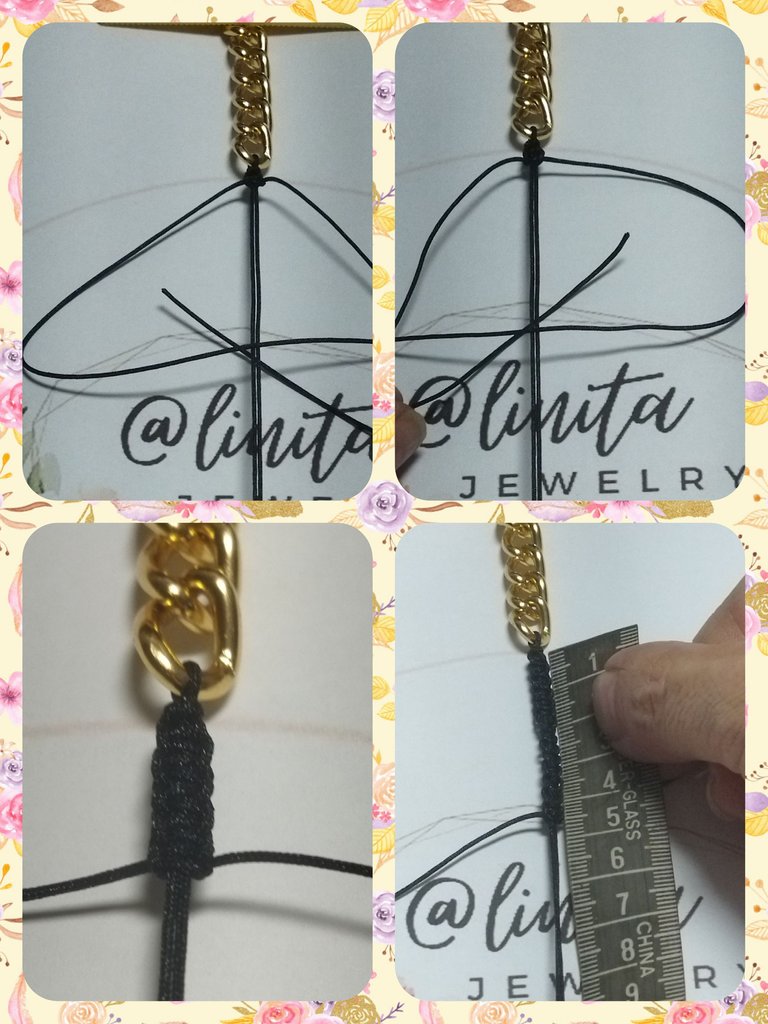
STEP #05
We are going to make complete flat knots. We start by making a 4 with the strand on the left side, then we pass the strand on the right side over all the threads and introduce it below the union and take it out through the middle of the 4, we adjust it tightly against the starting knot.
We repeat the process but now on the right side. We form a D with the strand on the right side, we pass the strand on the left side over the threads and insert through the union and remove through the center of the D, we adjust and we have formed the complete flat knot.
PASO #05
Vamos a realizar nudos planos completo. Empezamos realizando un 4 con la hebra del lado izquierdo, luego pasamos la hebra del lado derecho por encima de todos los hilos e introducimos por debajo de la unión y sacamos por el medio del 4, ajustamos bien pegado del nudo de inicio.
Repetimos el proceso pero ahora del lado derecho. Formamos una D con la hebra del lado derecho, pasamos la hebra del lado izquierdo por encima de los hilos e introducimos por la unión y sacamos por el centro de la D, ajustamos y ya hemos formado el nudo plano completo.
STEP #06
We repeat step #5 as many times as possible until we reach 4.5 cm of fabric.
PASO #06
Repetimos el paso #5 tantas veces hasta alcanzar 4,5 cm de tejido.
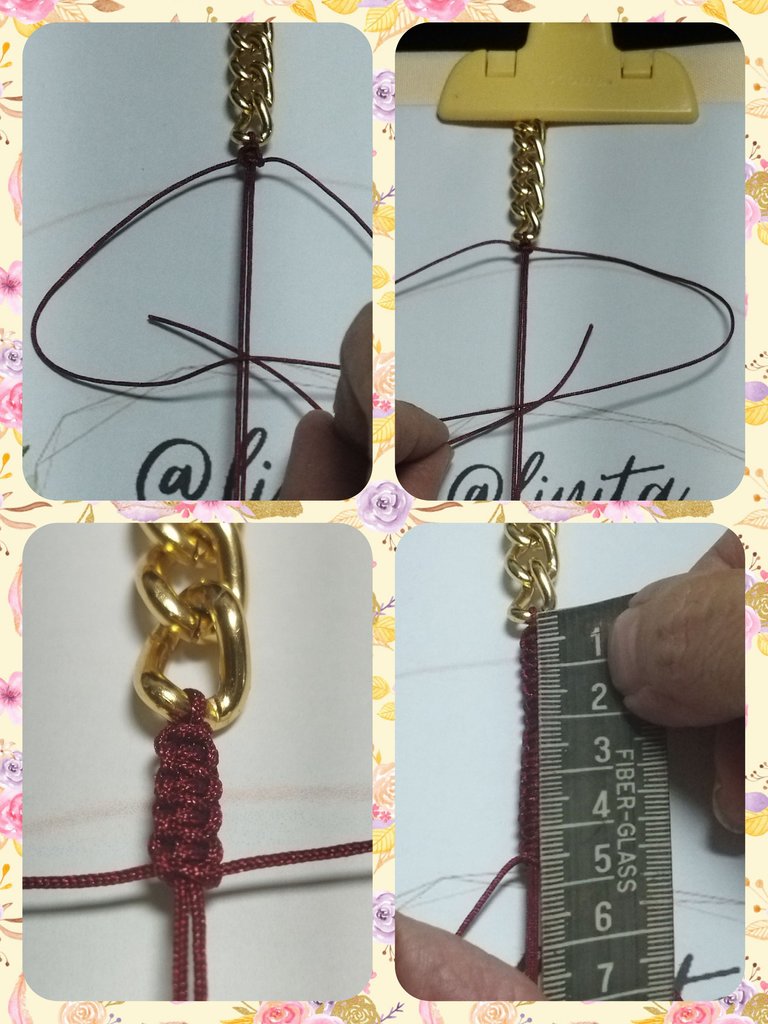
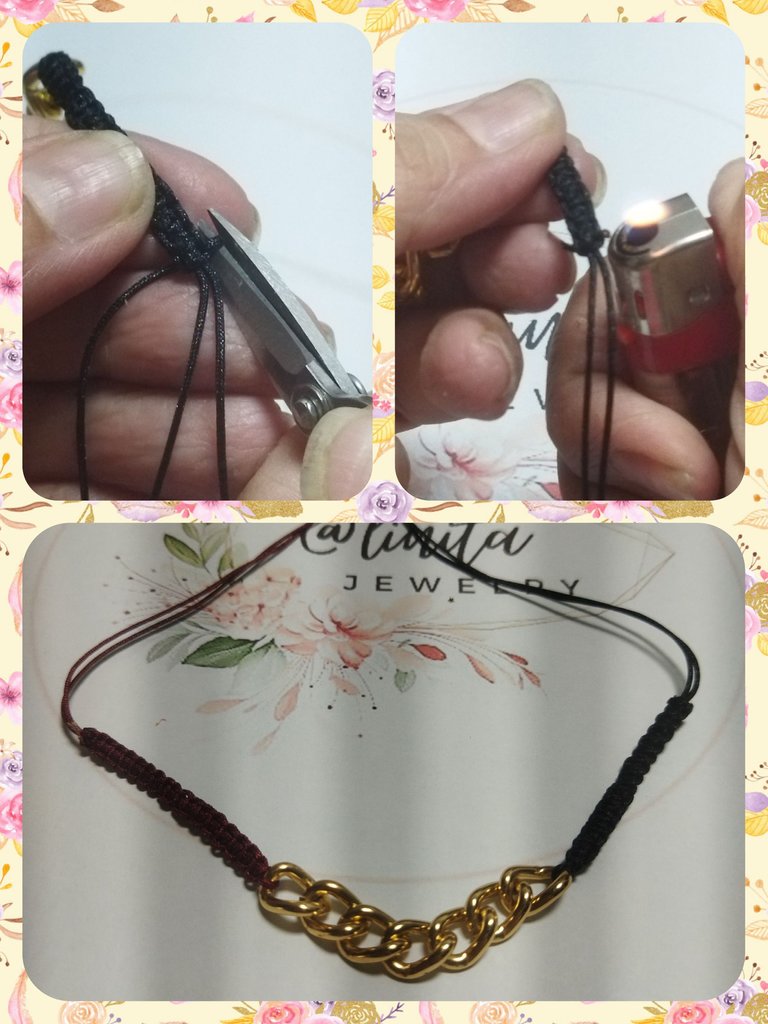
STEP #07
We cut the two strands of remaining thread from the fabric and keep the base threads. We seal with the lighter.
PASO #07
Cortamos las dos hebras de hilo restante del tejido y conservamos los hilos base. Sellamos con el encendedor.
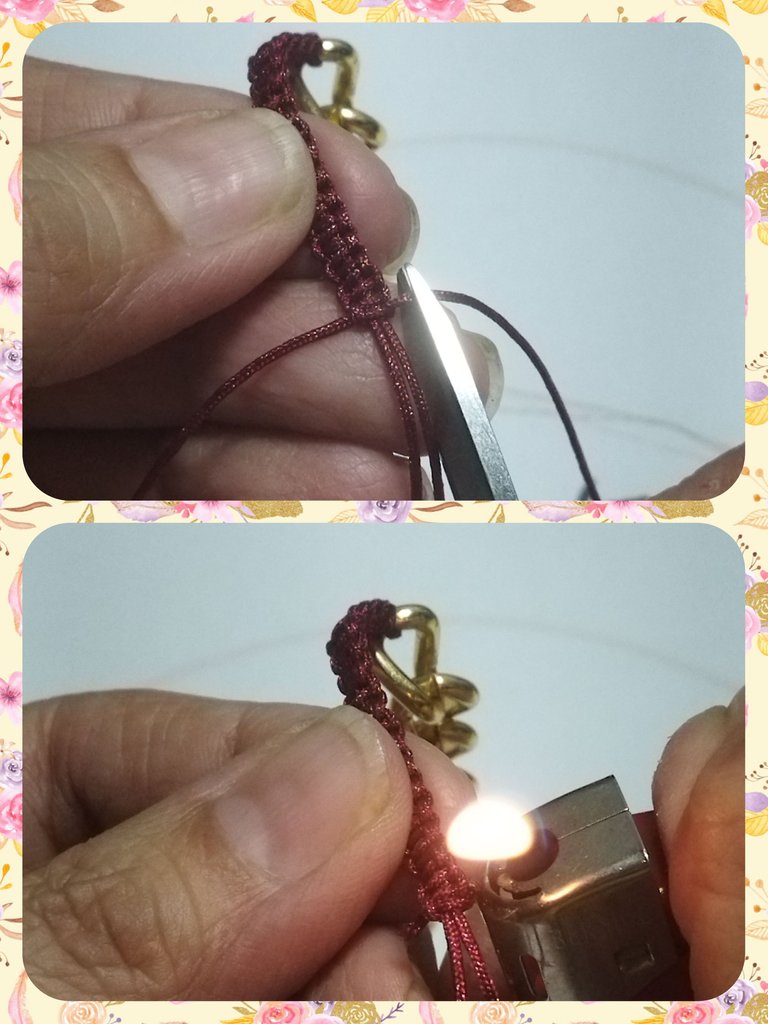
STEP #08
We turn the chain and begin to weave the other part of the bracelet using the two remaining strands of thread. We introduce the 40 cm strand through the last link, take it to the work table and secure it with the clamp and the strip of paper.
PASO #08
Damos vuelta a la cadena y comenzamos a tejer la otra parte de la pulsera utilizando las dos hebras restantes de hilo. Introducimos la hebra de 40 cm por el último eslabón, llevamos a la tabla de trabajo y sujetamos con la pinza y el tirro de papel.
STEP #09
We make a simple knot, and repeat the process from step #04 to step #07. Which consists of making complete flat knots until reaching 4.5 cm of fabric and then closing and sealing the fabric with the lighter.
PASO #09
Realizamos un nudo sencillo, y repetimos el proceso desde el paso #04 al paso #07. Que consiste en la elaboración de nudos planos completos hasta alcanzar 4,5 cm de tejido y posteriormente al cierre y sellado del tejido con el encendedor.
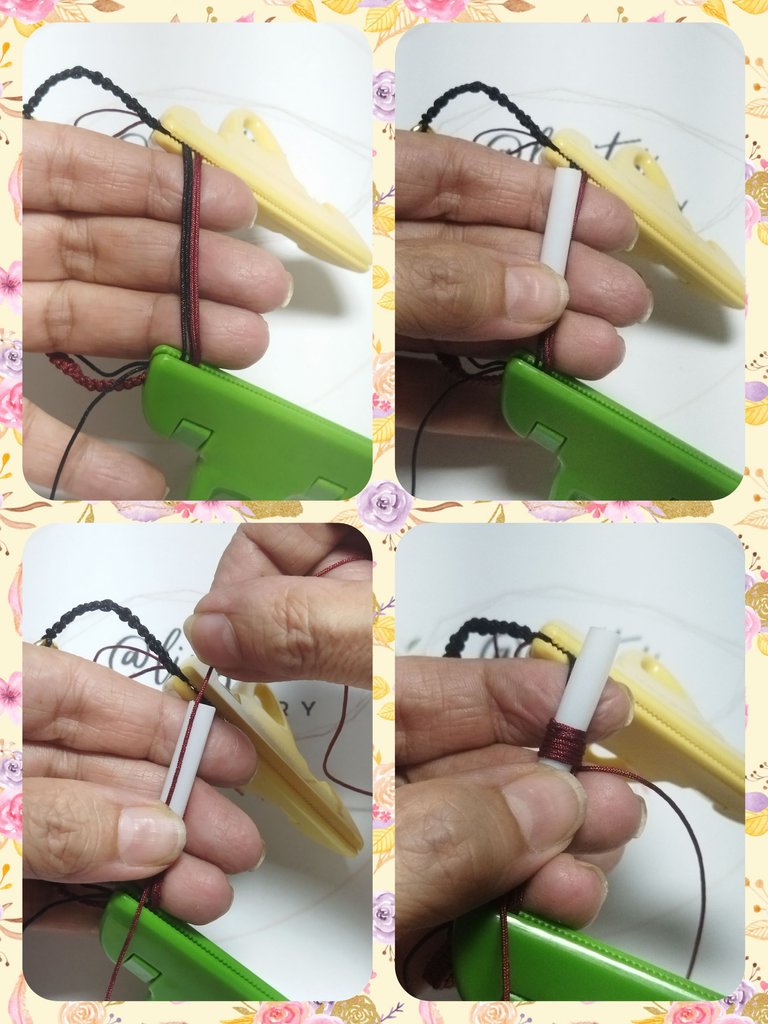
STEP #10
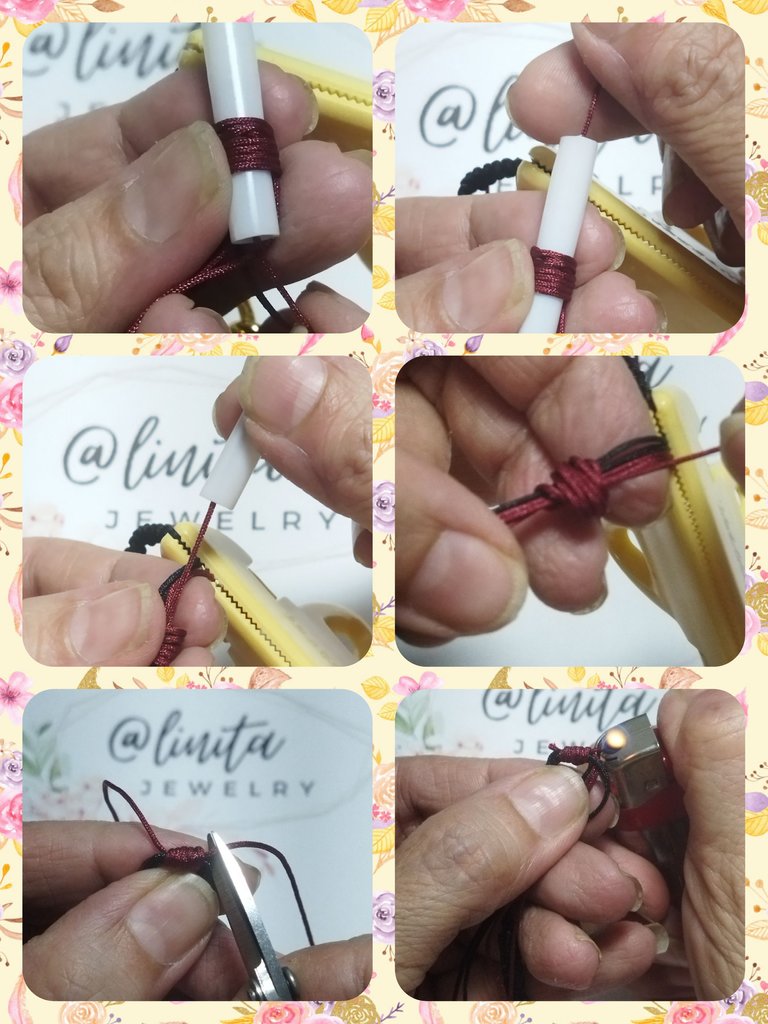
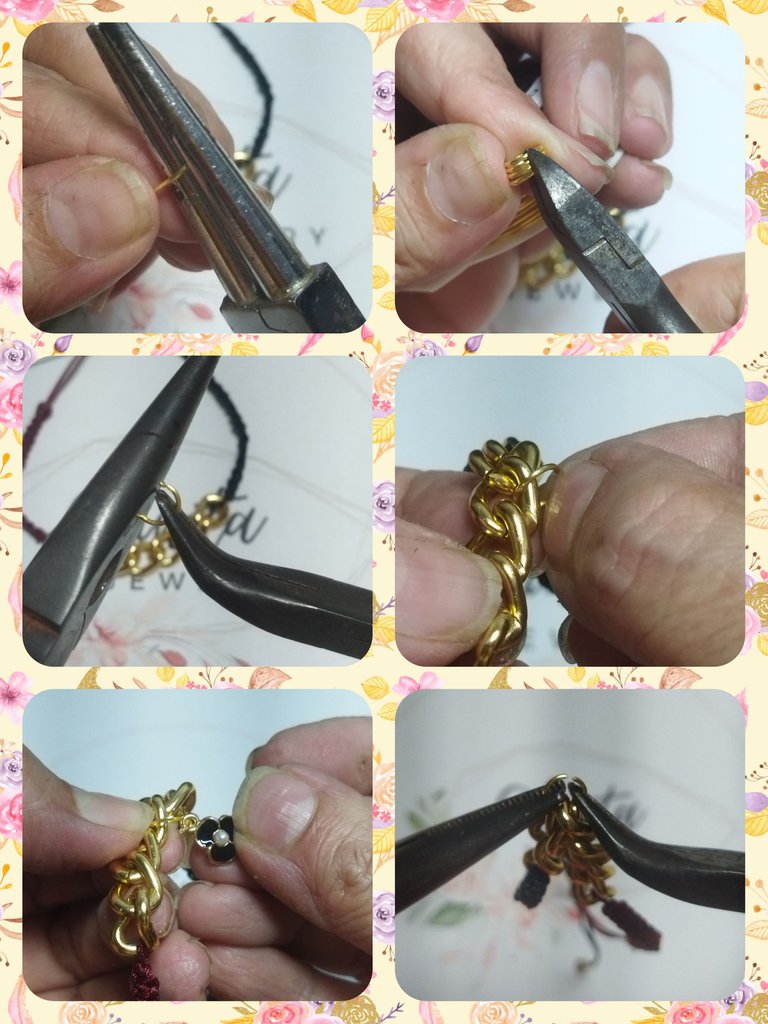
To close the bracelet we are going to make an adjustable closure with the Franciscan knot. To do this, we are going to take the 4 strands of the bracelet and align them in the opposite direction, hold them with the tweezers and form the Franciscan knot on the 4 strands.
We place a piece of straw and with a 30 cm piece of thread we make 6 turns in reverse. Then we introduce the same end of the thread with which we made the turns inside the straw and take it out from above, we remove the straw and adjust the threads so that we are going to adjust by pulling both ends of the thread until it is tight.
We cut off the excess and seal with the lighter.
PASO #10
Para cerrar la pulsera vamos a realizar un cierre ajustable con el nudo franciscano. Para ello, vamos a tomar las 4 hebras de la pulsera y alineamos en dirección contraria, sujetamos con las pinzar y formamos el nudo franciscano sobre las 4 hebras.
Colocamos un pedazo de popote y con un trozo de hilo de 30 cm hacemos 6 giros en reverso. luego introducimos el mismo extremo del hilo con el que realizamos las vueltas por dentro del popote y sacamos por arriba, retiramos el popote y ajustamos los hilos de manera que vamos a ir ajustando halando ambos extremos del hilo hasta que quede apretado.
Cortamos el sobrante y sellamos con el encendedor.
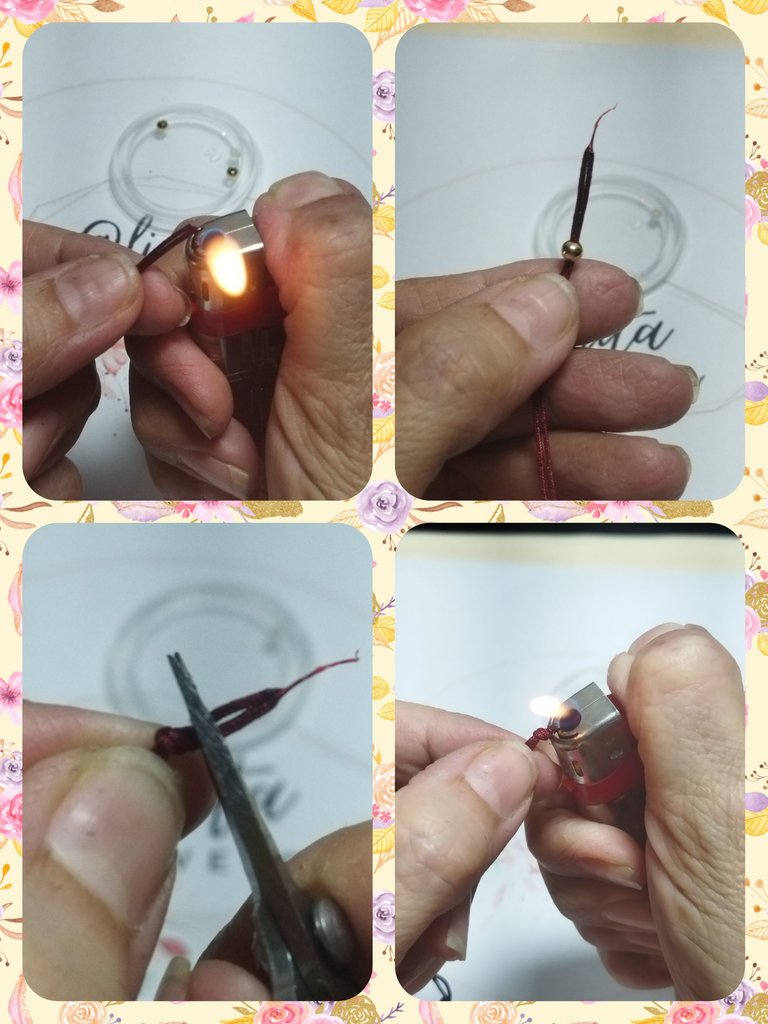
STEP #11
With the lighter we are going to make the needle point in each end strand and then we introduce a 4 cm ball into each end, we make a knot, we cut off the excess and seal with the lighter.
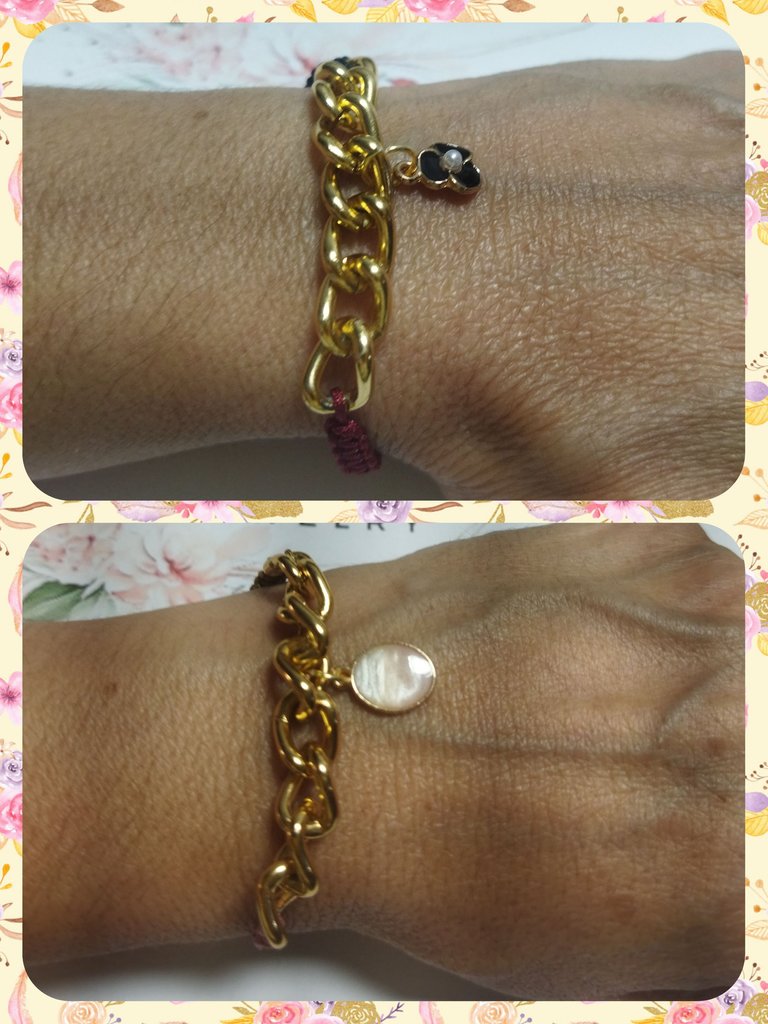
We now have the bracelet ready, we can use it like this or place any other beads on it to give it more volume and make it more striking.
PASO #11
Con el encendedor vamos a realizar la punta aguja en cada hebra de los extremos y luego introducimos un balín de 4 cm en cada extremo, realizamos un nudo, cortamos el exceso y sellamos con el encendedor.
Ya tenemos lista la pulsera, podemos usarla así o colocarle cualquier otro abalorio para darle más volumen y hacerla más llamativa.
STEP #12
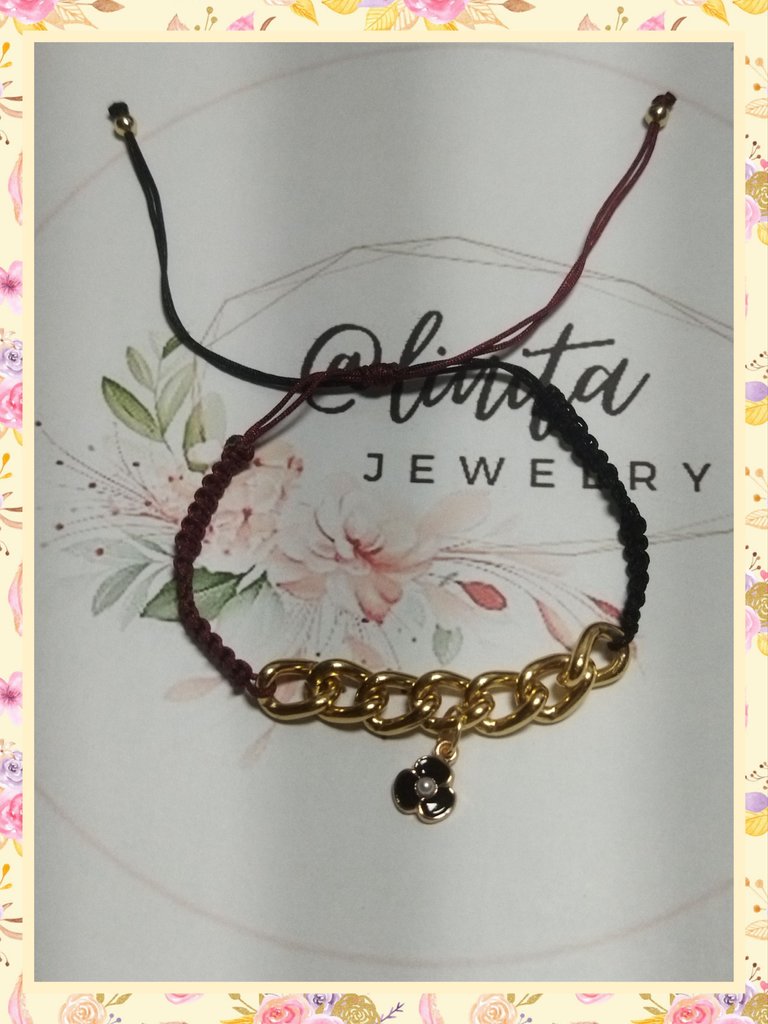
We make a 6 mm ring with the #20 wire to insert it into the chain and place the pendant of our choice in the center of the chain.
PASO #12
Realizamos con el alambre #20 un aro de 6 mm para introducirlo en la cadena y colocar el dije de nuestra preferencia en el centro de la cadena.
PROJECT COMPLETED
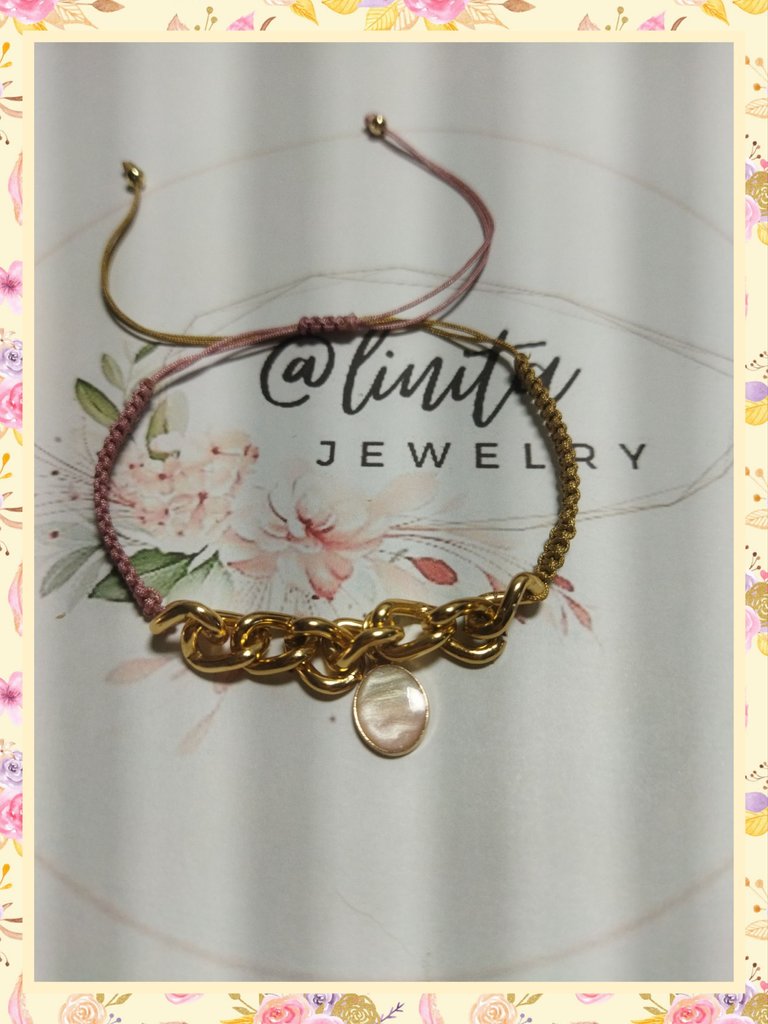
And now we have our bracelet ready. We can make more combinations with other colors of thread and making other fabrics using the same materials. These bracelets look very nice on and we can wear them with casual clothes. See you in the next tutorial.
PROYECTO FINALIZADO
Y ya tenemos nuestra pulsera lista. Podemos hacer más combinaciones con otros colores de hilo y realizando otros tejidos utilizando los mismos materiales. Estas pulseras quedan muy lindas puestas y podemos usarlas con ropa casual. Nos vemos en el próximo tutorial.
Lindo trabajo amiga. Exitos.
Gracias amiga, me alegro que te hayan gustado.
Te quedaron muy lindas estás pulseras, saludos 👋🏽
Holaaa, muchas gracias.
Is really beautiful
Thank you, I appreciate your comment
What a wonderful design! It looks great. Good to see how you made it. Well done!
a community encouraging first-hand content, and each individual living their best life.
Has sido curado por @visualblock / You've been curated by @visualblock
Bienvenidas delegaciones / Delegations welcome
Trail de Curación / Curation Trail
Vota por nuestro Testigo aliado - @hispapro / Vote for our allied Witness - @hispapro
Más información sobre el testigo aquí / More information about the witness here
Hermosa y a la moda me encanta la mezcla de materiales .
Congratulations @linita! You have completed the following achievement on the Hive blockchain And have been rewarded with New badge(s)
Your next target is to reach 10000 upvotes.
You can view your badges on your board and compare yourself to others in the Ranking
If you no longer want to receive notifications, reply to this comment with the word
STOPCheck out our last posts:
Beautiful. I love brown
Hola @linita 💕
De verdad que me gusto mucho como explico el procedimiento y el resultado fue fenomenal.
Gracias por compartir
Hola , esa combinación de metal con hilo te quedó genial . Además, los colores de los hilos están muy bonitos. Ese hilo chino se ve muy bonito