
Muy feliz noche queridos amigos de Jewelry, es un gusto saludarlos espero se encuentren bien. Hoy nuevamente me encuentro por acá para mostrarles una nueva creación de accesorios, el cual me parece super lindo y elegante es importante tener una prenda como esta y que pueda combinar con nuestra ropa al momento de salir.
Very happy night dear friends of Jewelry, it is a pleasure to greet you, I hope you are well. Today I am here again to show you a new accessory creation, which I think is super cute and elegant. It is important to have a garment like this that can combine with our clothes when going out.
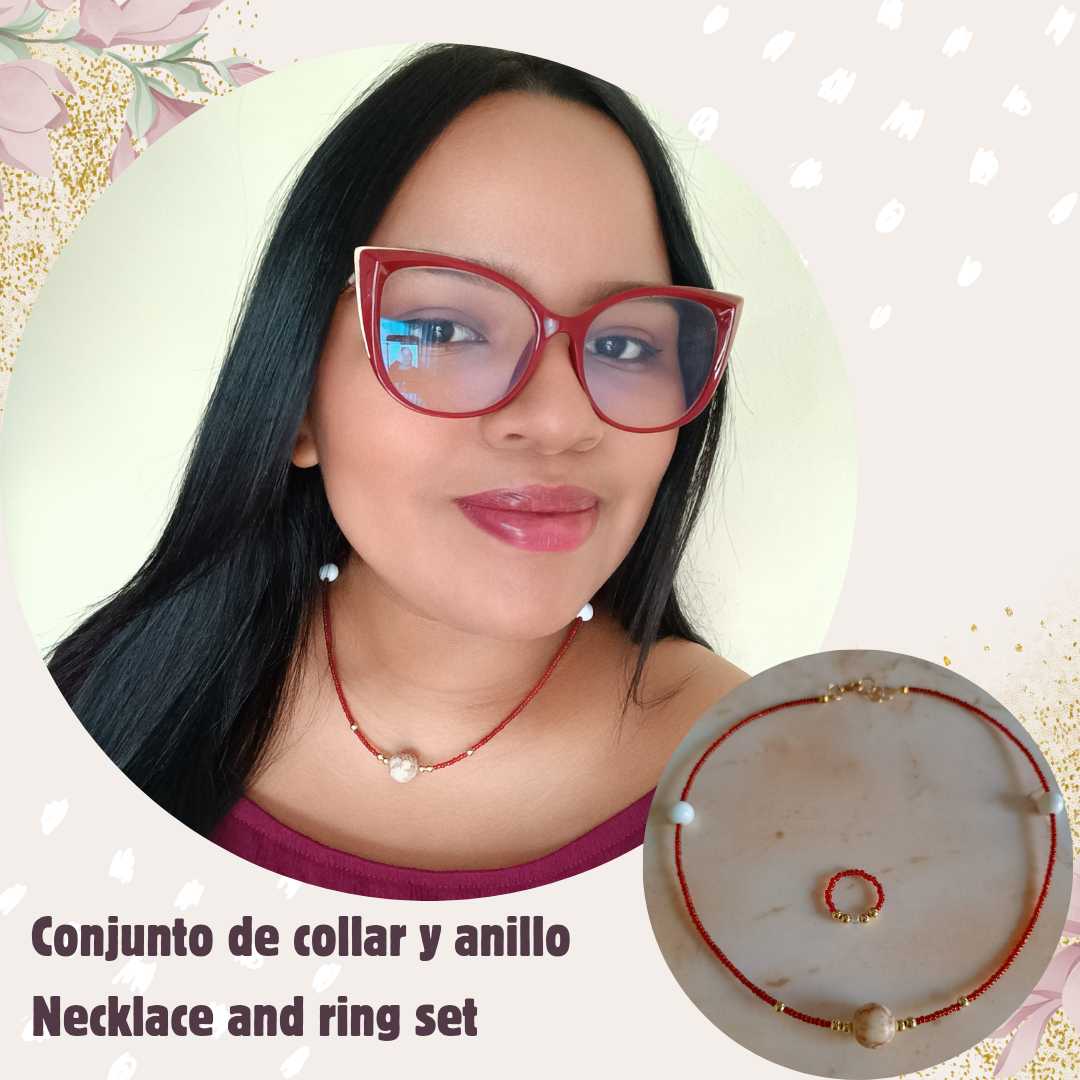
Siempre me ha gustado combinar los accesorios con el atuendo que nos coloquemos, y si los podemos realizar nosotros mismos pues mucho mejor. Este conjunto de collar y anillo lo realicé con mostacillas rojas, cuentas doradas, piedras blancas y en el centro una piedra grande con diseño de color marrón, a continuación les muestro el paso a paso y los materiales que utilicé.
I have always liked to combine accessories with the outfit we wear, and if we can make them ourselves, even better. I made this necklace and ring set with red beads, gold beads, white stones and in the center a large stone with a brown design. Below I show you the step by step and the materials I used.
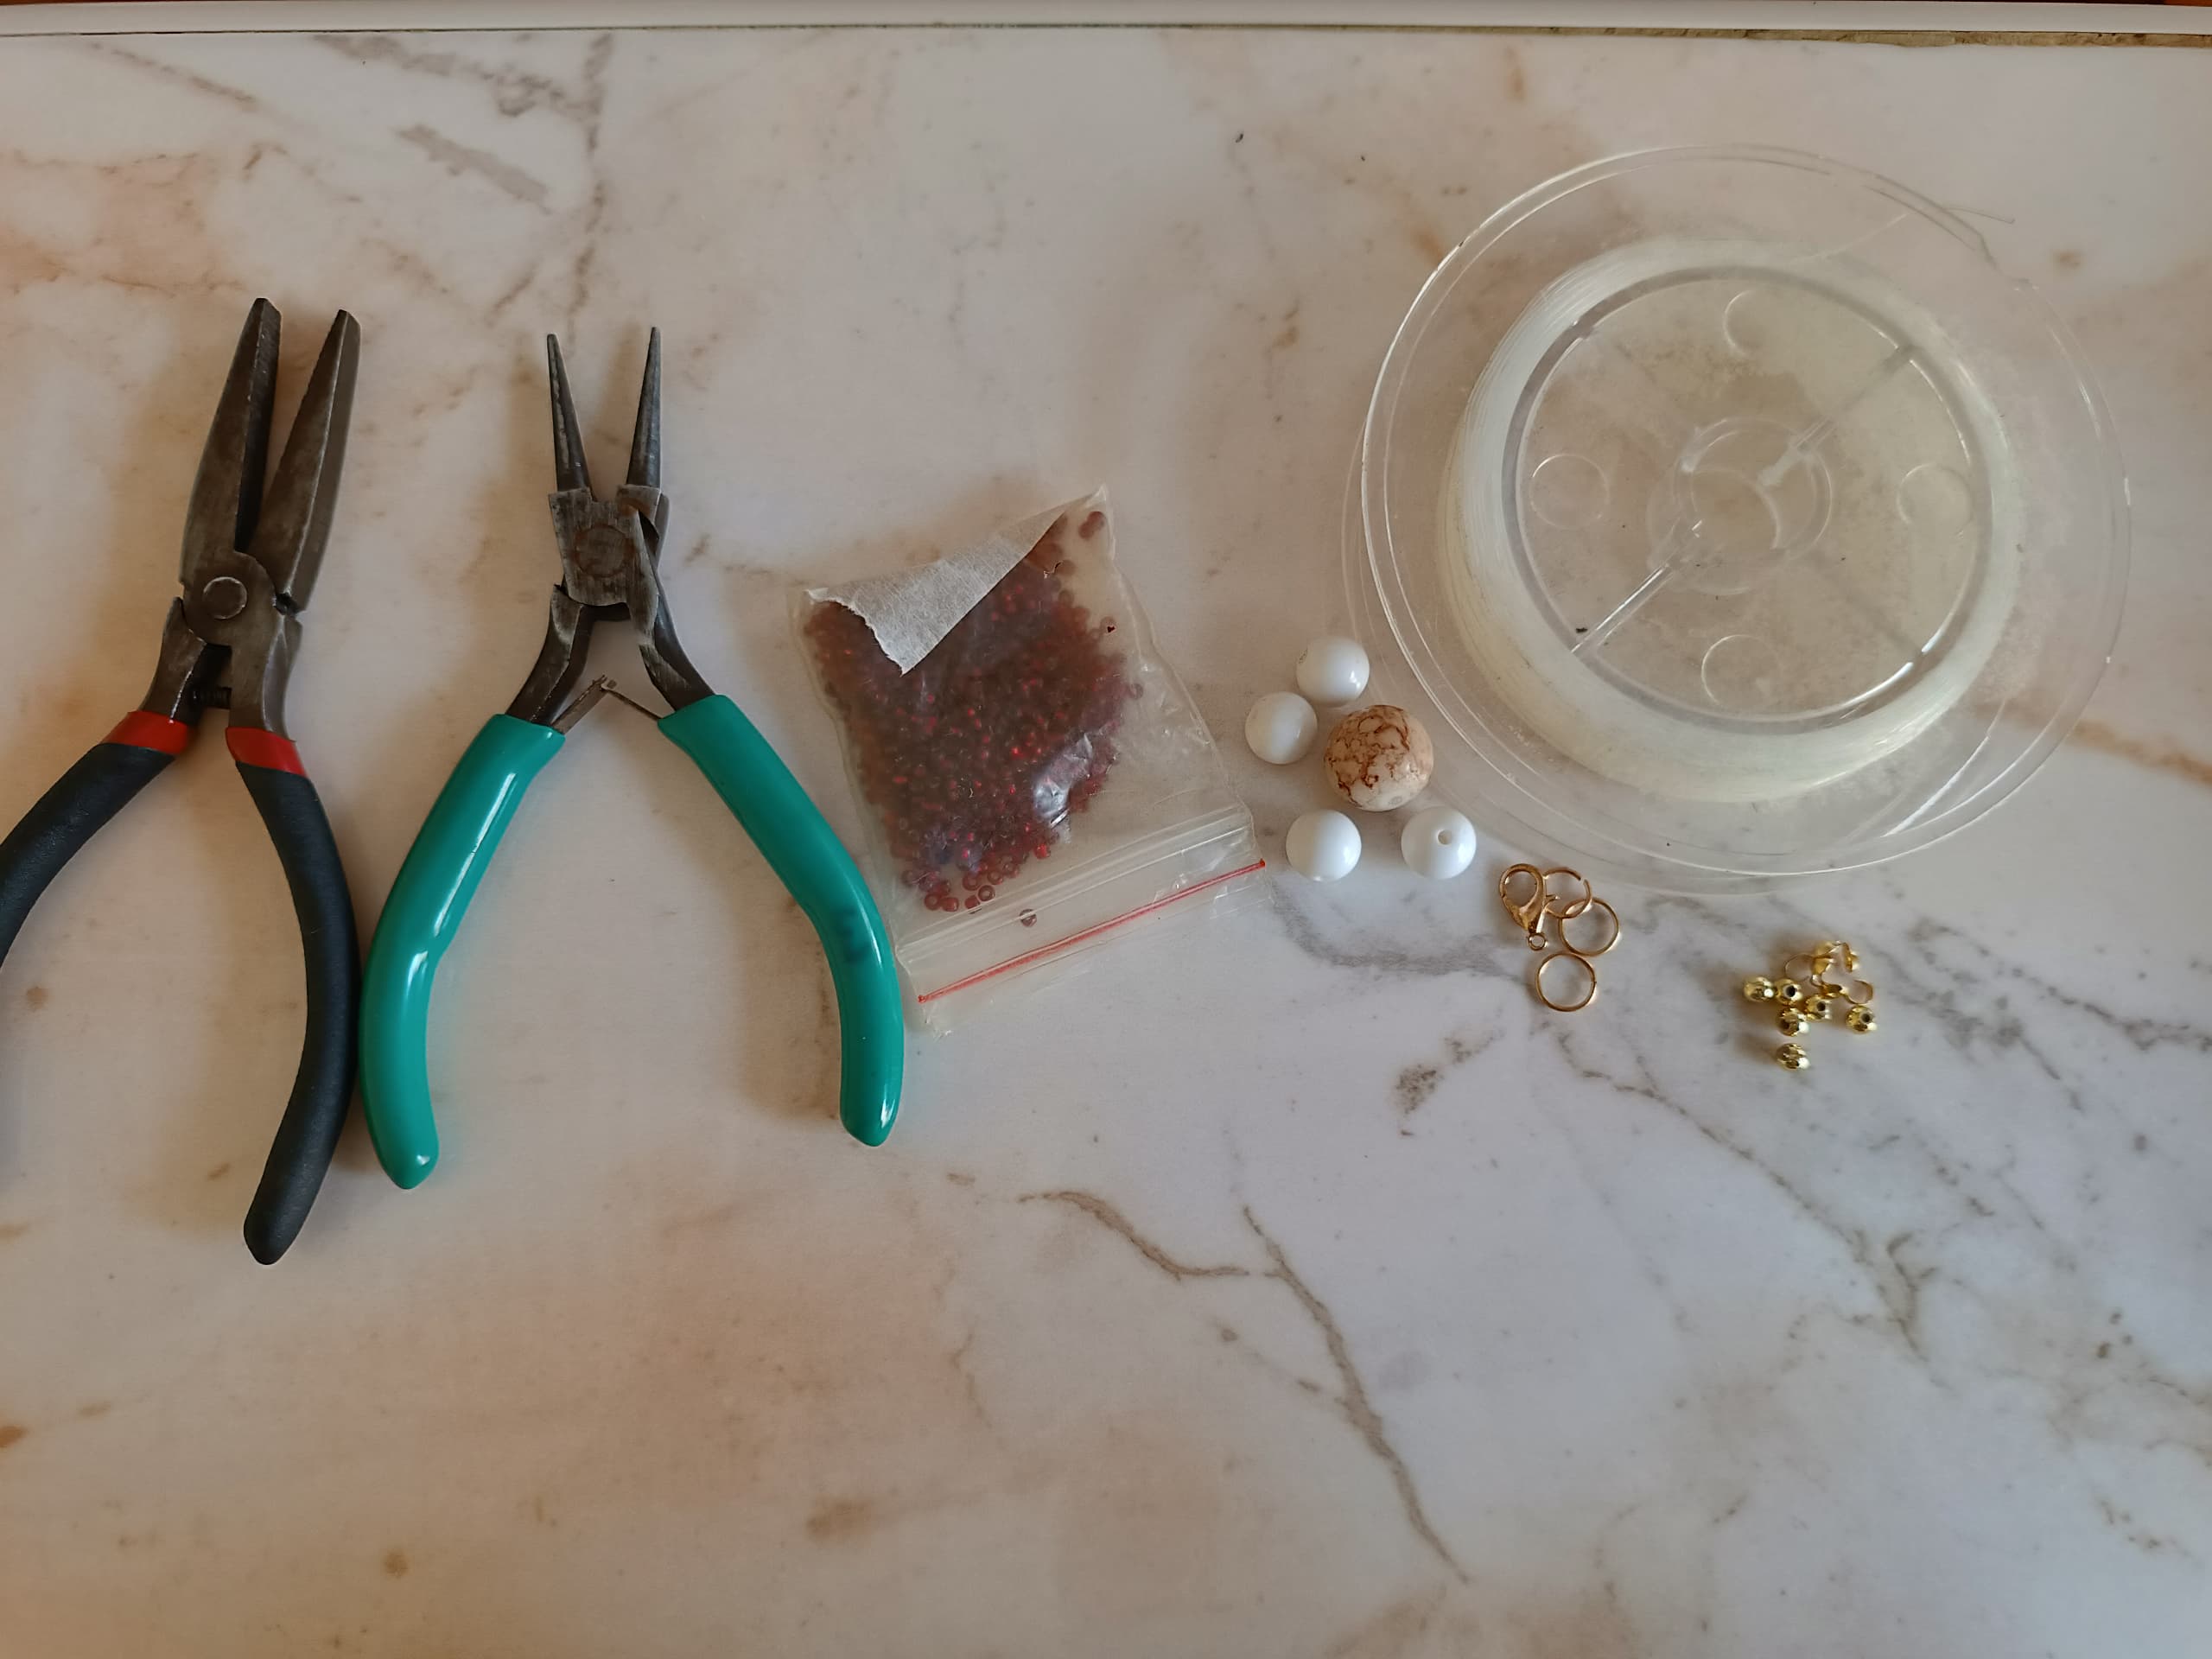
Materiales:
✅50 cm de nylon para bisutería.
✅4 argollas.
✅1 Broche.
✅2 tapa nudos.
✅Pinza punta plana y redonda.
✅10 cuentas doradas.
✅2 piedras de color blanco.
✅1 piedra grande color marrón.
✅1 cuenta transparente pequeña.
✅Mostacillas rojas.
✅Encendedor.
✅Tijera.
Materials:
50cm nylon jewelry making.
4 rings.
1 Brooch.
2 knot covers.
Flat and round nose tweezers.
10 golden beads.
2 white stones.
1 large brown stone.
1 small transparent bead.
Red beads.
Lighter.
Scissors.
Paso a paso / Step by Step
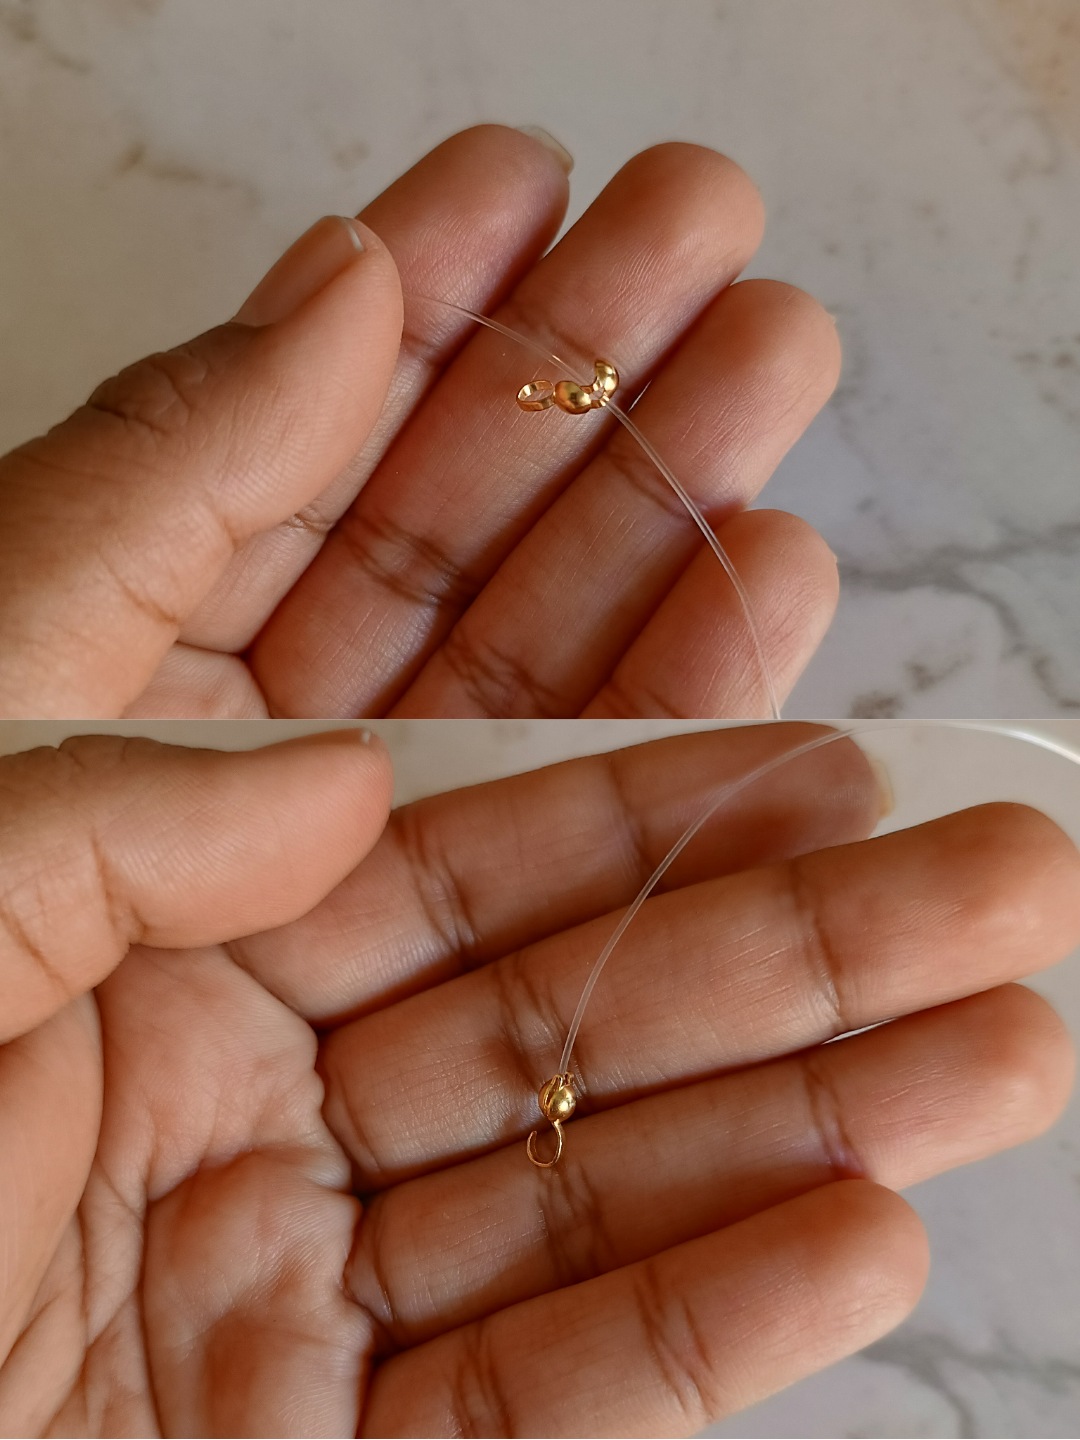
El primer paso es extender el nylon e introducir un tapa nudo, lo llevamos hasta la punta apretamos bien con ayuda de una pinza, cortamos y sellamos con un encendedor.
The first step is to extend the nylon and insert a knot cap, we take it to the tip, press it well with the help of tweezers, cut and seal with a lighter.
El siguiente paso es comenzar a introducir las mostacillas de color rojo a través del nylon, primero introducimos 50 mostacillas estás son super pequeñas así que debemos tener paciencia en el proceso, luego de haber culminado colocamos una piedra blanca y continuamos con 50 mostacillas más.
The next step is to start feeding the red beads through the nylon. First we enter 50 accounts. These are super small so we must be patient in the process. After finishing we placed a white stone and continued with 50 more beads.
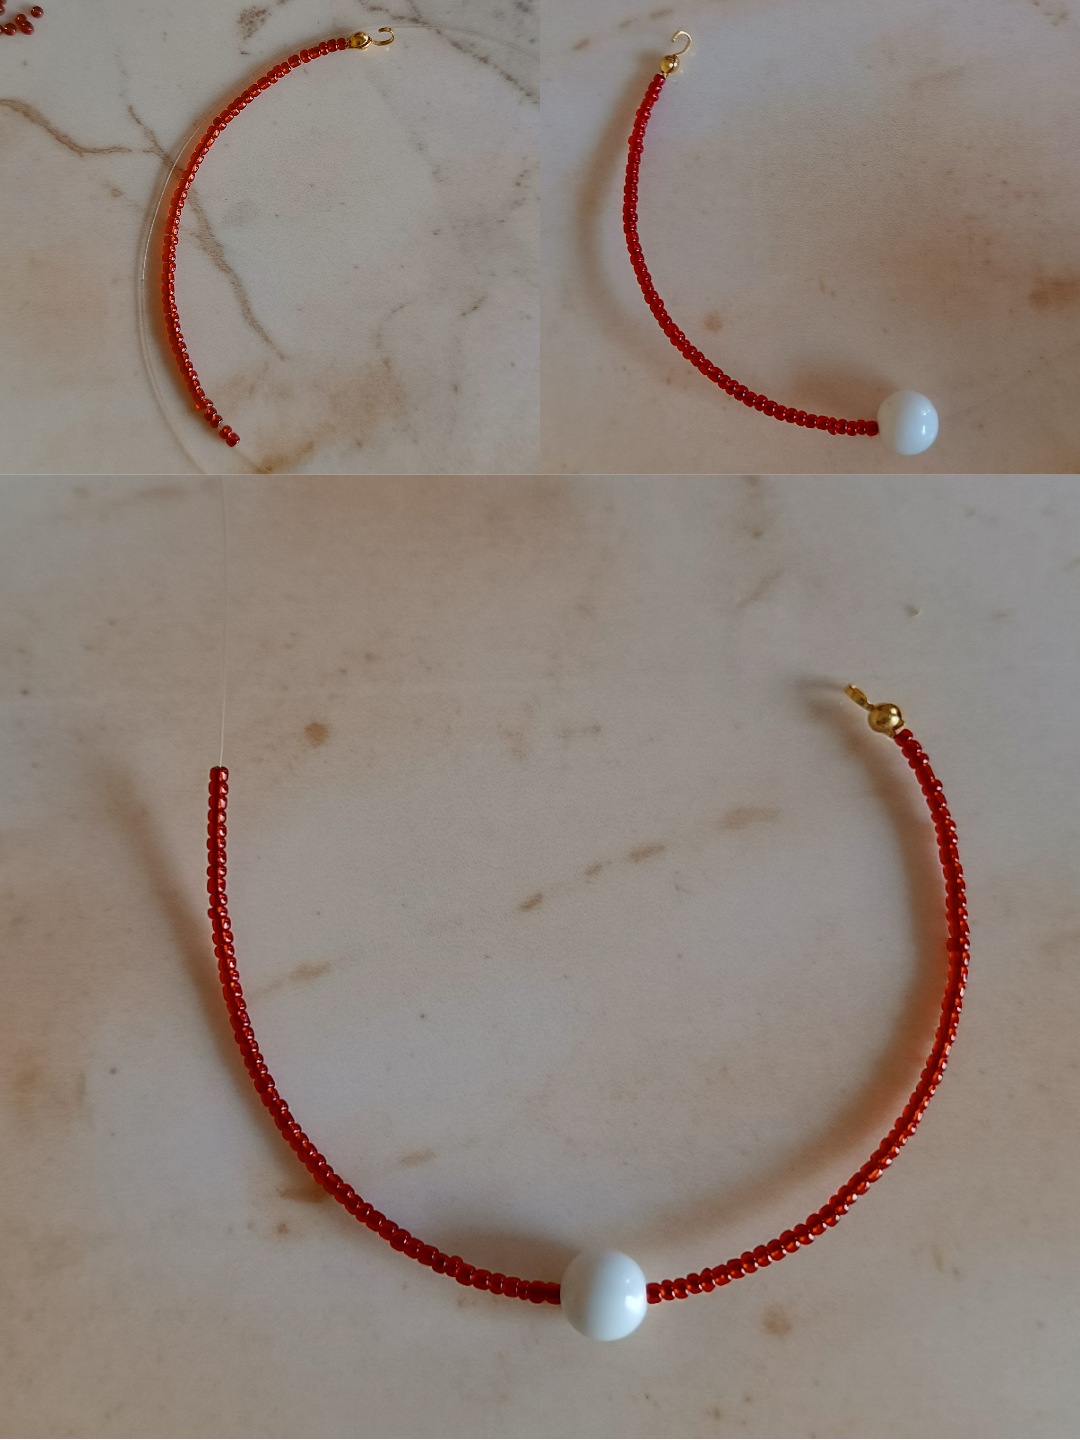
Ahora voy a colocar una cuenta dorada seguido de 10 mostacillas rojas, introduci dos cuentas doradas y en medio nos quedará la piedra de color marrón, ahora para terminar el collar seguimos el mismo paso dos cuentas doradas 10 mostacillas rojas, luego una cuenta dorada y terminamos con las mismas 50 mostacillas rojas una piedra blanca y 50 mostacillas para finalizar.
Now I am going to place a golden bead followed by 10 red beads, insert two golden beads and in the middle we will have the brown stone, now to finish the necklace we follow the same step two golden beads 10 red beads, then a golden bead and we finish With the same 50 red beads, a white stone and 50 beads to finish.
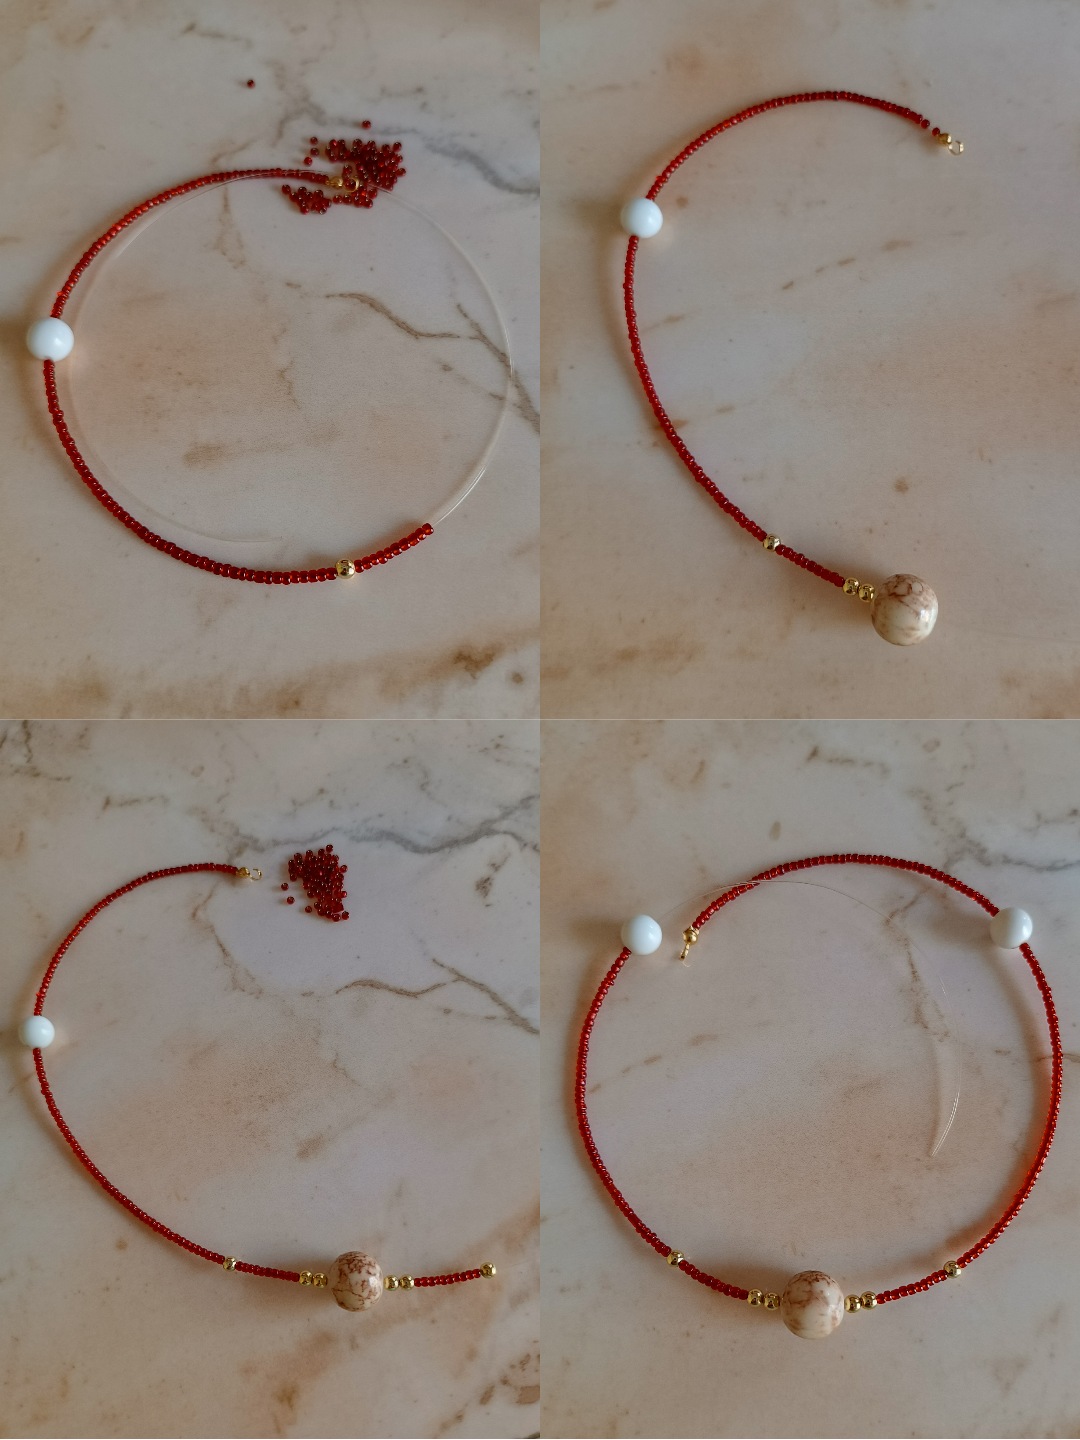
Ya luego de terminar de introducir todas las mostacillas vamos a colocar un tapa nudos en la parte final, tenemos que fijar bien para que las piedras no se muevan ni queden sueltas, con el nylon sobrante realizamos un nudo cortamos y sellamos la punta con un encendedor.
After finishing inserting all the beads we are going to place a knot cover in the final part, we have to fix it well so that the stones do not move or remain loose, with the excess nylon we make a knot, cut and seal the tip with a lighter .
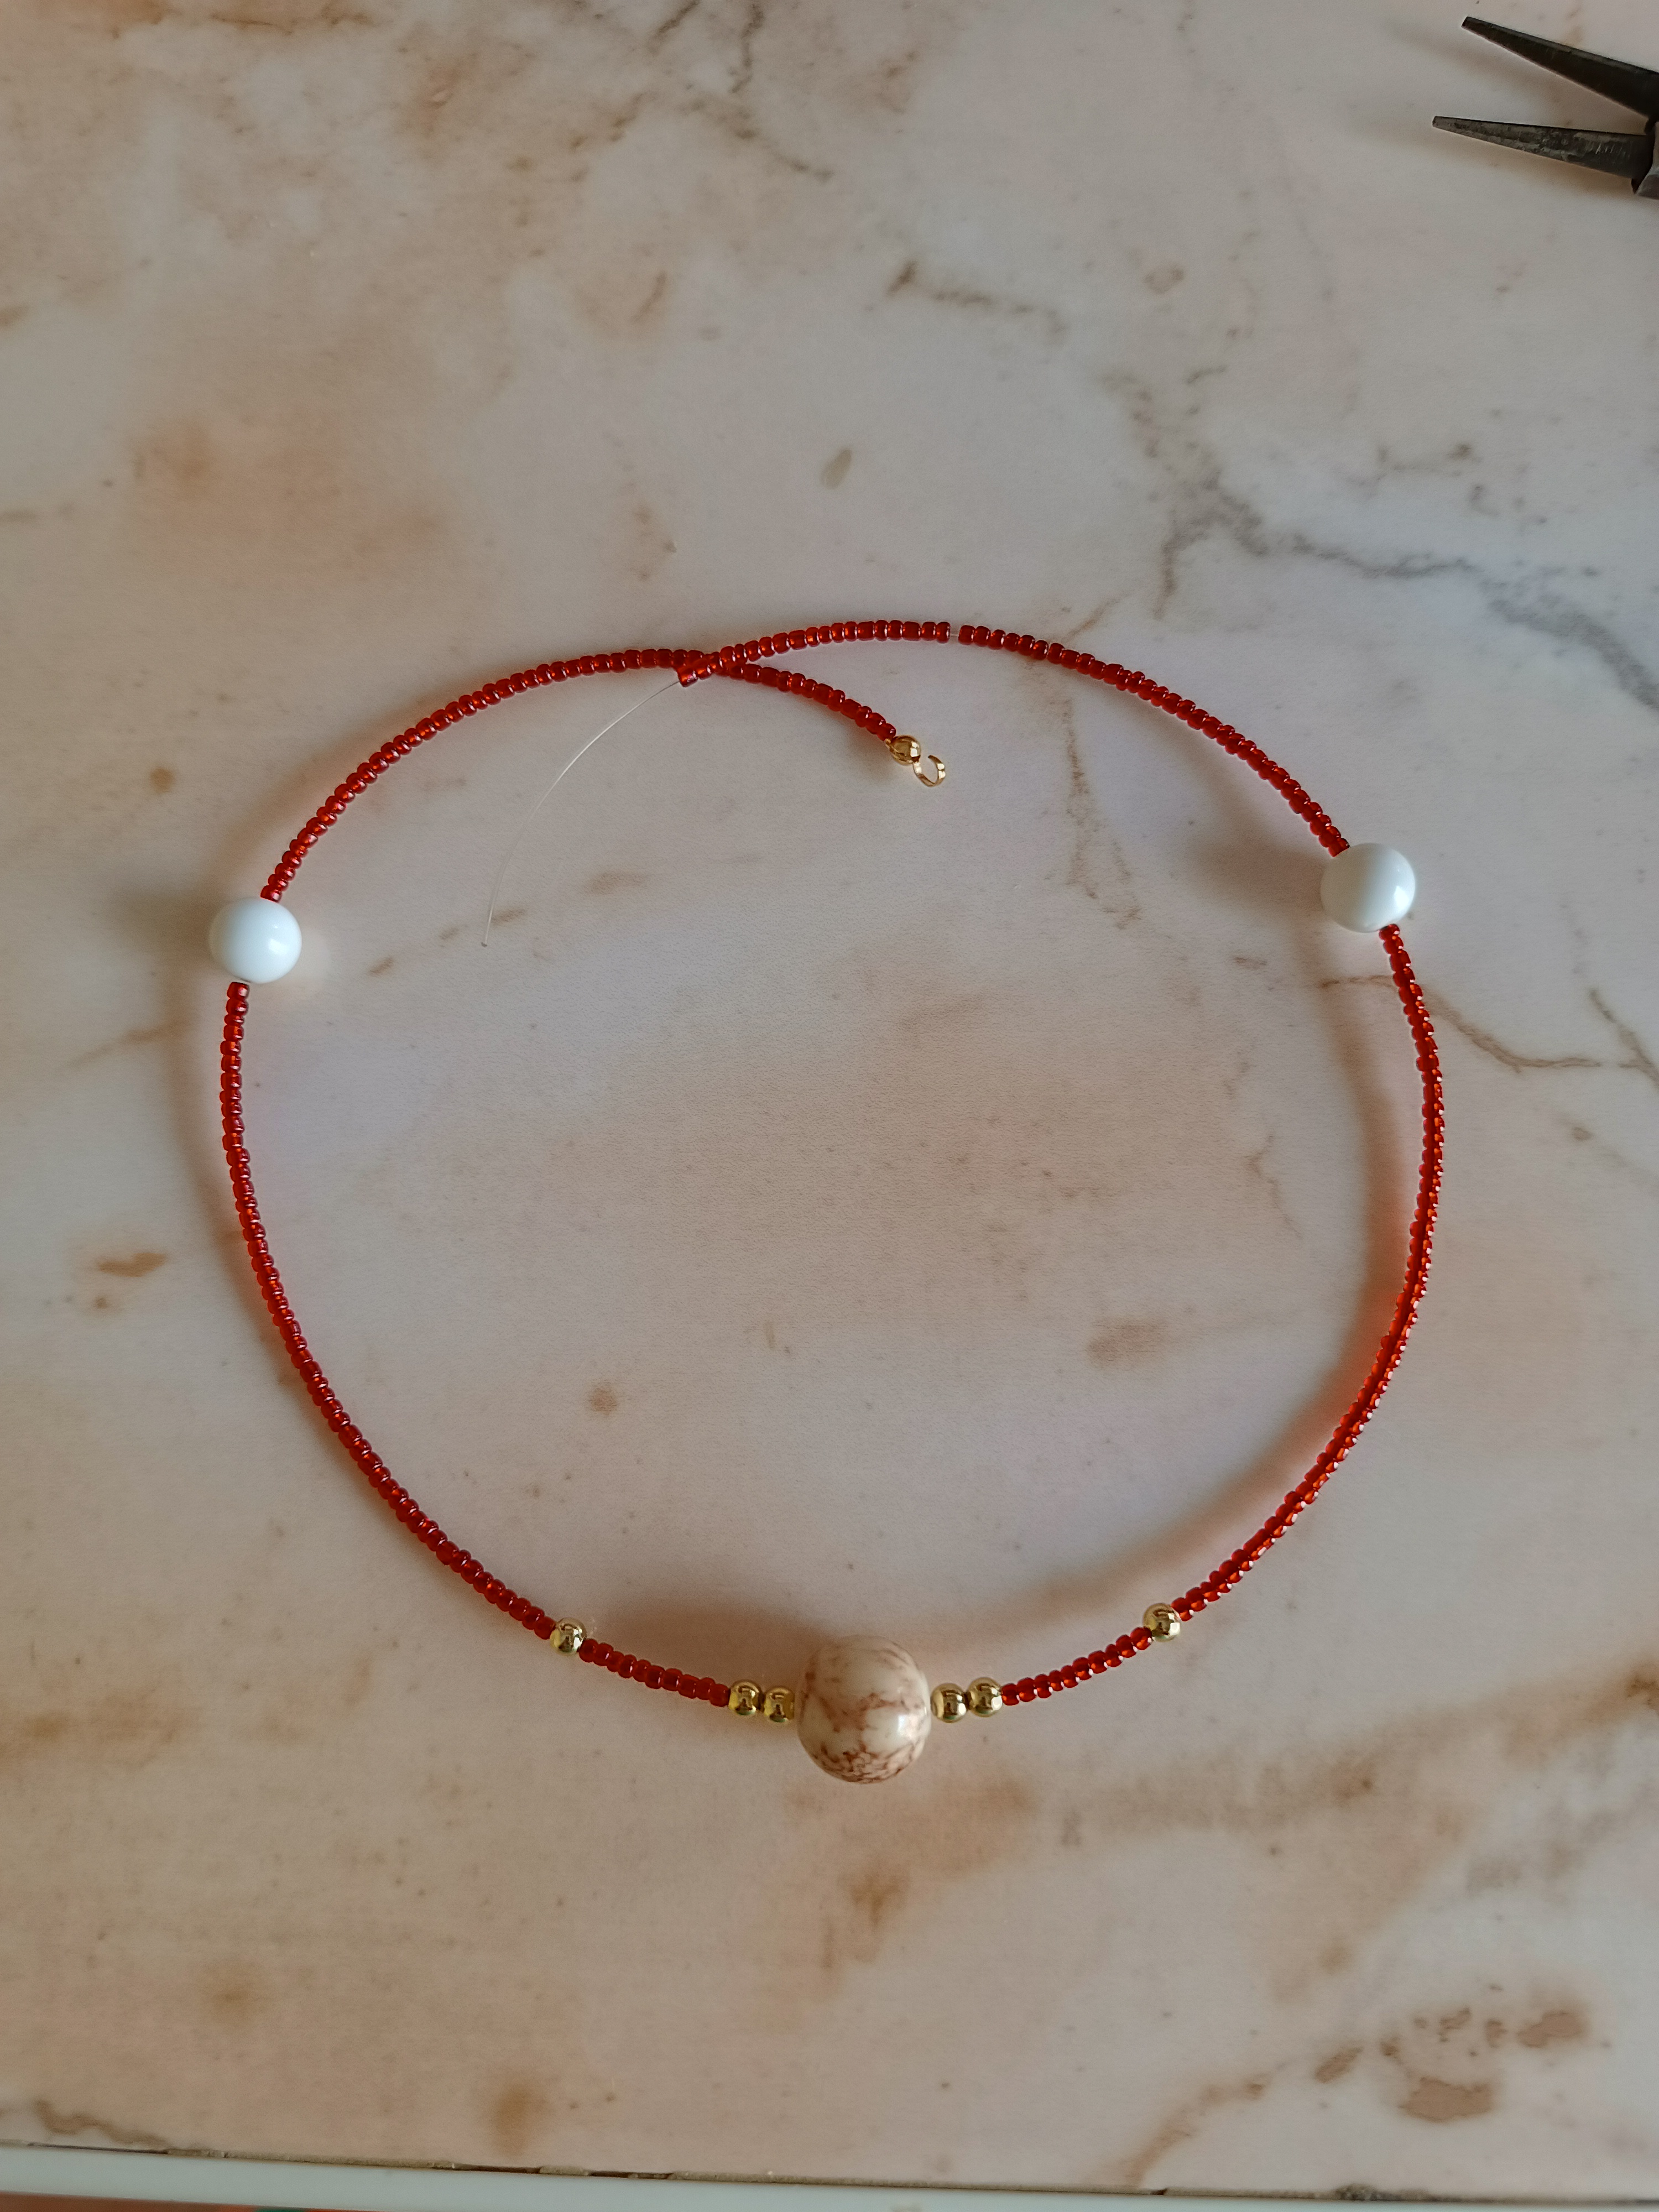

Ahora con una pinza punta redonda cerramos la punta del tapa nudo donde se ubicará una argolla seguido de un broche, realizamos el mismo el paso en el siguiente tapa nudo y colocamos tres argollas esto nos va a permitir ajustar mejor el collar.
Now with a round tip pliers we close the tip of the knot cover where a ring will be located followed by a clasp, we carry out the same step on the next knot cover and place three rings, this will allow us to better adjust the necklace.
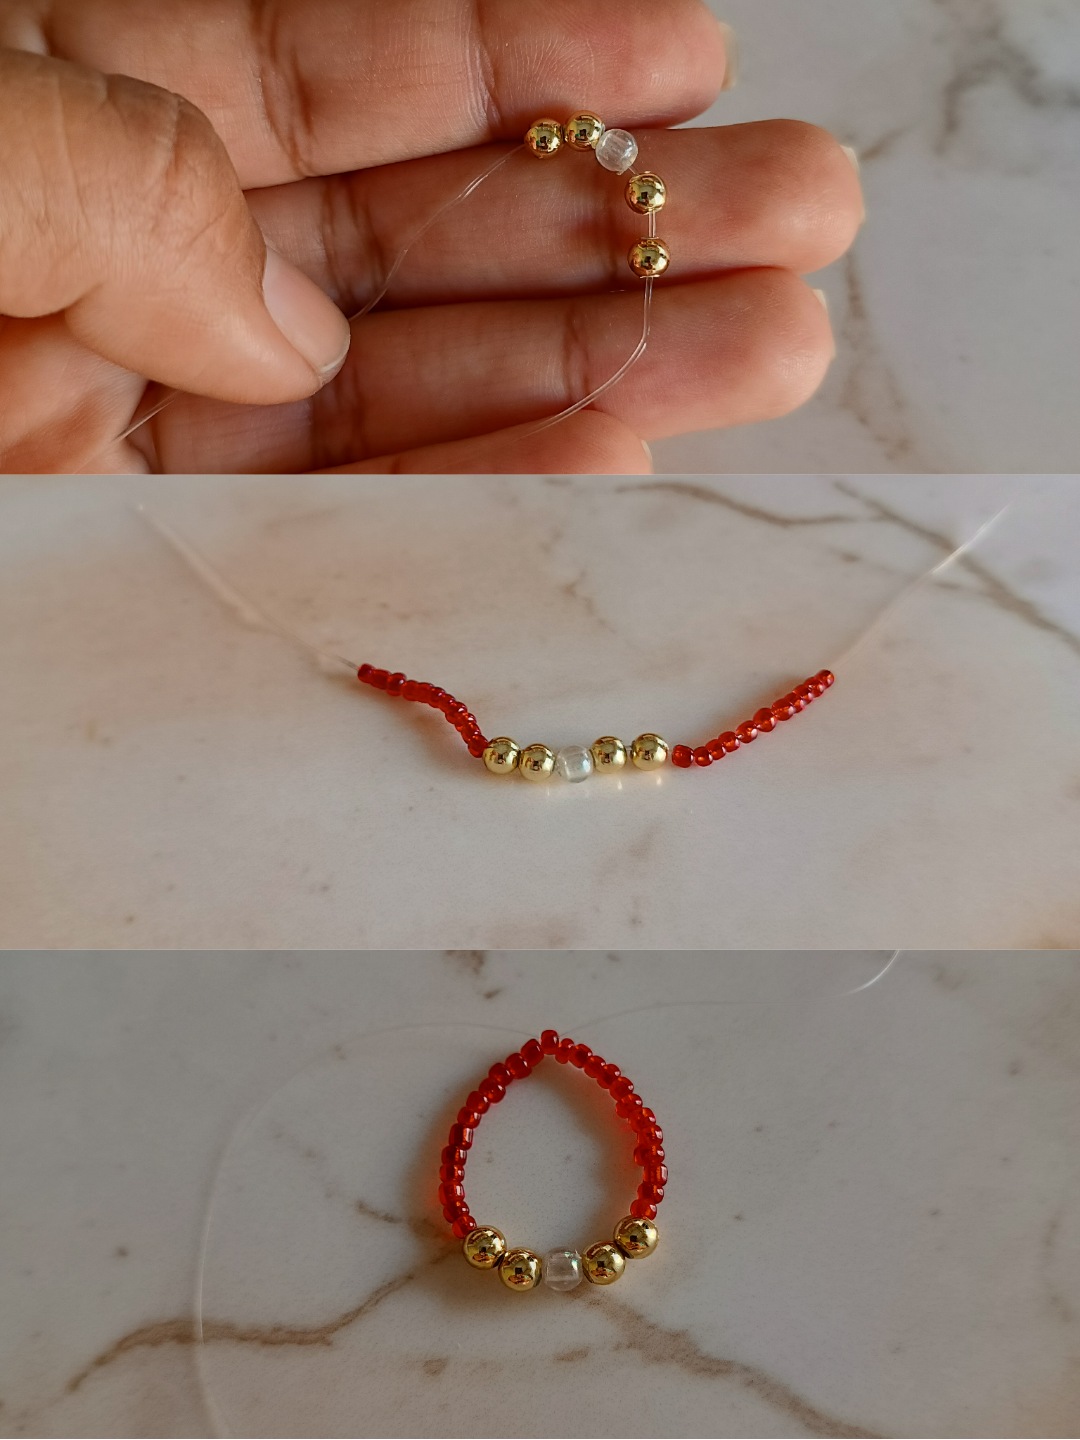
Ya terminamos el collar, ahora vamos a realizar el anillo, corte un retazo de hilo nylon comencé colocando 12 mostacillas color rojo, ahora dos cuentas doradas, una cuenta transparente y repetimos el paso anterior hasta terminar el anillo, para cerrar colocamos una mostacilla en una de las puntas del nylon cruzamos y ajustamos bien, para fijar bien y que el nylon no se salga cruzamos ambos hilos por las primera mostacilla hacemos un nudo que quede hacia la parte de abajo y sellamos con un encendedor.
We have already finished the necklace, now we are going to make the ring, we cut a piece of nylon thread, I started by placing 12 red beads, now two gold beads, a transparent bead and we repeat the previous step until finishing the ring, to close we place a bead in One of the ends of the nylon we cross and adjust well, to secure well and so that the nylon does not come off, we cross both threads through the first beads, we make a knot that is downwards and we seal it with a lighter.
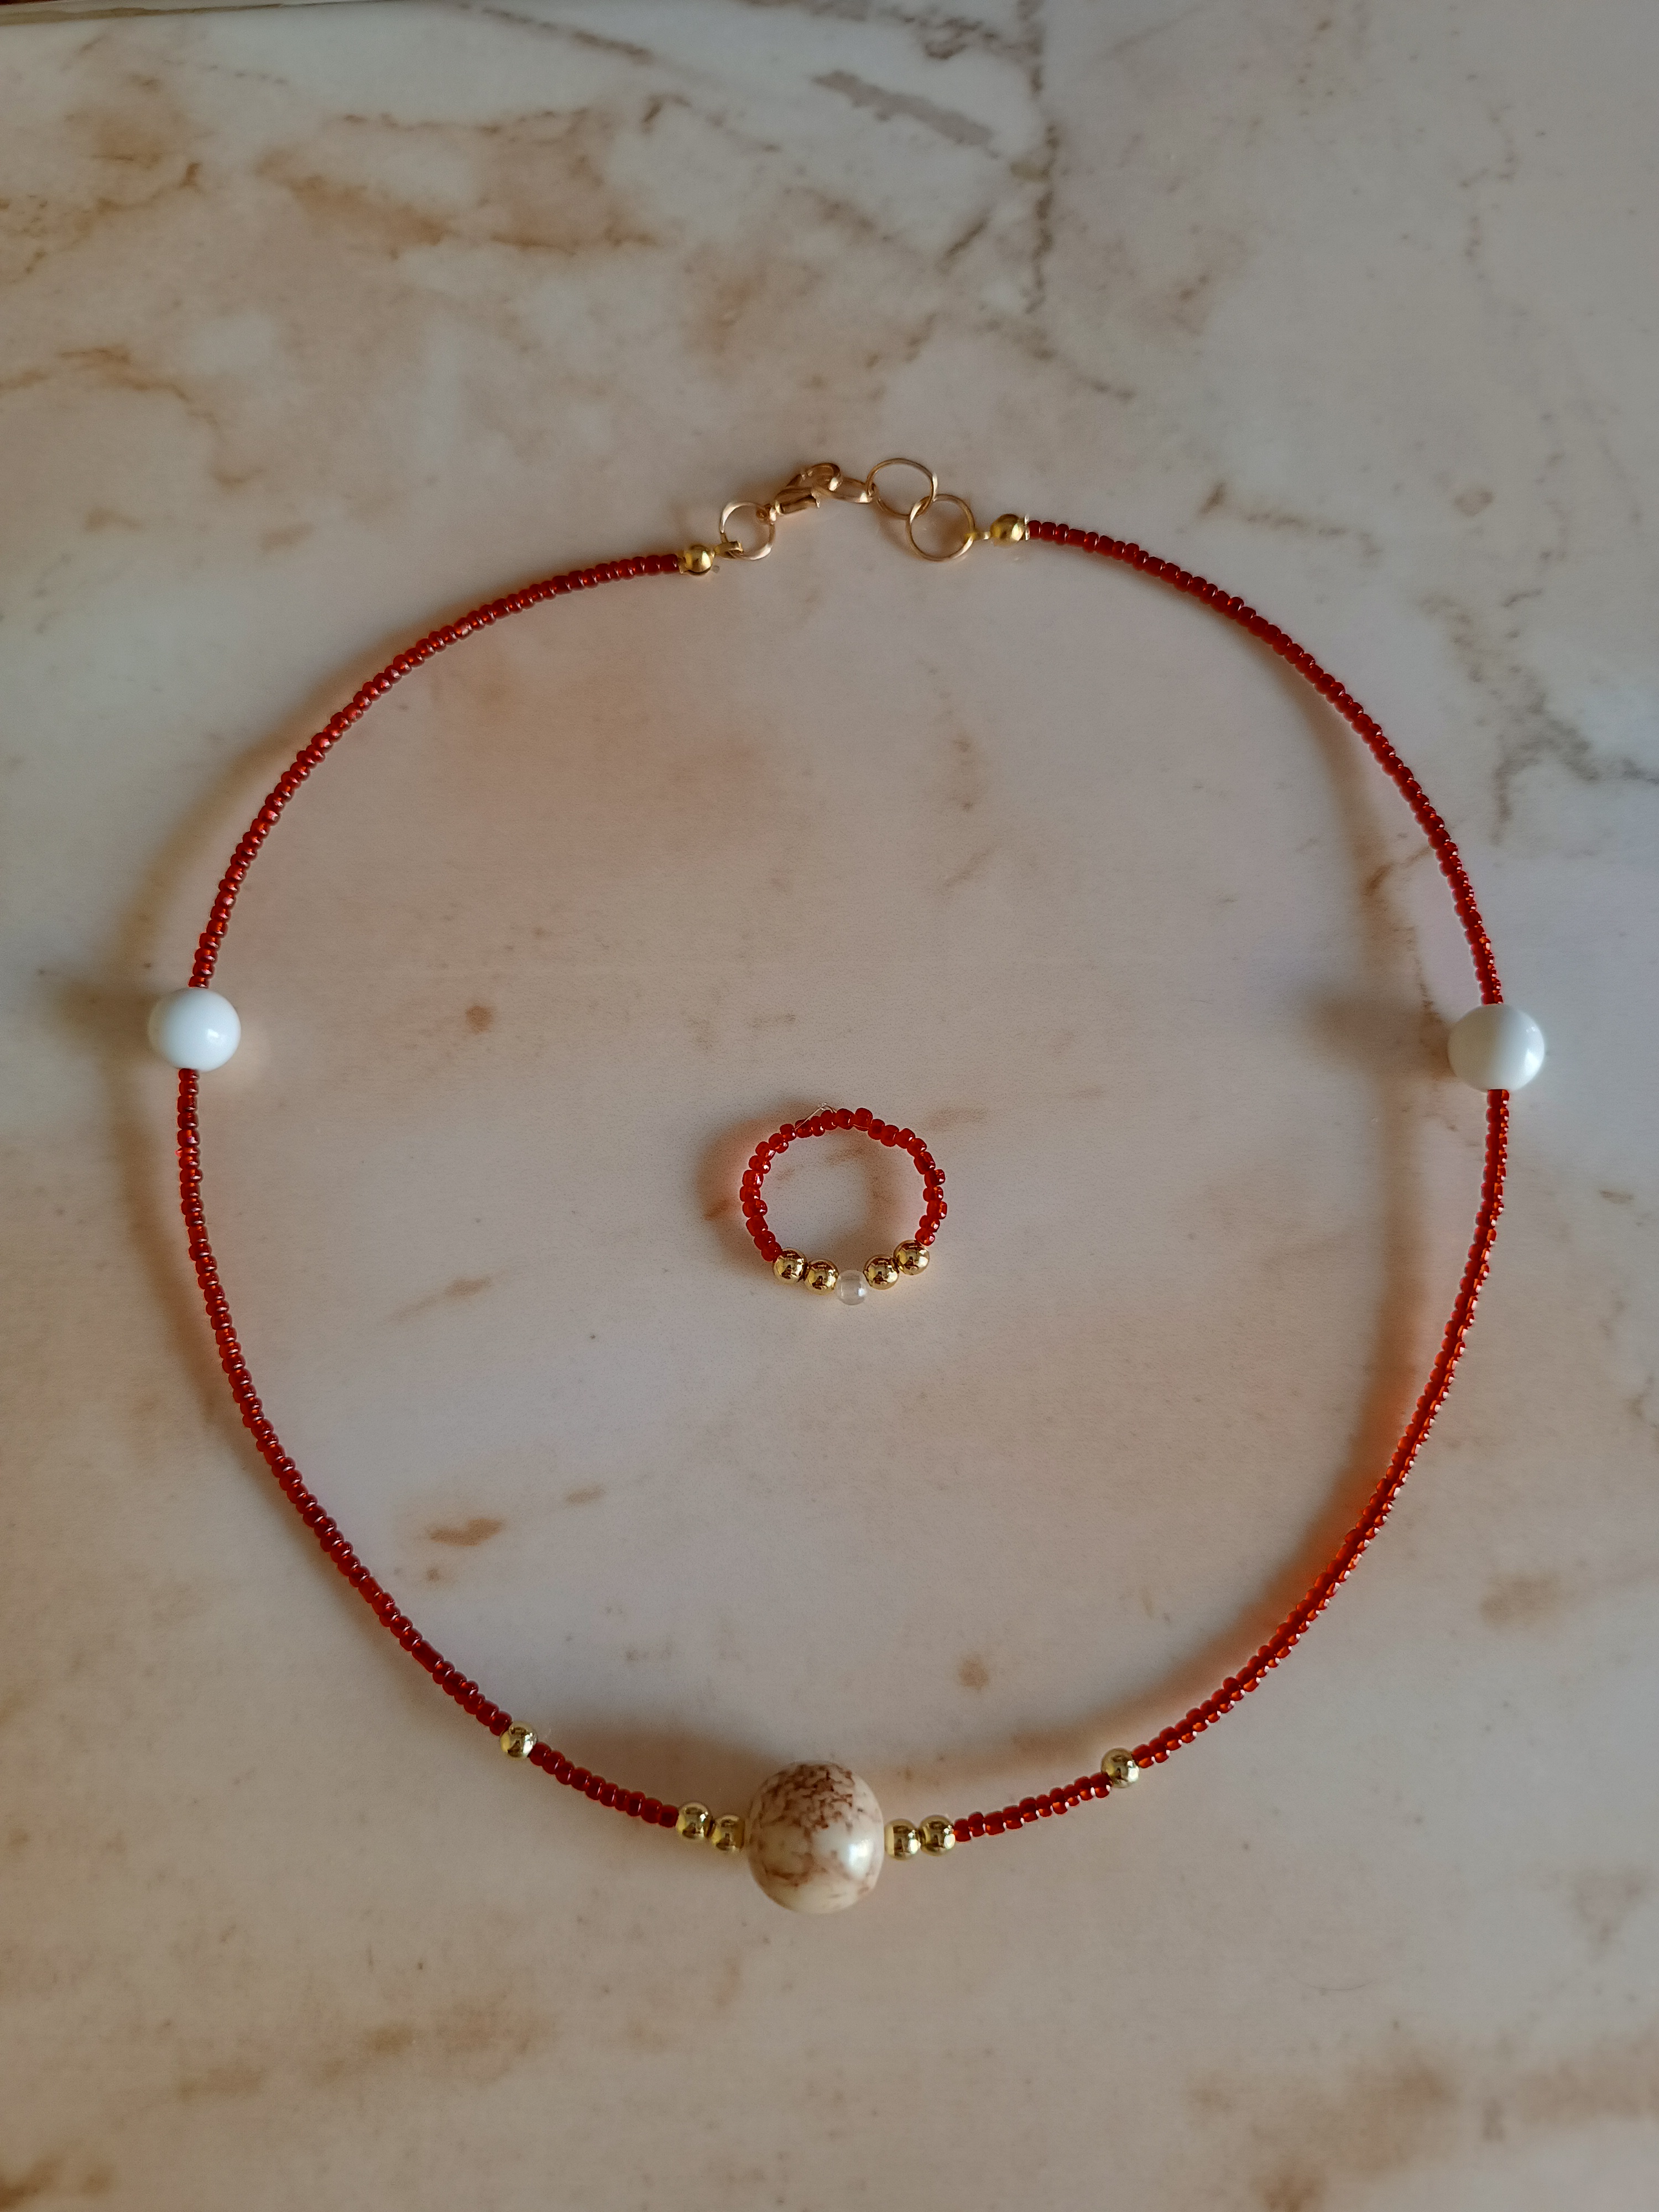
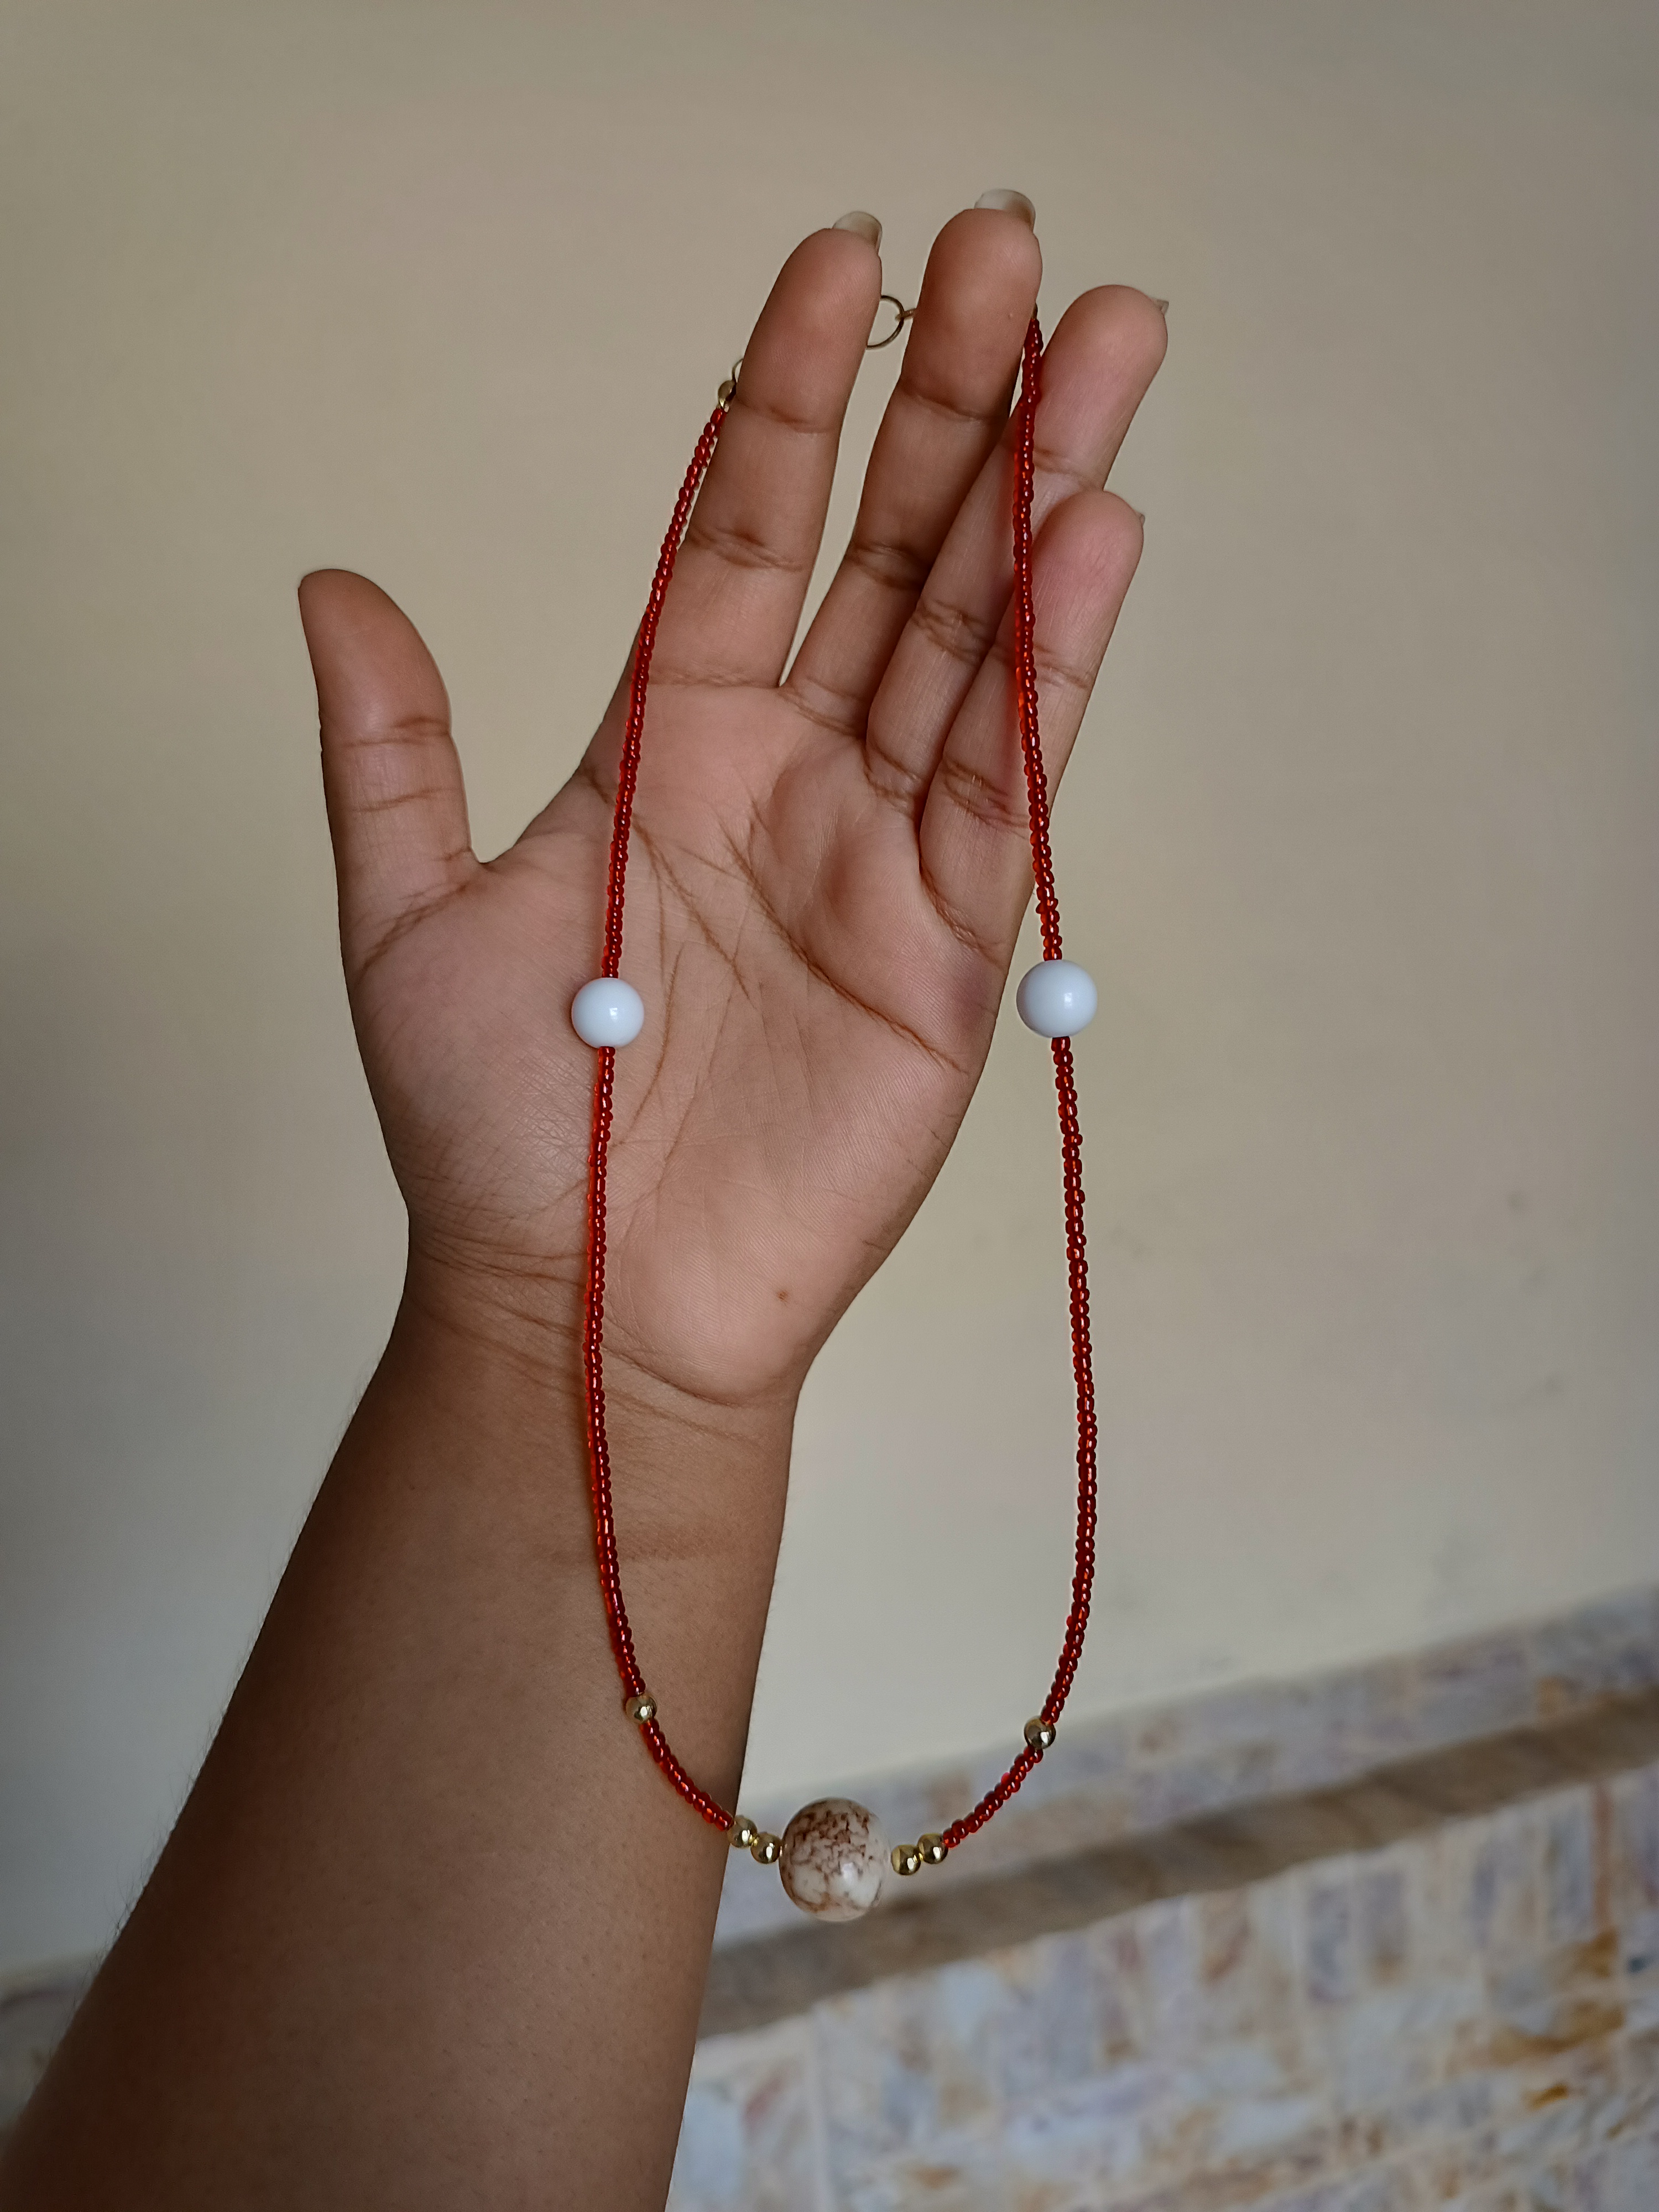
Y así terminamos nuestro juego de collar y anillos listo para usar, me encantó esta idea es muy linda y se ve elegante, el anillo le da un toque especial ya que añadimos las mismas cuentas doradas del collar.
And so we finished our necklace and ring set ready to wear, I loved this idea, it is very cute and looks elegant, the ring gives it a special touch since we added the same golden beads as the necklace.


Muchas gracias por visitar mi publicación, nos vemos en una próxima oportunidad con más ideas.
Thank you very much for visiting my publication, see you next time with more ideas.


Contenido original. - original content.
Los separadores y banner fueron realizados en Canva. - The dividers and banner were made in Canva.
Las fotografias son tomadas con mi teléfono Redmi Note 11s y editadas en PicsArt - The photographs are taken with my Redmi Note 11s phone and edited in PicsArt.
Traducción de: Google traductor - Translation of: Google translator.

Te ha quedado muy linda amiga...se ve realmente sencilla pero muy llamativa, me encantó. Felicidades
Muchas gracias por visitar mi publicación, que bueno que te haya gustado 😉☺️
Es hermoso. Me gusta que sea simple, me gustan los accesorios discretos y este es uno de los que usaria con toda certeza.
El color rojo le da el foco de atención justo.
Excelente diseño.
Muchísimas gracias 😉🥰
Un trabajo muy lindo amiga, entre la sencillez del los accesorios, representan mucha elegancia.
Gracias por regalarnos tu proceso creativo. Saludos...
!DIY
Muchas gracias por el apoyo, saludos 🥰
Impressive! It looks amazing. Good to see how you make this. Great job!
Muchas gracias por el apoyo, aprecio mucho su comentario 😉🥰
You can query your personal balance by
!DIYSTATS¡Felicitaciones!
Estás participando para optar a la mención especial que se efectuará el domingo 17 de marzo del 2024 a las 8:00 pm (hora de Venezuela), gracias a la cual el autor del artículo seleccionado recibirá la cantidad de 1 HIVE transferida a su cuenta.
¡También has recibido 1 ENTROKEN! El token del PROYECTO ENTROPÍA impulsado por la plataforma Steem-Engine.
1. Invierte en el PROYECTO ENTROPÍA y recibe ganancias semanalmente. Entra aquí para más información.
2. Contáctanos en Discord: https://discord.gg/hkCjFeb
3. Suscríbete a nuestra COMUNIDAD y apoya al trail de @Entropia y así podrás ganar recompensas de curación de forma automática. Entra aquí para más información sobre nuestro trail.
4. Visita nuestro canal de Youtube.
Atentamente
El equipo de curación del PROYECTO ENTROPÍA
Muchas gracias 😊