Illustrator nos ofrece funciones muy avanzadas, tantas que casi cualquier cosa que imaginemos las podemos crear. Hoy les traigo un bonito efecto que recuerda las ilustraciones de los años 70' una época realmente maravillosa. Es muy sencillo.
Illustrator offers us very advanced functions, so many that we can create almost anything we can imagine. Today I bring you a nice effect that reminds us of the illustrations of the 70's, a really wonderful era. It is very simple.
Lo primero que vamos a hacer es crear un círculo o un óvalo, con la herramienta forma, si la dejamos presionada nos mostrará las diferentes opciones, estas pueden ser rectángulo, elipse, estrella:
Para crear un círculo perfecto solo debemos presionar la tecla Control mientras dibujamos nuestro circulo.
The first thing we are going to do is to create a circle or an oval, with the shape tool, if we leave it pressed it will show us the different options, these can be rectangle, ellipse, star:
To create a perfect circle we just need to press the Control key while we draw our circle.

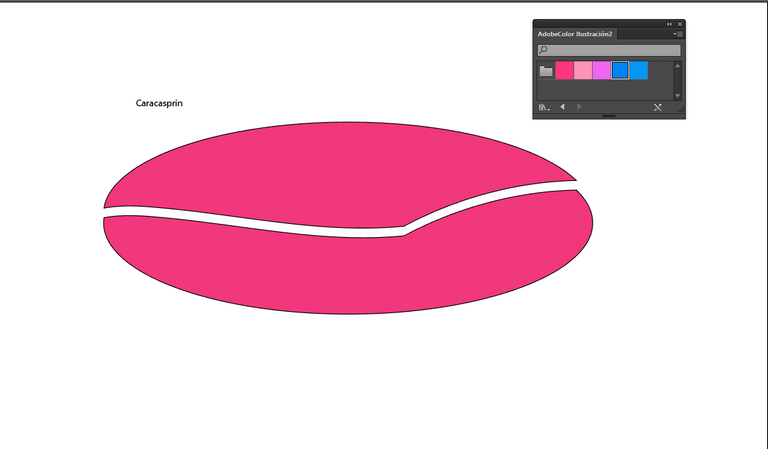
Luego con la herramienta Cuchilla, para a separar nuestro óvalo en dos. Una vez recortado nuestra forma vamos a escribir la palabra o la frase que queremos para nuestro diseño, yo escribí mi usuario y mi nombre real:
Then with the Knife tool, to separate our oval in two. Once our shape is cut out we are going to write the word or phrase we want for our design, I wrote my user and my real name:

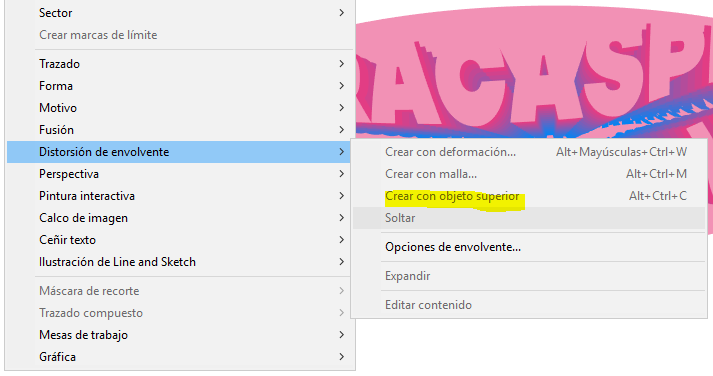
Para estar seguros de haber partido en dos nuestro círculo debemos comenzar a hacer el corte afuera del óvalo, una vez hecho esto escribimos nuestra frase. slogan, nombre y definimos la tipografía. Colocamos las palabras al fondo y con la herramienta Distorsión envolvente (Objeto>Distorsión envolvente>Crear con objeto superior) nuestra frase adoptará la forma que hemos creado con el óvalo. Un Vez que la frase adopte la forma procedemos expandirla seguimos la ruta Objeto > Expandir. Y la copiamos dos veces, la manera más rápida es arrastrar las dos frases mientras tenemos presionada la tecla ALT.
To be sure that we have split our circle in two we must start to make the cut outside the oval, once this is done we write our phrase, slogan, name and define the typography. We place the words at the bottom and with the Envelope Distort tool (Object>Envelope Distort>Create with top object) our phrase will adopt the shape we have created with the oval. Once the phrase adopts the shape we proceed to expand it by following the path Object > Expand. And copy it twice, the fastest way is to drag the two phrases while holding down the ALT key.
 |  |
|---|
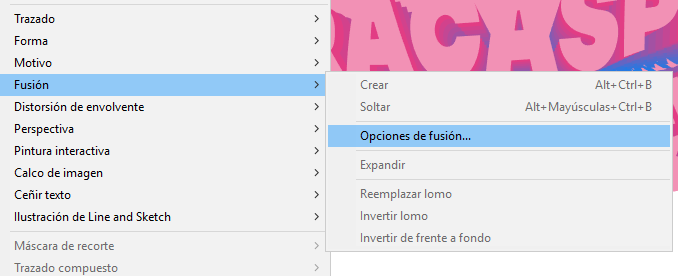
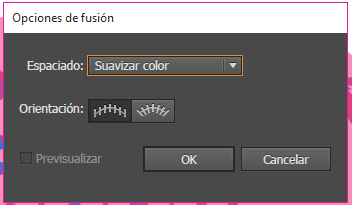
Podemos cambiar el color de las distintas copias, y así crear distintos efectos, es cuestión de jugar con los colores y en la experimentación ver cual se adapta mejor a nuestra idea. Ahora aplicaremos la herramienta fusión, también la encontramos en el apartado Objeto del menú principal. Podemos cambiar las opciones de la fusión, por ejemplo, mientras más pasos apliquemos más profundidad le daremos a nuestro texto.
We can change the color of the different copies, and thus create different effects, it is a matter of playing with the colors and experimenting to see which one best suits our idea. Now we will apply the blend tool, also found in the Object section of the main menu. We can change the blending options, for example, the more steps we apply the more depth we will give to our text.
 |  |
|---|
 |  |
|---|
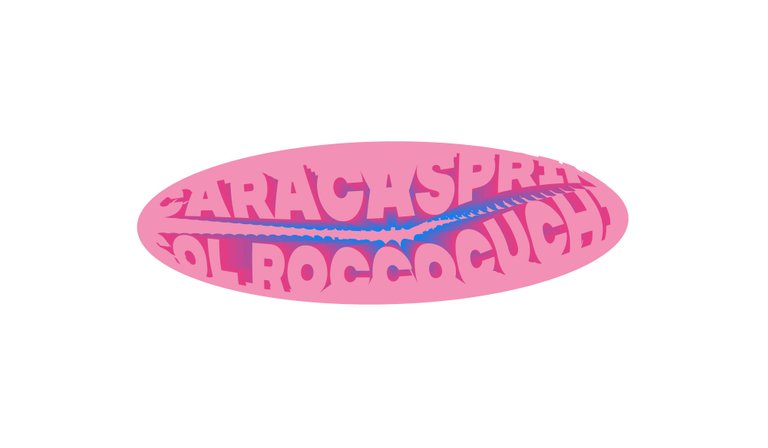
Para crear la sensación de profundidad coloqué el color más claro en las letras del fondo, pero también podemos invertirlo para crear una sensación ambigua y diferente, la tercera copia que le hicimos al texto lo coloqué en sobre el efecto de fusión, para diferenciar las capas y que se leyera bien el mensaje y así quedó:
To create the sensation of depth I placed the lighter color in the letters of the background, but we can also invert it to create an ambiguous and different sensation, the third copy that we did to the text I placed it on the fusion effect, to differentiate the layers and that the message was read well and so it was:
Paleta de colores descargada en: Adobe Color
Color palette downloaded from: Adobe Color

El contenido aquí presentado es de mi autoría.
Las fotografías son capturas de pantalla del proceso de trabajo en Illustrator, al igual que los GIF.
La imagen de portada fue editada en Illustrator con una de mis fotos.
Los separadores y banner fueron hechos por mi en Illustrator
The content presented here is my own.
The photographs are screenshots of the Illustrator work process, as are the GIFs.
The cover image was edited in Illustrator with one of my photos.
The separators and banner were made by me in Illustrator.

Muchísimas gracias por el apoyo!!! Es un verdadero honor!!!
Thank you for sharing this post in the DIYHUB Community!
Your content got selected by our fellow curator ashikstd & you just received a little thank you upvote from us for your great work! Your post will be featured in one of our recurring compilations which are aiming to offer you a stage to widen your audience within the DIY scene of Hive. Stay creative & HIVE ON!
Please vote for our hive witness <3
Thank you very much for always being attentive 💗
Efecto interesante el que lograste, se ve bien bonito en este tipo de trabajo. Lo aplicaré a otras cosas a ver que se puede lograr con esta distorción envolvente. Inventando se descubren cosas también jejeje
!discovery 30
Experimentando se aprende!! Me encantaría ver tus resultados!!!
This post was shared and voted inside the discord by the curators team of discovery-it
Join our Community and follow our Curation Trail
Discovery-it is also a Witness, vote for us here
Delegate to us for passive income. Check our 80% fee-back Program
Yay! 🤗
Your content has been boosted with Ecency Points, by @caracasprin.
Use Ecency daily to boost your growth on platform!
Support Ecency
Vote for new Proposal
Delegate HP and earn more