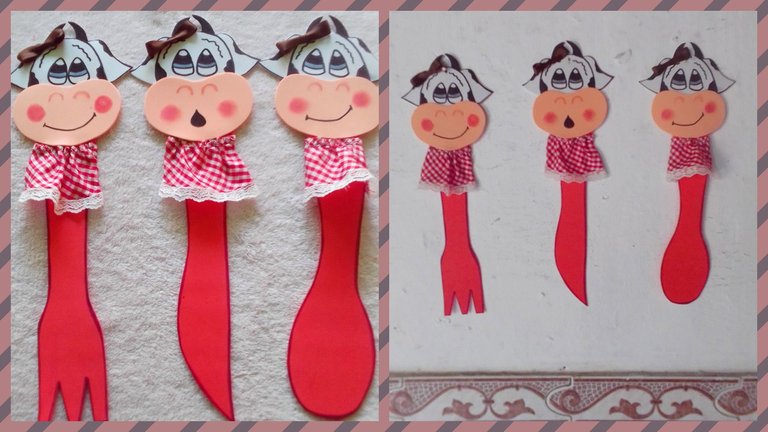
Good morning, it's a pleasure to be able to get back to my projects again. To start this new day, I will teach you how to make a set of kitchen utensils. One of the materials mainly used was EVA foam, followed by using tape, markers, shadow, among others. I made very good use of all the materials, in such a way, I saw a good result, which you will see below.
Buenos días, un gusto en poder retomar de nuevo con mis proyectos. Para comenzar este nuevo día, le enseñaré como hacer un juego de utensilios de cocina. Unos de los materiales que principalmente utilizados fue la goma eva, seguidamente usando cinta, marcadores, sombra, entre otros. Hice una muy buena utilización de todos los materiales, de tal manera, observe un buen resultado, la cual verán a continuación.
Let's get started:
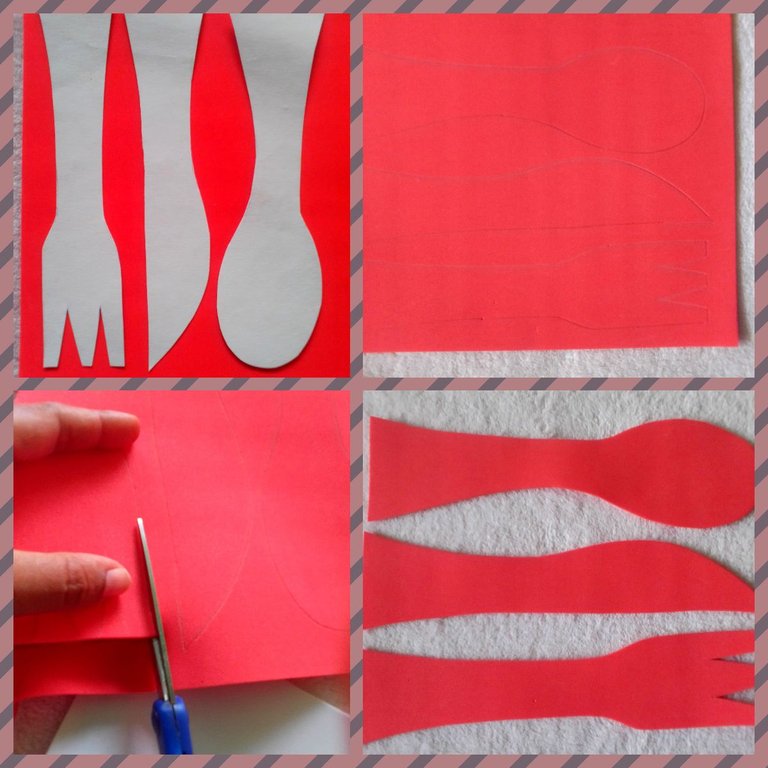
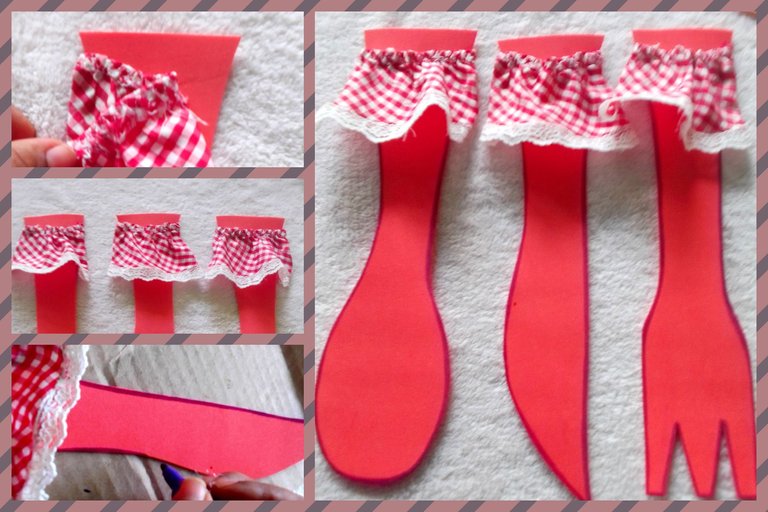
Step 1: To start, I made some molds of the utensils, which were made of cardboard, so that when marking they would remain fixed and not move, in this way I proceeded to cut each one of them, obtaining all 3.
Comencemos:
Paso 1: Para iniciar, elabore unos moldes de los utensilios, que fueran de cartón, para que así al marcar quedaran fijos y no se movieran, de esta manera procedí a cortar cada uno de ellos, obteniendo los 3.
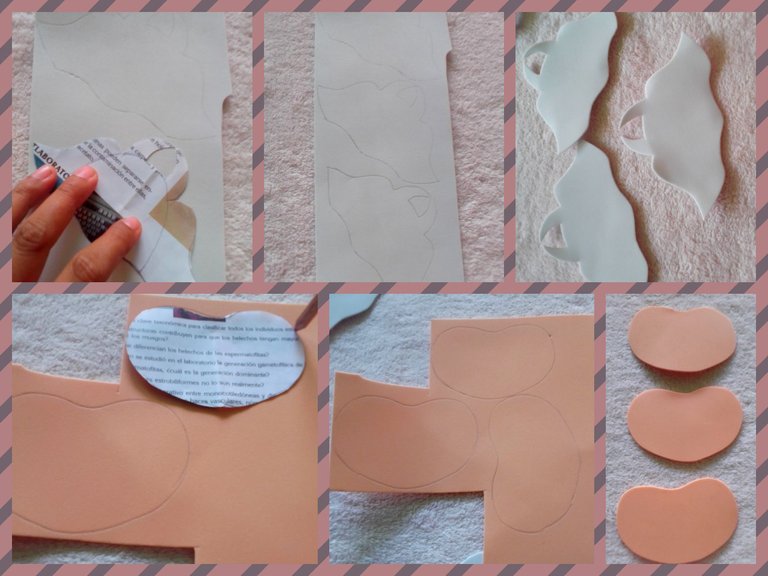
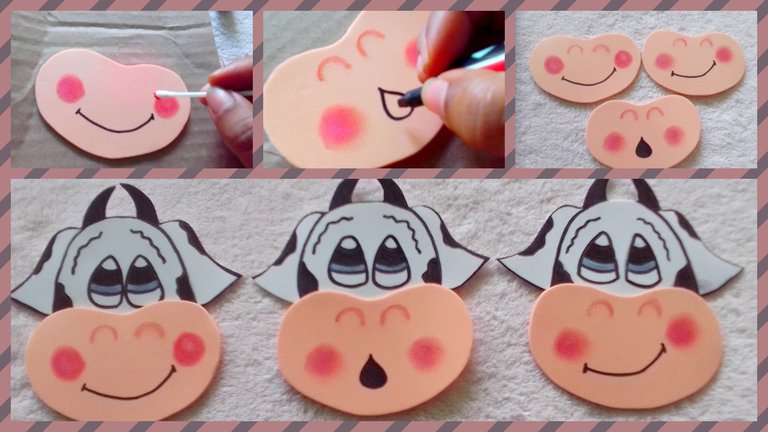
Step 2: Use the white EVA foam to make the cow's face, and with the help of a mold, I made a total of 3 faces. Likewise with the skin color, make 3 snouts.
Paso 2: Utilice la goma eva color blanco, para hacer la cara de la vaca, y con la ayuda de un molde, hice un total de 3 caras. Así igual con el color piel, elabore 3 hocicos.
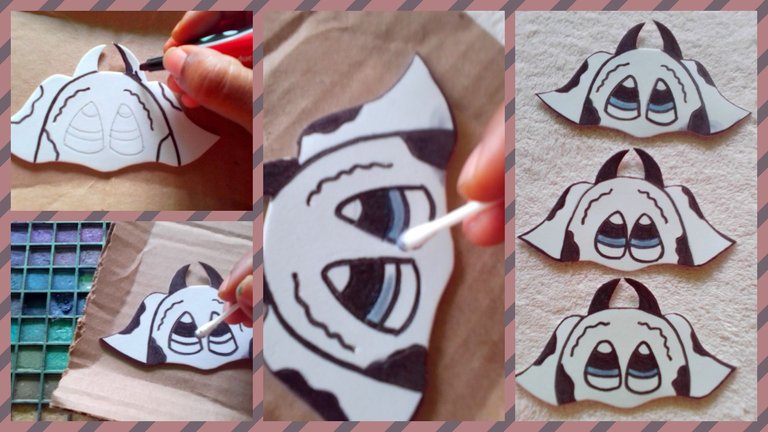
Step 3: Use a black marker to draw the spots on the cow's face, and to finish, use blue eyeshadow to draw part of its eyes.
Paso 3: Use un marcador negro, para dibujar las manchas en la cara de la vaca, y para culminar, utilice sombra color azul, para dibujar una parte de sus ojos.
Step 4: Draw the 3 snouts, and as you can see differently, on the mouth part. Draw their noses orange, cheeks red, and mouths with black marker. To obtain a better result, I joined the face with the snout, which when glued looks like this.
Paso 4: Dibuje los 3 hocicos, y como pueden observar de forma diferente, en la parte de la boca. Dibuje sus narices de color naranja, mejillas de color rojo, y las bocas con marcador negro. Para obtener un mejor resultado, uní la cara con el hocico, que al pegar queda de esta manera.
Step 5: At the top of each of them, I glued an already gathered fabric, with a faralao, that I carried along with it, leaving 1 cm in height. Then I ran a purple marker all over the edge.
Paso 5: En la parte superior de cada uno de ellos, le pegué una tela ya fruncida, con un faralao, que llevaba junto con ella, dejando 1 cm de altura. Luego le pase un marcador morado por todo el orillo.
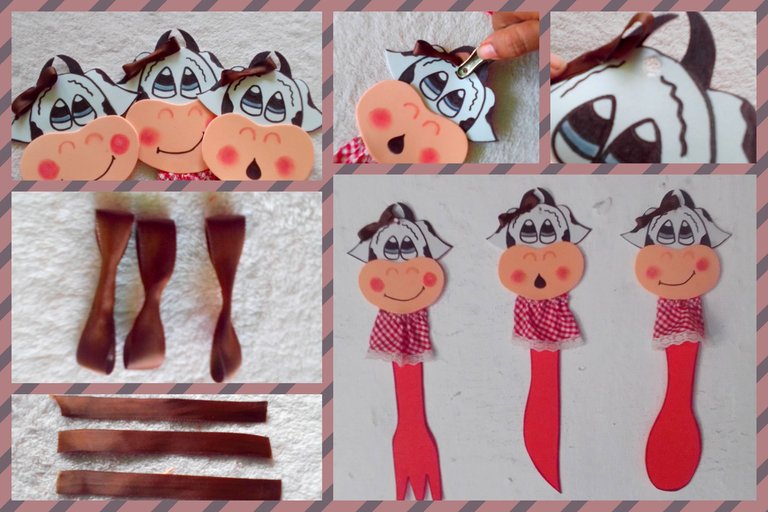
Step 6: I divided a ribbon into 3 equal parts, to make 3 small bows, I glue them on the part of the head, then with it I will make a space, pierce the EVA foam, in order to proceed to make the 3 holes, in each of the heads, for when when assembling each one has its hole. Here I conclude and leave you with my final result. I hope you enjoy doing it, it is very exciting and even more so if it is for yourself, with the purpose of decorating our kitchen. Happy day to all my friends, who transmit new teachings to us every day.
Paso 6: Dividí una cinta en 3 partes iguales, para hacer 3 lazos pequeños, los llevo a pegar en la parte de la cabeza, luego con él habré hueco, perfore la goma eva, para así proceder a elaborar los 3 huecos, en cada una de las cabezas, para cuando al montar cada uno tenga su orificio. Aquí culmino y los dejos con mi resultado final. Espero que disfruten al hacerlo, es muy emocionante y más si es para uno mismo, con la finalidad de decorar nuestra cocina. Feliz día para todos mis amistades, que día a día nos transmiten nuevas enseñanzas.
Collage making program: Fotojet Link
Translated from google translator Link
Photo editing program: PhotoFiltre 7
Las fotos fueron tomadas desde un Xiaomi Mi A2.
Programa para hacer el collage: Fotojet Enlace
Traducido del traductor de Google Enlace
Programa para editar fotos: PhotoFiltre 7
I say goodbye until another opportunity.
Thanks for your support.
Me despido hasta otra oportunidad.
Gracias por su apoyo.
Copyright @imargasa. All rights reserved.
Mi bella, tu vaquita quedo muy hermosa y muy tiernita y me gusta mucho como para decorar mi cocina.
Están hermosos, siempre me han gustado este tipo de manualidades
Congratulations @imargasa! You have completed the following achievement on the Hive blockchain And have been rewarded with New badge(s)
Your next target is to reach 30000 upvotes.
You can view your badges on your board and compare yourself to others in the Ranking
If you no longer want to receive notifications, reply to this comment with the word
STOPTo support your work, I also upvoted your post!
Check out our last posts:
que bellas, un excelente trabajo
what a beautiful, excellent work
Those are really cute and I like the blush you gave to the drawings
Great work