Hola mis bellos y bellas abejitas y arañitas porque ambas son muy laboriosas, ellas lo hacen con sus patitas y nosotros con nuestras manitos bendecidas para crear tantas cosas bellas.
Con la proximidad del Dia de las Madres, en años anteriores obsequio a mis vecinas madres y a las de mi familia pequeños detalles, pero en esta oportunidad el detalle es para que lo luzcan ella, no la nevera y que lo puedan llevar no solo ese dia sino todos los dias, ya que para mi el Dia de las Madres, es siempre.
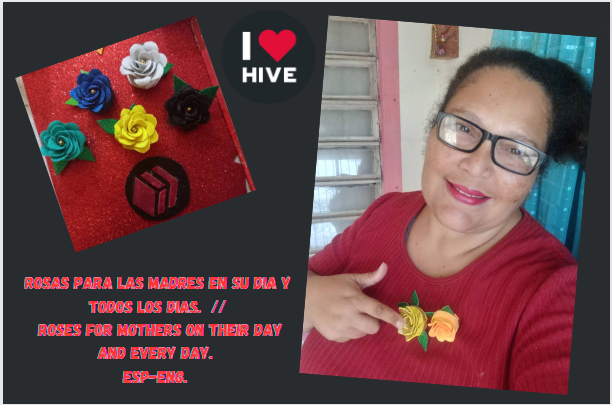
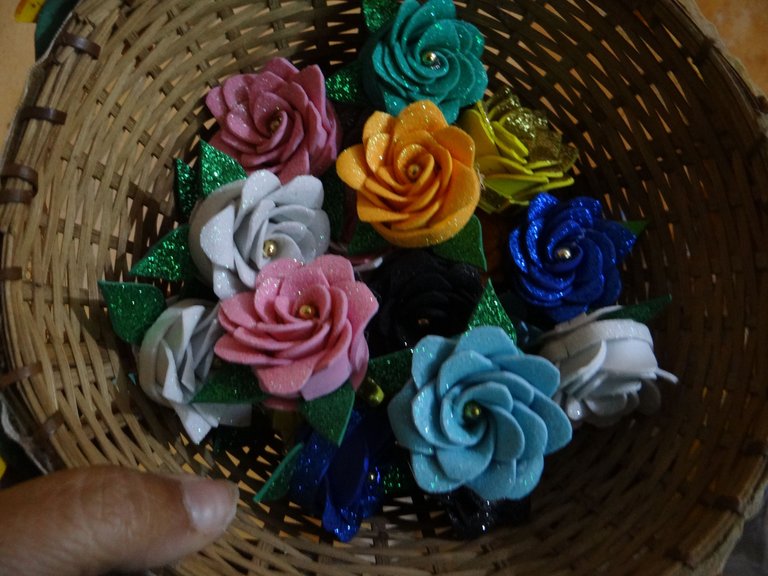
Para ello realice unos prendedores de forma de rosa en silicon, de varios colores, que al momento de darselos va ser como un sorteo, donde cada quien cerrara sus ojos para escoger su rosa, asi no diran que le di la mas bonita a una, todas estan bonitas y estab hechas con amor.
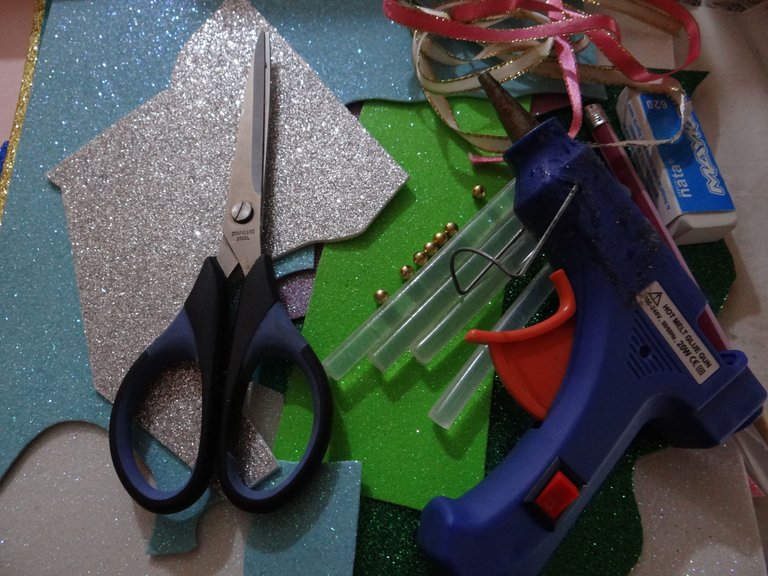
Materiales y herramientas a utilizar:
-Foami escarchado de varios colores preferiblemente los tonos nacarados es un consejo pero si debe ser escarchado.
-Pistola y barras de silicon.
-Cartulina, tijera, lapiz, objetos circulares.
-Nodrizas, perlitas doradas, cintas de raso de varios colores, esto tambien es opcional.

Paso a paso:
Durante el paso a paso veran diferentes colores porque de repente se me olvidaba con que la inicie porque me emocione y le tome la foto, luego le tome a la siguinete, pero lo que importa es la explicacion y el resultado final.
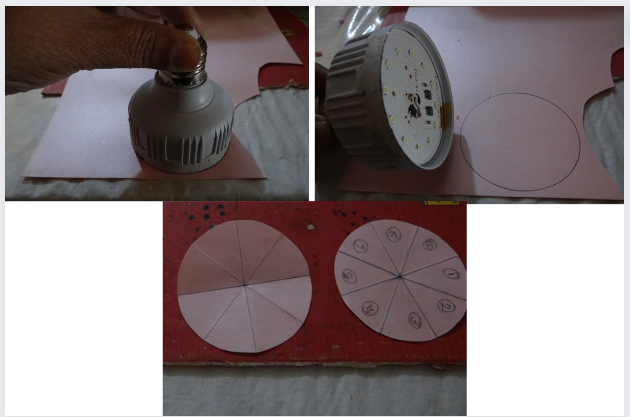
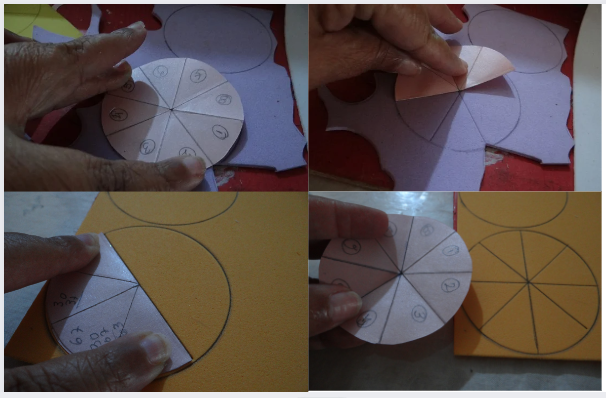
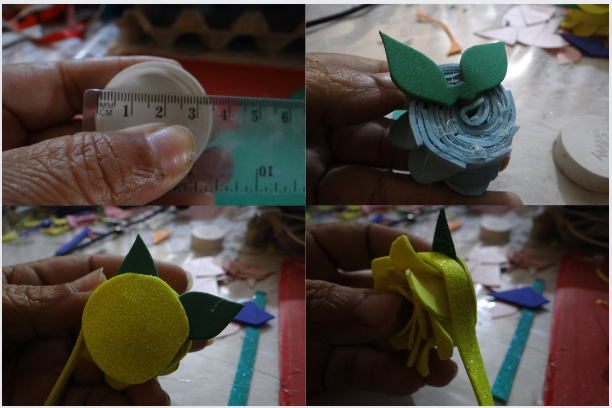
1.- Tomamos la cartulina puede ser reciclada, si es la escolar mejor porque permite doblar mejor, total es para el patron, en ella marco varios circulos con un objeto que tenga 7 cms de diametro y otro con la mitad 3.5 cms de diametro. A mi me funciono asi.
Recorto los circulos y luego doblo siempre a las mitades que tendre 8 partes iguales. Y las tengo ahi por un momento.
2.-Con el objeto que marque los circulos grandes, con el mismo marco en el foami porque es mas firme y no se gasta, para cada flor se necesitara dos circulos.
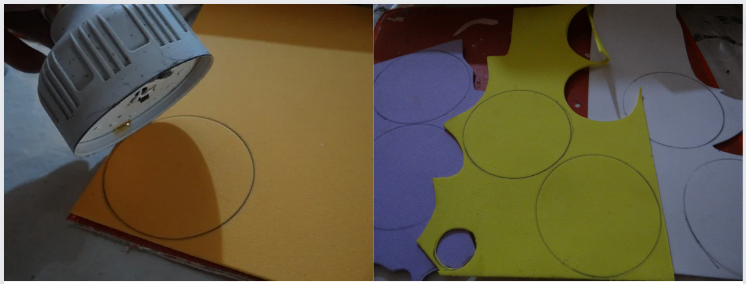
3.- A mi me gusta siempre sacar todas las piezas de una vez y luego armar todo.
Sobre los circulos en el foami, coloco el circulo de cartulina,voy doblando como esta ya en la cartulina y voy marcando con lapiz, al terminar debemos tener 8 partes, como 8 triangulos.
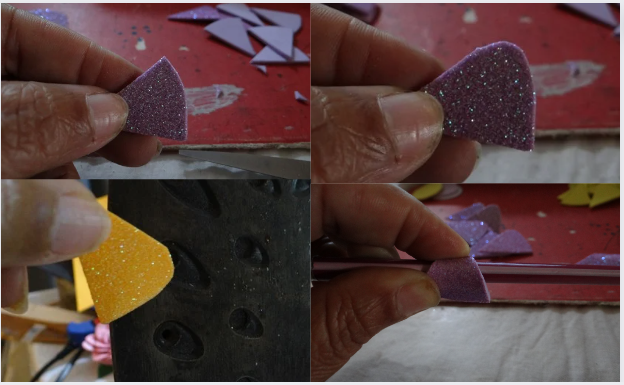
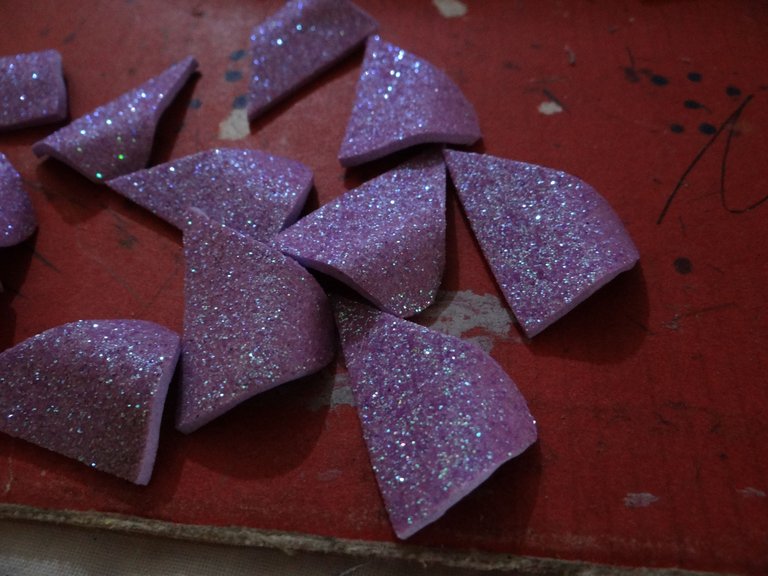
4.- Recortamos primero los circulos y despues los triangulos que seran los petalos. Cada rosa es de dos circulos y a su vez de 16 petalos.

5.- Antes a cada triangulo en la parte que ira como hacia arriba le damos una forma circular en uno de los extremos. Y despues con la plancha esa parte la pasamos y doblamos hacia adentro con un lapiz, u otro objeto cilindrico pero no muy grueso.
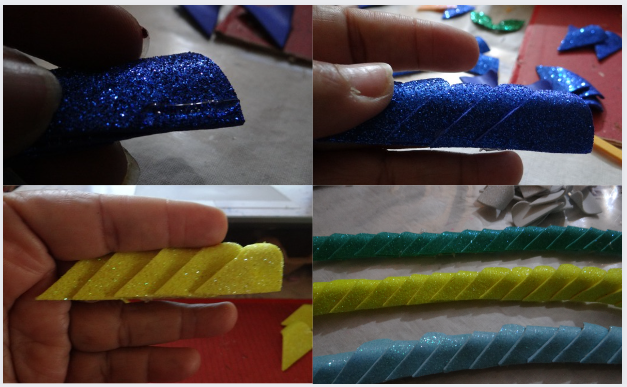
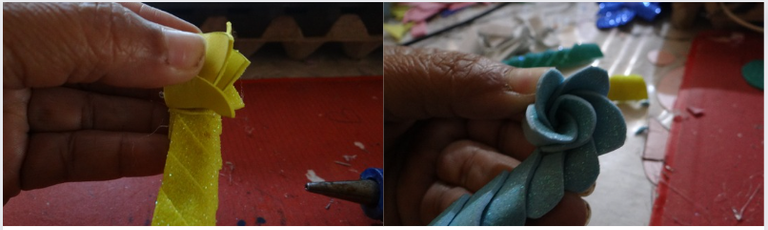
6.- Con la pistola de silicon, empezamos a pegar petalo sobre petalo como le ven en la foto, se coloca el silicon en la parte de abajo siempre desde la mitad hacia arriba y pegamos el otro petalo, eso se va hacer con los 16 petalos. Quedara como si fuera una cadeneta.
7.- Ahora si a hacer la rosa, desde el primer petalo vamos enrollando hacia adentro, en varias partes colocamos puntos de silicon, para asegurar, hasta llegar al petalo 16.
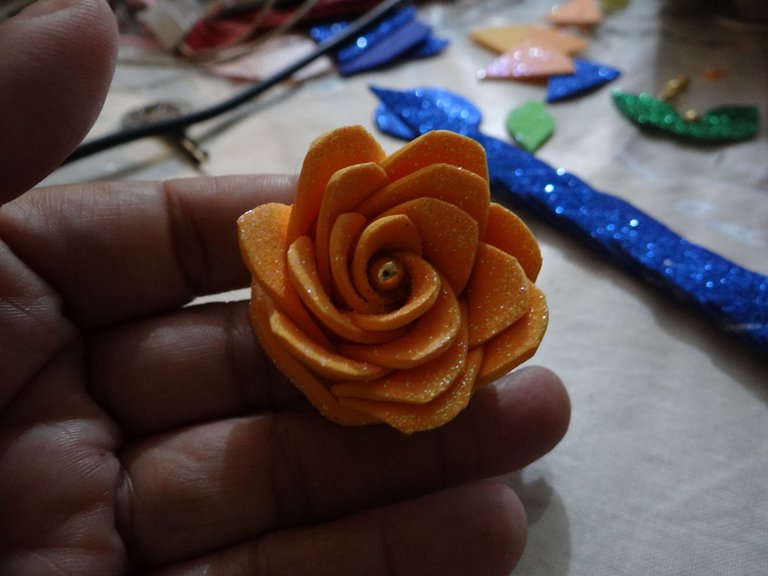
8.- Y ya tenemos la rosa, en el centro colocamos silicom y despues una perlita dorado, le da un toque muy lindo, esto fue idea mia no estaba en el video donde vi esta flor.
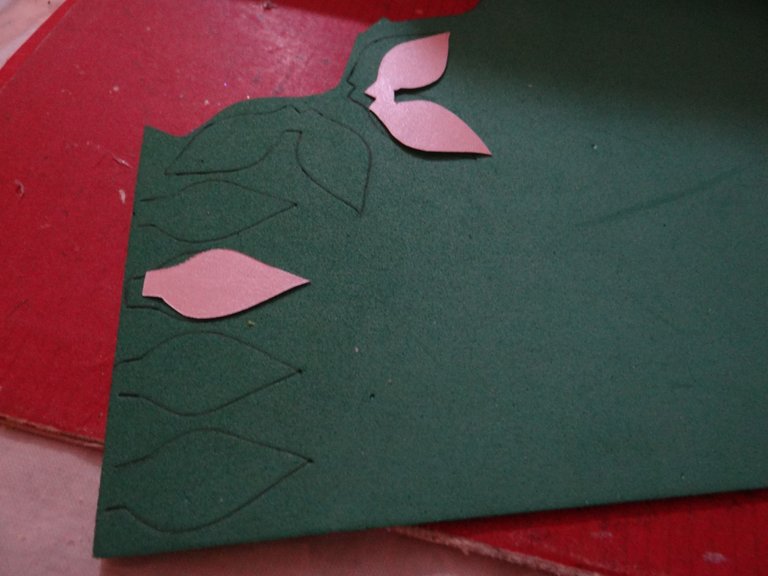
9.- Dejamos las rosas a un lado, para sacar el patron de las hojitas que deben ser pequeñas, yo saque dos modelos, que luego los paso al foami verde, recortar y pegar en la parte de abajo de las rosas.
10.- El otro objeto circular de 3.5 cms de diametro use una tapa plastica de un frasco de medicina, es para tapar la rosa debajo para que no quede asi, antes podemos quitar las hilachas que deja el foami.Pegamos el otro circulo, en este pegamos la nodriza o alfiler este es de gancho, con silicon, para asegurar este pongo un pequeño rectangulo del mismo color del foami de la tapa.
Ya asi hemos terminado las rosas, si unos lindos prendedores de rosa en foami.
Por ahi mencione un video, si porque vamos a estar claro muchas de nuestras ideas es porque la hemos visto en otras partes, redes sociales, pero yo siempre le hago alguna modificacion, mi toque personal como si fuera mi sello, mi marca.
Todas las fotos las fui tomando con mi camara SONY.
La traduccion del mismo hecha con DeepL.
SI gustan las pueden hacer quedan pocos dias para el Dia de las Madres, sorprendan a esas madres de su familia, am igas, vecinas, colegas y que¡VIVAN LAS MADRES.!

Hello my beautiful and beautiful little bees and spiders because both are very industrious, they do it with their little legs and we do it with our little hands blessed to create so many beautiful things.
With the proximity of Mother's Day, in previous years I have given small gifts to my neighbor mothers and those of my family, but this time the detail is for them to wear it, not the fridge and they can take it not only that day but every day, because for me Mother's Day is always.
To do this I made some pins in the shape of a rose in silicon, of various colors, which at the time of giving them will be like a raffle, where everyone will close their eyes to choose their rose, so they will not say that I gave the prettiest to one, all are beautiful and made with love.
Materials and tools to use:
-Frosted foami of various colors preferably pearly tones is a tip but if it must be frosted.
-Gun and silicone sticks.
-Cardboard, scissors, pencil, circular objects.
-Nodrizas, golden pearls, satin ribbons of various colors, this is also optional.
Step by step:
During the step by step you will see different colors because suddenly I forgot what I started it with because I got excited and took the picture, then I took the next one, but what matters is the explanation and the final result.
1.- We take the cardboard can be recycled, if it is the school better because it allows better folding, it is for the pattern, in it I mark several circles with an object that has 7 cm in diameter and another with half 3.5 cm in diameter. This is how it works for me.
I cut out the circles and then I always fold them to the halves so that I will have 8 equal parts. And I keep them there for a while.
2.-With the object that I mark the big circles, with the same frame on the foami because it is firmer and does not wear out, for each flower you will need two circles.
3.- I always like to take out all the pieces at once and then put everything together.
On the circles on the foami, I place the cardboard circle, I fold it as it is already on the cardboard and I mark it with pencil, when we finish we should have 8 parts, like 8 triangles.
4.- Cut out the circles first and then the triangles that will be the petals. Each rose is two circles and in turn 16 petals.
5.- Before each triangle in the part that will go as up we give a circular shape at one end. And then with the iron that part we pass it and bend inward with a pencil, or other cylindrical object but not very thick.
6.- With the silicon gun, start gluing petal on petal as you see in the picture, put the silicon on the bottom always from the middle up and glue the other petal, this will be done with the 16 petals. It will look like a chain.
7.- Now to make the rose, from the first petal we roll inward, in several parts we place silicone stitches, to secure, until we reach the 16th petal.
8.- And now we have the rose, in the center we place silicom and then a golden pearl, it gives a very nice touch, this was my idea was not in the video where I saw this flower.
9.- We leave the roses aside, to draw the pattern of the leaves that should be small, I drew two models, which then pass them to the green foami, cut and paste on the bottom of the roses.
10.- The other circular object of 3.5 cm in diameter use a plastic lid of a medicine bottle, is to cover the rose underneath so that it does not remain so, before we can remove the lint left by the foami.glue the other circle, in this we glue the nipple or pin this is a hook, with silicone, to secure this I put a small rectangle of the same color of the foami of the lid.
Now we have finished the roses, yes some nice rose pins in foami.
I mentioned a video, yes because we are going to be clear many of our ideas is because we have seen it elsewhere, social networks, but I always do some modification, my personal touch as if it were my stamp, my brand.
All the photos were taken with my SONY camera.
The translation of the same made with DeepL.
If you like you can make them, there are only a few days left for Mother's Day, surprise those mothers of your family, friends, neighbors, colleagues and LONG LIVE MOTHERS!

Me encantó el resultado final y también me gustó mucho la idea, si es un bonito detalle para las madres en su día 😊👍💕
Hola mi bella claro aun hay tiempo yo llevo 20 y me faltan...porque prefiero que me sobre y que no me falte asi no me quede a mi.
Están muy bellos estos detalles, ideales para hacer un pequeño obsequio en el día de las madres. ♥️
Genial idea.
Si bella, hola, hasta cuadro puedes hacer con ellas, despues de hechas vemos que hacemos jejeje
Thank you....very very god
Congratulations @zhanavic69! You have completed the following achievement on the Hive blockchain And have been rewarded with New badge(s)
Your next target is to reach 29000 upvotes.
You can view your badges on your board and compare yourself to others in the Ranking
If you no longer want to receive notifications, reply to this comment with the word
STOPCheck out our last posts:
Están preciosas las rosas, me encanta para regalar el día de las madres y lo bueno que lo haces con mucho esmero, felicidades.
Hola mi Petrica si para eso es que las hice, este fin de semana voy a obsequiar, si vivieras cerca de tocaba una.
Si todo lo que hago me gusta hacerlo con amorrrrrrrrrrrrrrrrr