Portada diseñada en Canva.
Saludos nuevamente amigos de esta colmena, motivados por la cercania de la celebracion del Dia de las Madres, este proximo 12 de mayo, en Venezuela, que se celebra el segundo domingo de mayo.
Un buen detalle tambien puede se los que se dan personalizado, con el nombre de esa persona, en ese caso de la mama.
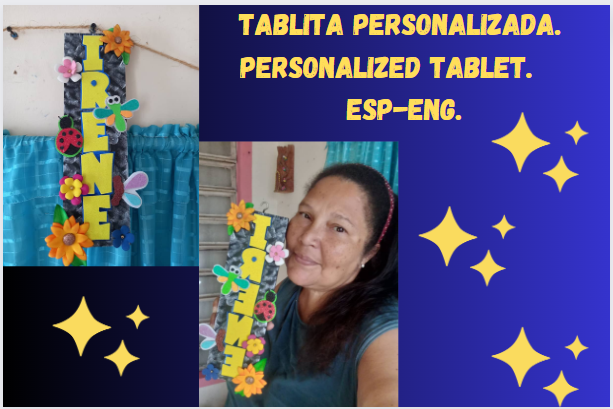
Yo hice este otro detalle para una madre, que es una gran amiga se llama IRENE, es docente como yo, madre-padre como yo, guerrera como muchas madres venezolanas.
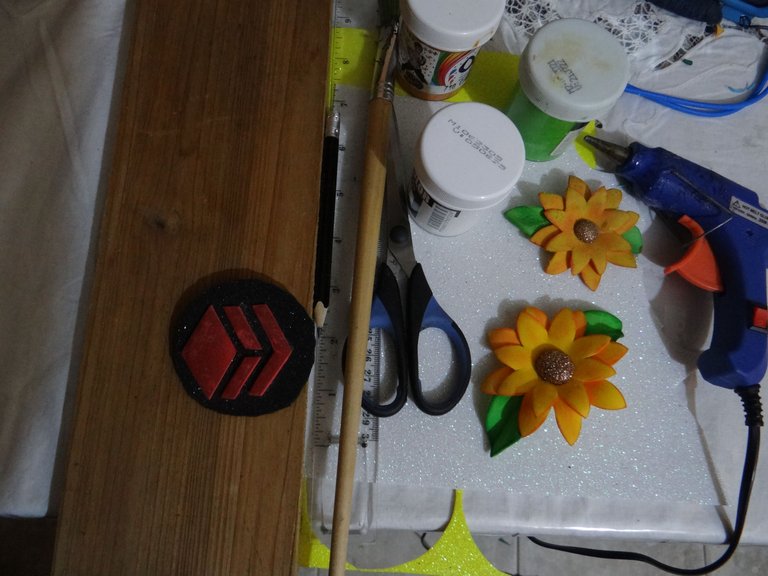
Claro antes de hacerlo primero busque con que contaba en mi casa de las tantas cosas que voy guardando y eso es bueno, encontre lo siguientes materiales:
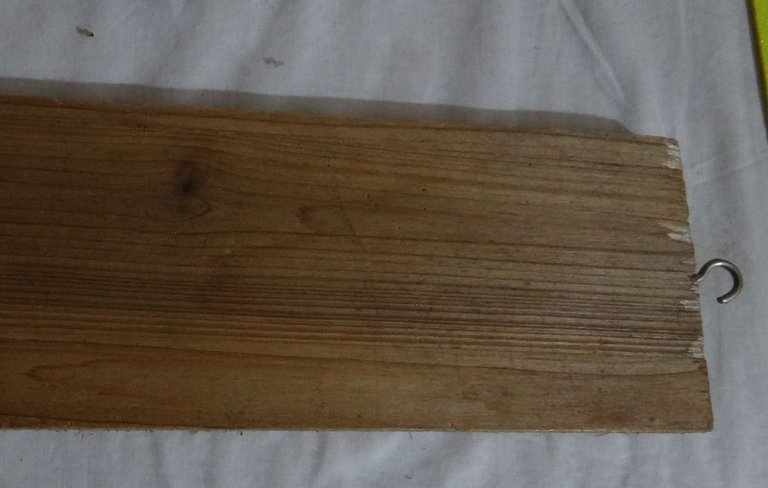
-Una tablita de madera de : 35 x 10 cms y 1,5 cms de grosor.
-Papel de lija.
-Pinturas al frio y pincel.
-Foami de varios colores de prederencia escarchada.
-Cartulina espejo azul rey.
-Pistola y barra de siliocn,
-Cancamo abierto.
-Figuras de foami.
Como lo hice:
1.- Lijar la tablita para evitar que alguna astilla me lastime, una vez lista, limpiamos la misma.
2.- En uno de los bordes mido la tablita como mide de ancho 10 cms, la mitad es 5 cms, ahi marco con lapiz, es para poner ahi el concamo, este se coloca a presion hacia adentro, es como un tornillo, se hace girando.
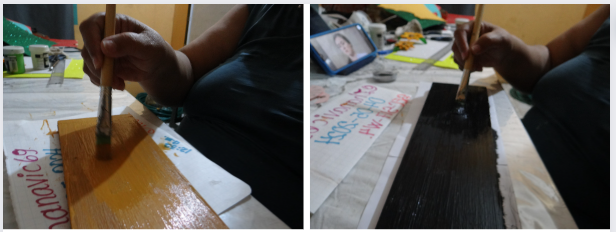
3.- Para pintar la tablita, use dos colores, primero uno marron asi como para fondo, una vez seco luego de dos capas, lo pinte de negro y lo deje secando.
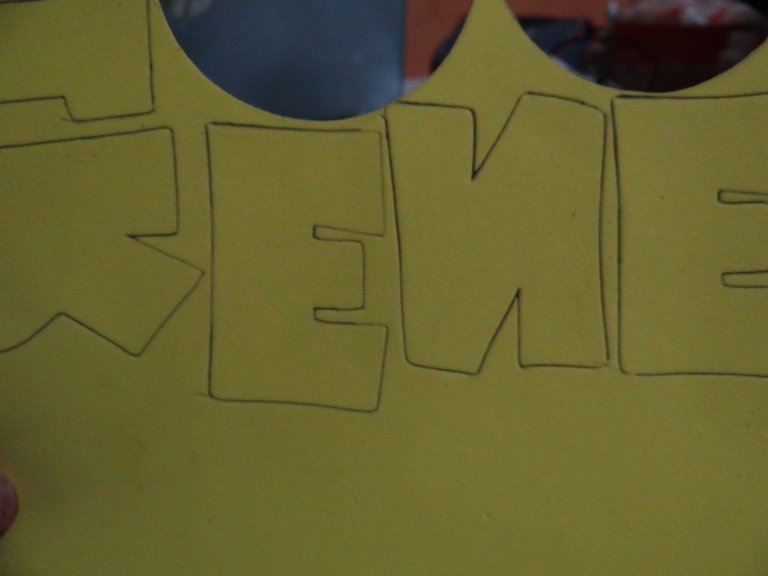
4.- Como la tabla la pinte de negro, entonces el nombre debia ser en un color que resaltara del foami. Use foami escarchado amarillo nacarado, marque las letras que forman el nombre no tan grandes y que quepan en la tabla, que lo hice el forma vertical.
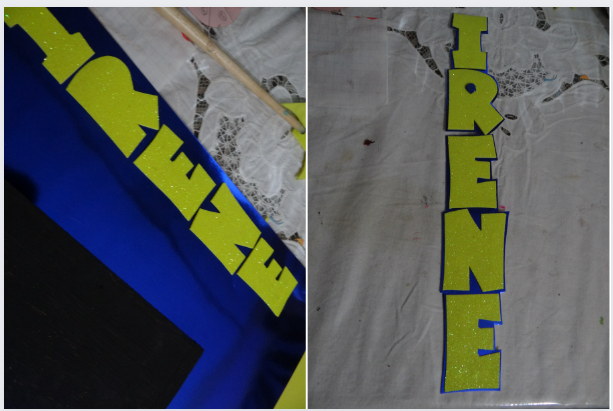
5.- Luego con la cartulina espejo azul, pegue las letras amarillas con silicon, para luego cortar el nombre dejando u borde perqueño asi como en los tooper.
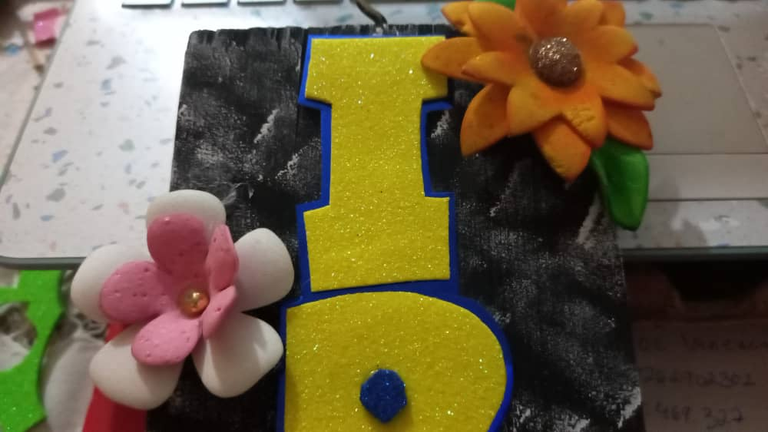
6.- Antes de pegarlo en la tabla, para minimizar mucho lo negro, con una esponja motee con pintura blanca. Ahora si pegue el nombre debe quedar centrado.
7.- Ahora a decorar con flores e insectos como de jardin, porque asi mas o menos se vera la tabla comi un jardin.
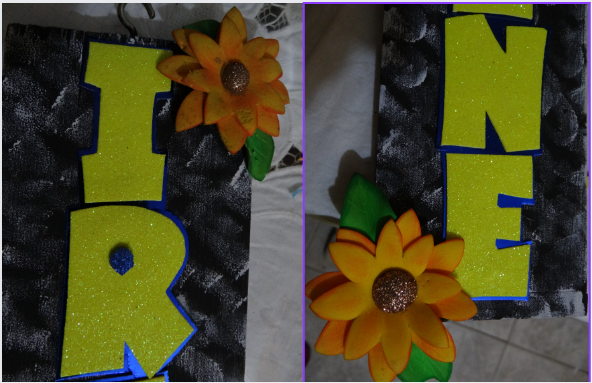
8.- Use unas flores, girasoles y otras que ya tenia recortadas y solo le di forma con la plancha y la hice doble, para luego pegarlas en la tabla.
9.- De los insectos: una mariposa que me encantan, una libelula y una mariquita, estas las hice rapido. Y luego las pegue.
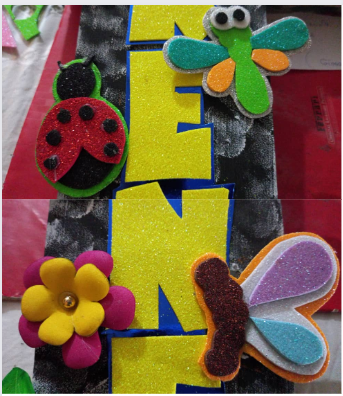
10.- Ya quedo lista la tablita para mi amiga y madre Irene.
Este tipo de manualidades o detallitos, me hace recordar cuando trabajaba en la escuela, los hacia para las madres de mis alumnos, tambien para otras madres como mis vecinas, colegas, pero en otra forma.
Todas las fotos las tome con mi camara Sony mi gran amiga.
Contenido original traducido con la app DeepL.
Greetings again friends of this hive, motivated by the proximity of the celebration of Mother's Day, this coming May 12, in Venezuela, which is celebrated on the second Sunday of May.
A good detail can also be personalized with the name of that person, in this case the mother.
I made this other detail for a mother, who is a great friend, her name is IRENE, she is a teacher like me, a mother-father like me, a warrior like many Venezuelan mothers.
Of course before I did it, I first looked for what I had in my house of the many things that I keep and that's good, I found the following materials:
-A small wooden board of: 35 x 10 cm and 1.5 cm thick.
-Sandpaper.
-Cold paints and brush.
-Foami of various colors of frosted prederence.
-King blue mirror cardboard.
-Gun and siliocn bar,
-Open cancanamo.
-Foami figures.
How I did it:
1.- Sand the little board to prevent any splinters from hurting me, once ready, we cleaned it.
2 .- In one of the edges I measure the board as it measures 10 cm wide, half is 5 cm, there I mark with pencil, is to put there the concave, this is placed inward pressure, it is like a screw, is done by turning.
3.- To paint the board, I used two colors, first a brown one as well as for background, once dry after two coats, I painted it black and let it dry.
4.- As the board was painted black, then the name had to be in a color that would stand out from the foami. I used pearly yellow frosted foami, mark the letters that form the name not so big and that fit in the board, I did it vertically.
5.- Then with the blue mirror cardboard, glue the yellow letters with silicone, and then cut the name leaving a small border as in the tooper.
6.- Before gluing it on the board, to minimize the black, with a sponge stain it with white paint. Now if you paste the name it must be centered.
7.- Now decorate with flowers and insects like a garden, because this way the board will look more or less like a garden.
8.- I used some flowers, sunflowers and others that I already had cut out and I just gave it shape with the iron and made it double, and then glued them on the board.
9.- Insects: a butterfly that I love, a dragonfly and a ladybug, these I did quickly. And then I glued them.
10.- The little board is ready for my friend and mother Irene.
This kind of handicrafts or little gifts, makes me remember when I worked at school, I made them for the mothers of my students, also for other mothers like my neighbors, colleagues, but in another way.
All the pictures were taken with my Sony camera, my great friend.
Original content translated with the app DeepL.

Está muy lindo y original. Es una buena y bonita idea. Gracias por compartir este proyecto amiga. Saludos 🌺🌷🌹💐🌺🌹
Muy lindo, me encantó. Abrazos.
Gracias es facil la puedes hacer.
Muy lindo y delicado trabajo.
!discovery 40
Gracias animate consigue una tablita y haces uno.
This post was shared and voted inside the discord by the curators team of discovery-it
Join our Community and follow our Curation Trail
Discovery-it is also a Witness, vote for us here
Delegate to us for passive income. Check our 80% fee-back Program
un diseño bonito, sencillo y genial jeje buen trabajo!
nice, simple and cool design hehe good job!
Yeehaw! What a rootin' tootin' craft for your friend Irene, partner! Great job on spreading joy with your thoughtful handmade gift!