Hola comunidad, hoy vengo con un nuevo tutorial de NFTs, debido a que a muchos usuarios se les ha sido tedioso poder añadir sus coleccionables digitales a su billetera, hoy explicaré el proceso paso a paso para poder agregarlos de forma efectiva. ¡Comencemos!
Hello community, today I come with a new NFT tutorial, because many users have found it tedious to add their digital collectibles to their wallet, today I will explain the step by step process to be able to add them effectively. Let's get started!
Primero que todo, para realizar el procedimiento, debes tener la billetera Metamask instalada ya sea en tu navegador o dispositivo móvil, además de contener dentro al menos un activo financiero o no fungible, ya que comentaré como hacerlo para ambos casos al ser casi de la misma manera.
First of all, to perform the procedure, you must have the Metamask wallet installed either in your browser or mobile device, as well as containing at least one financial or non-fungible asset inside, as I will discuss how to do it for both cases as they are almost the same way.
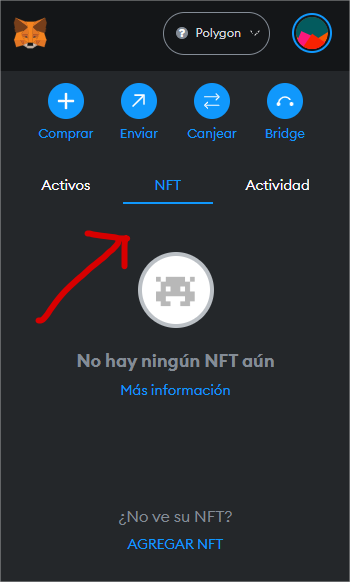
Teniendo en cuenta esto, abrimos Metamask, y seleccionamos el panel donde dice NFT y pulsamos el botón AGREGAR NFT.
With this in mind, we open Metamask, and select the panel where it says NFT and click the ADD NFT button.
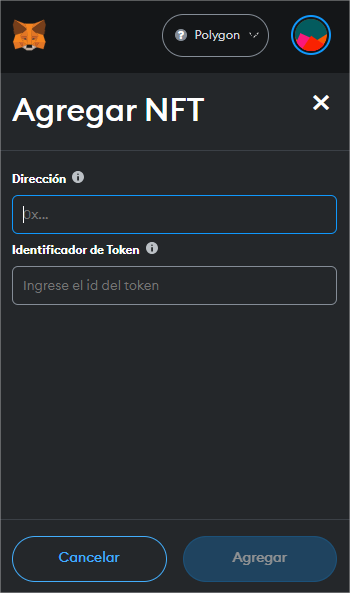
Veremos que nos piden, para agregar un NFT, una dirección y un identificador de token que son los datos provenientes del contrato que nos permitirán recoger y visualizar la multimedia de nuestro activo, vamos a ello:
We'll see that we are asked, to add a NFT, an address and a token identifier which are the data coming from the contract that will allow us to collect and visualize the multimedia of our asset, let's go to it:
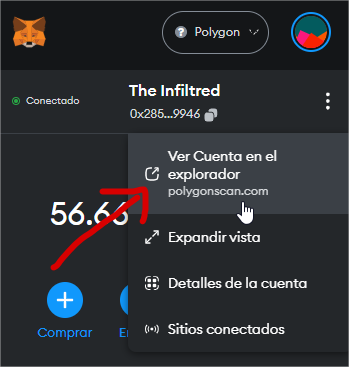
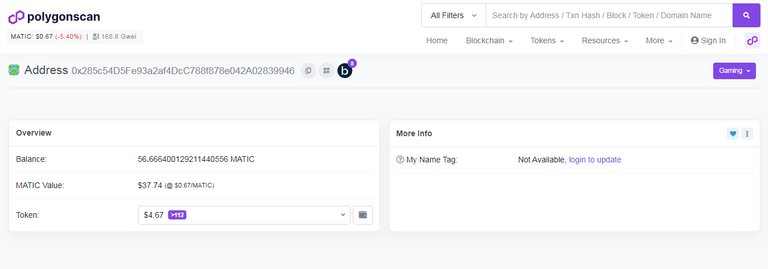
Vamos a ir a los tres punticos dentro de la billetera y le daremos en Ver Cuenta en el explorador; en caso del procedimiento para teléfonos móviles, debemos ir al menú de hamburguesa (las tres rayitas) y presionar el botón que dice Ver en (la red donde te encuentres), también puedes identificarlo con el ícono de un ojo.
Abrirá una ventana como esta.
We will go to the three dots inside the wallet and click on View Account in browser; in case of the mobile procedure, we must go to the hamburger menu (the three little lines) and press the button that says View in (the network where you are), you can also identify it with the icon of an eye.
It will open a window like this.
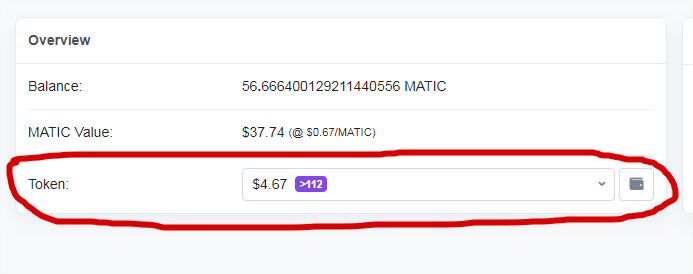
Nos dirigimos al apartado de Token, donde navegaremos entre los diferentes activos de nuestra billetera, si queremos agregar un NFT, buscaremos, en caso de la red de Polygon (ERC-751 ó ERC-1155) y para la red de Binance (BEP-20).
We go to the Token section, where we'll navigate between the different assets of our wallet, if we want to add a NFT, we will look for, in case of Polygon network (ERC-751 or ERC-1155), and (BEP-20) for Binance network.
Escogí el primero que me aparece ya que no tengo ninguno agregado en mi billetera.
I picked one at random since I don't have any added to my wallet.
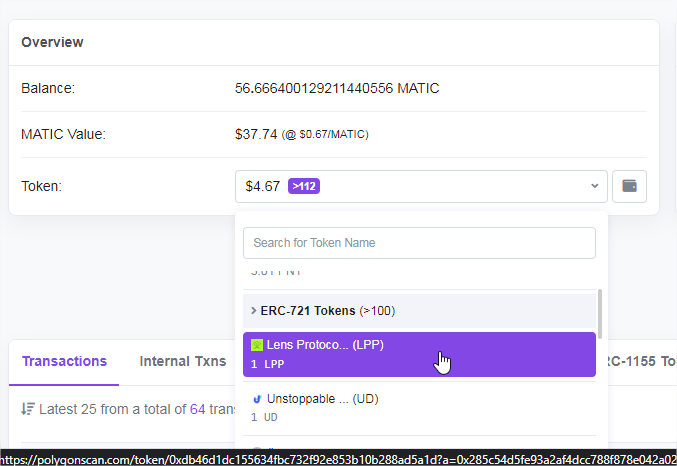
Presionamos y se nos abre una ventana como la de abajo.
Click on it and a window like the one below will open.

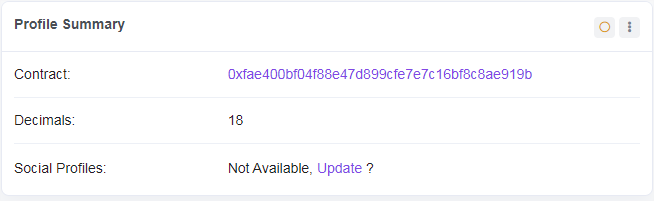
La sección señalada en rojo hace referencia al contrato del token, para cualquiera que seleccionemos, el contrato estará ubicado en el mismo lugar, este, lo copiamos y lo guardamos temporalmente en un gestor de notas o chat.
The section marked in red refers to the token contract, for whichever one we select, the contract will be located in the same place, copy it and save it temporarily in a note manager or chat.
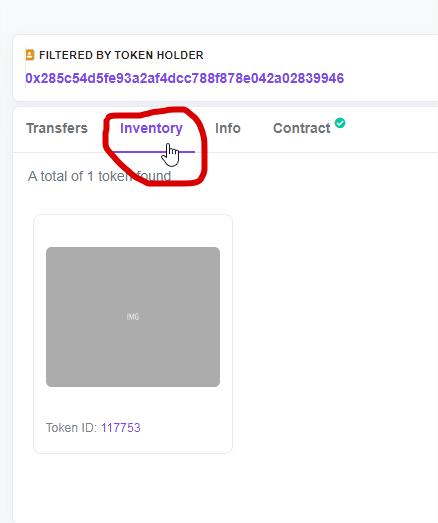
Más abajo, dando scroll, nos dirigimos a Inventory y tomamos el ID del token y lo copiamos también a nuestro gestor de notas temporal. Cabe destacar que puedes tener múltiples activos dentro del mismo contrato, sólo debes seleccionar o todos o buscar (si sabes que ID tiene) el NFT que quieres mostrar.
Further down, we go to Inventory section and take the token ID and copy it to our temporary note manager as well. Note that you can have multiple assets within the same contract, just select either all or search (if you know what ID it has) for the NFT you want to display.
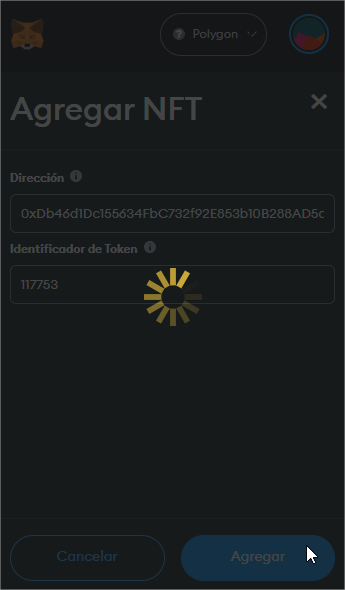
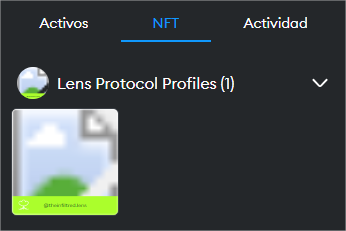
De nuestro gestor copiamos ambos, el contrato y el ID y los pegamos en Metamask, y listo, ya podemos ver nuestro NFT.
We copy both, the contract and the ID from our manager and paste them in Metamask, and that's it, we can see our NFT.
Para agregar criptomonedas el procedimiento es casi el mismo, sólo debemos seleccionar, en vez de un NFT, alguna de las monedas que no tenemos agregadas en nuestra billetera, la pulsamos y copiamos su contrato y sus decimales, luego, vamos a Metamask y seleccionamos la opción AGREGAR ACTIVO y pegamos allí estos datos.
To add cryptocurrencies the procedure is almost the same, we only have to select, instead of a NFT, one of the coins that we don't have added in our wallet, click on it and copy its contract and decimals, then, we go to Metamask and select the option ADD ASSET and paste this data there.
Recuerda que sólo debes añadir activos que se encuentren en tu billetera, de lo contrario te dará error y tampoco se mostrarán. No puedes ver en tu billetera un billete de 500 CUP que no tienes ¿O sí? Espero que te haya gustado este pequeño tutorial, sin más, agrega los NFTs que aún no tienes y enséñaselos a tus amigos, nos vemos la próxima semana.
Remember that you should only add assets that are in your wallet, otherwise you will get an error and they will not be displayed either. You can't see in your wallet a 500 CUP bill that you don't have, can you? I hope you liked this little tutorial, without further ado, add the NFTs you don't have yet and show them to your friends, see you next week!

Banner made in Canva
Main image made in Adobe Photoshop
Screenshots to my Metamask wallet
Screenshots to Polygonscan
Hermano definitivamente eres unos de mis Hiver favoritos. Tu contenido es de lo mejores que he visto. Mil Gracias una vez más por compartir. Un abrazo
¡Muchas gracias por tus alentadoras palabras bro! 😃
Es un placer poder compartir mis conocimientos con ustedes por acá, vienen muchas más mieles 😃
Congratulations @theinfiltred! You have completed the following achievement on the Hive blockchain And have been rewarded with New badge(s)
Your next target is to reach 500 comments.
You can view your badges on your board and compare yourself to others in the Ranking
If you no longer want to receive notifications, reply to this comment with the word
STOPMuy buen tutorial. Excelente
¡Muchas gracias por su apreciación!
siempre he querido hacer de mis fotos NFTS, me interesa mucho ese mundo, podrias explicar un poco como seria ?
I have always wanted to make my photos NFTS, I am very interested in that world, could you explain a little how it would be?
@theinfiltred tu sabes que para poner en práctica el tutorial te necesitamos. Un abrazo mil bendiciones y todo nuestro cariño 🤗😘❤️
Jajajaja okok, pronto hago tutorial en vivo. Saludos.