Buenas noches Comunidad Holozing
Espero te guste.
Comencemos:
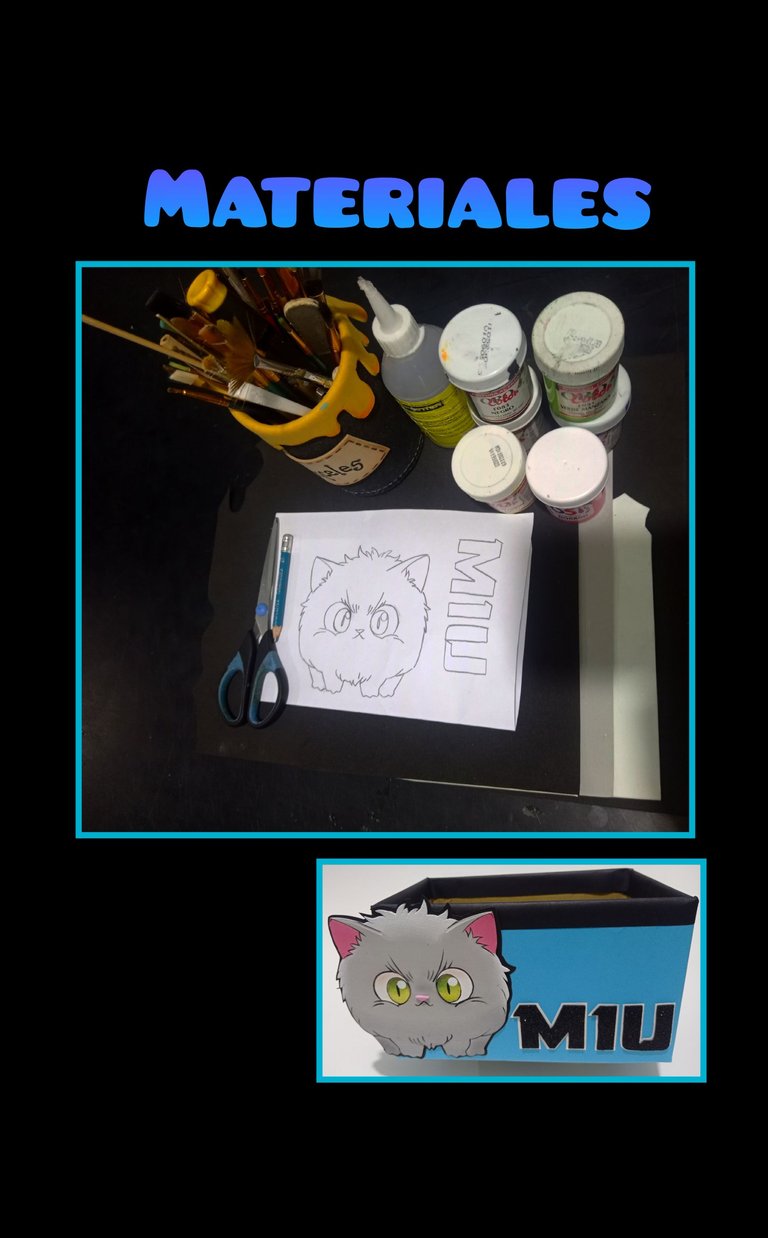
| Foami mate | Pinturas y pinceles |
|---|---|
| Dibujo o impresión | Cartulinas escolar |
| Tijera y cuchilla | Lápiz 6B |
| Regla | Silicón |
| Caja reciclada |
Procedimiento:
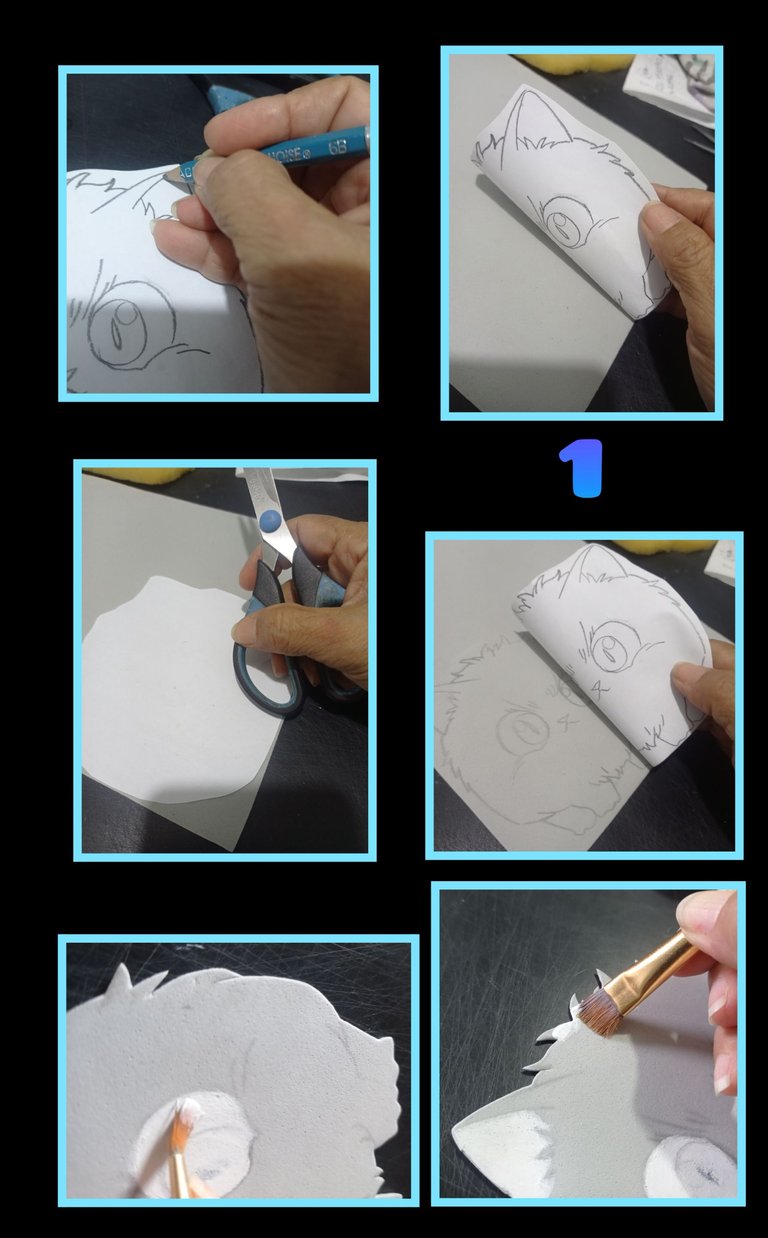
- Para realizar a MIU, remarca el dibujo con un lápiz 6B o de mina blanda, luego coloca sobre el foami, sujeta bien y frota con los anillos de la tijera, luego asegúrate que se haya transferido bien el dibujo levantando de un lado el dibujo y recorta por todo el borde.
- Ahora comienza a pintar rellenando los ojos con pintura blanca, deja secar y aplica otra capa, haz igual en las orejas, luego moja el pincel en agua, quita el exceso de agua pasando por un paño seco, después moja en pintura blanca la punta del pincel y comienza a pintar el borde superior, guiándote por el dibujo.
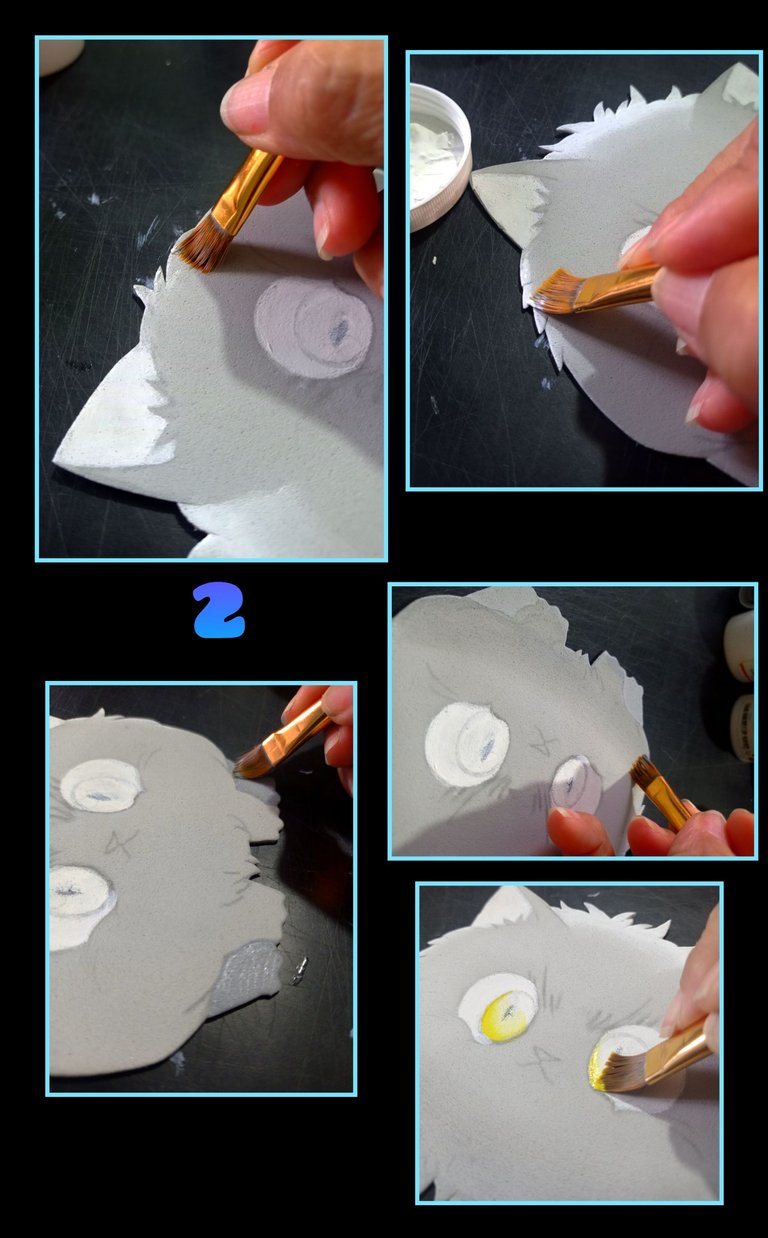
- Deja secar y vuelve a pasar el pincel por los contornos que van en blanco y deja secar.
- Ahora rellena las paticas con pintura gris, deja secar y luego difumina igual la parte baja de las paticas.
- Aplica pintura amarilla en la parte baja de los ojos.

- Ahora combina pintura verde con gris para darle el tono lo más parecido y aplica en la parte de arriba, luego lava el pincel y moja en pintura amarillo y une los dos colores difuminando hasta que nos se vea la uniòn de colores.
- Ahora pinta las líneas y borde de los ojos con pincel o marcador punta fina por si se te hace difícil.
- Después comienza a rellenar las orejas con pintura rosada.
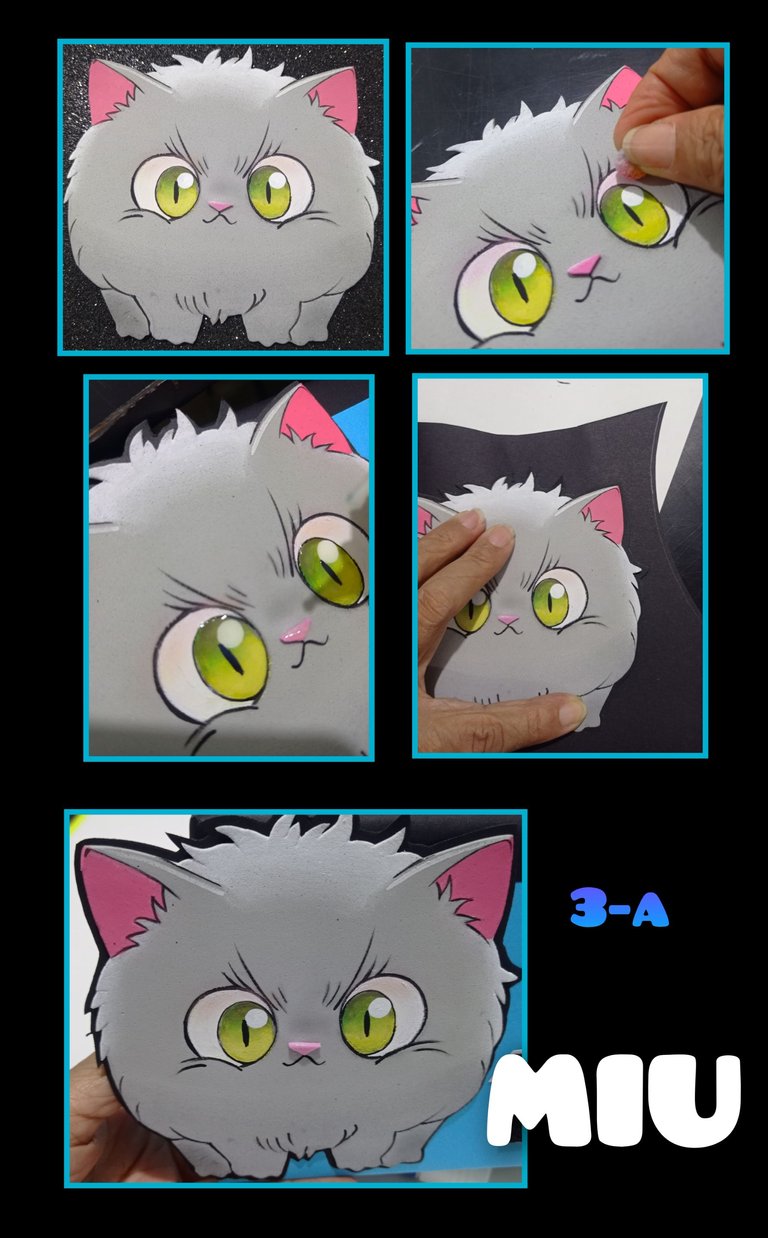
- Pega la nariz y pasa un algodón por tiza y frota con cuidado sobre la parte superior del ojo.
- Ahora pega sobre cartulina negra o foami y recorta dejando un pequeño borde.
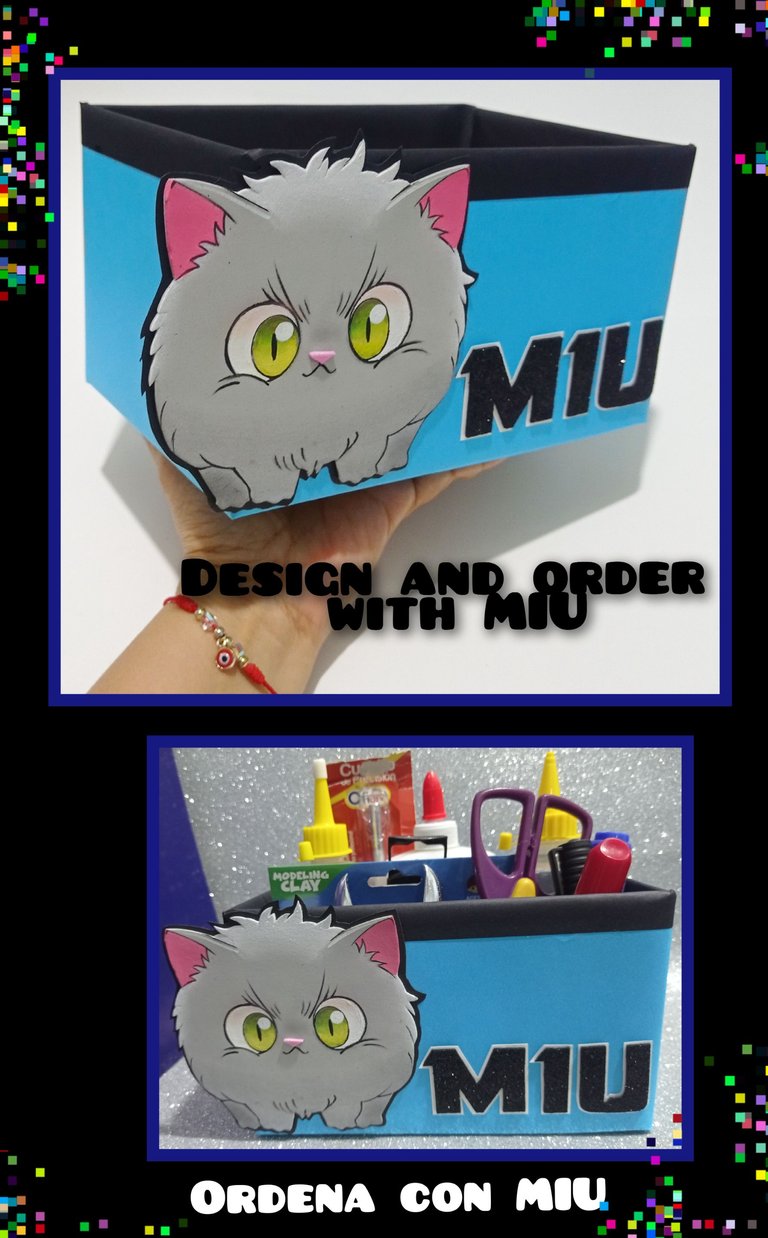
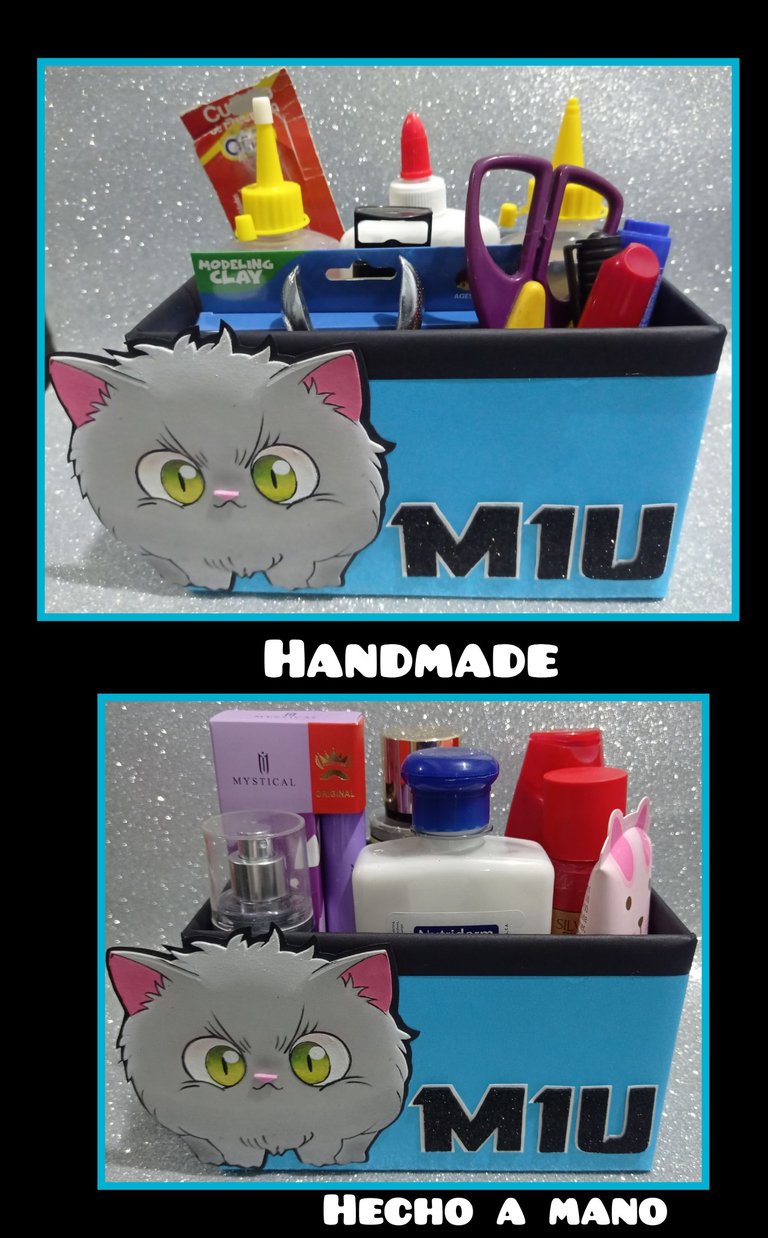
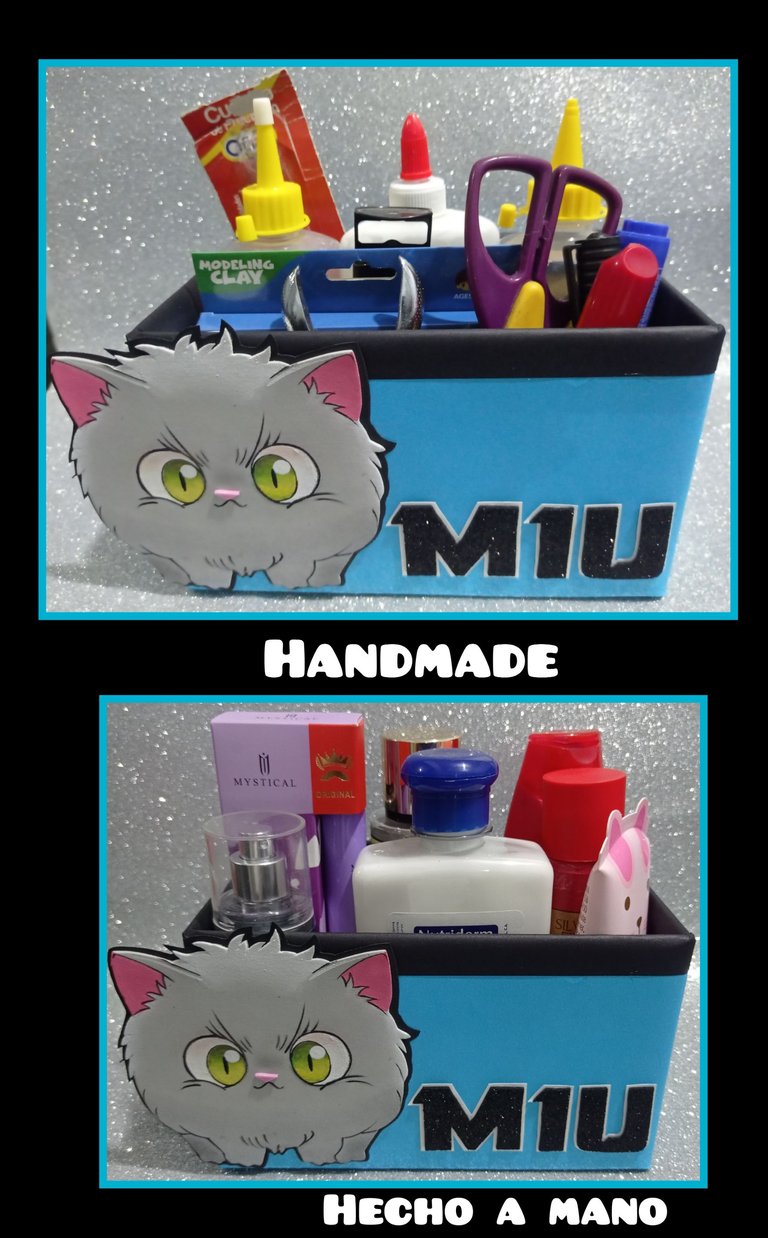
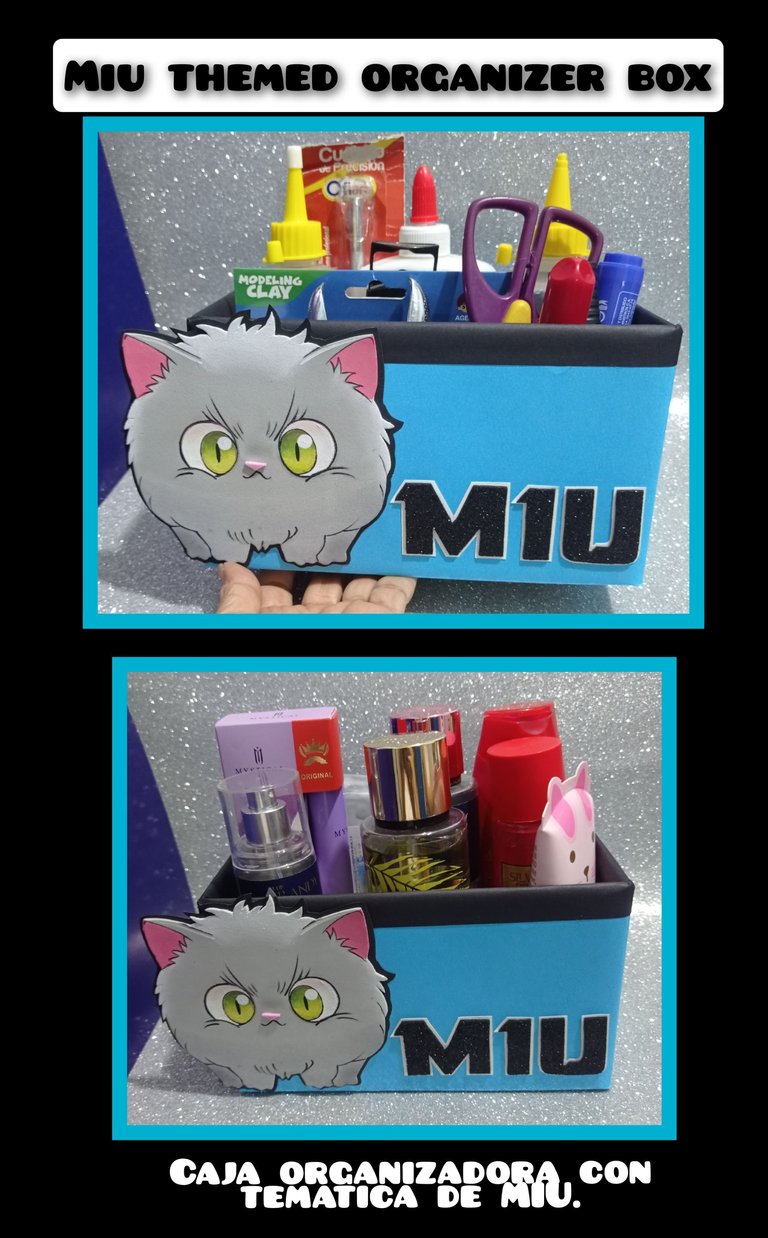
Así quedó listo MIU!
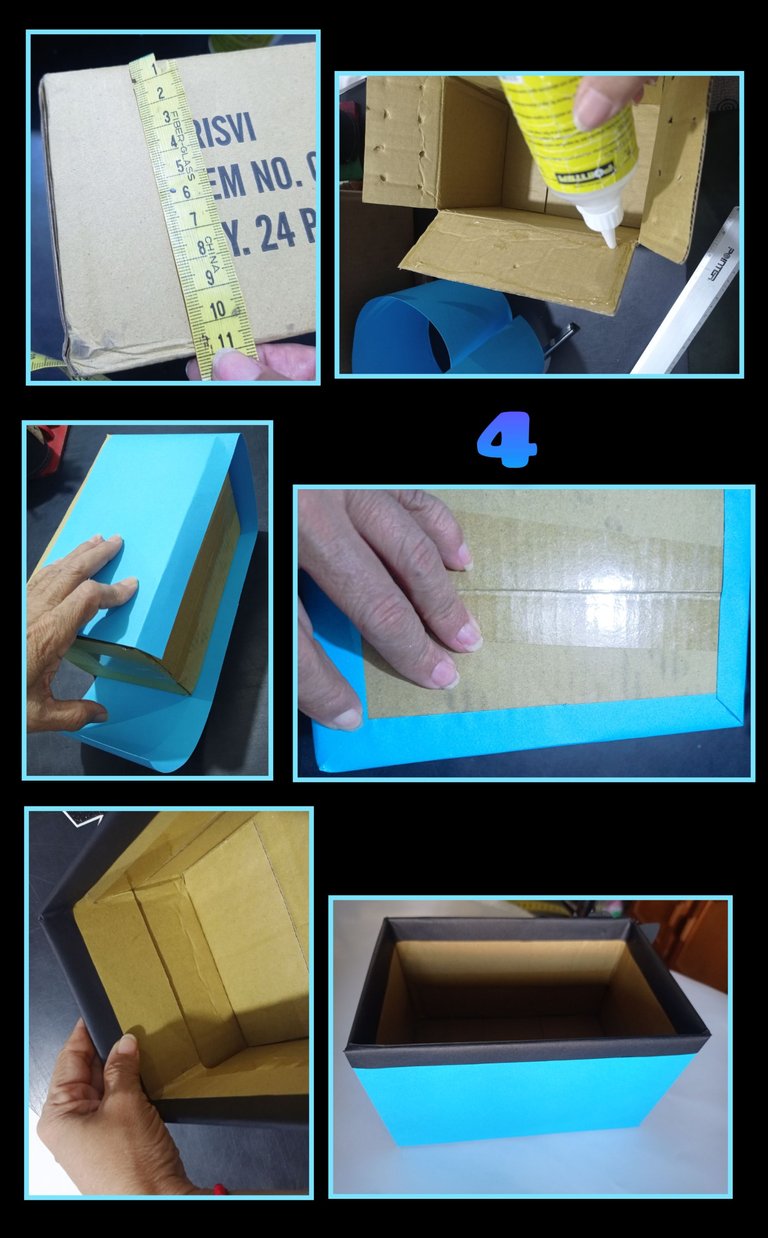
- Toma las medidas de la caja alto x ancho y recorta un rectángulo aumentando 2 ó 3 cms más para el doblez.
- Aplica silicón en las pestañas superiores y pega hacia adentro para reforzar la caja.
- Comienza a pegar la cartulina en los lados de la caja (como te muestro en la foto) y pega el sobrante en la parte de abajo.
- Luego recorta una tira de cartulina negra de 5cm de ancho por el contorno de la caja y pega en el borde superior, tratando de que no se vean las uniones y muy bien rematado, recuerda siempre tratar de que tus trabajos queden lo mejor posible.
Así quedó forrada la caja.
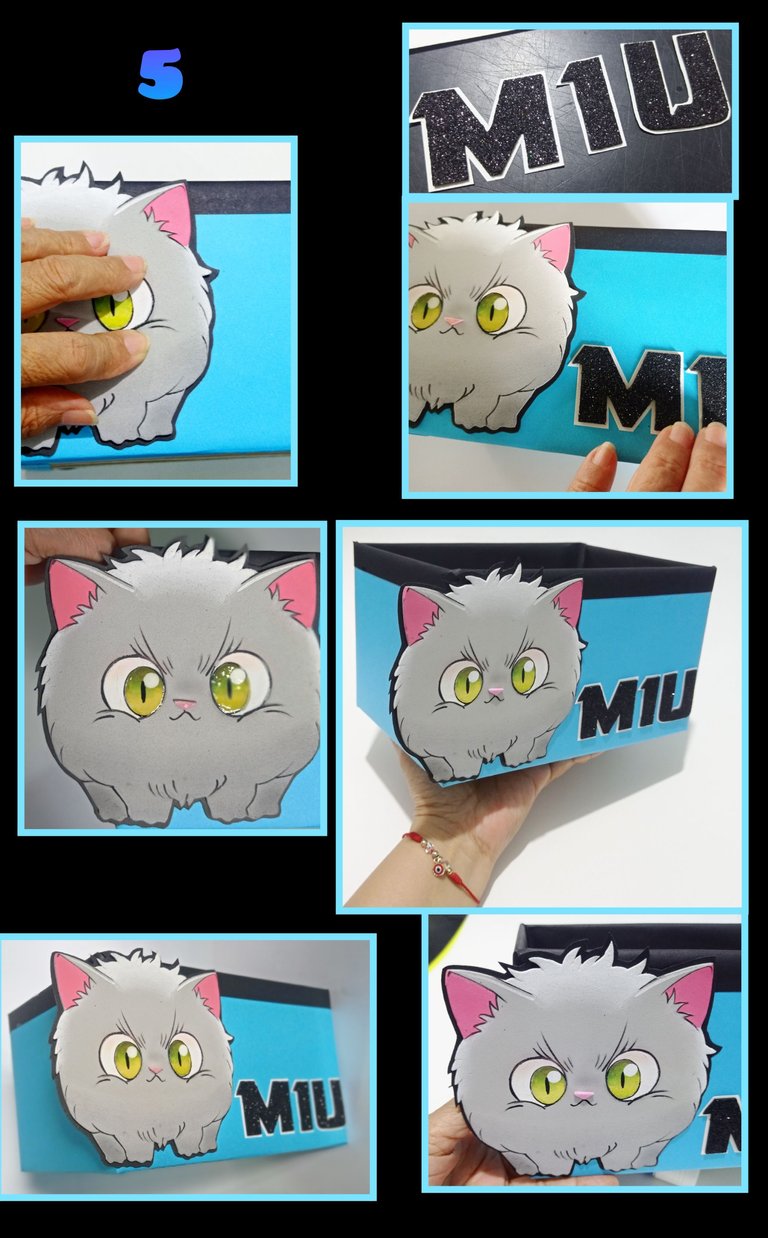
- Ahora solo queda aplicar silicón y pegar la imagen y el nombre en el sitio de tu preferencia y si quieres también lo puedes personalizar.
Como pudiste ver, sería un buen regalo para un aficionado de @Holozing y pueden dar cualquier uso.
y lo mejor es que los materiales son muy económicos y si usas una caja reciclada aún más
Aquí dejo una fotos por si te animas.
Fuente:
https://peakd.com/holozing/@holozing/new-holozing-creature-reveal
Usando Etiquetas HTML y mi telf. Redmi Note 9
Editor de Fotos: GridArt.
Me despido deseando les guste mi publicación.
Hasta mi nueva publicación donde les mostraré otra manualidad con estas criaturas.
Saludos.
Good evening Holozing Community
So I invite you to join me.
I hope you like it.
Let's get started:
| Foami matte | Paints and brushes |
|---|---|
| Drawing or printing | School cardstock |
| Scissors and blade | Pencil 6B |
| Ruler | Silicone |
| Recycled box |
Procedure:
- To make MIU, outline the drawing with a 6B or soft lead pencil, then place it on the foami, hold well and rub with the rings of the scissors, then make sure that the drawing has been transferred well by lifting the drawing on one side and cut around the edge.
- Now start painting by filling the eyes with white paint, let dry and apply another layer, do the same on the ears, then dip the brush in water, remove excess water by wiping with a dry cloth, then dip the tip of the brush in white paint and start painting the top edge, guided by the drawing.
- Let it dry and run the brush again along the white outlines and let it dry.
- Now fill in the legs with gray paint, let dry and then blend the lower part of the legs the same way.
- Apply yellow paint on the lower part of the eyes.
- Now combine green paint with gray to give the tone as close as possible and apply on the top, then wash the brush and dip it in yellow paint and join the two colors blurring until the union of colors is not seen.
- Now paint the lines and edges of the eyes with a brush or a fine tip marker in case you find it difficult.
- Then start filling in the ears with pink paint.
- Glue the nose and dab a cotton ball with chalk and carefully rub over the top of the eye.
- Now glue on black cardboard or foami and cut out leaving a small border.
This is how MIU is ready!
- Take the measurements of the box height x width and cut a rectangle increasing 2 or 3 cms more for the fold.
- Apply silicone to the top tabs and glue inward to reinforce the box.
- Start gluing the cardboard on the sides of the box (as shown in the photo) and glue the excess on the bottom.
- Then cut a 5cm wide strip of black cardboard around the box and glue it on the top edge, making sure that the joints are not visible and very well finished, remember to always try to make your work look as good as possible.
This is how the box was lined.
- Now just apply silicone and paste the image and the name in the place of your choice and if you want you can also customize it.
As you could see, it would make a nice gift for a @Holozing fan and they can put it to any use.
And the best thing is that the materials are very economical and if you use a recycled box even more.
Here I leave some pictures in case you are up for it.
Source:
https://peakd.com/holozing/@holozing/new-holozing-creature-reveal
Using HTML Tags and my Redmi Note 9 phone
Photo Editor: GridArt.
I say goodbye wishing you like my publication.
Until my new publication where I will show you another craft with these creatures.
Greetings.
Te quedo muy linda. Gracias por compartir el paso a paso. Saludos!
Gracia amiga, siempre con mucho gusto.
Igual, buenas noches.
!discovery 40
Muchas gracias @dayadam por tu apoyo.
This post was shared and voted inside the discord by the curators team of discovery-it
Join our Community and follow our Curation Trail
Discovery-it is also a Witness, vote for us here
Delegate to us for passive income. Check our 80% fee-back Program
Agradecida por @discovery-it por compartir, votar y apoyar mi publicación.
Buen día @innerblocks me siento muy agradecida por el apoyo que me brindan.
With Miu protecting our utensils, it will not be so easy to be stolen. Very original. Congratulations @elmundodebetty
Jajajaja...Así es amigo un buen guardián! Gracias por visitarme y comentar mi publicación.
Feliz día.