Hello friends, how are you? How was your weekend. I also take this opportunity to congratulate all mothers, our greatest gift in the world.
I want to show you the step by step of a small gift box, being able to make our own boxes is wonderful because we save money and also personalize our boxes.
Materials
- Cardboard
- Scissors
- Ruler
- School glue
Step by Step
1
1000182508.jpg](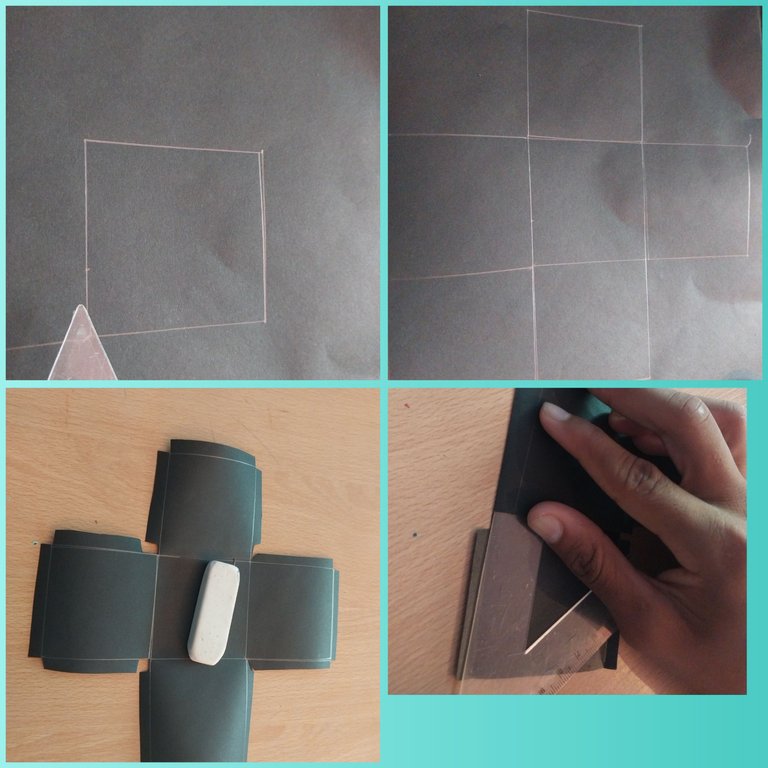 )
)
Let's start by making a square in the center of 6 cm X 6 cm. Then we are going to make 4 more squares from the lines of the 4 sides of the square we made first.
So you will have one square in the center and four on the sides. We make some edges to the square to allow us to glue the sides.
Then we have to cut the square and bend the lines with the help of the ruler.
2
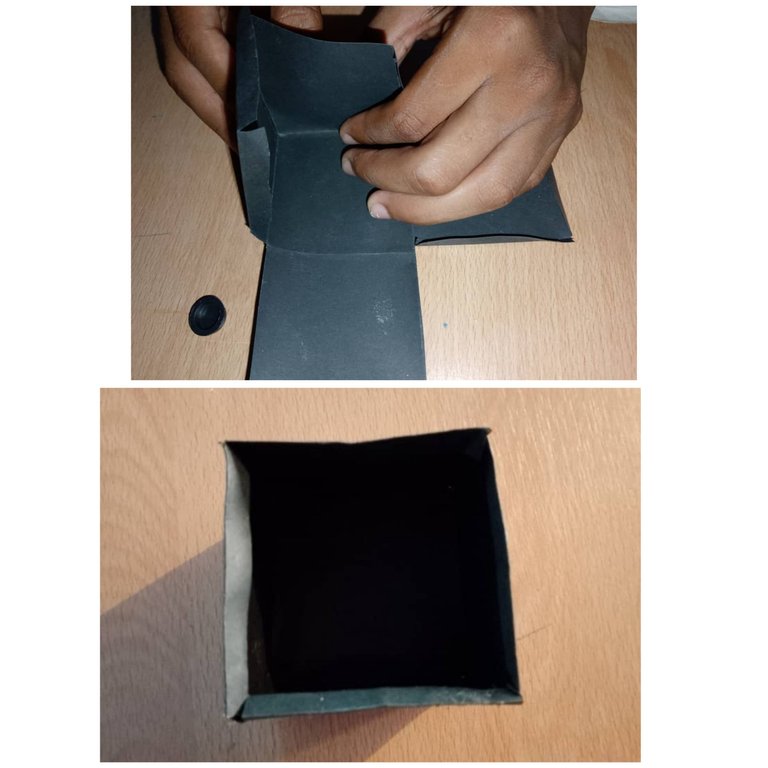
Then we proceed to glue the sides with the help of the glue.
This is how the box will look like!
3
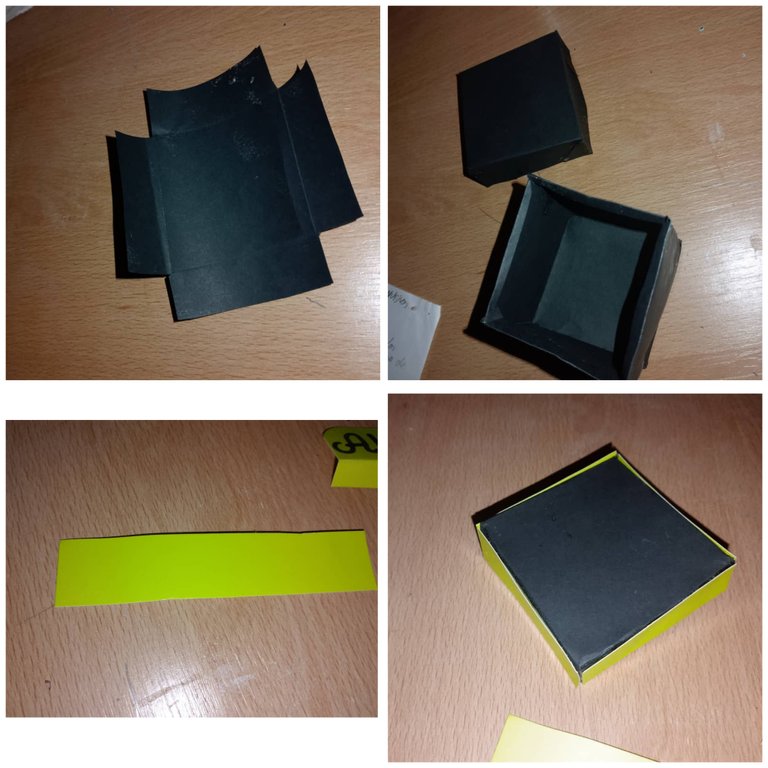
Then we make the lid of the box. We must make a square of 6.2 cm and then on each side of the base square we make a rectangle with a height of 3 cm.
Then we glue the sides with the help of glue.
Then we use a cardboard ribbon the size of the lid of the rectangles of the lid and glue it to decorate.
4
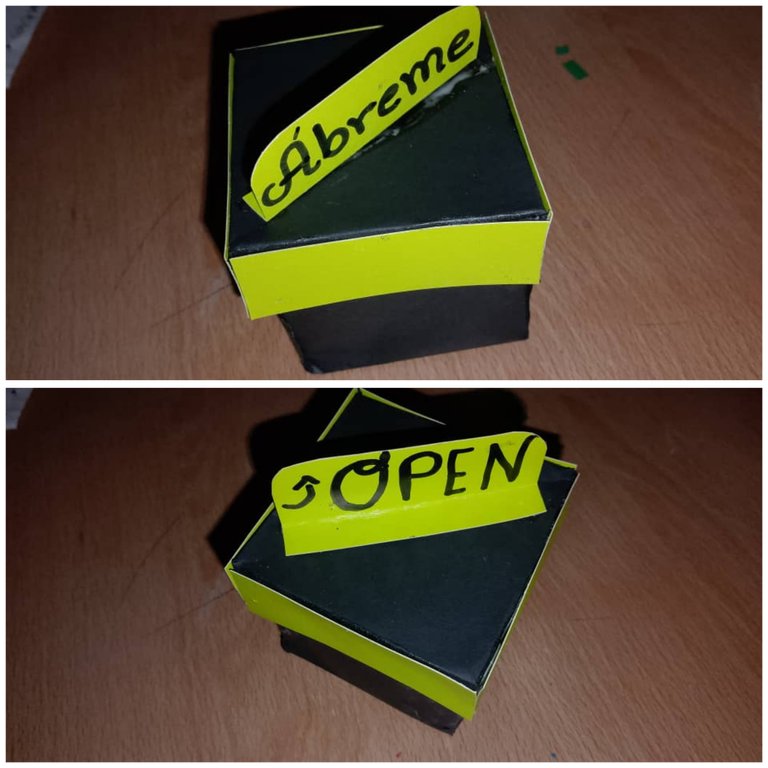
Finally we should paste on a yellow cardboard and place the name of open or open me. We can also use the name of the person to whom we are going to give the gift.
I hope you like it!
- Images belong to me
- Translator: Deepl Traslator
- Editing: Canva
Hola amigos. Que tal? Como pasaron su fin de semana. Además aprovecho para felicitar a todas las madres, nuestro regalo más grande en el mundo.
Les quiero mostrar el paso a paso de una pequeña caja de regalo, poder realizar nuestras propias cajas es maravilloso porque ahorramos dinero y también personalizamos nuestras cajas.
Materiales
- Cartulina
- Tijera
- Regla
- Pega Escolar
Paso a Paso
1
Vamos a iniciar haciendo un cuadrado en el centro de 6 cm X 6 cm. Luego vamos a hacer 4 cuadrados más desde la líneas de los 4 lados del cuadrado que realizamos primero.
Así tendrás un cuadrado en el centro y cuatro a los lados. Hacemos algunas arista al cuadrado para que nos permita luego pegar los lados.
Después debemos recortar el cuadrado y doblamos las líneas con la ayuda de la regla.
2
Después procedemos a pegar los lados con ayuda de la pega.
De esta manera quedaría la cajita!
3
Luego hacemos la tapa de la cajita. Debemos hacer un cuadrado de 6,2 cm y luego en cada lado del cuadrado base hacemos unos rectángulo que lleve una altura de 3 cm.
Luego pegamos los lados con la ayuda de la pega.
Luego utilizamos una cinta de cartulina del tamaño de la tapa de los rectángulos de la tapa y la pegamos para decorar.
4
Por último debemos pegar en una cartulina amarilla y colocar el nombre de open o ábreme. También podemos utilizar el nombre de la persona a la quien le vamos a regalar.
Espero les guste!
- Las imágenes me pertenecen
- Traductor: Deelp traslator
- Edicion: Canva
Whaooo this beautiful and creative.
Te quedó hermosa gracias por compartír
Muy ingenioso de tu parte
Thats a really nice and neat little gift box. Great job