CAMERA OPERATION - Take photo, Video Record, ImageView Live with @Abiolagbode
Lets start by creating our project
* Start a new Project
Android Studio makes it easy to create Android apps for various form factors, such as phone, tablet, TV, Wear, and Google Glass. The New Project wizard lets you choose the form factors for your app and populates the project structure with everything you need to get started. Use the following steps to create a new project.
. Step 1: Start and configure the project
If you didn't have a project opened, Android Studio shows the Welcome screen. To create a new project, click Start a New Android Studio project.
Note:If you had a project opened, Android Studio shows the development environment. To create a new project, click File > New > New Project.
The next window lets you configure the name of your app, the package name, and the location of your project
Enter the values for your project then click Next.
Step 2: Select form factors and API level
The next window lets you select the form factors supported by your app, such as phone, tablet, TV, Wear, and Google Glass. The selected form factors become the app modules within the project. For each form factor, you can also select the API Level for that app. To get more information, click Help me choose.
The Android Platform Distribution window shows the distribution of mobile devices running each version of Android, as shown in figure 2. Click on an API level to see a list of features introduced in the corresponding version of Android. This helps you choose the minimum API Level that has all the features that your apps needs, so you can reach as many devices as possible. Then click OK.
Then, on the Target Android Devices window, once you've selected your form factors and API versions, click Next.
Step 3: Add an activity
The next screen lets you select an activity type to add to your app, as shown in figure 4. This screen displays a different set of activities for each of the form factors you selected earlier.
Choose an activity type then click Next.
Note: If you choose "Add No Activity," click Finish to create the project.
Step 4: Configure your activity
The next screen lets you configure the activity to add to your app,
Enter the activity name, the layout name, and the activity title. Then click Finish.
Step 5: Develop your app
Android Studio creates the default structure for your project and opens the development environment. If your app supports more than one form factor, Android Studio creates a module folder with complete source files for each of them
sourcecode: < /RelativeLayout> fig 2. MainActivity sourcecode: import android.content.Intent; public class MainActivity extends AppCompatActivity { } fig 3. AndroidManifest sourcecode < /manifest> Result..
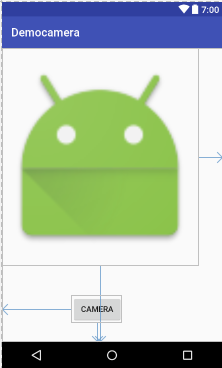
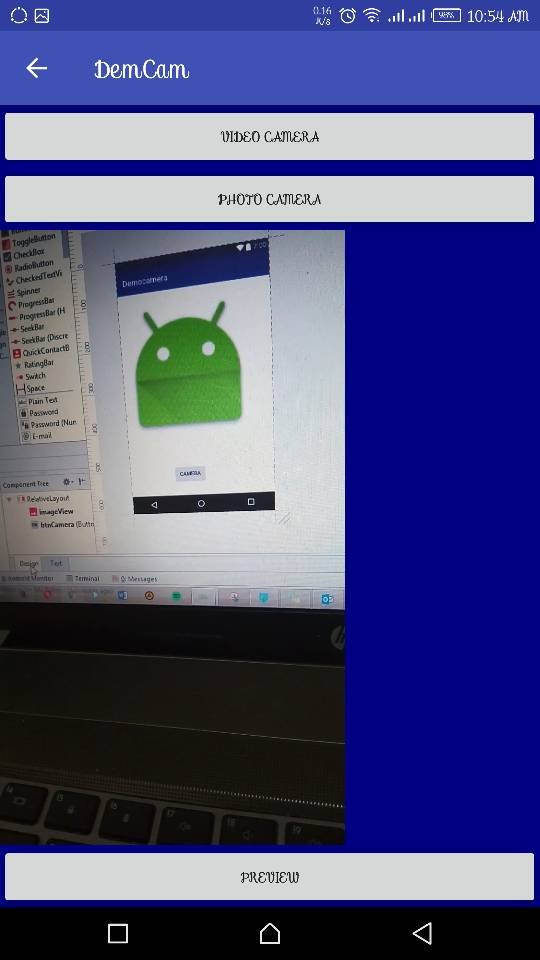
fig1. Design View
TextView
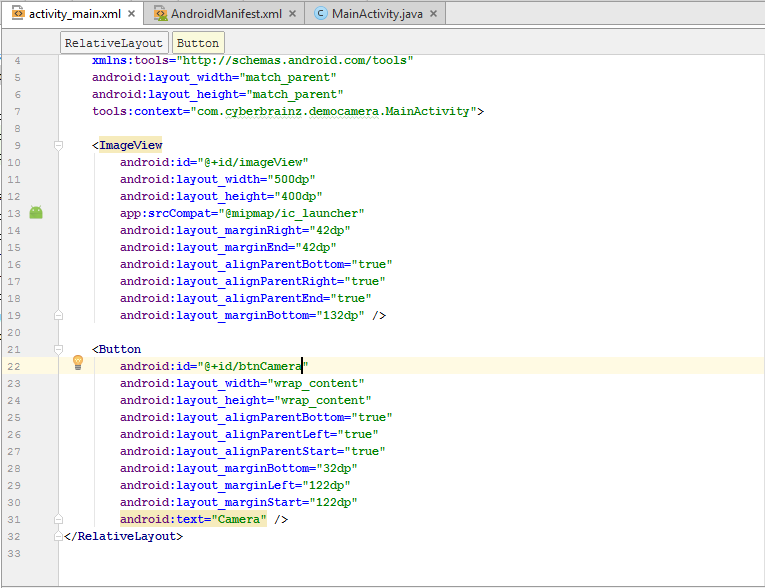
?xml version="1.0" encoding="utf-8"?><
RelativeLayout xmlns:android="http://schemas.android.com/apk/res/android"
xmlns:app="http://schemas.android.com/apk/res-auto"
xmlns:tools="http://schemas.android.com/tools"
android:layout_width="match_parent"
android:layout_height="match_parent"
tools:context="com.cyberbrainz.democamera.MainActivity"><ImageView
android:id="@+id/imageView"
android:layout_width="500dp"
android:layout_height="400dp"
app:srcCompat="@mipmap/ic_launcher"
android:layout_marginRight="42dp"
android:layout_marginEnd="42dp"
android:layout_alignParentBottom="true"
android:layout_alignParentRight="true"
android:layout_alignParentEnd="true"
android:layout_marginBottom="132dp" />
<Button
android:id="@+id/btnCamera"
android:layout_width="wrap_content"
android:layout_height="wrap_content"
android:layout_alignParentBottom="true"
android:layout_alignParentLeft="true"
android:layout_alignParentStart="true"
android:layout_marginBottom="32dp"
android:layout_marginLeft="122dp"
android:layout_marginStart="122dp"
android:text="Camera" /><
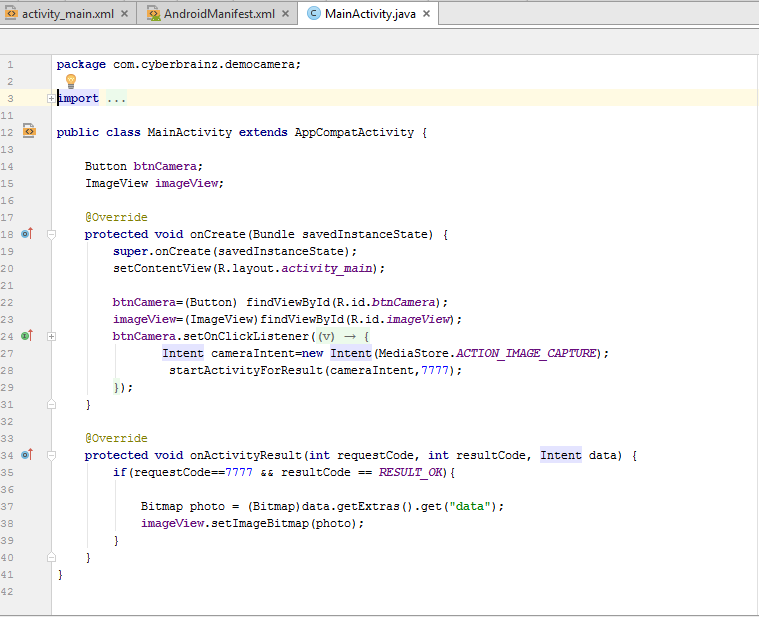
package com.cyberbrainz.democamera;
import android.graphics.Bitmap;
import android.provider.MediaStore;
import android.support.v7.app.AppCompatActivity;
import android.os.Bundle;
import android.view.View;
import android.widget.Button;
import android.widget.ImageView;Button btnCamera;
ImageView imageView;
@Override
protected void onCreate(Bundle savedInstanceState) {
super.onCreate(savedInstanceState);
setContentView(R.layout.activity_main);
btnCamera=(Button) findViewById(R.id.btnCamera);
imageView=(ImageView)findViewById(R.id.imageView);
btnCamera.setOnClickListener(new View.OnClickListener() {
@Override
public void onClick(View v) {
Intent cameraIntent=new Intent(MediaStore.ACTION_IMAGE_CAPTURE);
startActivityForResult(cameraIntent,7777);
}
});
}
@Override
protected void onActivityResult(int requestCode, int resultCode, Intent data) {
if(requestCode==7777 && resultCode == RESULT_OK){
Bitmap photo = (Bitmap)data.getExtras().get("data");
imageView.setImageBitmap(photo);
}
}
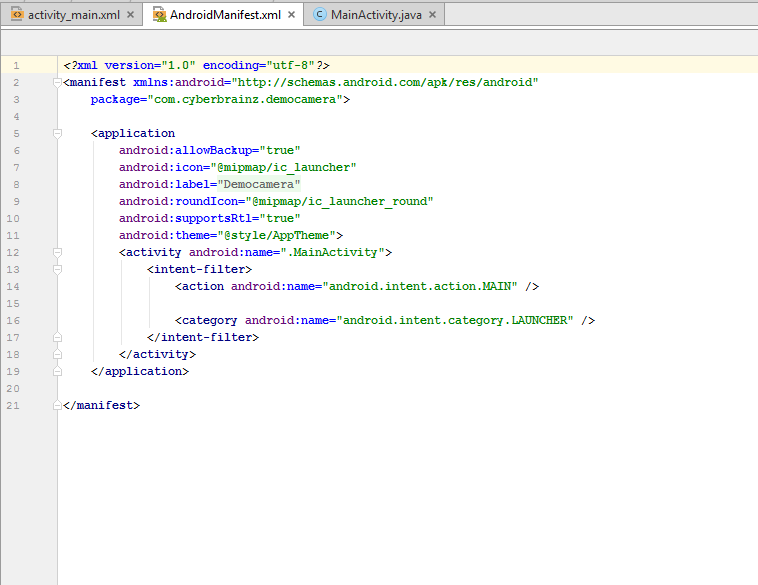
?xml version="1.0" encoding="utf-8"?><
manifest xmlns:android="http://schemas.android.com/apk/res/android"
package="com.cyberbrainz.democamera"><application
android:allowBackup="true"
android:icon="@mipmap/ic_launcher"
android:label="@string/app_name"
android:roundIcon="@mipmap/ic_launcher_round"
android:supportsRtl="true"
android:theme="@style/AppTheme">
<activity android:name=".MainActivity">
<intent-filter>
<action android:name="android.intent.action.MAIN" />
<category android:name="android.intent.category.LAUNCHER" />
</intent-filter>
</activity>
</application>
.jpeg)
.jpeg)
.jpeg)
Upvote and Folow
Share your view...
Hi! I am a robot. I just upvoted you! I found similar content that readers might be interested in:
https://developer.android.com/studio/projects/create-project.html