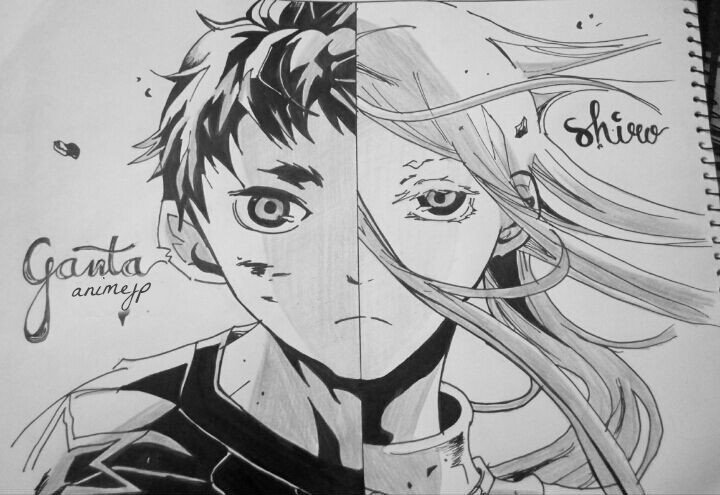
Hello Steemians!! This time I will give you another art from one of characters and that is Ganta and Shiro From Anime Deadman Wonderland.
PROCESS
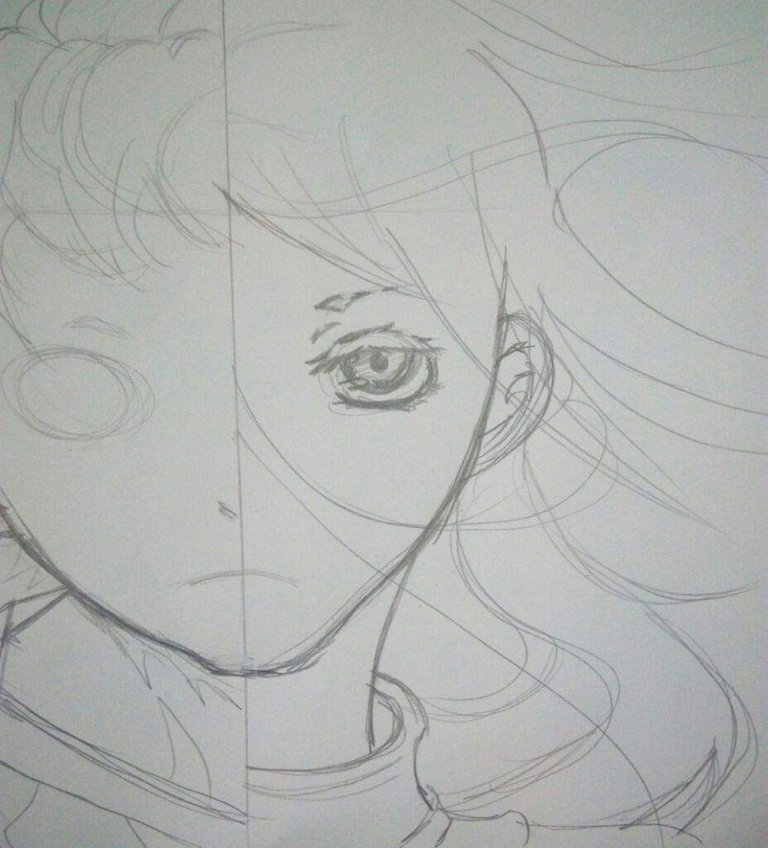
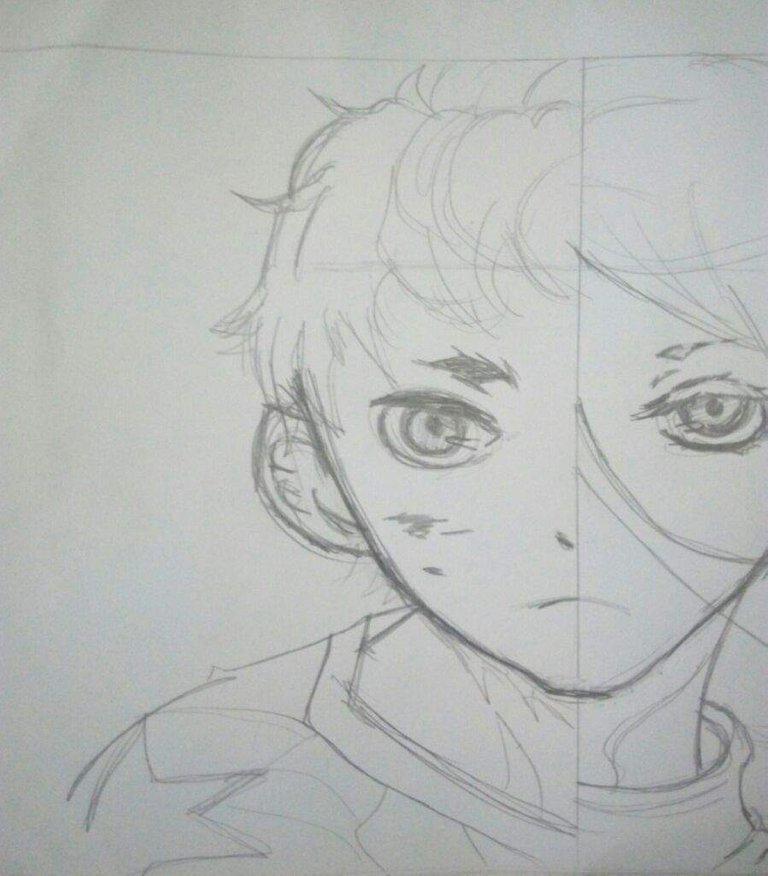
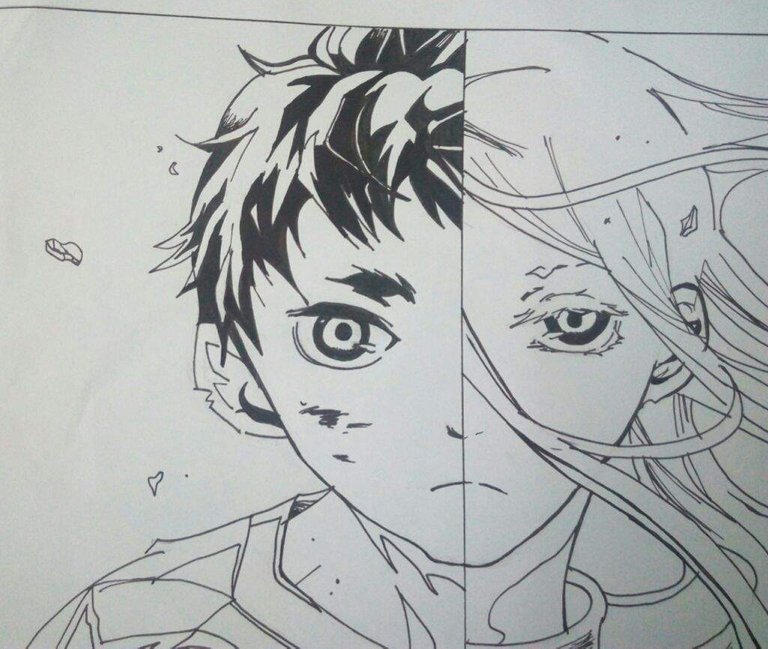
In this section, drag the border first so you will know where to draw the other. For that you can use a ruler however if you're too awesome it's all right if you won't use it. After you draw the boundary line, draw the face shape according to the side you used first. For me, I drew the left part first and targeted on his jaw and chin, making it attach to the right part. After you've accomplished each sides, I sketched a draft of their facial expressions so I'd know where they are placed.
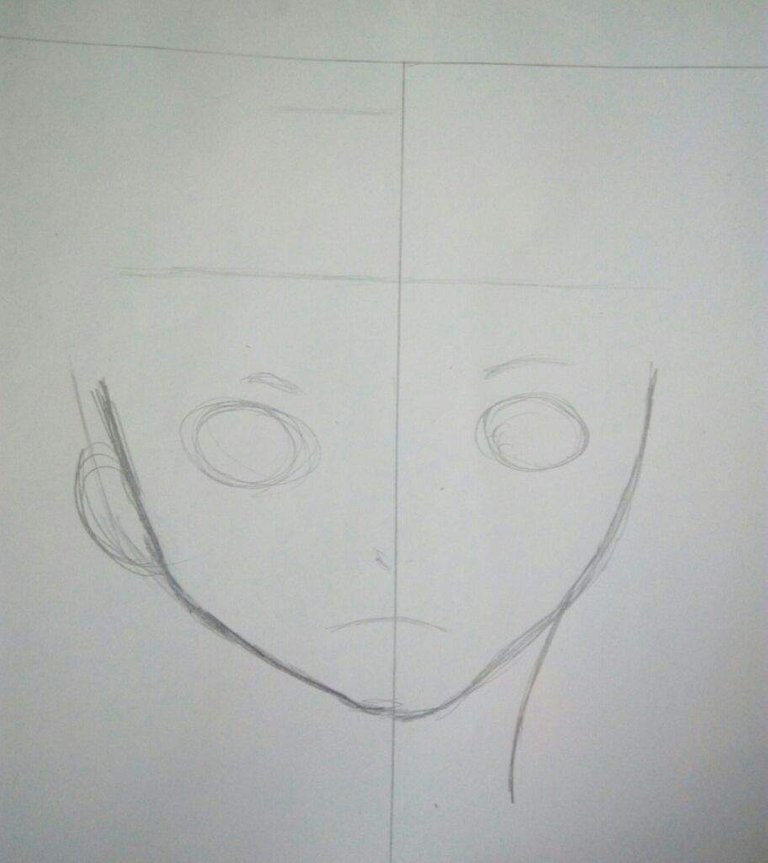
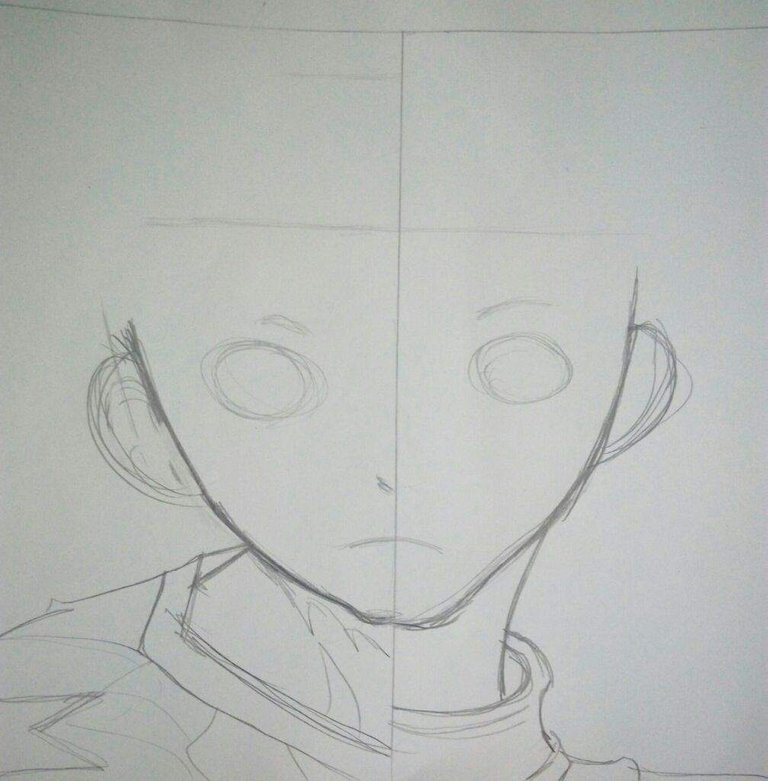
After every thing on the first part, draw the ears and go away the particulars for that later on. Then, pull their necks or half of their necks and forward the picture with their clothes. There aren't much particulars on the garments so try to make it as light as possible because we're still sketching.
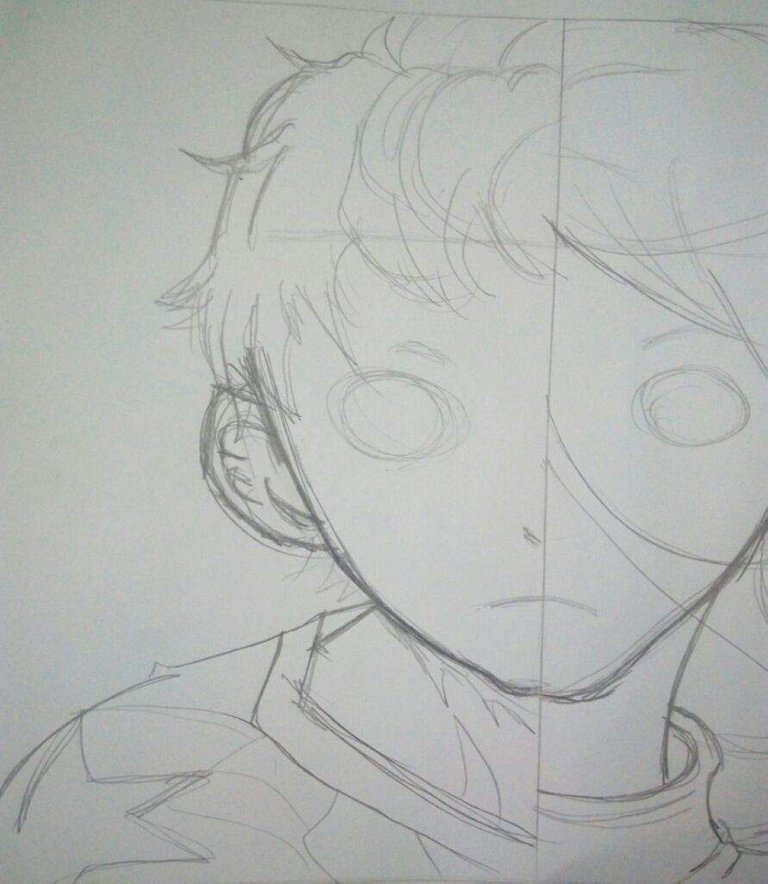
For this step, I began to draw Shiro's hair however only targeted on where the strands should be located. I didn't draw the particulars yet however only the outline of what has to come.

I just put little particulars like the lines dividing each strand and you can do this as well however be aware to look at the guidelines/border lines so you'll know where to place the hair parts.
I started pulling Shiro's eyes for his eyes, because of his eyelashes, thick and white, I pulled the top using this abnormal shape and put a line and a pointed line. Then using only one line, I drew the backside part of her eye. After that, it's the iris that's subsequent. So with that just draw a circle then a smaller circle for the pupil.
Finally for Ganta's eye sketch, eyebrows and blood on his face. For blood, just drawing random lines and make it look like blood-stained.
After sketching all the things that are needed, except for the things we will be drawing later on, we have to underline each line of pencil so that it will be a little clear. Although to be fair it's very well if you don't use a pen and outline this if you want it to look raw however unclear.
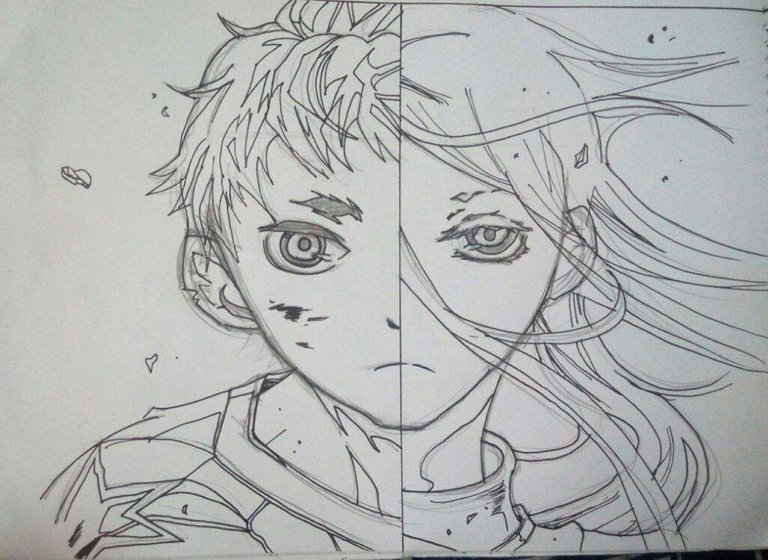
For the erasing, just go grab an eraser and erase all the pencil lines until you don't want to erase it because you'd have to regulate it later on. Keep it simple and clean although if you don't want a messy drawing.
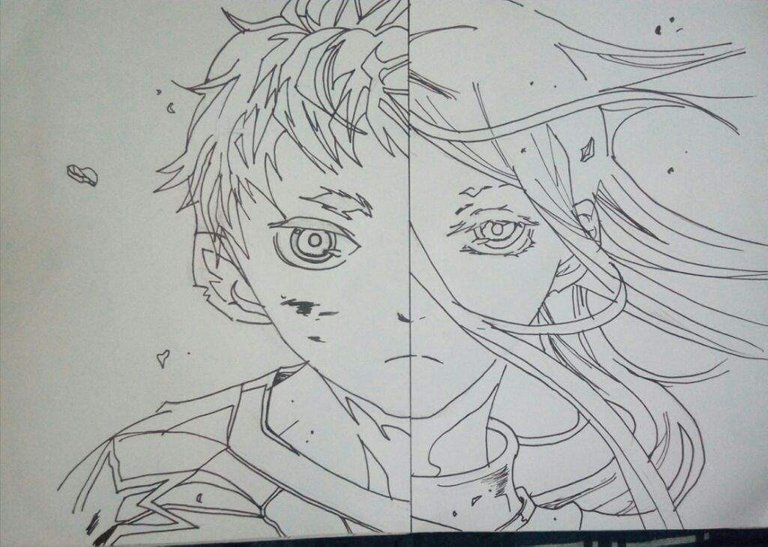
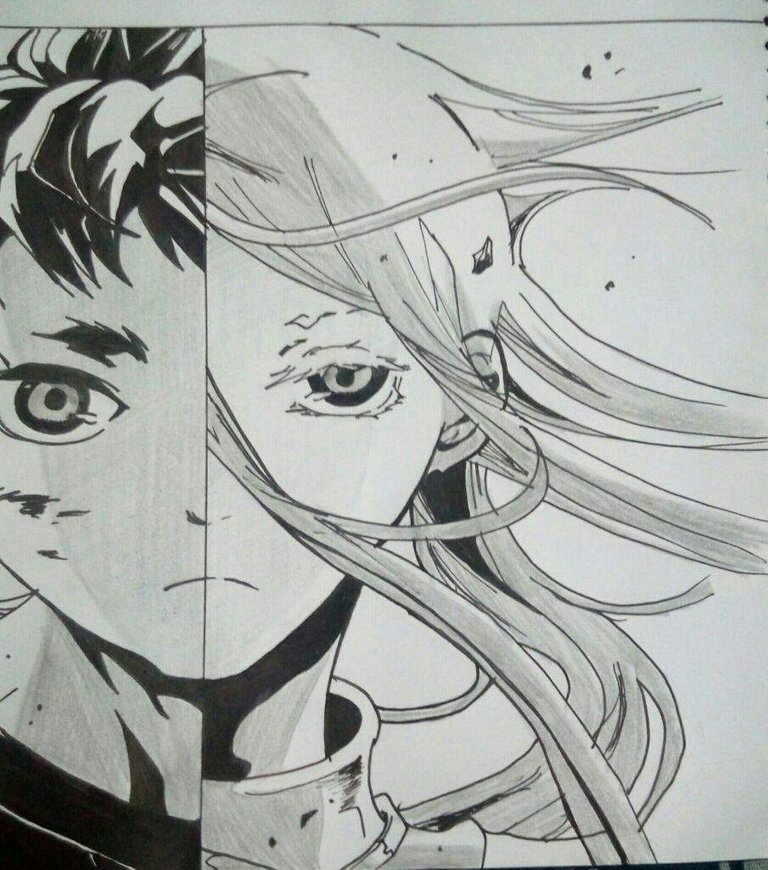
For the first part of the inking, I inked their eyes or a part of their eyes. After that, I started plunging Ganta's eyebrows and blood on his cheeks.
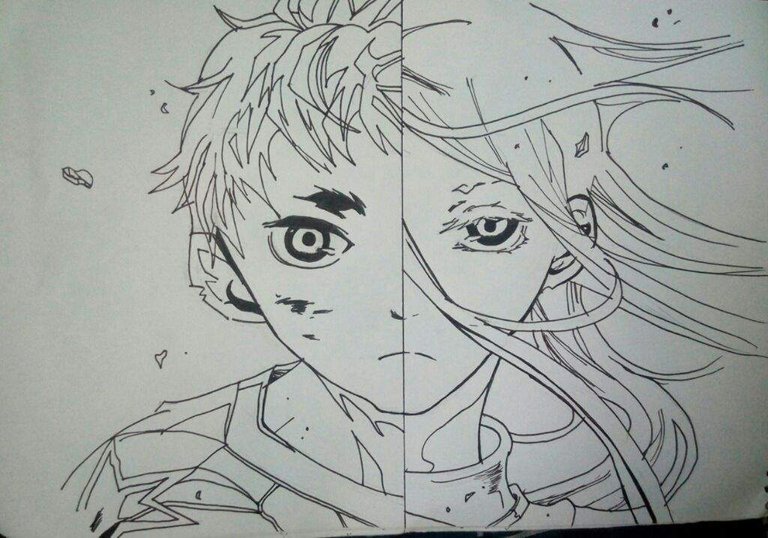
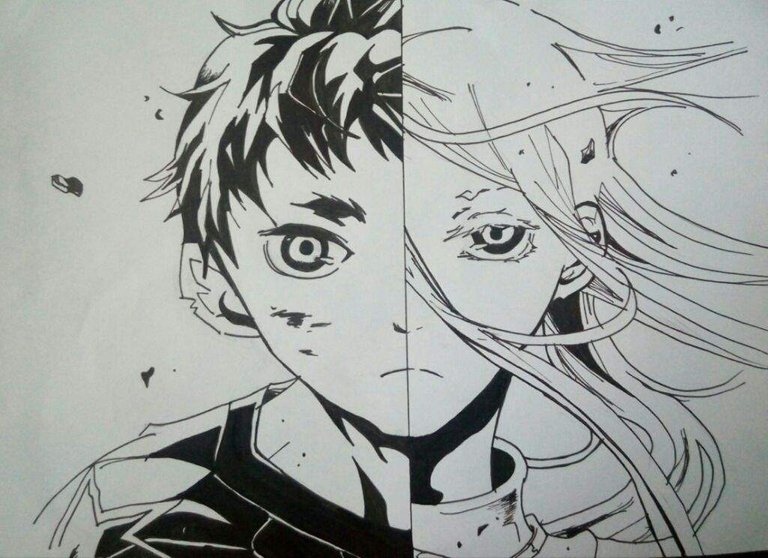
Because I already defined and divided the components based on "will be inked" and "will be clean all we have to do now is to ink the components than need to be inked. So we'll statt with the hair first and ink every thing labelled "to be inked" just an imaginary label although of course.
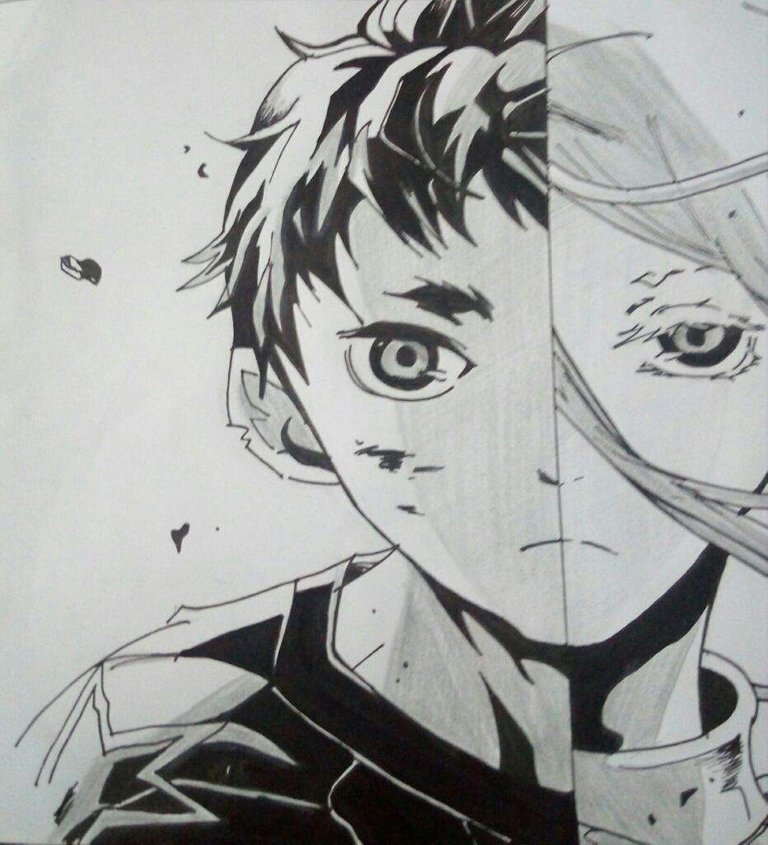
After plugging my Ganta's hair, I then start plugging in his clothes. So for this, because I've also defined some components, so all we have to do is to observe the outline as a support and ink for the need to be inked and to let go. Clean breaks so they are both colored or left clean later.

Next is a special ink on the Shiro side. So starting with small stones, I inserted the component as a shadow and it was not much because the color was very small. Then after that, I plugged his neck to overshadow a slightly larger one so I used a marker. After that, I used a pen to plug a component into his hair. Both ink is fully or half or gives a faded effect.
This time, we'll have to take our grey coloured pencil and color the center part of their faces. So for this just don't make your strokes too clear however make it light however at the same time darkish Maybe overlapping can assist and if you color it too darkish then erase it and color once more. After the face, additionally color their necks and they're usually parallel to the inked parts.
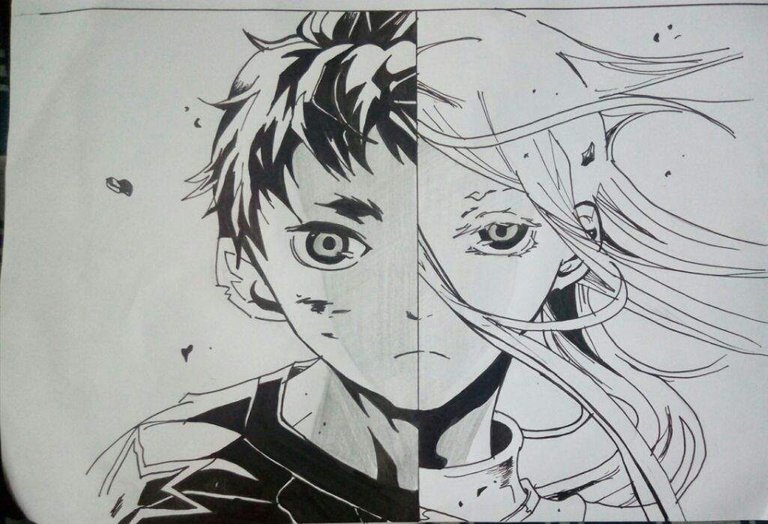
Still using the grey coloured pencil, continue to coloring their garments. There's not much to color however be aware to color lightly or approximately relying on which part you're coloring however for the garments you can use and do anything because it usually has inked components anyway.
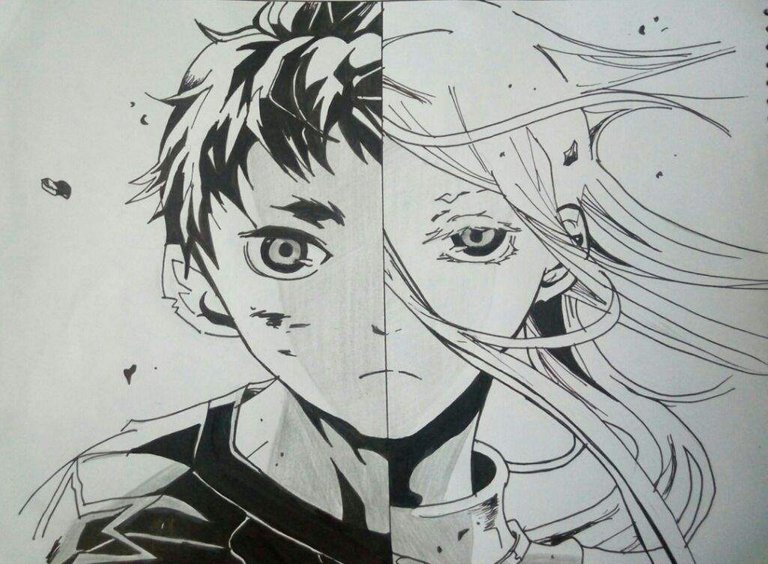
Using a grey coloured pencil, I coloured Shiro's hair with the same type of shade and amount of force. Easily color the strands and go away most sides clean or white so we'll have a highlighting effect for it.
Finally the last thing to do is color Ganta's hair with the grey coloured pencil. For this just color the sides and corners in any way you want as long as you additionally go away clean areas because this'll be used for the highlights and that sort of stuff. And now that we're done with every thing let's continue to one last thing.
For this step, in sure it's all right I that I only wrote each their names and then my own for the signature for various purposes that most of us already know. Like staking declare proving and so on so forth.
so cool
nice draw
i love it
Thanks @gunawanramli
good work and great art and i like art..!
keep it up
I glad you like it.. Thanks @nomishiekh
great job with the illustration!
This gem of a post was discovered by the OCD Team!
Reply to this comment if you accept, and are willing to let us promote your gem of a post! By accepting this, you have a chance to receive extra rewards and one of your photos in this article will be used on our compilation post!
Gems! We strive for transparency.You can follow @ocd – learn more about the project and see other