Good day dear reader,this article will be about how to create simple, but stylish, geometric artwork on a canvas with the help of some color theory.
As already seen in my introduce yourself post here is the end result.
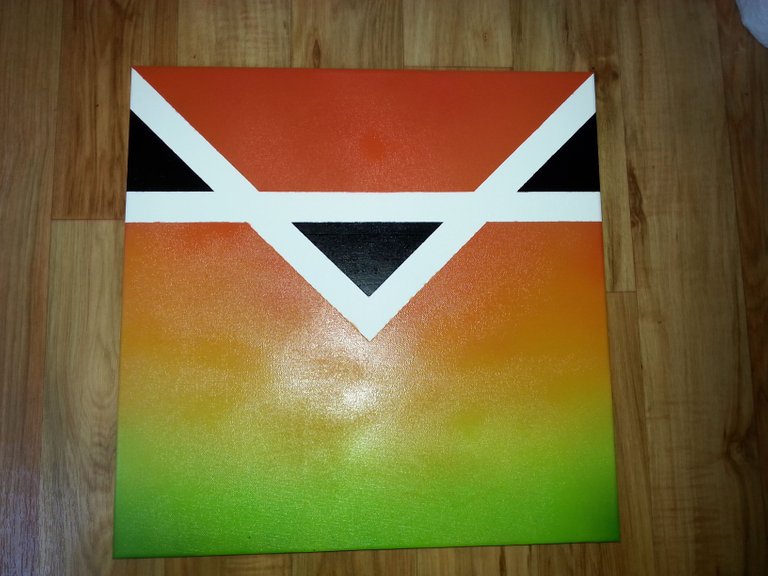
Table of content:
-a canvas
-masking tape
-acrylic paint(spray cans and soft body paints work both)
-a respirator (a must when spray cans are used)
-gloves (same here)
optional:
-Ruler
-Razor blade
-Ground cover
-Primer
-Varnish
Step 1
Prepare your canvas with the primer,it will help your paint, with binding to the surface.
This will decrease the risk of cracks.
You need to wait 12-24 hours to take the next step.
Step 2
If you don't have any shapes in mind yet don't worry,coat the canvas with your base color completely, don't forget the edges.
This color will determine the color of the stripes, so if you have a shape in mind only cover it to save on paint.
Step 3
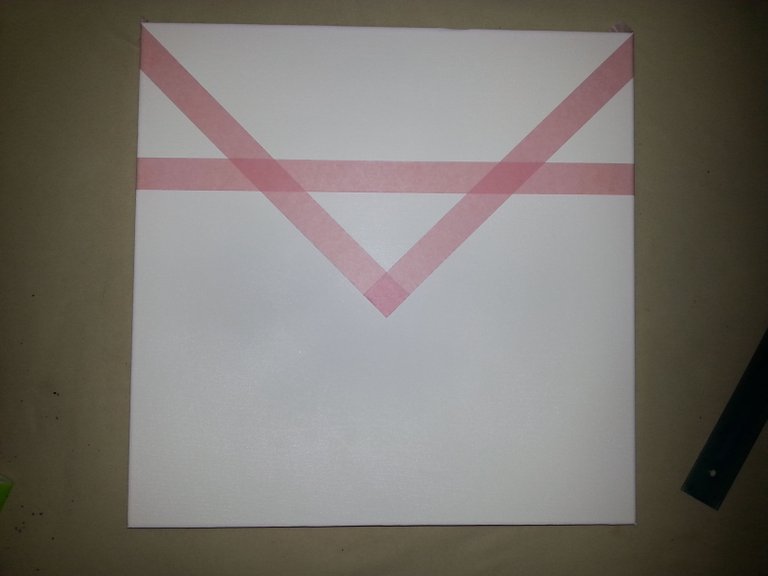
Cover up your stripes with the masking tape, you can measure it out and calculate the form of the shapes or just do it free hands, its up to you so get creative.
I choose something simple that would benefit the composition of the overall piece,the shapes separate most the deep red part from rest. I basically had it already planed out.
Step 4
Fill in your blank shapes with another color and cover them with the masking tape, so the shapes stay clean. Or leave them free its up to you again.
I painted my shapes black as contrast to all the vibrant colors I used.

Step 5
Choose your colors.
You can do this again just by trying it out but I advise you to look at a color wheel.
Option 1 is the analogue color scheme, where you just choose color that are right next to each other on the color wheel.
Option 2 is the complementary color scheme, where you choose colors on opposite side of each other.
Option 3 is that you can also easily combine those two by choosing 2 analogue colors and the complementary colors to them
I will go more in depth into color theory in an other article.
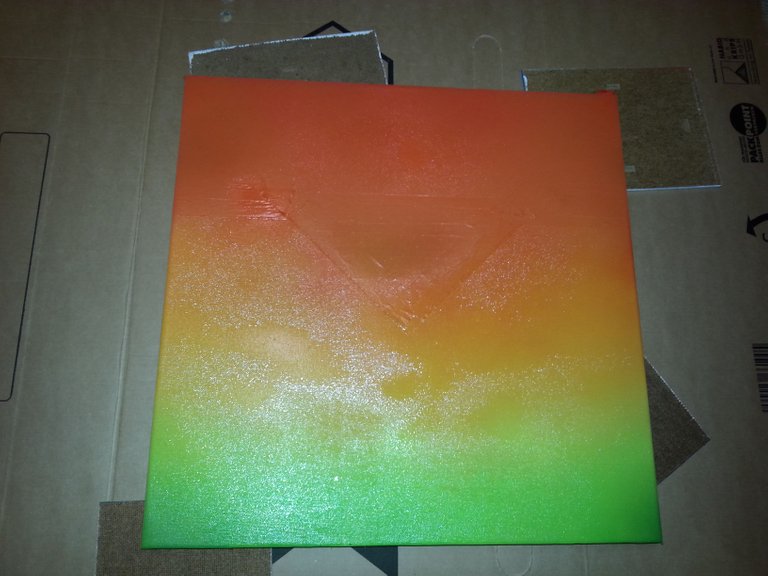
I used red at the top, green at bottom and I tried to get a smooth color shift with the complementary colors between them
Here is a free website play with a color wheel https://color.adobe.com/de/create/color-wheel/
And now have FUN! start painting!
Step 6
after your paint is finished with drying, you can remove the masking tape.
if you want to, sign it and give it a coat of varnish.
The varnish protects it from uv light.
The benefits are that the paint wont get as brittle ant the colors stay more vibrant.
I Hope you enjoyed this article.
And i am looking forward to see your work, tag me so I can find it.
here is my introduction post if you haven't read it.
https://steemit.com/introduceyourself/@cypher-ghost/my-introdution-to-steemit
That's all folk's,CG signing out.