You will learn how to create an illustration from scratch using the Brush Tool  (B), adjusting layers and resources from the Envato Market website.
History
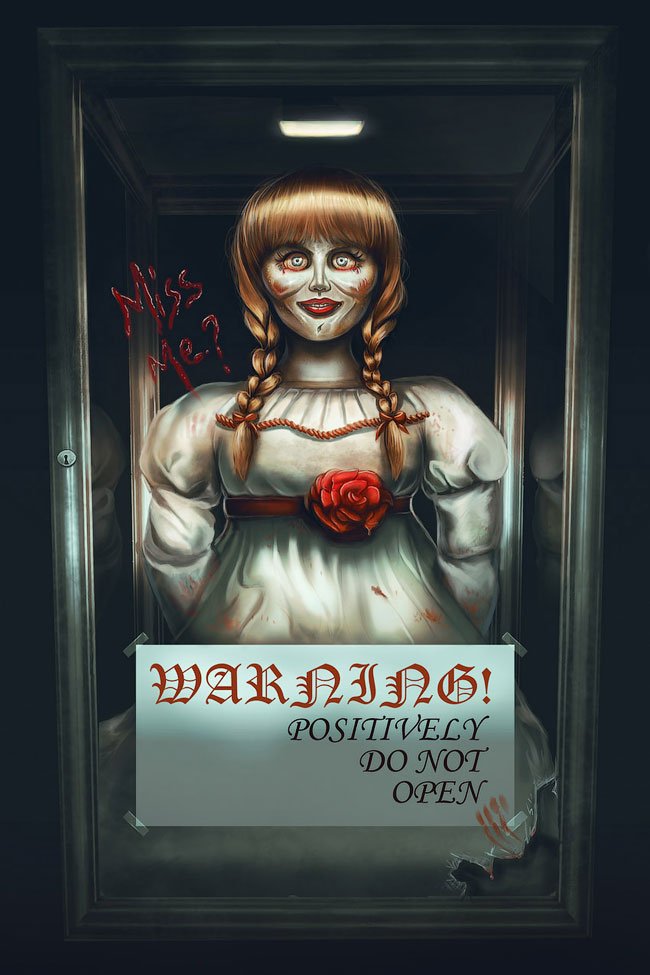
The story of Annabelle begins with an ordinary couple who is waiting for her first child. The husband gives his wife a rare doll and soon reveals that the neighbors of the couple were victims of a brutal murder. One of the killers was mortally wounded, and while he was dying, his spirit moved into a doll.
And the whole nightmare begins ...
Details
Before drawing any fan art you should clearly understand who you are drawing and know the story of the character. Even if your drawing has a different plot and style of the hero, you still need to have a few details that will link your fan art to the original image.
Below I will give a few facts about Annabelle's doll, which will help me in my work:
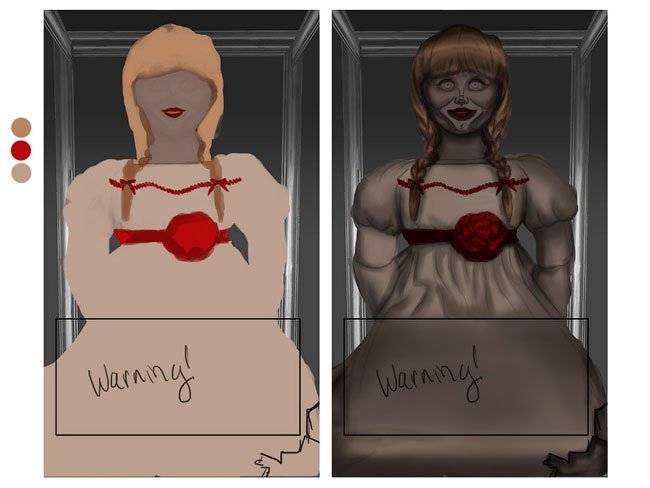
Annabelle is a great vintage doll
She has red hair plaited in braids, and a smooth bangs
The doll has big eyes, a piercing look, the mouth can be open or closed
Annabelle is in a glass box that protects the world from this monster
Having defined the main features of the character, we can start to work.
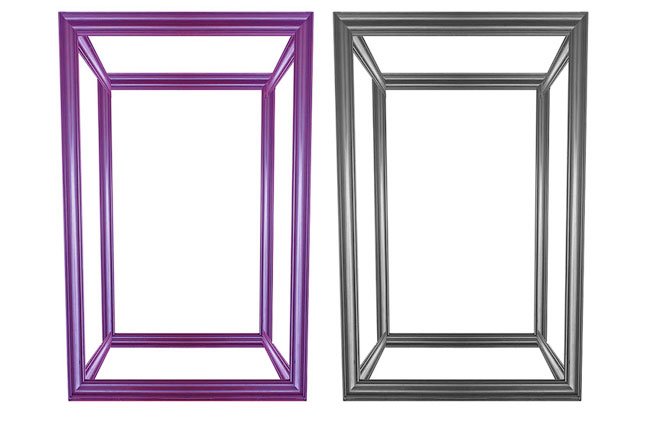
- Draw a glass box
Step 1
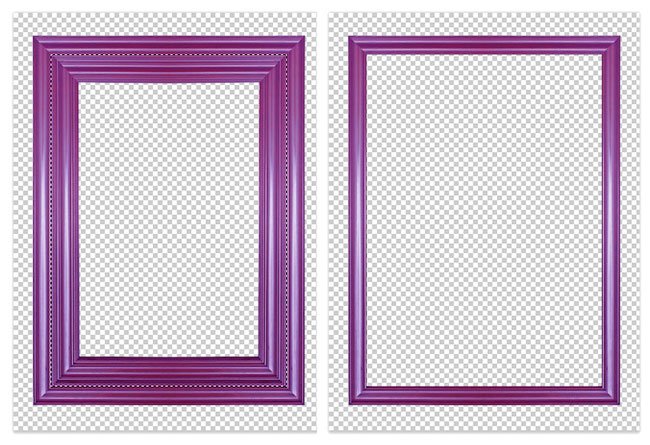
When Annabelle was first shown to us, she was locked in a glass drawer in the house of Ed and Lorraine Warren from the movie "Enchantment." Honestly, I'm not going to draw a box from scratch. Instead, I decided to use a stock photo with a frame from the Envato Market website.
Create a new document with a size of 1771 x 2656 pixels and a resolution of 150 dpi. If you want, you can change the document settings. Open the frame in Photoshop. Use the Magic Wand Tool (W) to select white areas and delete them using the Delete key. Then use the Rectangular Marquee Tool  (M) to select the inner part of the frame and also delete it with the Delete key.
Step 2
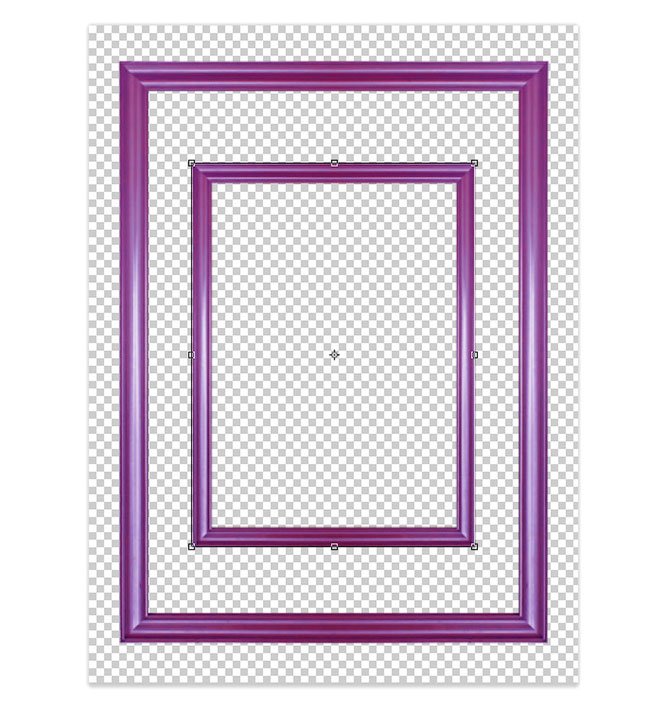
Hit Ctrl + J to duplicate the layer with the border. With the help of free transformation (Ctrl + T) we reduce the copy and place it in the center of the original. So we created the back of the box.
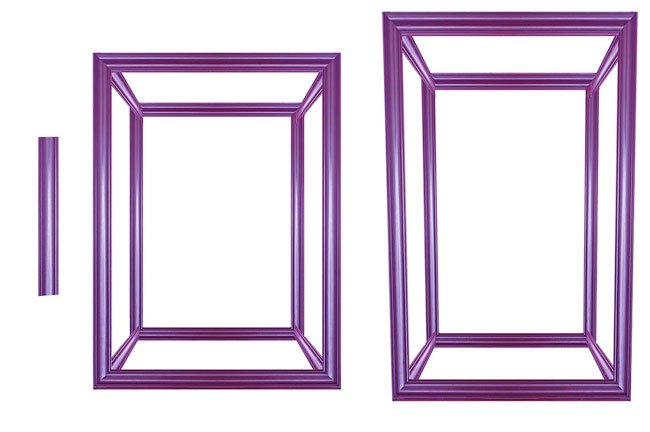
Then use the Polygonal Lasso Tool  (L) tool to create a selection of any part of the frame and cut it out onto a new layer (Ctrl + J). Activate the free transformation (Ctrl + T), rotate the piece of the frame and deform it in perspective to connect the front and back walls of the box. Duplicate this piece of the frame several times and reflect the copies horizontally and vertically to connect all the corners of the box, for this use the commands Edit - Transform - Flip Horizontal and Flip Vertical.
When finished, merge all layers with the box together (Ctrl + E). If the result looks too perfect, again activate the transformation (Ctrl + T) and correct the perspective distortion of the box. Do not hurry, experiment and try to get the most suitable result.
Step 3
Let's replace the bright purple color of the frame. Go to Image - Adjustments - Hue / Saturation (Image - Correction - Hue / Saturation) and set Saturation to -100. Frame for the glass box is ready.
- Draw a sketch of Annabelle
Step 4
On the new layer, we make a rough sketch of the doll using a round hard brush. Note that the position of Annabelle's body needs to be drawn with the account that it is in the box.
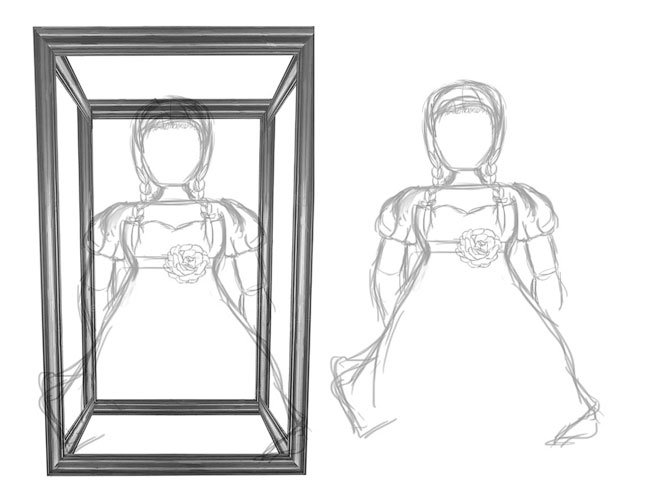
If the skeleton of the box hinders you, just turn off the layer with it.
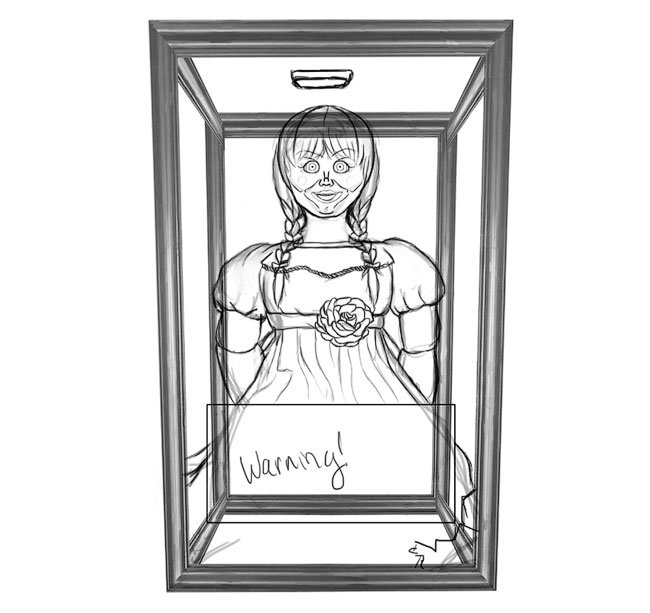
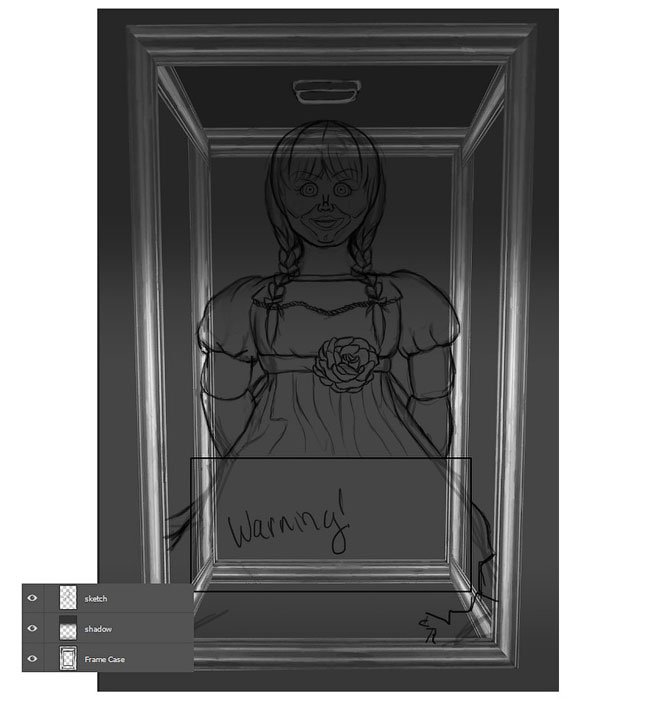
Step 5
Reduce the opacity of the outline. Create a new layer and outline the first sketch, adding more details. Try to include in the sketch more elements from the movie.
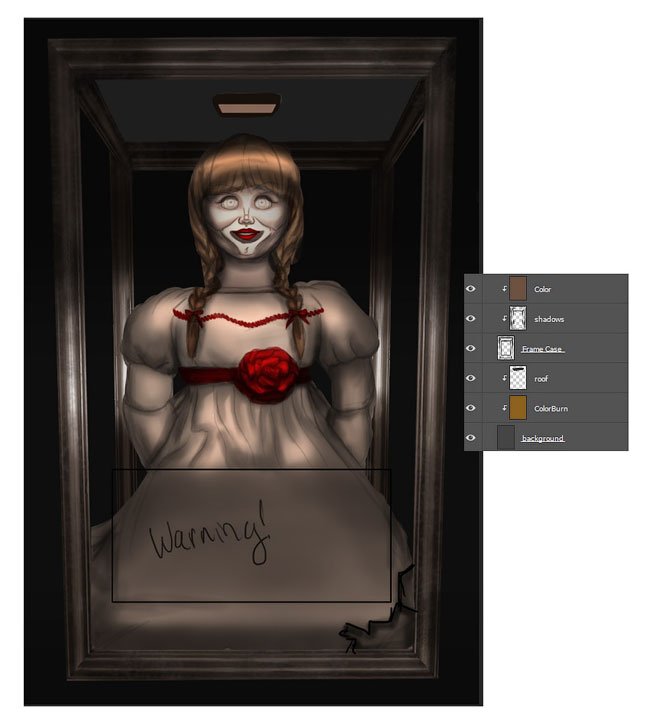
The box has two important features: a warning inscription and a backlight that illuminates the doll. We also add these details to make the drawing as authentic as possible. To add atmospheres, we draw a cracked glass in the lower right corner.
This is how the sketch looks like.
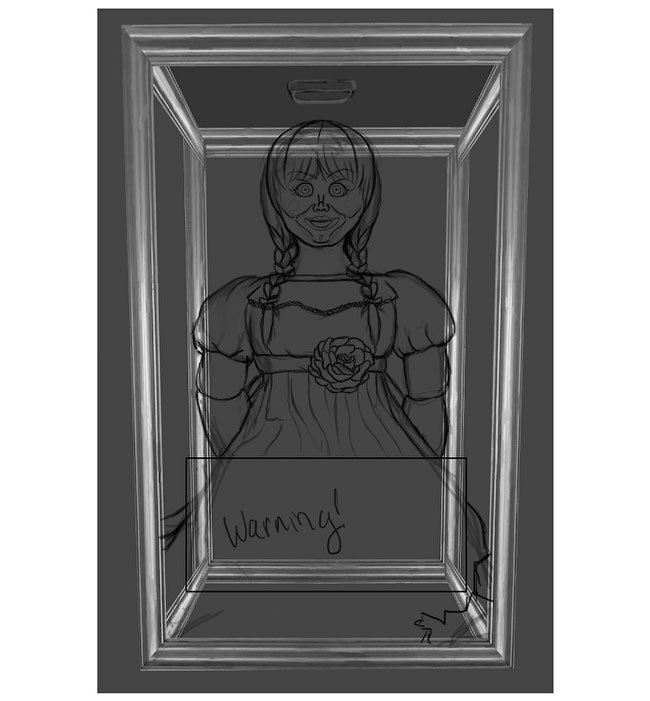
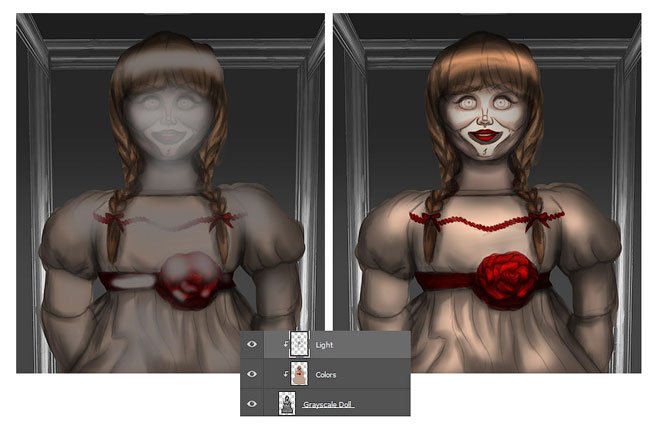
- Drawing a black and white base
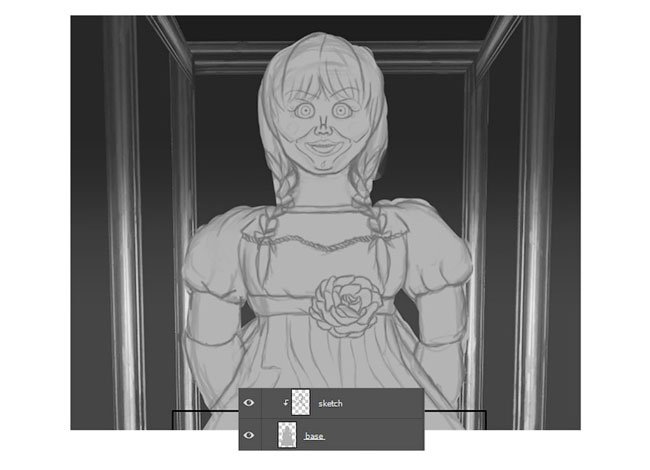
Step 6
If you have not yet decided on the color scheme of the picture, it's best to start by filling it with shades of gray. Many digital artists use this method to fully work through the lighting of the scene, and then proceed to fill with color.
Using the Paint Bucket Tool  (G) (Fill), fill the background with gray color # 454545. Using the Polygonal Lasso Tool (M), create a selection of the top edge of the box and fill it with a dark gray color # 353535.
Step 7
We begin to work with the atmosphere of the picture. Create a new layer in the Multiply blending mode. Take the Gradient Tool (G)  (Gradient) and fill the layer with two gradients: first from top to bottom, and second from bottom to top.
Create a new layer under the outline and fill the doll with light gray # b4b4b4 using a hard round brush with Hardness of 100%. The mode of blending the layer with the outline is set to Overlay, then right click on it and select Create clipping mask.
Step 8
For each repainting of the shadows, create a new layer and transform it into a clipping mask (Ctrl + Alt + G). Set the blending mode of the first layer to Multiply and use the Brush Tool (B) to draw the first layer of shadows. Try not to skip patches and cast a shadow everywhere, so you do not have to modify it during color filling.
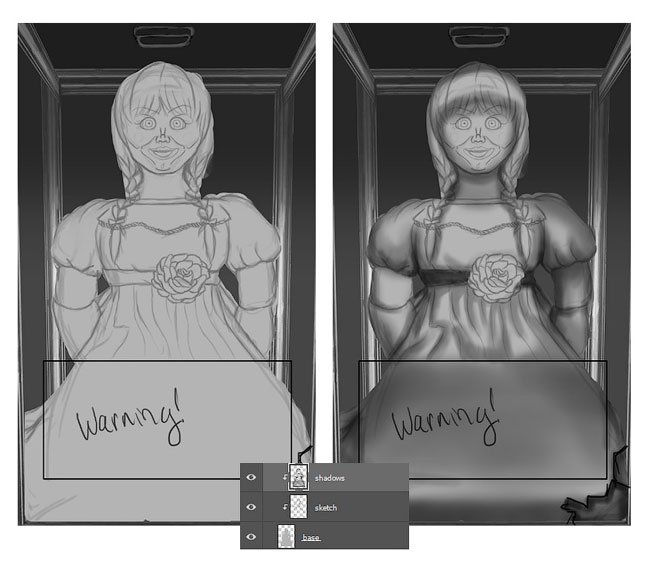
Since the light source is at the top of the box, as well as in front of the doll, I will not completely paint the light-gray base color and leave some areas as glare. Note that I draw a shadow on the bottom of each part to show its remoteness from the light source.
With a solid round brush, we detail the face of the doll. Try not to make too dark shadows, otherwise it will spoil us further work on color casting.
- Add color
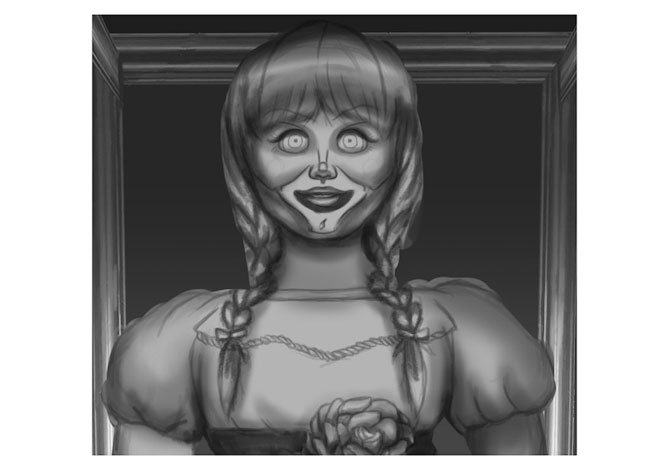
Step 9
Combine the layers with the doll together. Create a new layer above the doll and transform it into a clipping mask (Ctrl + Alt + G). Set the layer blending mode to Multiply and select the base colors to draw the doll. The main colors are yellow # b58562, red # b40909 and cream # bba08e.
Step 10
Now lighten the doll a little. Create a new layer in the Color Dodge mode and transform it into a clipping mask. Light color # 96908d, using a soft round brush, we paint glare on the face, dress and hair.
Step 11
We do not forget that we are limited by the width of the glass box, and we draw the lighting taking into account this factor. Create a new layer above the background layer and transform it into a clipping mask (Ctrl + Alt + G). Fill this layer with brown # 8c611d and change the blending mode to Color Burn to darken the background.
We pass to the frame of the box. Create another new layer above the skeleton and transform it into a clipping mask. Change the layer blending mode to Multiply and draw a shadow on the frame. I advise you to work with texture brushes to slightly age the frame. Then create a new layer, fill it with brown # 6d5241 and set the blending mode to Soft Light.
Step 12
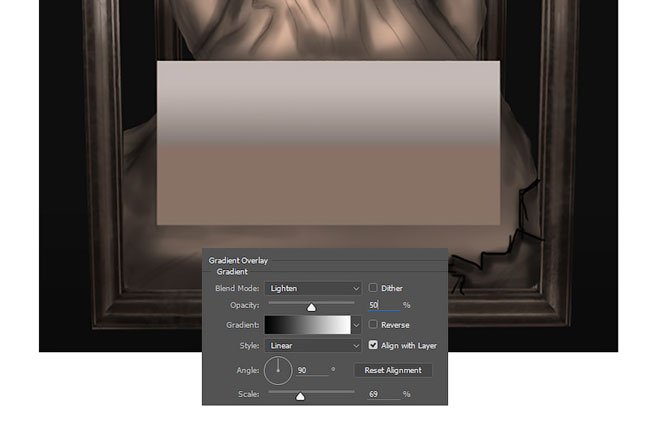
Before we continue to detail the drawing, we must add one more basic detail. Using the Rectangular Marquee Tool (M), create a selection in place of the warning label and fill it with the color # 877266. Right click on the layer and select Blending Options. Apply the Gradient Overlay layer style:
That's all for now add we will continue in part 2
Source: https://design.tutsplus.com/tutorials/digitally-paint-a-haunted-doll-in-adobe-photoshop--cms-27271
Not indicating that the content you copy/paste is not your original art could be seen as plagiarism.
Repeated plagiarized art posts are considered spam. Spam is discouraged by the community, and may result in action from the cheetah bot.
#art (https://steemit.com/trending/art)
Please refrain from using “art” tag for posting other people's creations without proper attribution or explicitly stating it's not yours.
If you are actually the original author, please do reply to let us know!
Thank You!
More Info: Abuse Guide - 2017.