Hello guys time to end Complete beginners guide to Adobe Photoshop Lessonі and start to create something real special and cool, but before i end i wonna teach you how to batch photo processing in Photoshop.
Often, we have to work with a lot of photos. Treating 300-500 photos at a time is very difficult and time consuming. Thanks to the small photoshop tutorial on batch processing of photos, you will learn to do a few actions on the images at once, which in turn reduces the time to work.
Let's consider a lesson on an example of such a concept as a preview. It is extremely important for any photographer. You may now say that only enlarging the image can realize its quality and skill of shooting, but as practice shows, even the very best photos are rarely placed in the original size. Most likely, so within the framework of the preview, they will remain. Then it is extremely important that, despite the small size, the user has felt the quality of the photo.
The main thing in small-sized photo processing is the sharpness, especially if you greatly reduce the original size of the image. In addition to changing the size, when creating a preview, it is necessary to increase the sharpness.
If you have to process several hundred photographs (batch processing), the most expedient option will be to use the action games in Photoshop. In this case, you only need to write the course of action once, and everything, then the program will do everything for you.
Our action can be applied to photos of any size and subject matter. The main actions we require from action is to resize the photo, increase sharpness and then save it in the correct format. To do this, we first need to study the Edit Dimension command, it is located in the File - Automation tab.
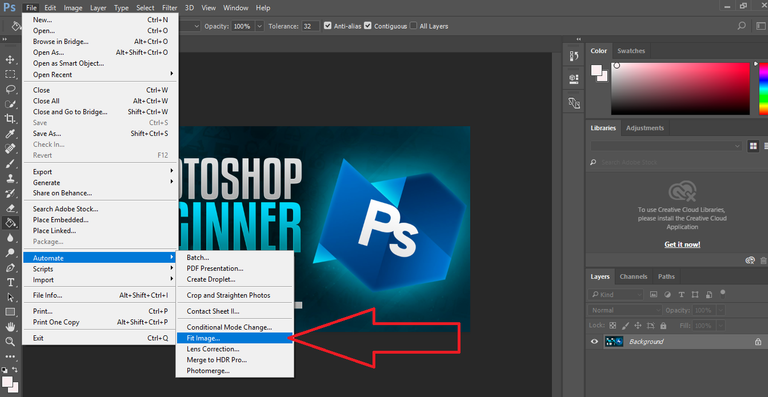
In contrast to the "Edit Size" command, which changes the size of the image regardless of whether the photo originally was horizontal or vertical, the Change dimension recognizes the image of the photo and accordingly leads it to the desired form.
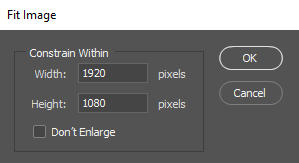
To illustrate what the work of the team is about, I give an example. Imagine that by setting "Resize" we set the parameters to 400px, as a result, all the horizontal photos will be processed correctly, but the vertical ones will become much larger, since they should have 400px not width nor length.
Through the Edit Dimension, we simply put two necessary digits and the program itself recognizes which number refers to the length, and which width is.
Now let's go to the instructions for batch processing photos
Step 1
You must first open any photo. Over it, we will carry out a number of operations that we will record into action.
Step 2
First press Window Then Action. Find second arrow on the image then press create action then find third arrow and press record button.
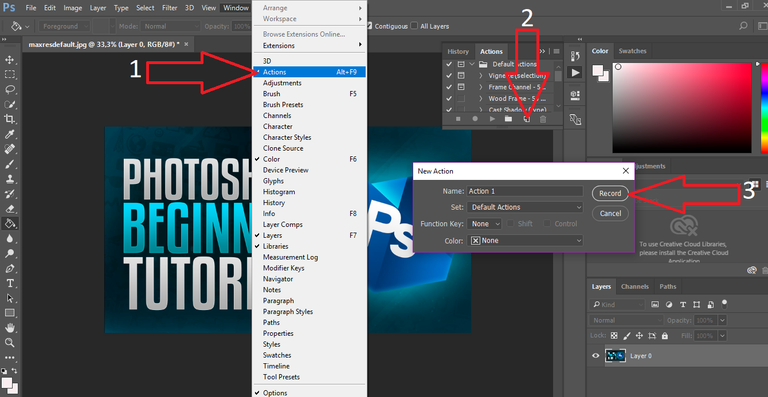
Congradulations we start recording the action.
Attention! All of the following actions are already recorded in the action.
Step 3
You need to convert the photo to sRGB (only this standard is displayed correctly by all browsers, on any device). To record an action, click Edit - Edit Profile. If all sources are already stored in the required format, then this step can be ruled out.
Step 4
In the Change Dimension setting, set the value to 700px. Of course, you can put any number, but as practice shows, it's the perfect size for a preview.
Step 5
Now the actual thing is sharpness. It is best to use a filter to optimize sharpness. So, go to the Filters section - Sharpness - Smart sharpness. Set up optimal settings.
Step 6
The last step is to save the image. Next you have to specify the quality of the photo. For Internet sites the optimal parameter will be 9-10.
Step 7
Finally, close the photo, if you do not want to get 300 open tabs in the end.
Step 8
Press Stop. All! Our versatile action is ready.
There is one thing that makes it easier and more convenient to process your photos for the Internet. This is a Droplet. Thanks to that, you can create a file that will run the entire action of the action.
How to create a droplet?
It is created from an already recorded action.
Step 1
Go to File - Automation - Create a droplet
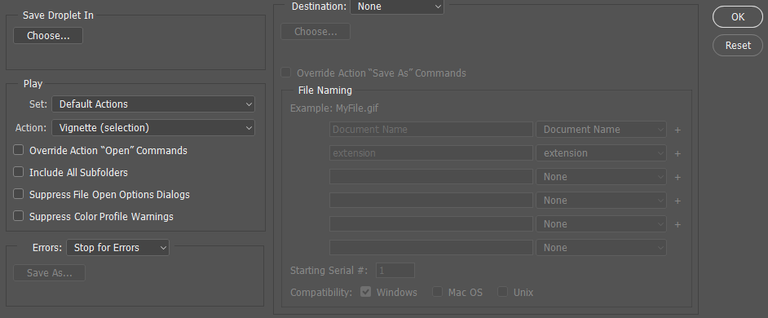
Step 2
You must configure the parameters:
Select the folder where the photo is stored;
Select an already recorded action;
Select the folder where you want to save the received photos.
After clicking on the OK button, a droplet appears in the form of a blue arrow in the folder you specified. You just need to transfer your photos to this arrow, as they will be applied to all the preinstalled settings right there.
Save your time and use batch processing of photos!