My introduction
So far since joining Steemit my blogs have been about politics and the economy. However, my true passion is art. I studied art at college and I like to browse art online and I also like to visit galleries and in my free time I like to draw and sketch. I love to hear about art fans and their experiences. I tend not to judge people on their tastes as art in my eyes is subjective. My own taste is mostly traditional though.
My favourite artists are Degas, Monet, Manet, Rembrandt, Vermeer and Dali to name a few. I also like art deco, art nouveau, impressionism, realism, surrealism, fantasy art, fan art and anime. So quite a broad spectrum and a mixture of traditional and non-traditional styles although mostly traditional.
My progress so far to be continued....
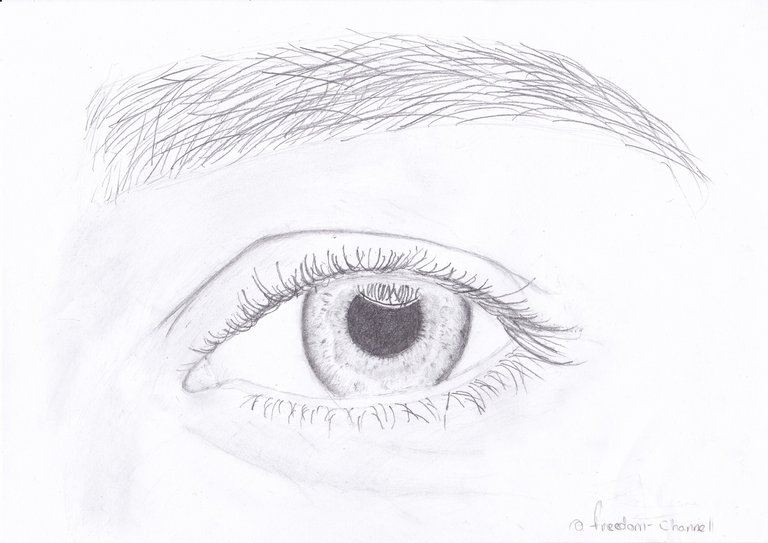
For my first piece of art I draw an eye in as much detail as possible. Above is where have got to so far and below is how went about it.
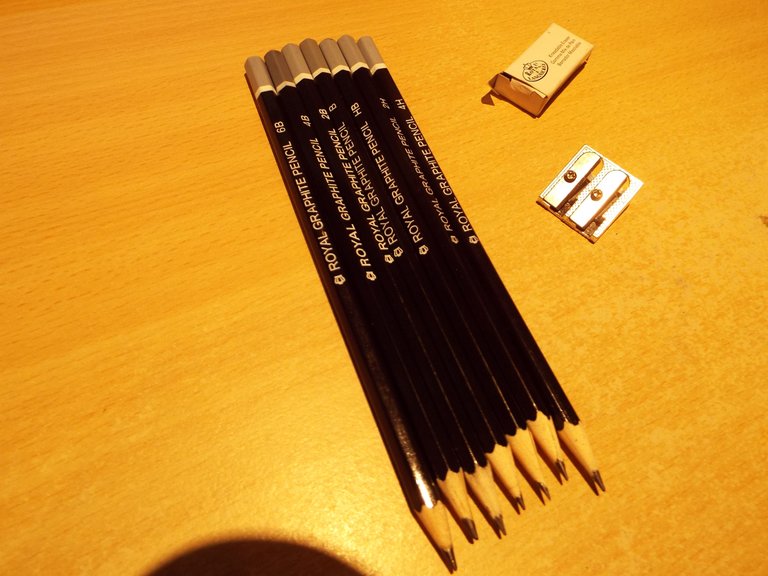
The materials I will be using is good sketching pencils from a range of hardness from 8B up to 4H. I also got a high-resolution image from royalty free image website. It does not show in the picture, I do have an 8B oops. It's advisable to have an eraser and it's a good idea to sharpen your pencils depending on the level of control you want.
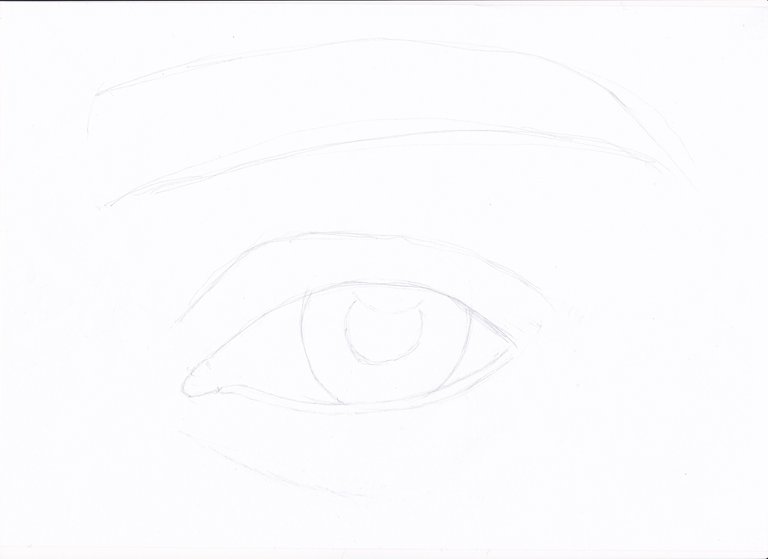
Firstly, I start to pencil in the outline of the eye. How you hold the pencil will give you better control. I like to hold the pencil between the index finger and middle finger and at the end the pencil. I find loosely outline the sketch and then refine the accuracy of the outline.
Sorry for the faintness of the image, my scanner settings needed adjusting here:
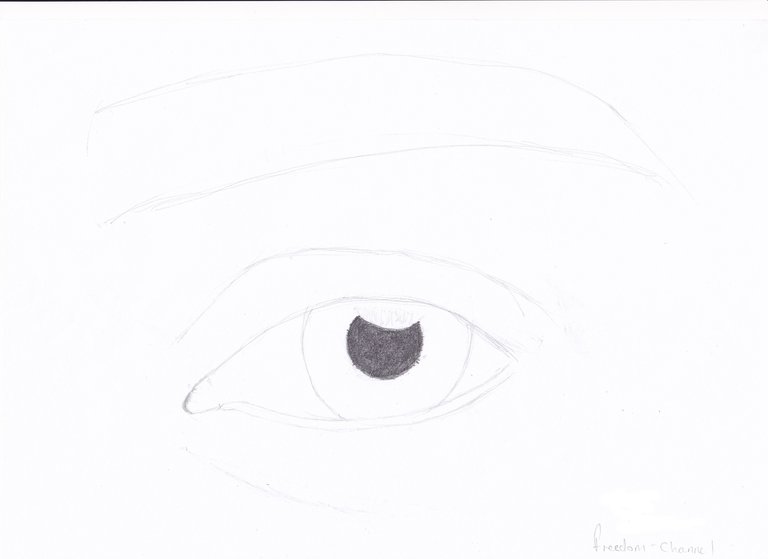
I then start detail by pencilling in the pupil. You will need a 6B or 8B for this :-).
In the next step I started to detail the iris which I found to be the most time consuming part. For the iris I used a harder pencil 2H was sufficient enough and then with a 6B pencil I pencilled in the eye lashes. Getting the direction of the lash is important and notice how it changed direction halfway across the eye lid. I also started pencil in some skin texture.
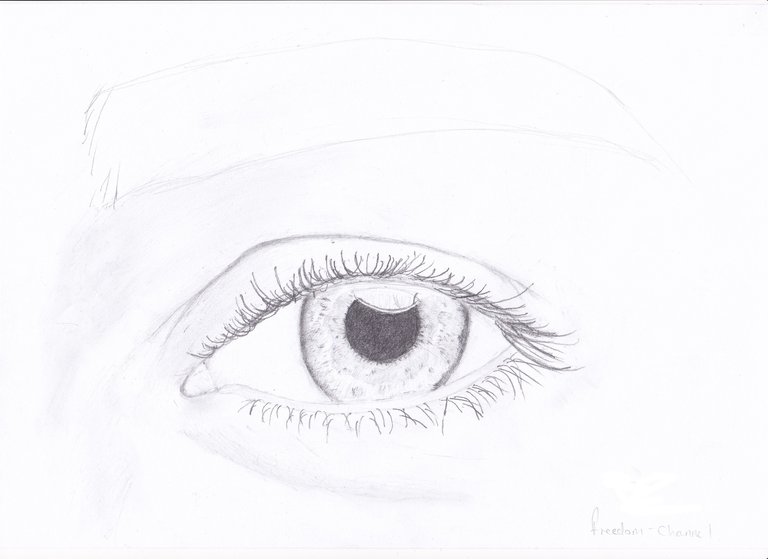
In the last image is how the image has progressed so far. I have continued to put in some detail around the eye and continued with some detail in the iris. In the eye brow again I used the 6B pencil which I had to sharpen. The direction of hairs entered from different directions but met roughly in the centre of the brow.
I hope you have enjoyed my first art post and if you did please upvote and follow. Upvoting my post will help me upload better quality posts in future. In part 2 I will complete the drawing by adding more detail to the iris and skin.
Welcome to Steem @freedom-channel I have upvoted and sent you a tip
Thank you very much :-)
Hi @freedom-channel welcome to Steemit, have a nice time ahead.
Thanks :-).
Great work! I always envy those who can draw well. lol
Thanks Josh, I admire those who report on the truth.
hello Freedom-channel !! Nice to see more people like you - here joining steemit!! Becoming a steamian is a great adventure! Here you can win money while bloging! At the beginning it wouldn't be easy, but it isn't impossible. So just write from your heart and everything will be allright. Wish you much luck! Cheers! Wish you much luck! Greetings, @khunpoom !
I intend to, thanks for the kind greeting.
Cool! I can see you're new here so I'd like to offer you my welcome. Here's an upvote from me and keep on doing you!
As a fresh steemian it can be hard to increase your steem power so I suggest you to try out @MinnowPowerUp as you can earn up to 30% more steem power than just powering up with steem directly! It's a subscription based daily upvote bot that draws its power from a delegation pool. I compiled this post to explain the system in more depth and share my own experience in earning wupvotes for over $1 a day.