Be happy with what you have
Be excited about what you want.
~ Alan Cohen
I've seen people who are happy while being "poor", and I've seen people who are sad and depressed while being "rich". Apparently to be happy isn't depend on what you have, but it's depend on your mindset. I think someone will be able to be happy when she could let go of what she thought her life supposed to look like. Accepting, be grateful and enjoy the moment is the key to be happy and live in peace.
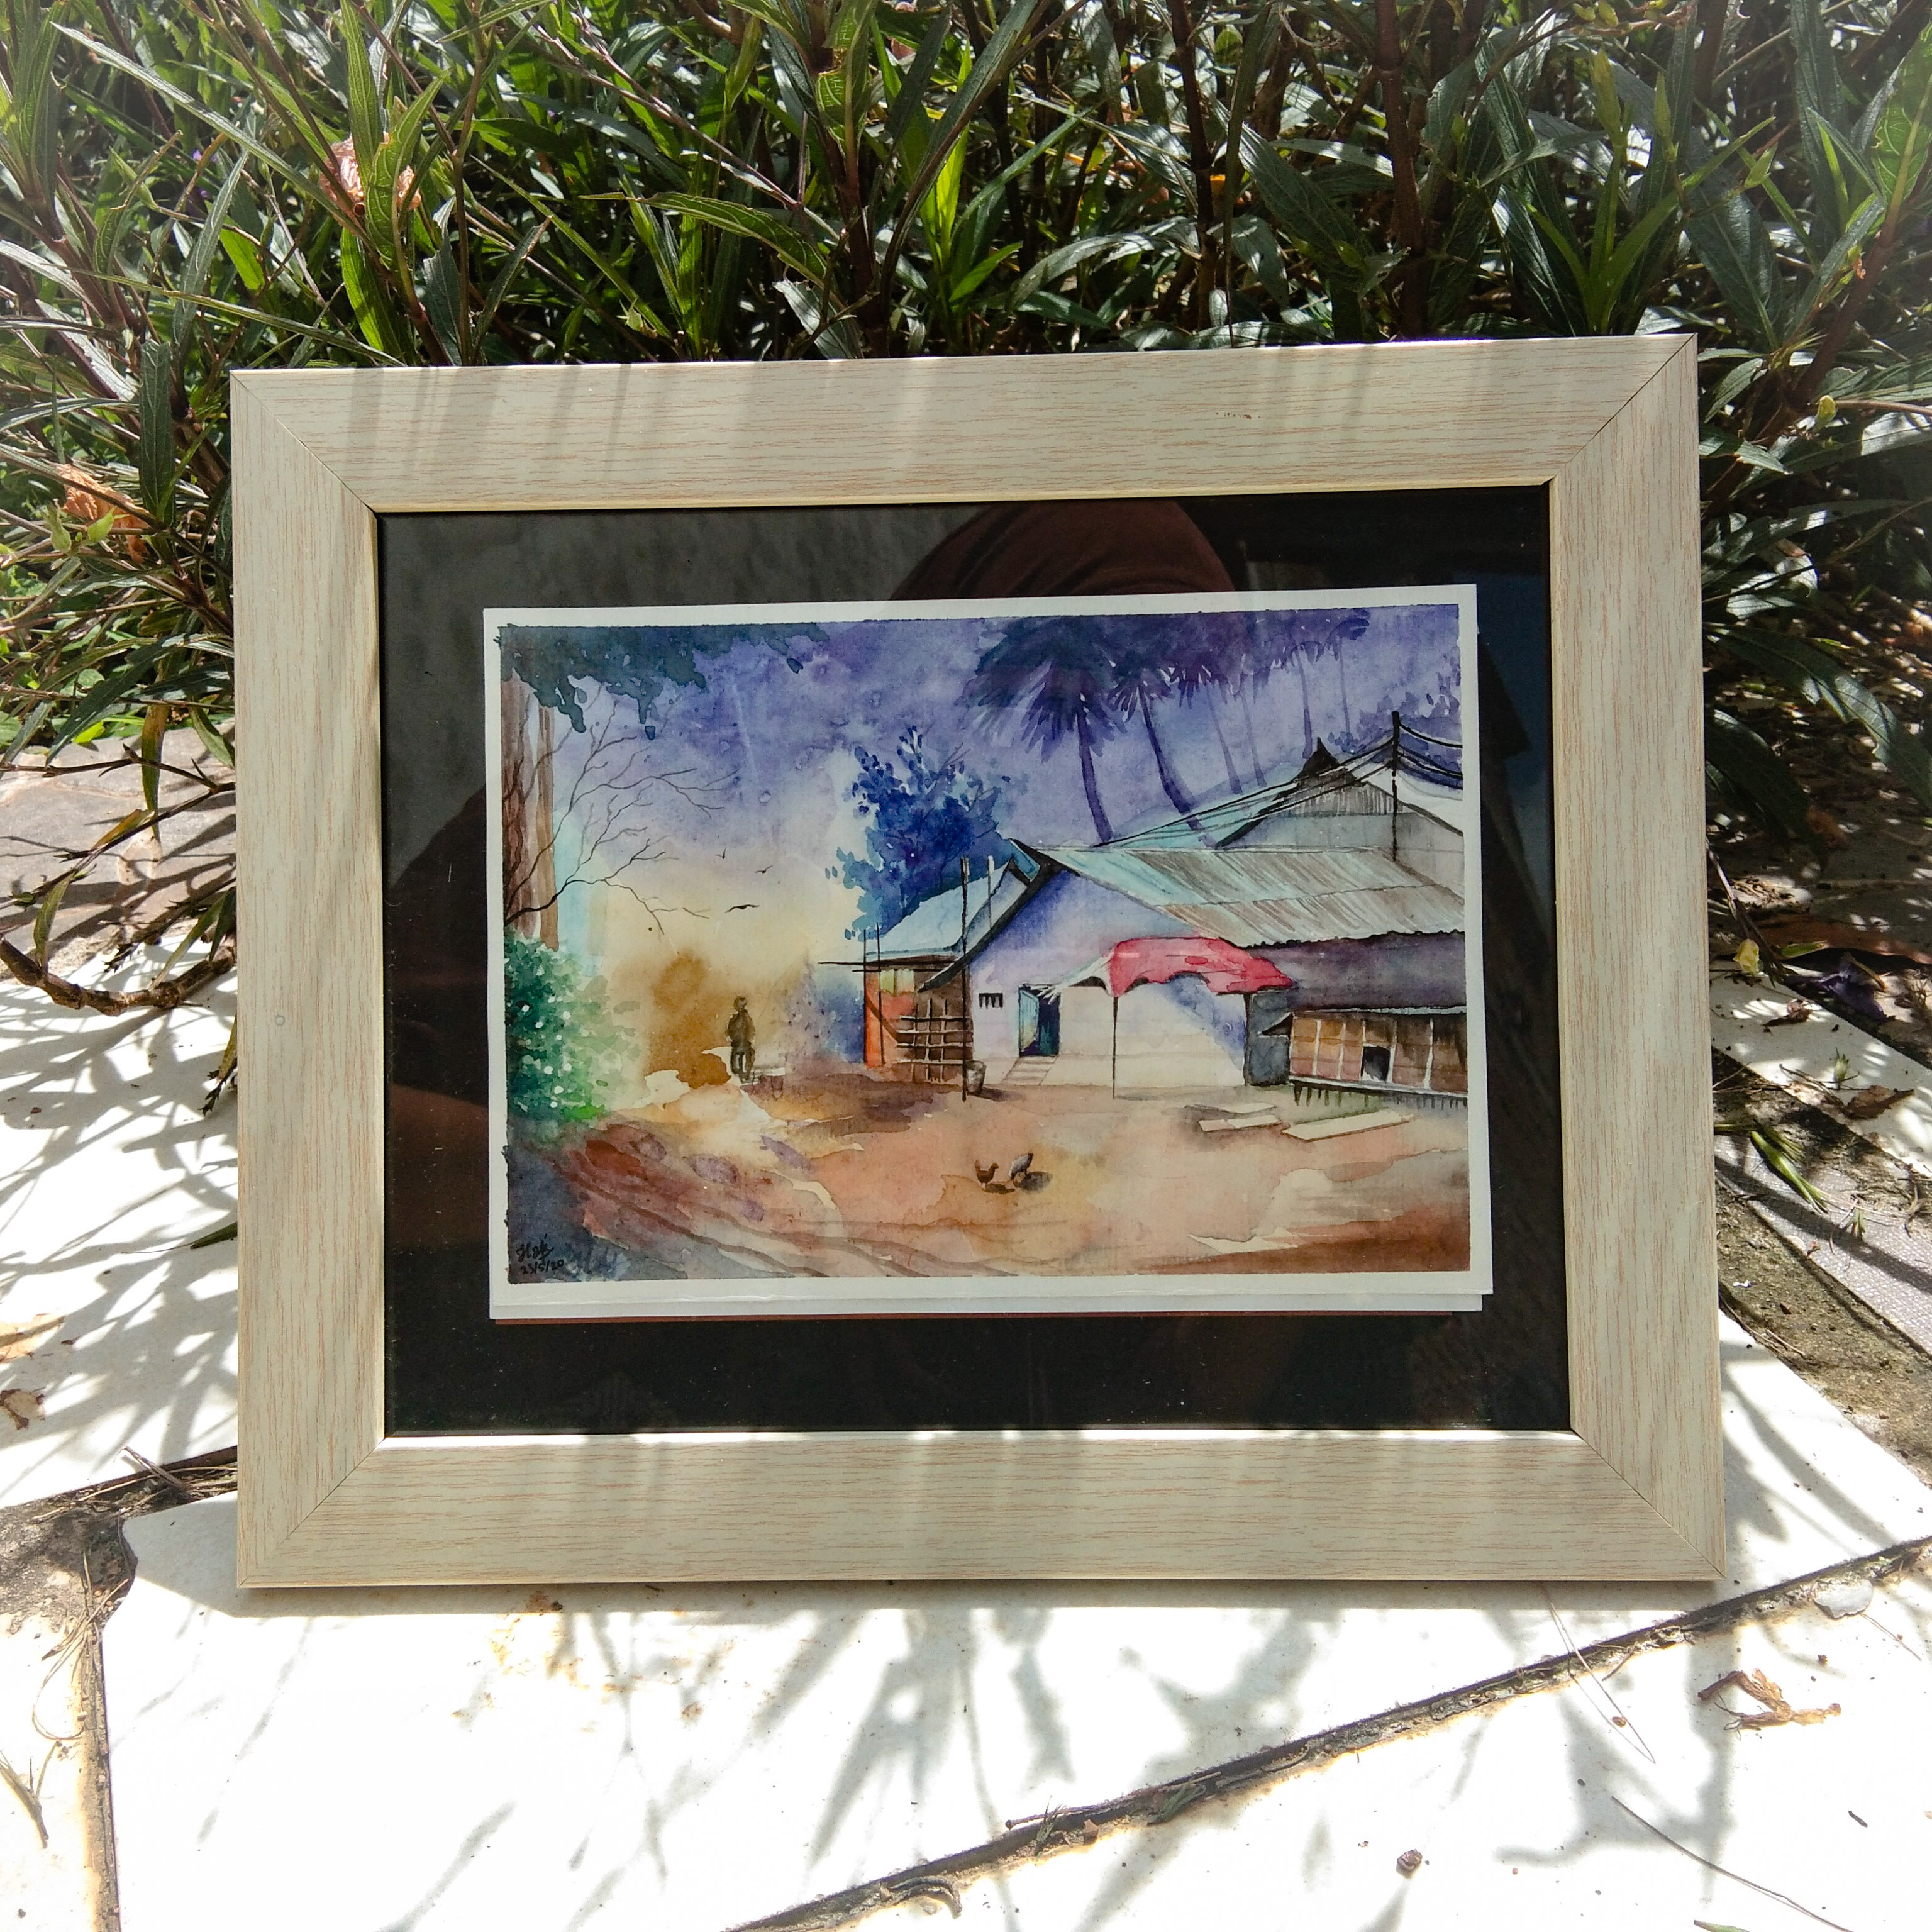
Hello everyone! Today I'd like to explain how to paint this wonderful piece of art. First of all prepared the tools.

If you are a beginner it's better to use student grade art supplies like me, because it's cheap so you can keep practicing.
The paint that I used :
- Phoenix watercolor, the price is around 8$, this paint is fine for practicing watercolor.
- Koi Water colors tube, 20$, I really likes this paint, because the colors is pigmented and easy to blend.
- Mijello Mission Silver, I'm not sure about the price, because I get it from my teacher, she sold it for 0.3$ for one tube, but when my friend check it on online shop, the price is around 46$.
My Brushes :
Artemedia Manglon, 11$ for 5 pieces
Artemedia Kazan-M, 6$
Unknown brushes, I bought it online, from china. If you need cheap brushes check out china's products.
V-Tec Paper, 300 gsm
Towel/tissue
Water
Masking fluid

First, Make a light sketch, don't put pressure on your pencil, else it would leave stain and your paint won't looks so good.
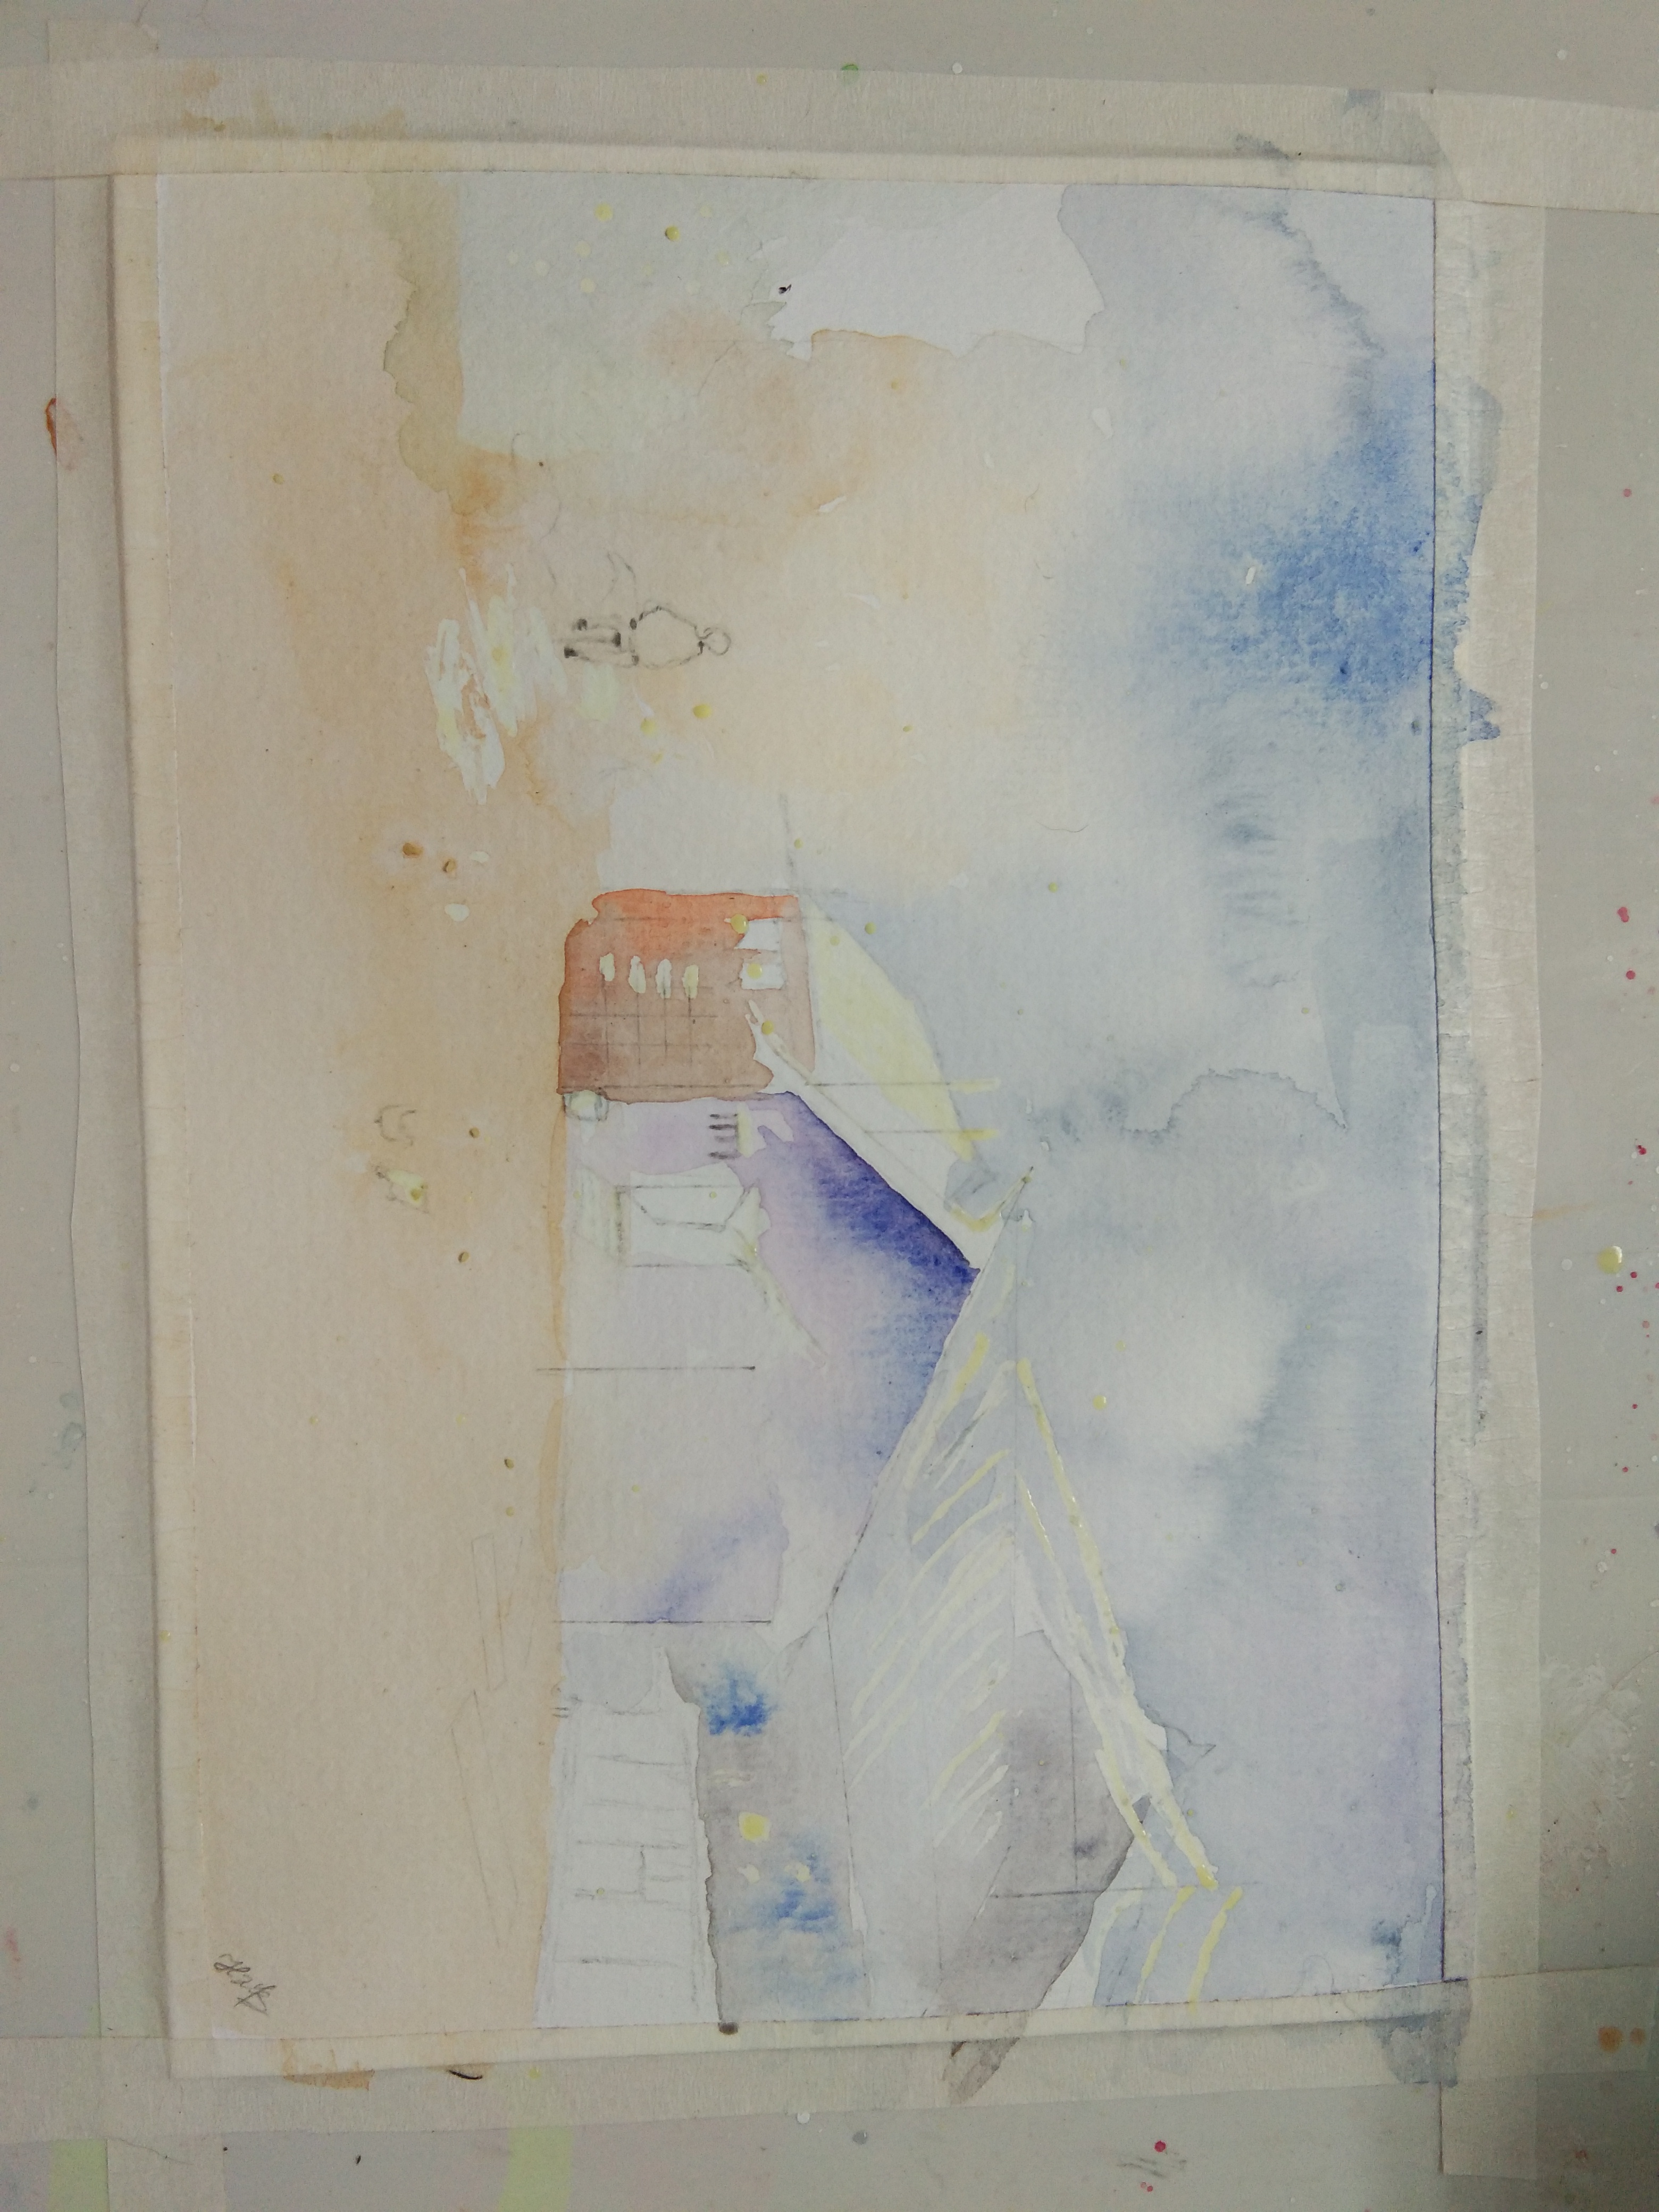
Add masking fluid on any part that you wish to stay white. (in watercolor painting, we don't use white on our work, if you want some part to looks white, simply don't paint it, or protect it using masing fluid).
Then, paint the 1st layer, wait until it dry.
Colors that I used : Ultra Marine, Purple, prussian blue, Cerulean blue, yellow ochre, burnt umber and burnt siena.

Working on second layer ; adding some trees.
Colors that I used : purple, .prussian blue, ultra marine, and sap green.
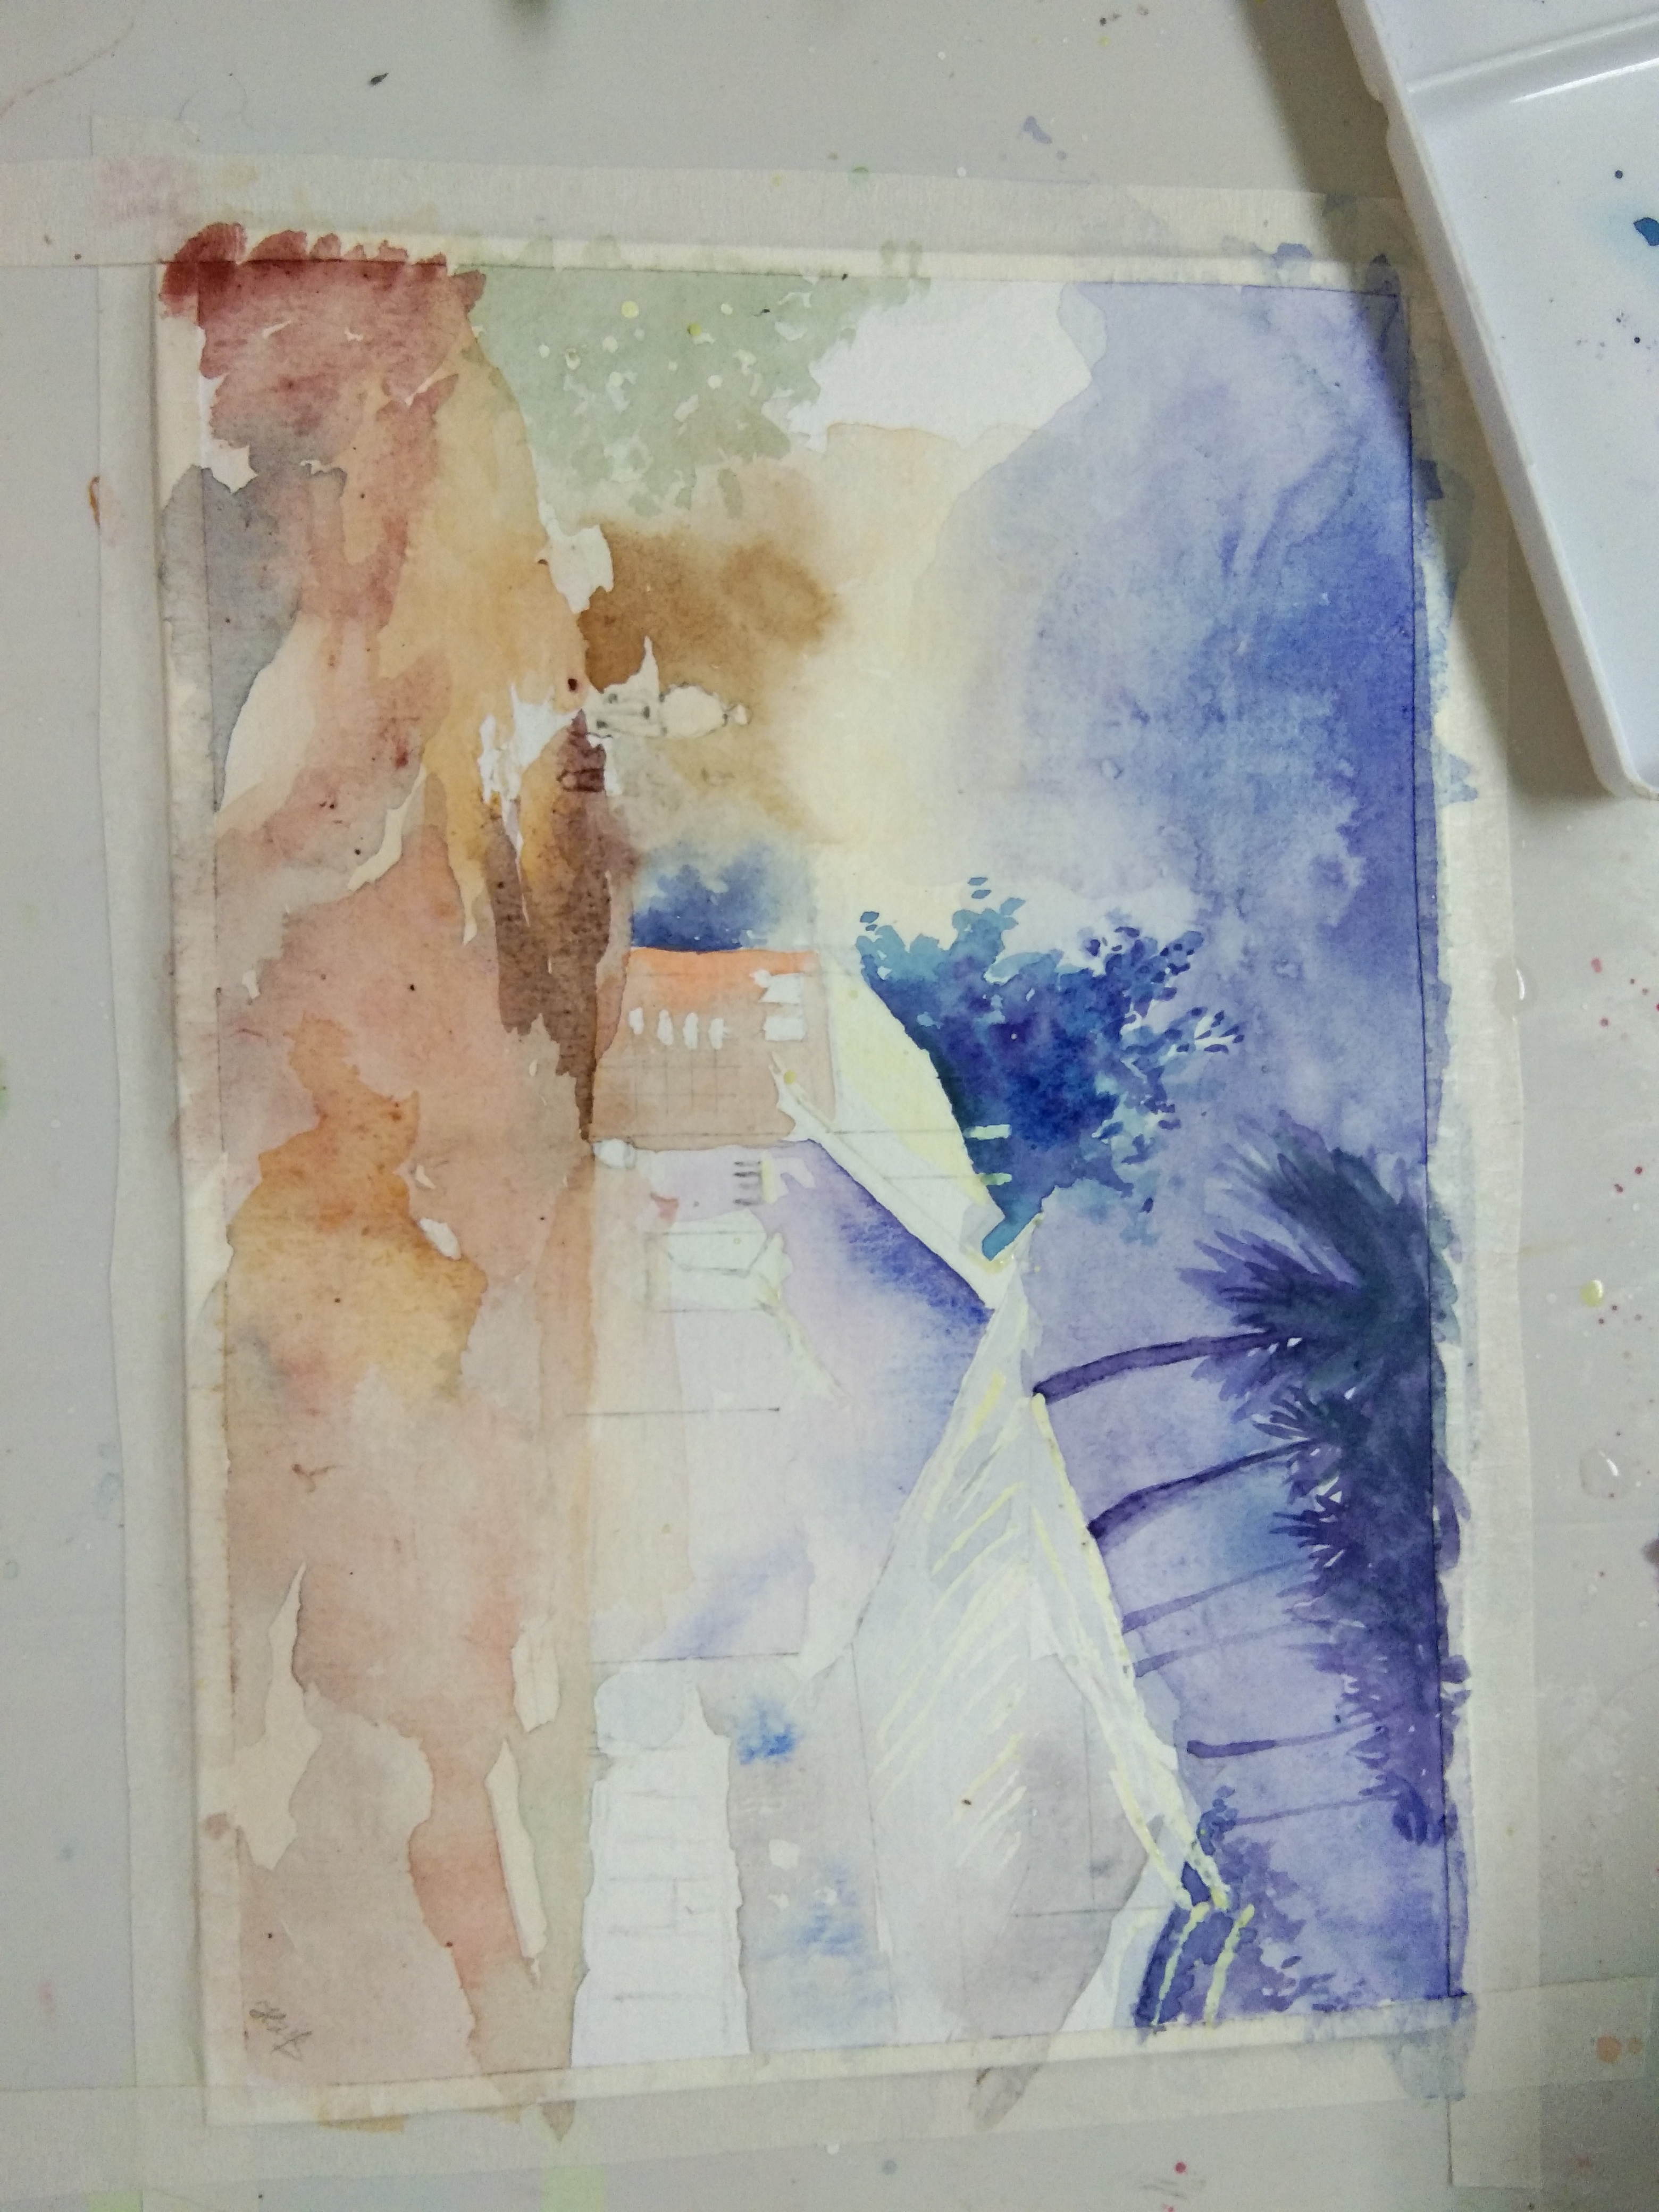
Still on the 2nd Layer, coloring the soil and make the sky looks darker.
Color that I used : orange, vermilion, burn umber, sienna, purple and prussian blue.
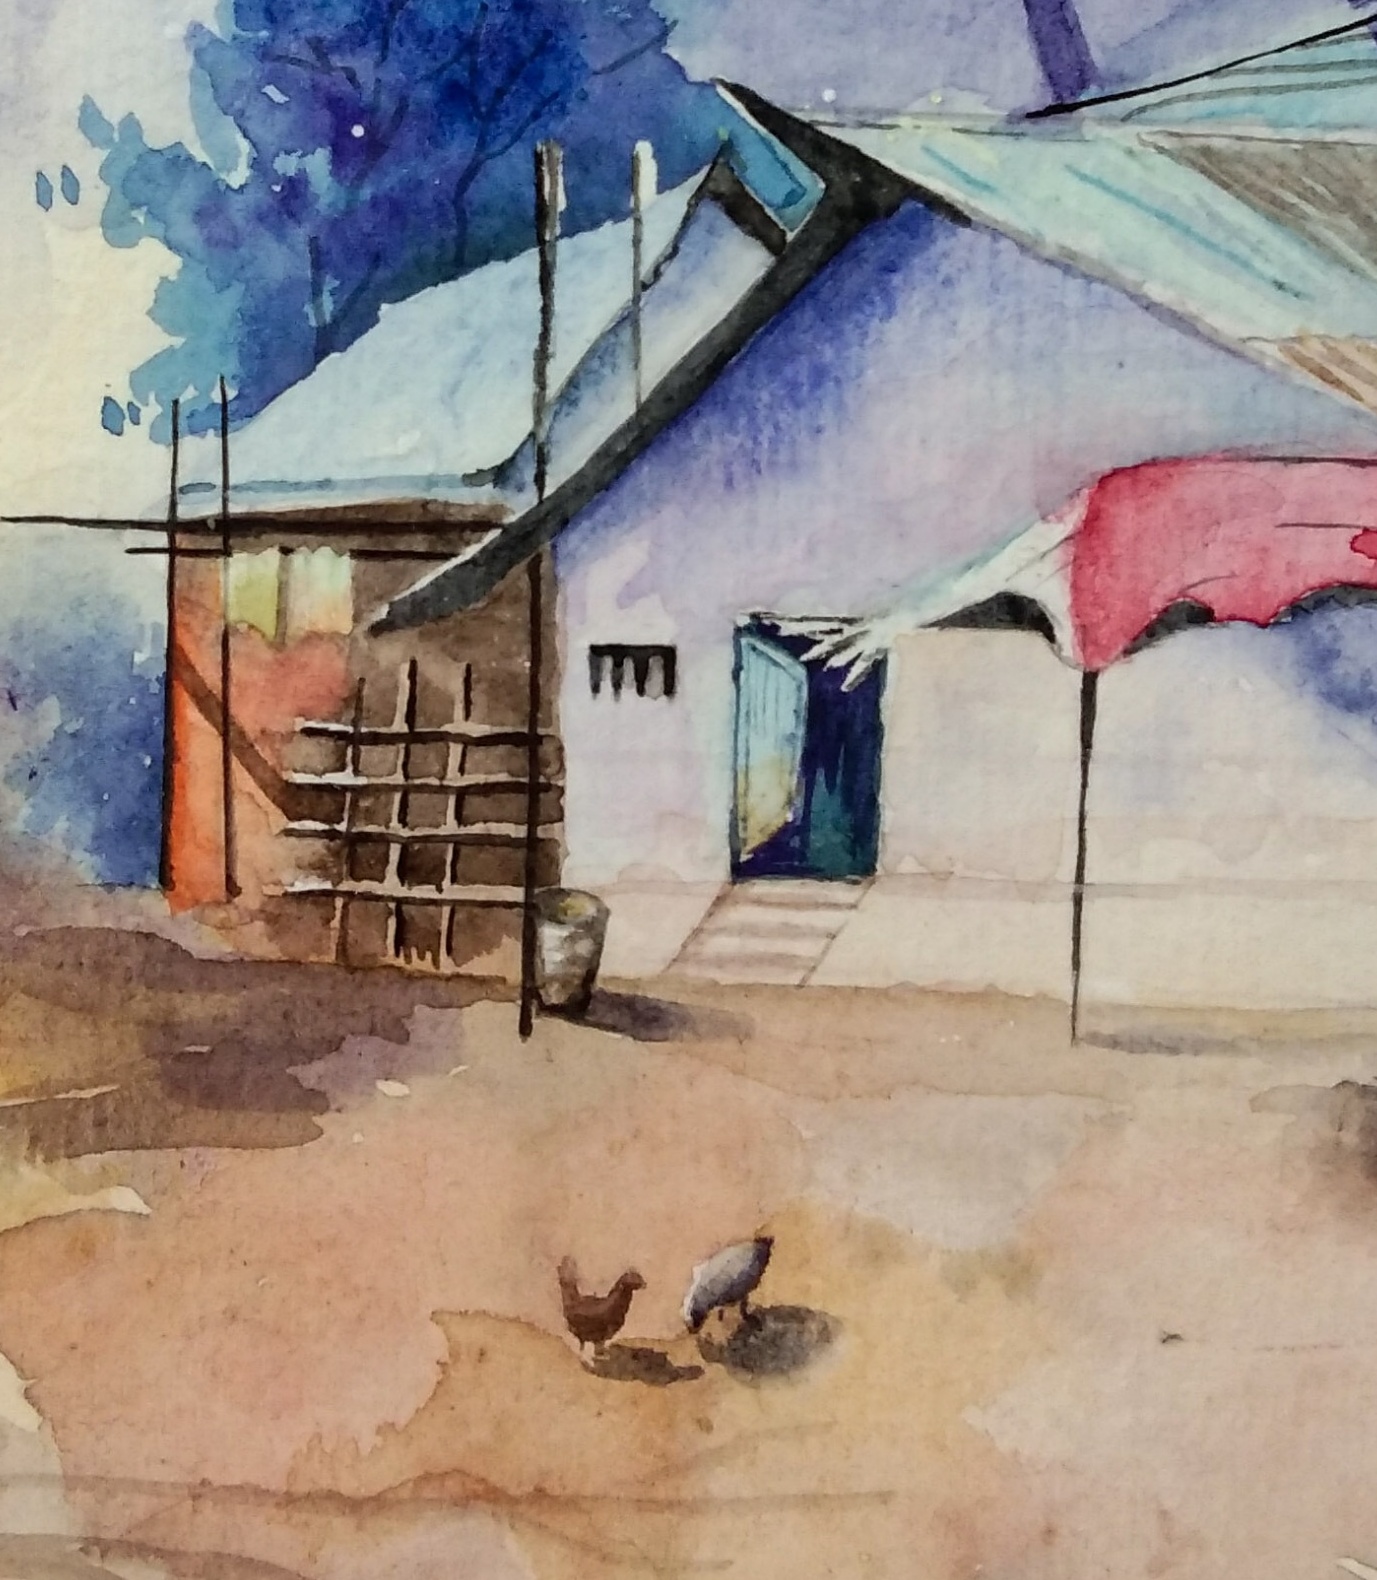
After I feel satisfied with the background, now I'm working on the houses and other part which need details.
My favorite part in this painting are those cute little chicken, hhaha... I used A5 paper, so those chicken really so small, I'm glad that it looks fine.
How I work : 1st layer, 2nd layer, details, that's it. On my early journey on watercolor I don't have any idea that you need to wait until the paper dry before working on the next layer. So for any beginners who might read it, always wait your paper to dry before you moved to the next step, or you might use hair dryer.
I think that's all for today, see you.
If you have any question, feel free to ask on the comment section.
Or if you have any critics about how I supposed to paint it, you can tell me on the comment, because I'm an amateur, I always open for critics and new knowledge ^ ^
See you!
Loveeed! Like the palet color
Thank you 😁