Hello, this is Leonardo, and we are here again for a new drawing!
In this post we will draw the character Kakashi from the anime Naruto, in CHIBI format.
Come on then, just to remind you that I always present the video walkthrough first, and just below it will be written.
We left for the video then!
Step by step writing
Now let's go through the written walkthrough if you can't keep up with the video, or it's very hard for you to learn in this format.
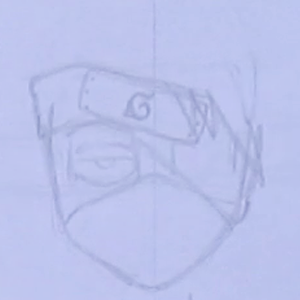
Step 1
I always start with the characters' faces, so for the right eye, make a downward curved stripe, another upward curved line, a straight line between these two streaks, and from that line, make a little ball cut in half.
Close the face with a pointed chin, and make the mask, which will even turn around the nose.
Then you make the headband, and make it crooked, covering your left eye.
And on it you make a crooked rectangle, and in the middle of it, make it almost like a snail to represent the leaf symbol.
Make three triangles over this range, two smaller, and the last largest of all, going below the eye.
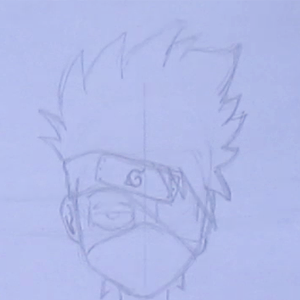
Step 2
Now it's time to do the hair and neck, and by character's character, your hair is curved upwards.
Also make the collar of the blouse, but as the style of the design is in CHIBI, the rest of the body will be minimized.
Step 3
Time to make the blouse and the character's hand.
As I said before, make them in miniature, and the hand, make as if holding a coin in the fingers: thumb and index finger.
Do not forget to make the scratches on the fingers, representing the glove in the hand, which is not complete as it does not cover the fingers.
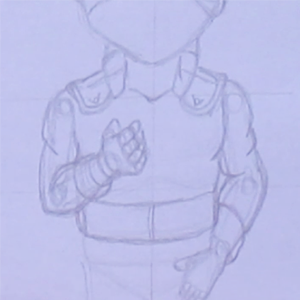
Step 4
After that, make an open booklet in your left hand; It has to pass behind the index finger, and in front of the thumb.
Then you make the pockets on his shirt, and for that, make a square on the left, as the view of the right pocket is obscured by the right arm and the book in his hand.
In this square that is the left pocket, make two vertical stripes, and two horizontal stripes, and your pocket is ready.
Also make the stripes on the sleeves and underside of the blouse.
And on the left arm, make the circle that looks like those big lollipops.

Step 5
To make the right leg pants, just make wavy lines that reach halfway down the calf.
In the thigh make a square, and in it make two stripes; this to represent the band he has tied in the region.
To make the shoes, make openings in the toes and heels, and also speak a curved rectangle just below the limit of the pants.
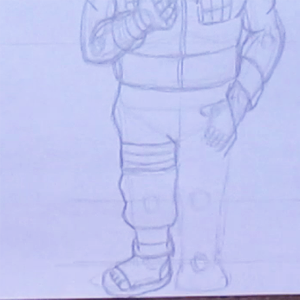
Step 6
To do the left leg, simply repeat the process, but without the thigh band, and with the left hand in the pocket.
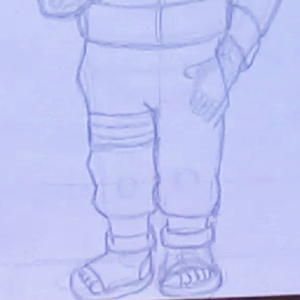
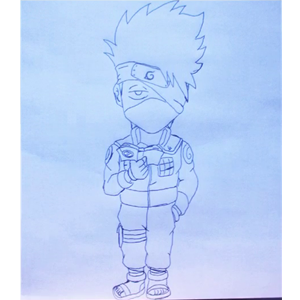
Final result
So this is the final result of the drawing after contouring and erasing the outline lines.
Feel free to color!