
Usare griglie prospettiche in Adobe Photoshop - Tutorial sulla pittura digitale #4
I software per la pittura digitale ci offrono il grandissimo vantaggio di poter realizzare facilmente delle griglie prospettiche che rimarranno separati rispetto al nostro dipinto.
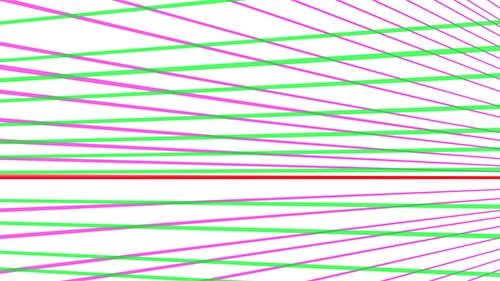
È possibile realizzare facilmente una griglia prospettica disegnando delle linee perfettamente orizzontali (tracciandole tenendo premuto il tasto Shift) per poi distorcerle dagli angoli con il comando Distorci, avendo cura di lasciarne una orizzontale in corrispondenza dell'orizzonte.
Personalmente le traccio sempre con colori molto vividi in modo che siano visibili anche ad opacità diminuita.
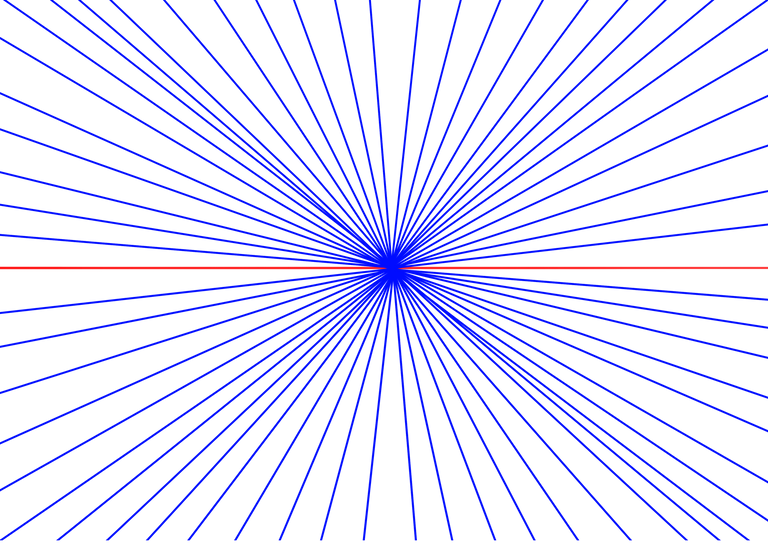
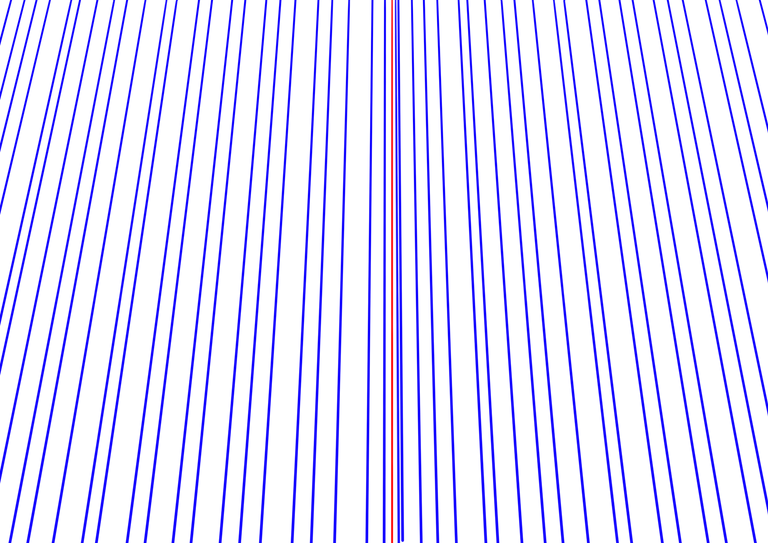
Metto a disposizione alcune delle mie griglie in formato png, scaricabili cliccando con il tasto destro sulle immagini qua sotto (punto di fuga centrale, destro, sinistro, terzo punto di fuga) per poi scegliere "Salva immagine" dal menu.
A seguire, un esempio molto semplice su come usare le griglie prospettiche.

Using perspective grids in Adobe Photoshop - Digital painting tutorial #4
Digital painting softwares offer the great advantage of making us able to easily create perspective grids that will stay separate from our painting.
It is possible to create a perspective grid by drawing perfectly horizontal lines (tracing them by holding down the Shift key) and then distorting them by dragging corners with the Distort command, taking care to keep a line horizontal corresponding to the horizon.
Personally I always trace it with very vivid colors so that they are visible even with lowered opacity.
I'll make available some of my grids in png format, downloadable by right clicking on the images below (central vanishing point, left, right and third vanishing point) and then choosing "Save image" from the menu.
Next up, a very simple guide on using perspective grids.


Creare un quadro di lavoro in Photoshop e definire una linea dell'orizzonte. Inserire o creare da nuovo tutte le griglie prospettiche che vogliamo, ad esempio una destra e una sinistra. È importante che la linea orizzontale della griglia prospettica combaci con il nostro orizzonte.
Per accentuare o smorzare la griglia, attivare la trasformazione con Ctrl T (Command T sul Mac), cliccare con il tasto destro, scegliere Distorci e poi tirare gli angoli della griglia sempre lasciando orizzontale la linea dell'orizzonte.
A piacimento, diminuire l'opacità delle griglie in modo da far trasparire eventuali disegni realizzati sotto.
Create a canvas in Photoshop and define a horizon line. Insert or create all the perspective grids you like, for example a right and a left. It is important that the horizontal line of the perspective grid fits with the horizon.
To accentuate or soften the grid, activate the transformation with Ctrl T (Command T on the Mac), right-click, choose Distort and then pull the corners of the grid always keeping the horizon line horizontal.
If you please, lower the opacity of the grids so as to show any designs made underneath.

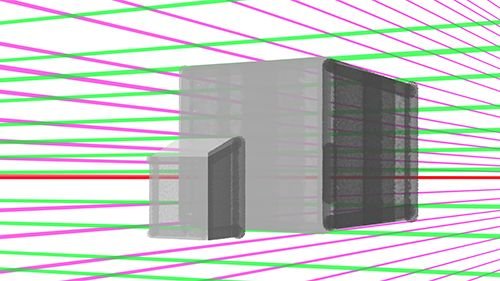
Disegnare volumi geometrici a piacimento, seguendo le griglie. Ricordo inoltre che la prospettiva può anche essere usata con elementi naturali (nuvole, staccionate, strade, segni di ruote, etc.) per aumentare la profondità anche laddove non ci siano edifici.
Draw geometric volumes at will, following the grids. I also remember that perspective can also be used with natural elements (clouds, fences, roads, wheel marks, etc.) to increase the depth even when there are no buildings.

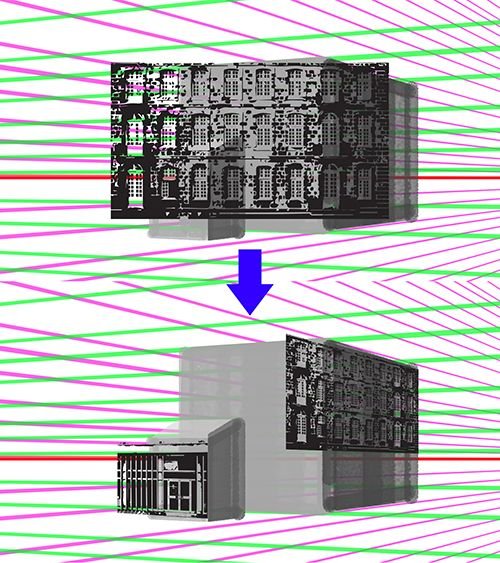
Sempre seguendo le griglie, è possibile posizionare texture o elementi altrimenti difficili da dipingere direttamente in prospettiva, come ad esempio le finestre. Per fare questo occorre dipingere l'elemento frontalmente o incollare una texture sul dipinto, poi premere Ctrl T per lanciare lo strumento trasformazione libera, e scegliere Distorci dal menu del tasto destro. Posizionare gli angoli sulla griglia prospettica per mettere la texture sui volumi dipinti.
Always using the grids as guides, you can place textures or elements otherwise difficult to paint directly in perspective, such as windows. To do this you need to paint the element frontally or paste a texture onto the painting, then press Ctrl T to launch the free Transform tool, and choose Distort from the right-click menu. Place the corners on the perspective grid to place the texture on the painted volumes.

Fundamentals of learning how to paint environments - Digital painting tutorial #1 [IT/EN]
Painting with selections - Digital painting tutorial #2 [IT/EN]
Geometric perspective - Digital painting tutorial #3 [IT/EN]
i wish can practice this kind of art
Why can't you??
Molto utile!