Hello everyone!
As requested some people wonder the process in which I take to make my art and some tips and tricks that I use as I create my pieces. Well without further ado, lets jump in.
In order to create digital art of course we will need the following:
A decent Computer
A Graphic Tablet
A desk where you can rest your laptop/desktop and graphic tablet on.
A Art Program.
Current here is my laptop specs:
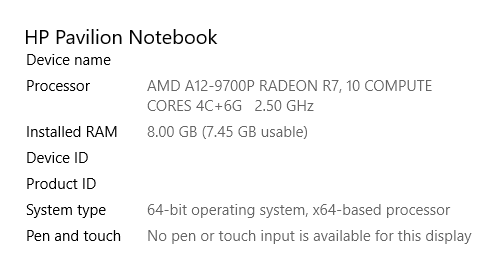
I have no issues running my art program and still listen to music as well as opening other alternative programs. But Make sure your computer have decent specs above 2.0GHZ to properly run your Art programs with no issues or malfunctions.
I use aside my laptop is my Wacom Intuos Comic (Small). There are many brands and names for different graphic tablets, but its recommended to look into what you can afford as well as the reviews on all graphic products you are interested in purchasing before making that big jump. Wacoms are a good brand and very easy to adjust to , but the prices may not be in your range. Always make sure to discuss and ask other fellow artist what their recommendations are before making a blind choice as well.
You would also need a empty space to work, like a desk or a table. I currently do not own a desk for my workspace, so I use the family dinner table to draw. If looking to make a workspace, look into different tables at your local Walmart, or furniture place.
And Lastly a art program. There are many art programs out their that can be used such as
Sai
Clip Studio Paint
Corel Painter
Photoshop
GIMP
Kirta
AutoDesk Sketchbook Pro/AutoDesk Sketchbook
And a Few others.....
But they are all specialized for certain functions. Make sure to always look into a programs functions and capabilities before purchasing or looking into buying them. But for today we will be discussing about Paint Tool Sai. :) .
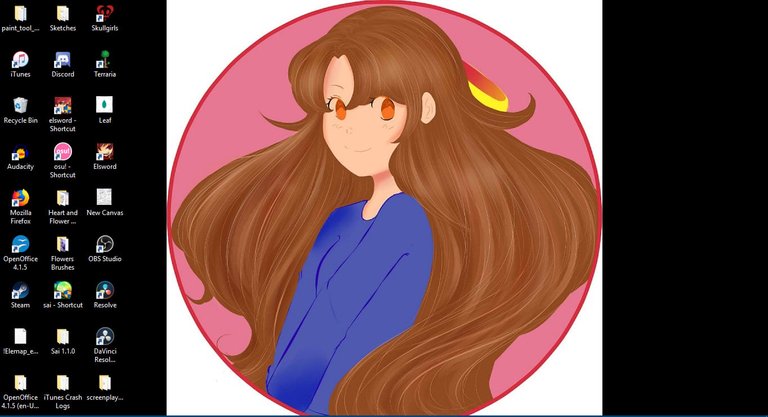
First we will locate SAI on our desktop shown below. Make sure that you can locate SAI easily.
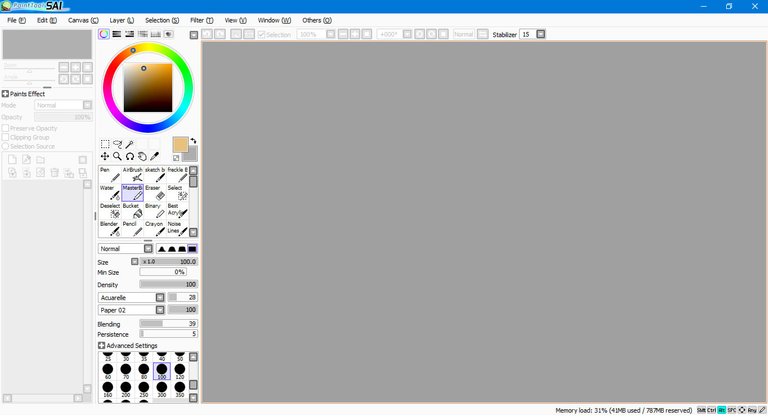
Next after Opening the program and you will be presented with the Opening screen. This is factory setting of SAI when opened. It is Possible to customize your work station. But this will be discussed in a later tutorial.
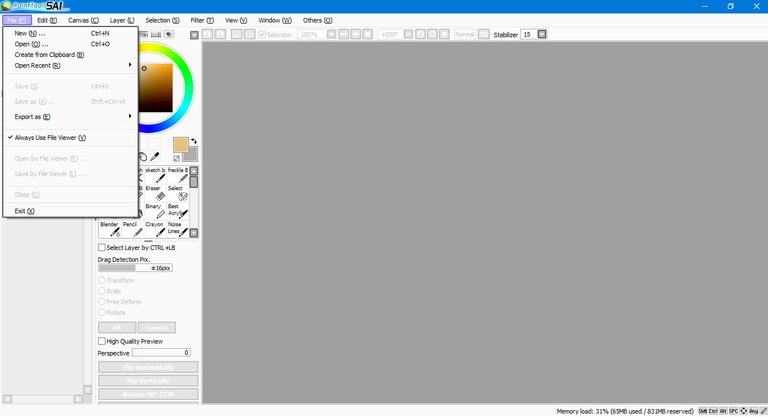

Select file as shown in the picture and you will be presented with a 2nd screen on top of your Program. This is where you can selected and alter the canvas size to the current project that you want.

I usually set my canvas to 8x11 on a 300 resolution. Usually resolution refers to the number to pixels in a image, so this affects the quality of your artwork, Recommend to start off with a resolution of 150/200 for normal drawing and 300+ for high quality artwork for prints, and desktop backgrounds. But I choose to use 300 for all my projects and artwork to give my art a clean resolution as possible.
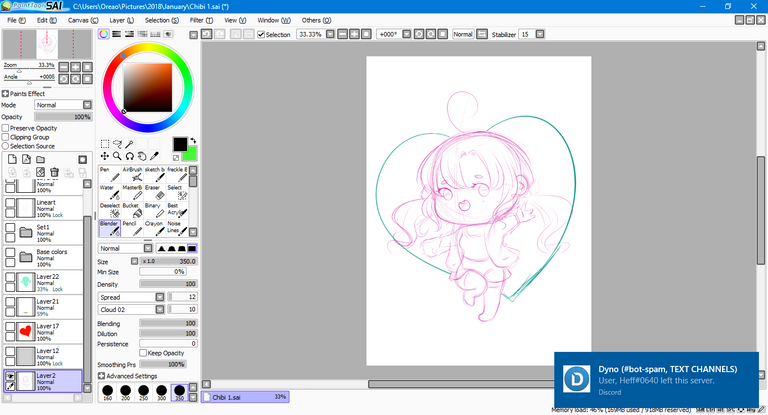
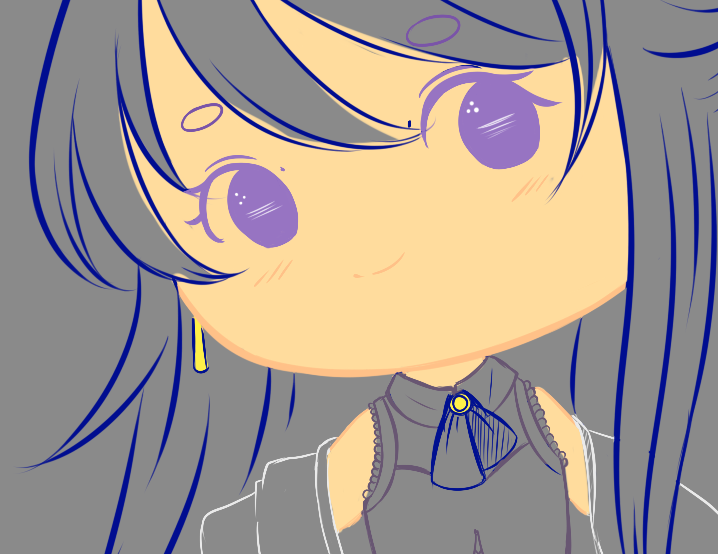
As shown above u can see I drew out my initial sketch I was going for which was a cute chibi girl. I sketch it out without paying mind to much details as possible. When sketching ideas, Be as sloppy and messy, Never try to be sloppy to the point you cant recognize your initial idea but draw in a manner than you can recognize where the eyes, hair, etc. is located.
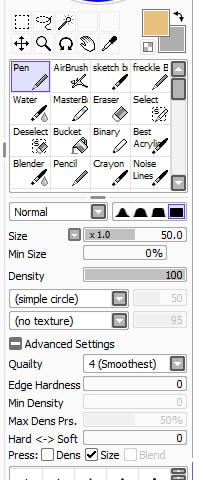
This is my trusty sketch pen that I use for ALL my sketches and lineart..
At this point you may be asking or wondering, “ But Oreao... My lines are terrible, or they are oddly shaped, or not smooth..” . When you first obtain your purchased tablet, You must set up the program CD that came with your Tablet. Without this , your tablet driver will not install on the computer automatically and you WILL have a hard time using your graphic tablet.. Make sure to always set up and follow all directions given via CD/Instruction Manual that came with your product.
Another Factor that affects your lines and the smoothness or how “Stable” your lines art is the “ Stabilizer function” 
After constructing the sketch layer from the previous screenshot, then you can start to lineart.
Always make sure to keep your strokes smooth and use your wrist to create your lines.
I create my lineart without the vector option that SAI have and do everything via my hands.
I lower the sketch layer's OPACITY to anything under 30% to 10%!! You can go lower to at least 5% but I do not recommend this , because the crucial parts of your drawing will not be visible to create the lineart of!!
Then we move on to COLORSSS!!!!!
Its best to learn color Theory before proceeding with coloring objects, but proceed to using color swatches if needed to choose colors that will make your art lively.!!
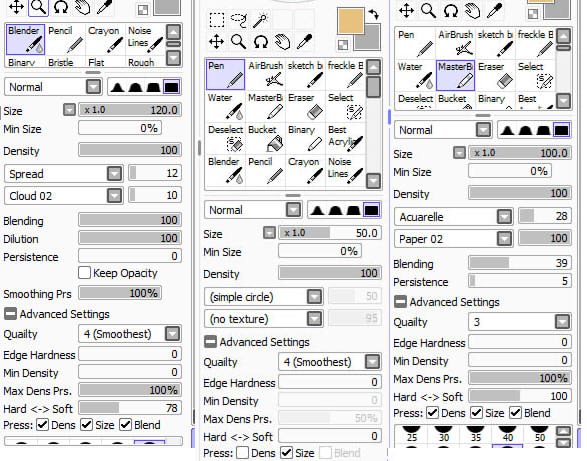
These are all my brushes that I use when I color my artwork. You can always tweak and customize your own brushes but that will be discussed in a later tutorial
REMEMBER, ALWAYS NAME YOUR LAYERS!!!
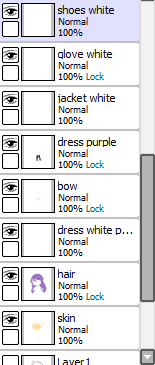
You can use single letters to indicate what each layer is exp: Skin = S , Eyes = E, Hair = H and so forth.
Or you can write out the full name if you want, This is suggested for faster working with commissions and projects.
COLOR COLOR COLOR!!
Its always good to start off with a layer under your line art but above the sketch layer, Usually I use Grey , but u can use any dark color like Dark Purple , Blue , Brown etc.. This is done to allow the user to see where they are coloring as well as making sure that the color is properly shaded and filled in between the lines of the area chosen. Slowly build off making sure that each layer is named properly and is separated by areas to keep your art space organized and sorted for easy access when needing to readjust colors or darkening colors to stand out more.
Almost Done!!!!
When you finish adding your colors and shading.. look at your drawing, Is it properly colored? Do the color blend well together? ( color theory), Is the colors saturated? Is the color dull? Is the drawing watermarked? Did the drawing emphasized what you initially wanted in the sketch stage of the drawing? Can you hide the layers and the lineart layer is visible? Is the lines in your lineart too thick? And so forth.
And boom:
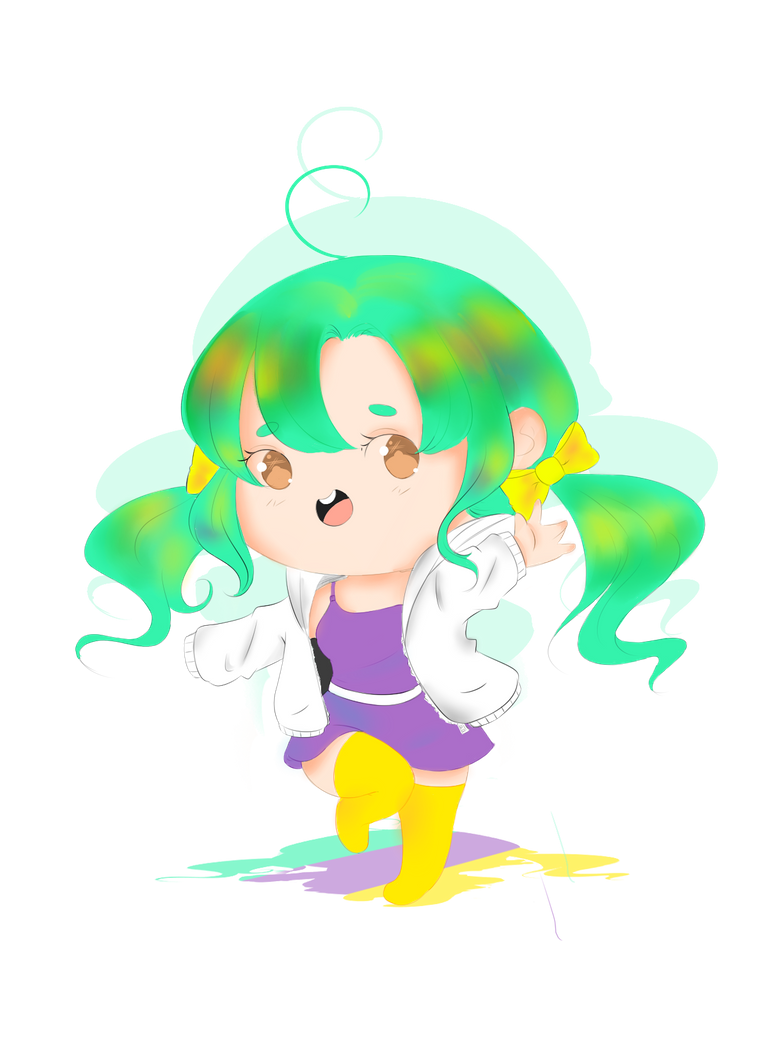
I hope this tutorial was of Much Help. This is my way of drawing Using Paint Tool SAI.
I will bring more Tutorials in my future posts... Stay Tune. :)
If you liked this tutorial, like and comment and ill try to assist or explain anything more in depth if possible