Dear steemians,
Today I am posting an interesting assignment I have completed for one of our group concerns.
I am given an assignment to conceptualize and design a sample packaging box and render it in 3D. I have conceptualized a packaged soft drink box and designed it
I have used the following applications to create different components:
- Adobe Photoshop
- Adobe Illustrator
- Blender 3D
Even though the process is quite long and not possible to explain all the steps in detail in a single post, I will go through the basic steps I have taken in each application to achieve the desired result. I will definitely capture the process videos showing each step with required explanations and post it for your reference after some time.
I have used Adobe Photoshop to create the box front design.
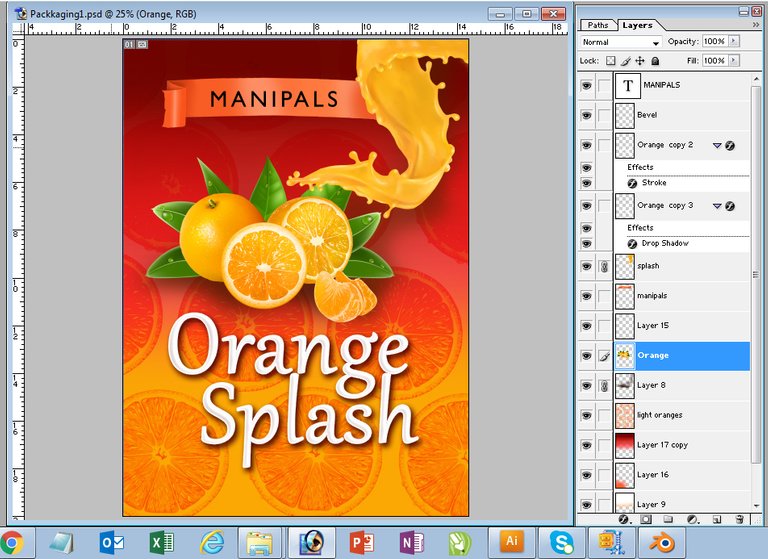
I put together different objects required for the design including Oranges, juice splashes etc. and placed them in the design in such a way that the oranges and splash is blended properly.
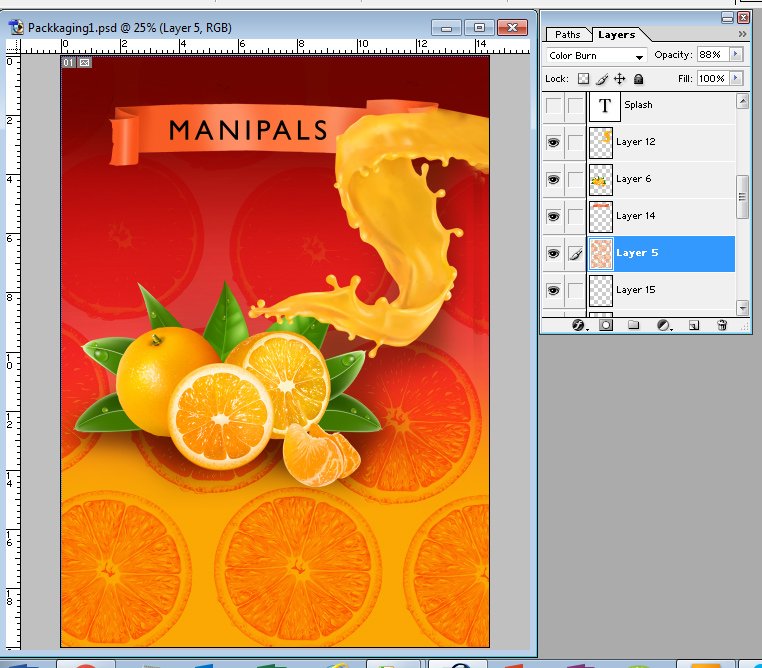
I have used orange slices in the background as pattern and blended the layer with color burn option
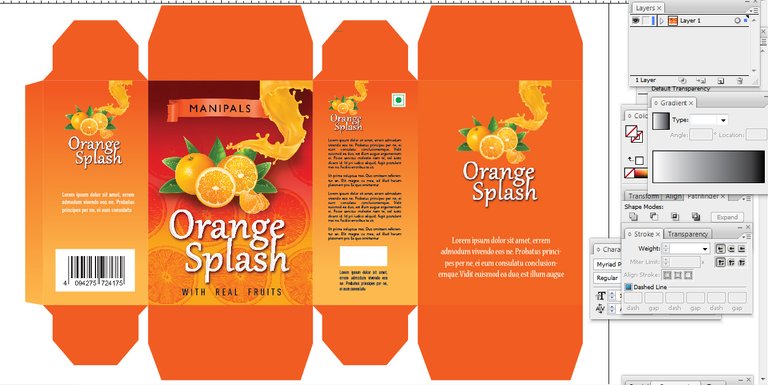
Once the front design is ready, i have taken the image to Adobe Illustrator and designed the dieline for the packaging design
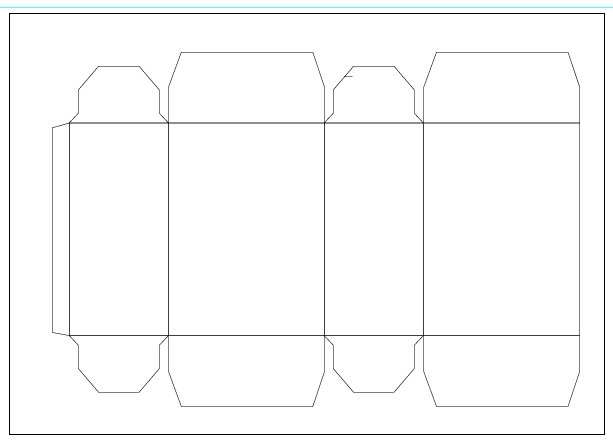
Then I put gradient and colours to different boxes, mostly orange shade to go with the orange drink theme
The text and logo is placed in the required space. As it is a sample box design, i have used lorem ispum text in most places
Once the design with dieline is finished in Adobe Illustrator I have saved the design in .jpg format so that it can be used in Blender application for applying UV image texture map for the box.
OK, now its 3D time :-)
Even though I like 3D Max for creating polygon modelling, I used Blender this time to create the Packaging Box and believe me Blender is an amazing application with lot of features.
Now, to create a 3D box, first we have to create a basic Cube shape in Blender.

I have set the size as 10 cm width, 15 cm height and 7 cm depth.
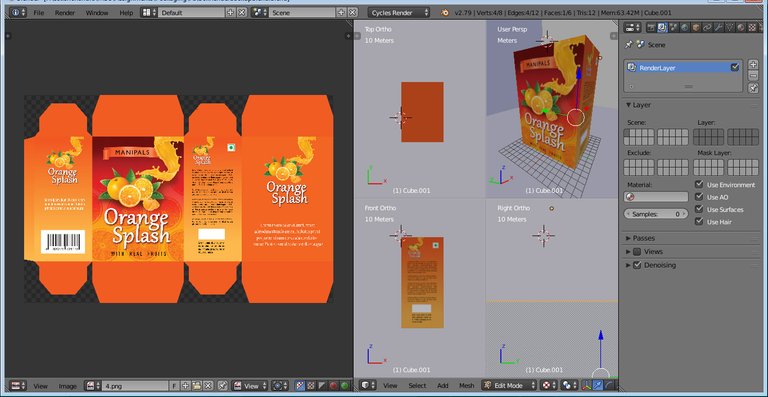
Once the Cube shape is created, its time to add UV map to put the dieline image designed in Adobe Illustrator on the Box.

I have tweeked the vertices of the UV Map so that the Unwrapped shape of the Cube is fit to the packaging dieline design perfectly.
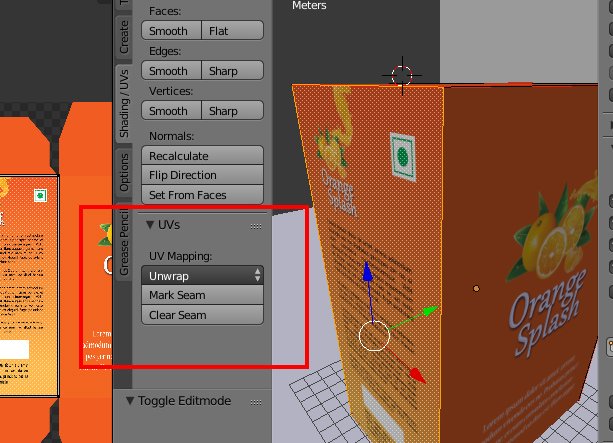
Once the UV Mapping is done and we are satisfied with the desired result, it is time to add the lights and render the scene as image.
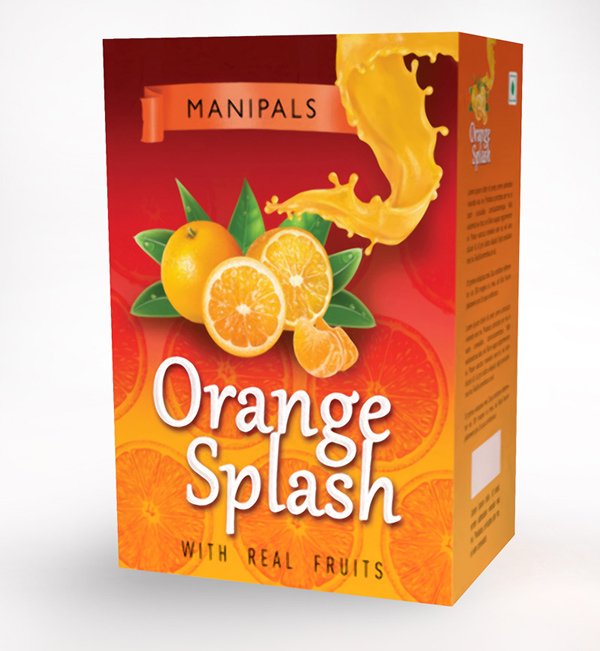
This is the final rendered image
Hope you liked this post.
If you find this post useful, please upvote, comment and resteem.
Till my next post, happy designing
Dear Artzonian, thanks for using the #ArtzOne hashtag. Your work is valuable to the @ArtzOne community. Quote of the week: Art, freedom and creativity will change society faster than politics. -Victor Pinchuk