Welcome to the second tutorial for SolidWorks beginners. In this tutorial we will cover some basics of revolves and revolved cuts. You will need to follow through the first tutorial to be up to speed with some of the commands we will use in this tutorial such as how to sketch on planes.
Lets begin.
1 . As usual we will start a new Part.
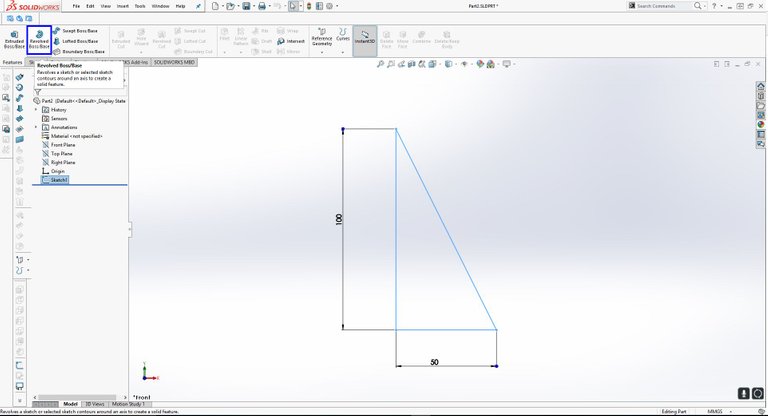
2 . Lets select a plane to draw on. We can go with front plane.
3 . Go to the sketch tab and click sketch. I want you to draw the sketch below, a simple triangle. It is always important to make your sketch fully defined with dimensions. The sketch will go black when it is fully defined.

I have highlighted the sketching tools in blue.
4 . Exit the sketch in the top right corner. Now select the features tab in the top left. Lets select the revolved boss/base button (highlighted below)
5 . You now want to select the axis of the revolution. Select the longest line and you should see this below:
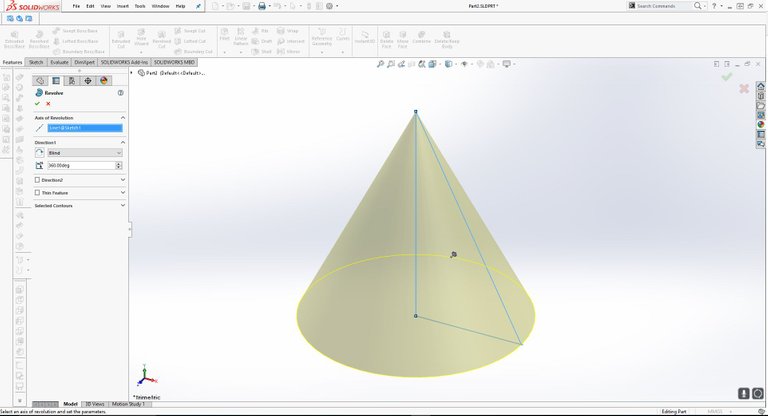
6 . Tick the feature in the top right or left to finish the command. You have now made a cone shape.
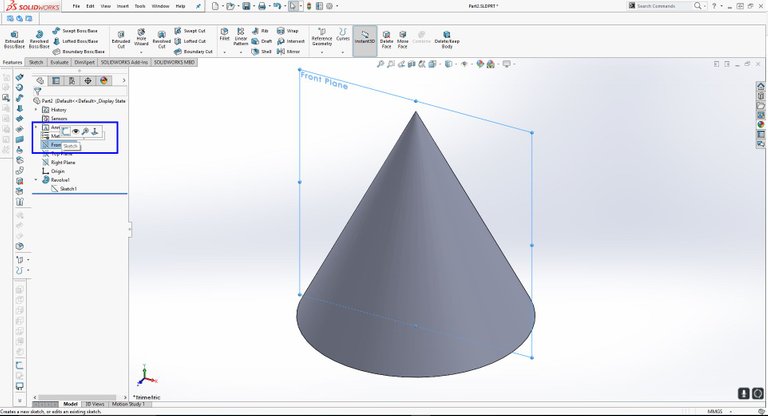
7 . I will now teach you a quick shortcut to sketching on planes. Click on the plane in the left feature tree. Then select the sketch tool to open a sketch on that plane. Shown below:
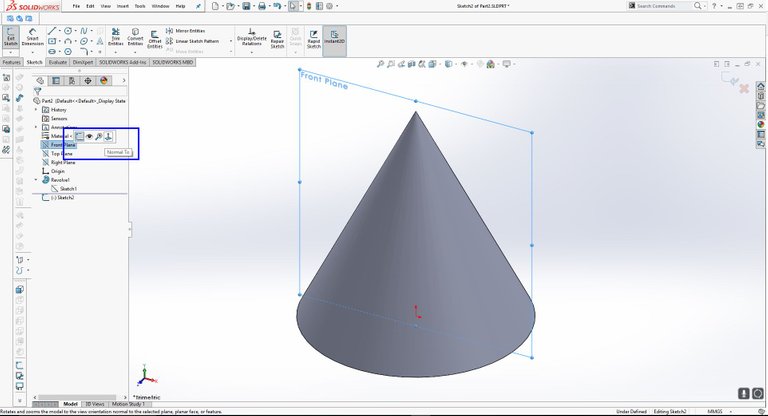
8 . Select the plane again and click the normal to button (highlighted below) to become face on to the plane. This makes it easier to draw.
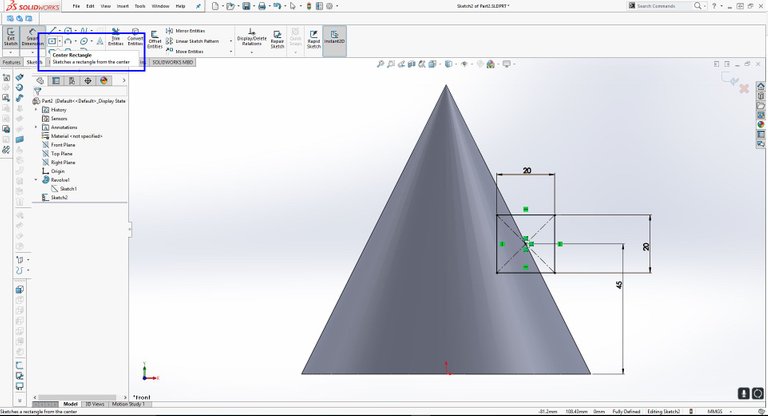
9 . Lets draw the sketch below using the center rectangle tool that i have highlighted in blue. You can use this tool and click the outside line of the cone to make it coincident to the line.
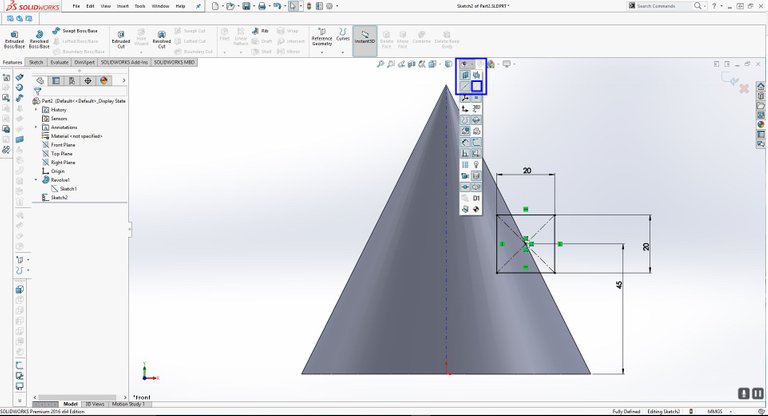
10 . Now lets show some temporary axis. Click the eye button above your cone shape. I have highlighted it below. This will open a drop down list, select the one i have highlighted. This will show a blue dotted line in the middle of your cone.
11 . After this lets go to the features tab in the top left. Select revolved cut.
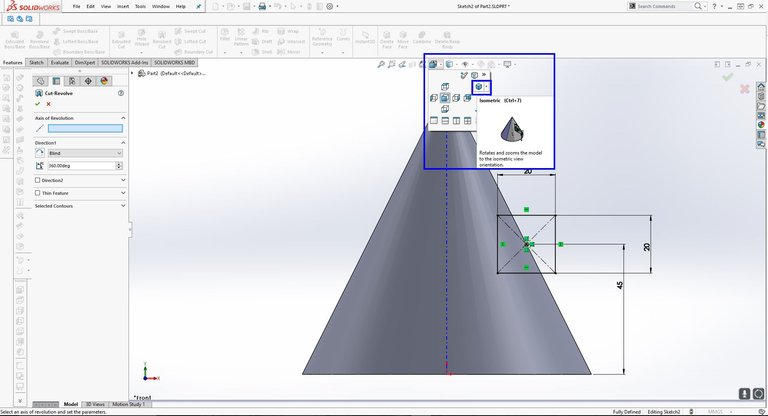
12 . We should now go to an isometric view so we can see what is going to happen. Go to the views tab that is near the eye drop down used above. I have shown this below. Click the isometric button. Highlighted below:
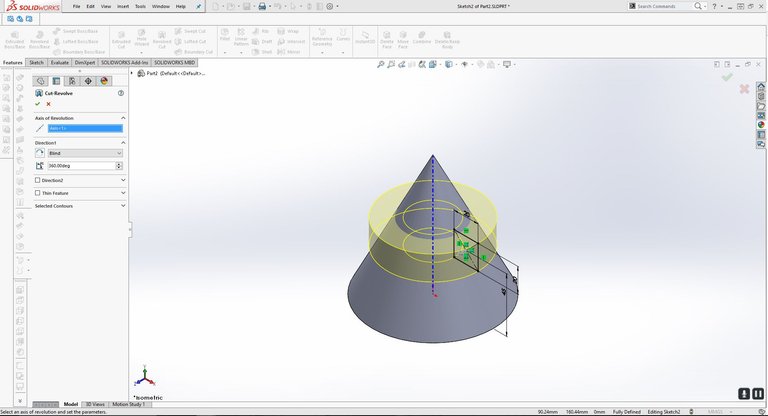
13 . Now click the axis in the middle again to cut around. You should see this below:
14 . Complete the feature and add some 5mm fillets on the corners like we did in the previous tutorial. You should end up with a shape like this below:
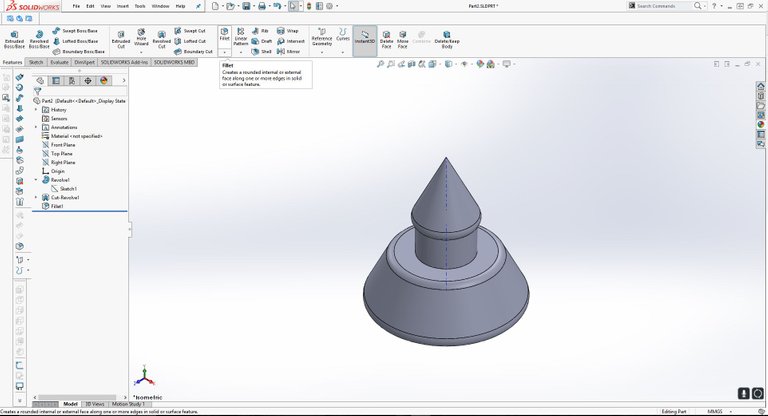
That's it for this tutorial. A very random shape we have created here but hey, this is just the beginning. We will get onto much more complex things later in my tutorials.
Please follow, upvote and resteem for more content!
I will also be delving into some Keyshot tutorials in the near future for those of you who would like to learn some 3d rendering.
Thank you for the step by step instruction, very helpful
Good job!.. upvote it!.. Congratulations!