Below you will find a step-by-step guide for converting tokens on the Bancor Network, using your ERC20 supported wallet. This wallet will be linked to the network with a Web3 service (such as MetaMask) and with no need to login or create a Bancor profile.
Let’s get started:
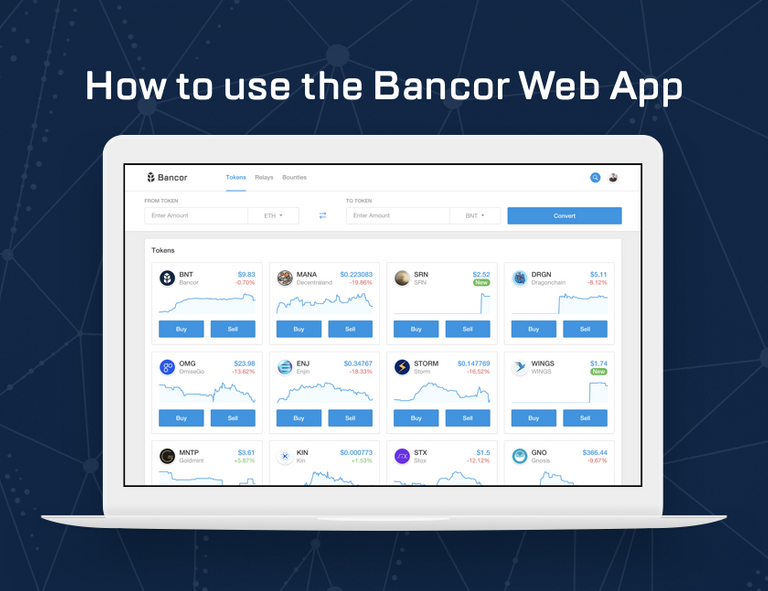
Step 1: Go to https://www.bancor.network/
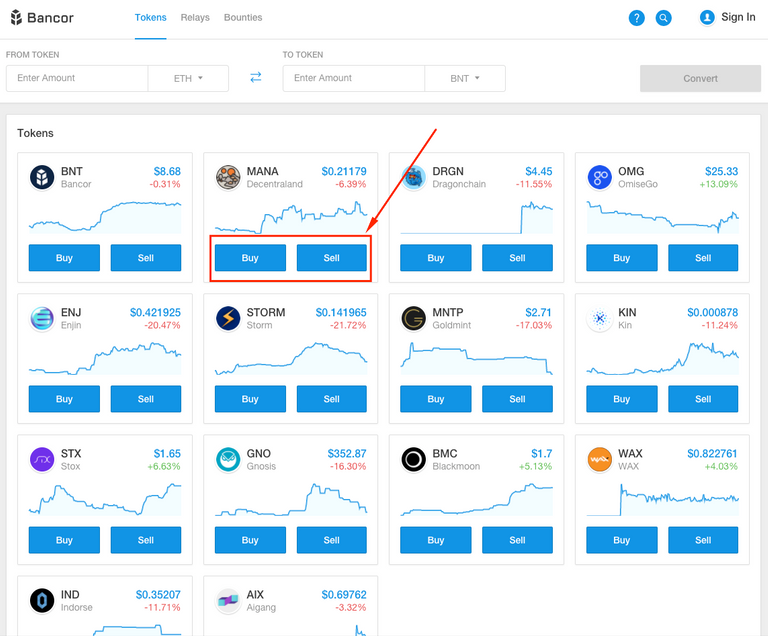
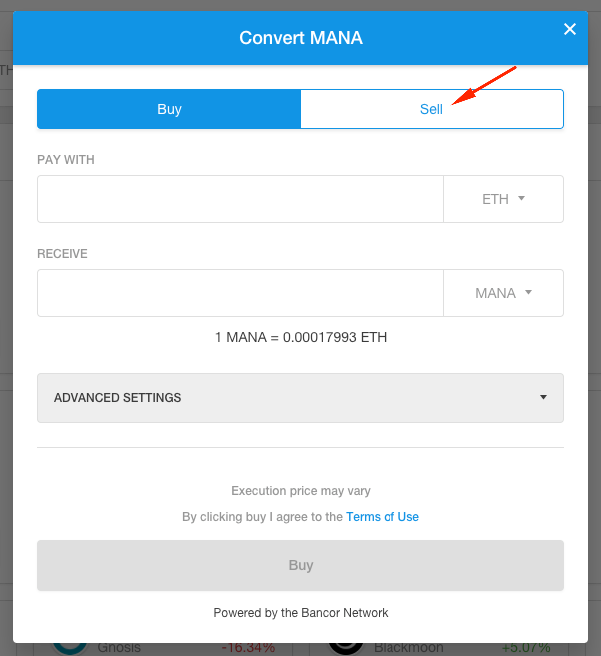
Step 2: Click Buy/Sell Button
Select which token you'd like to convert, click either "Buy" or "Sell" and the widget window will open.
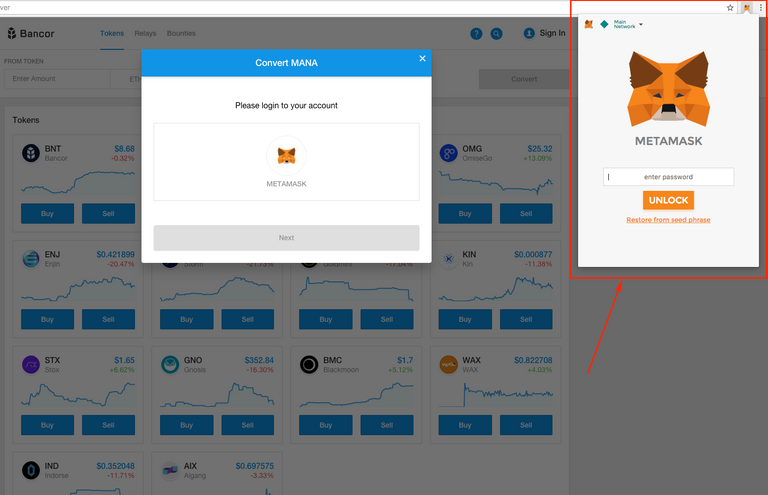
At this stage, if we identify that you are not logged into your MetaMask wallet, you will be prompt to login to it. Once you login, click the “Next” button and proceed to the conversion widget.
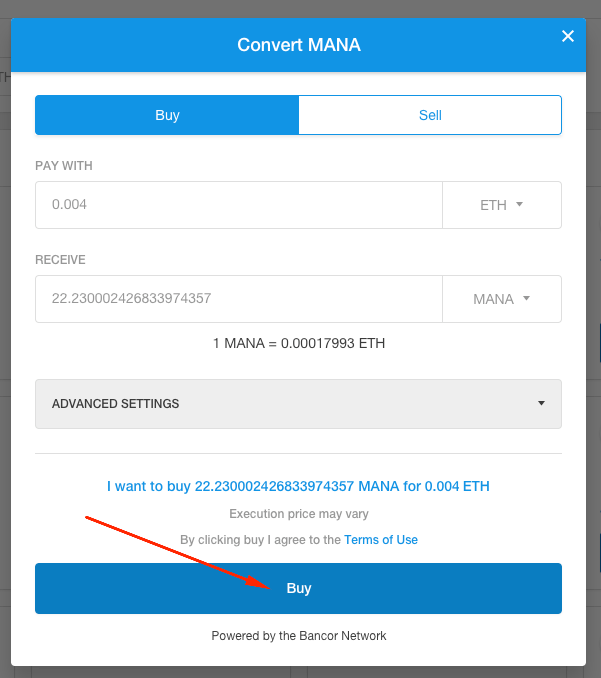
Step 3: Enter Amount to Convert
In the widget screen, you will have the option to enter the amount of tokens you would like to convert and into which token. You also have the option to change the "From" and "To" tokens using the drop down selection.
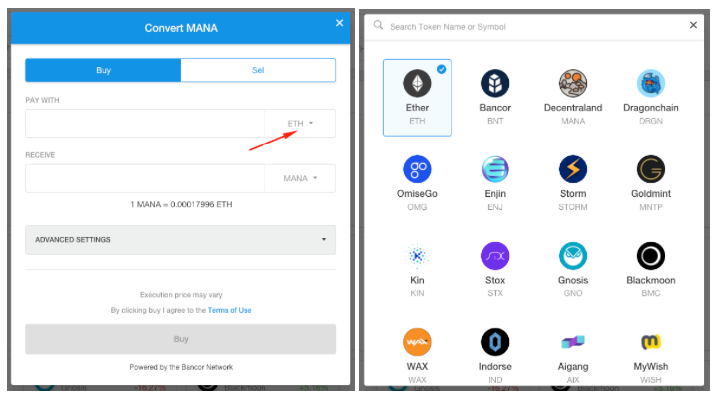
If you decide to change your action from "Sell" to "Buy" or vice versa, you can easily navigate between these options on the widget itself as well.
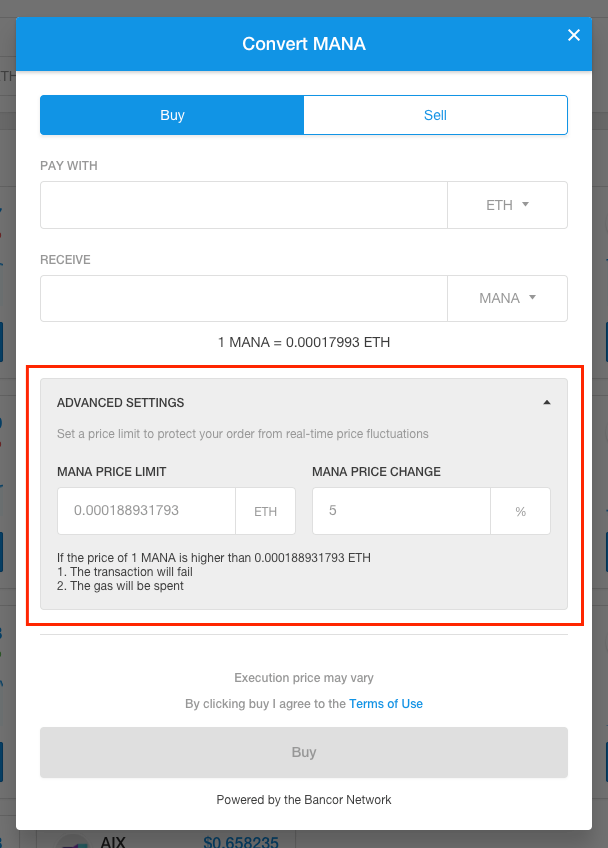
Step 4: Advanced Settings
After you enter the amount and set the action you’d like to perform, you can open the “Advanced Settings” option and limit the transaction to a specific maximum price. By limiting it, you assure that it will only execute if the price you pay per unit is between the current rate and the rate limit you set.
Keep in mind, transactions that are not executed due to the limit still charge Ethereum network gas fees for the transaction, but prevent you from paying rates you do not want to accept for a given conversion.
Once you have your transaction ready to execute, click the “Buy” or “Sell” button and proceed to the next screen.
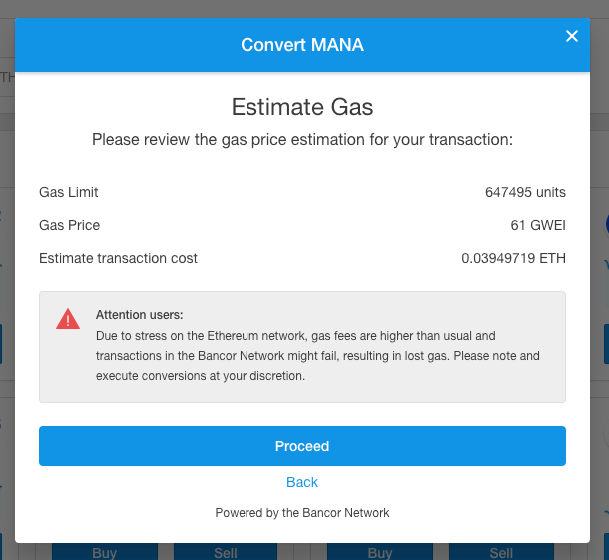
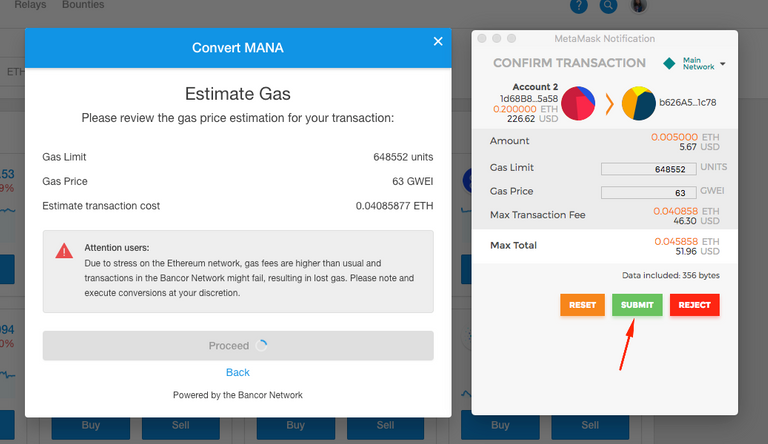
Step 5: Review Gas Fees
This step will provide the absolute highest Ethereum network gas fee it could cost to process your conversion. The actual gas fee you will pay is usually lower than the suggested number, but to help avoid transactions failing due to insufficient gas (which will be lost), we have added a bit of a buffer.
Click the “Proceed” button to move to the next step in the process.
If you still want to edit your gas amount, you can do so directly through MetaMask in the next step.
Step 6: MetaMask Confirmation
At this stage, the conversion will trigger your Web3 enabled wallet (MetaMask) to open. You can now see up to 3 transactions waiting to be signed. Make sure you sign them all in the correct order of appearance in order to execute the conversion as intended (if you sign partially, the conversion will not execute completely). Click SUBMIT to complete your conversion.
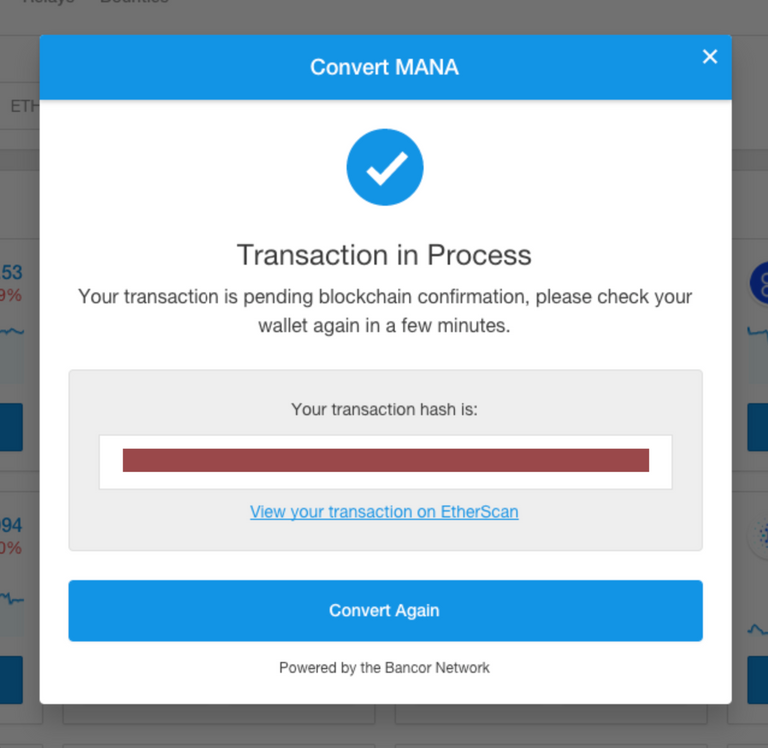
Step 7: Conversion in Process
Congrats! Your transaction was sent to the Ethereum blockchain and is in process. Click "View Your Transaction on EtherScan” to see its status. This may take some time to update, depending on Ethereum network traffic.
Once your conversion has been confirmed on the network, you will see your tokens in your Web3 enabled wallet. MetaMask will require you to "add token" in order to see recently added ERC20 tokens, such as those you are converting to/from in the Bancor Network.
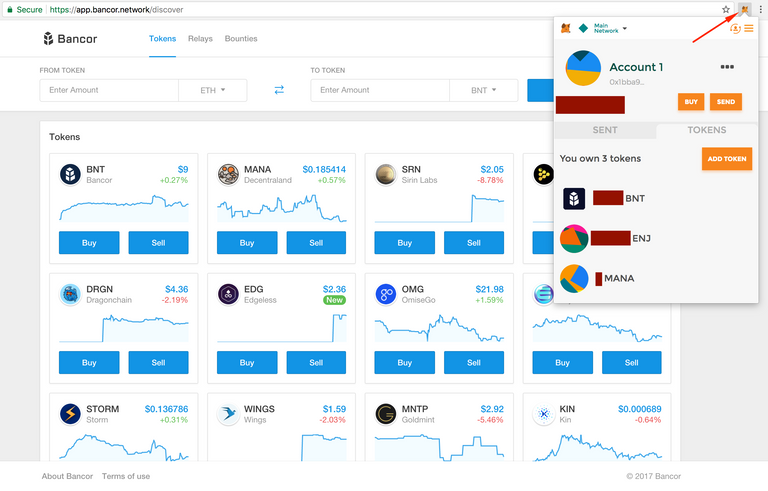
Step 8: Add Tokens (Optional)
Adding new tokens to your MetaMask wallet:
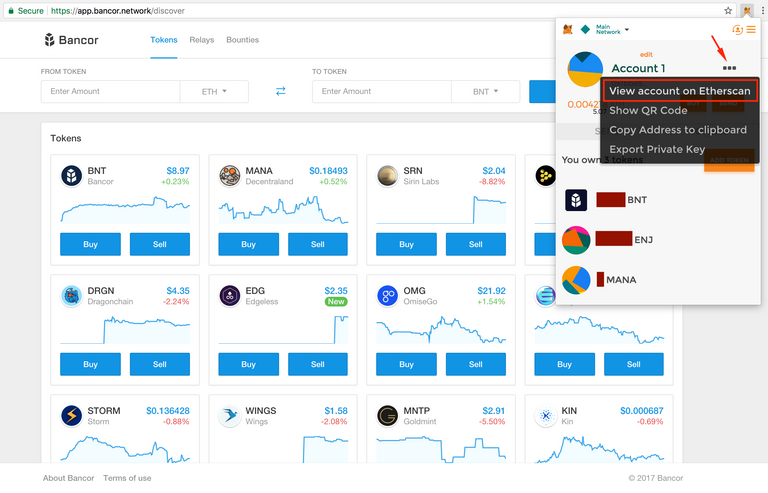
1 - Open your MetaMask wallet by clicking the MetaMask icon on the right side of your browser.
2 - Click the 3 dots.
3 - Choose “View account on EthereScan” which will open your wallet on Etherscan in a new tab.
4 - On EtherScan, click on “View Tokens”, this will open up a drop down with details about the tokens in your wallet.
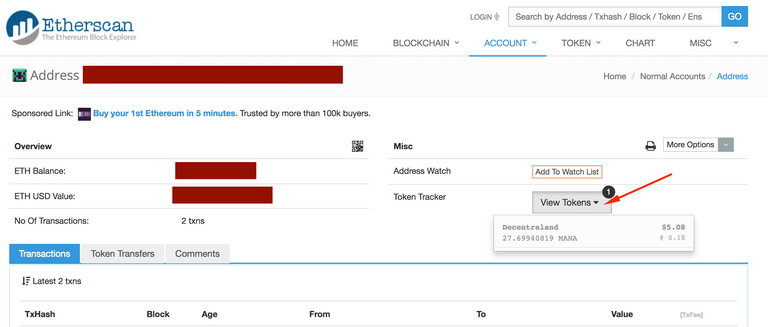
5 - Select the new token you would like to add in order to visit it on Etherscan.
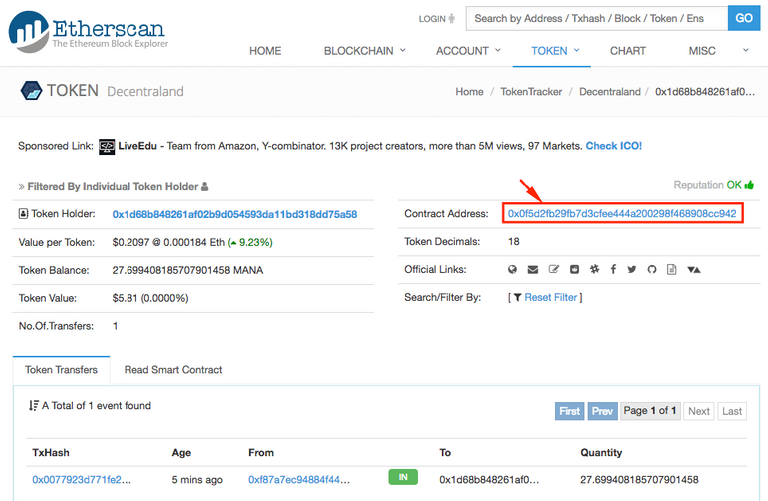
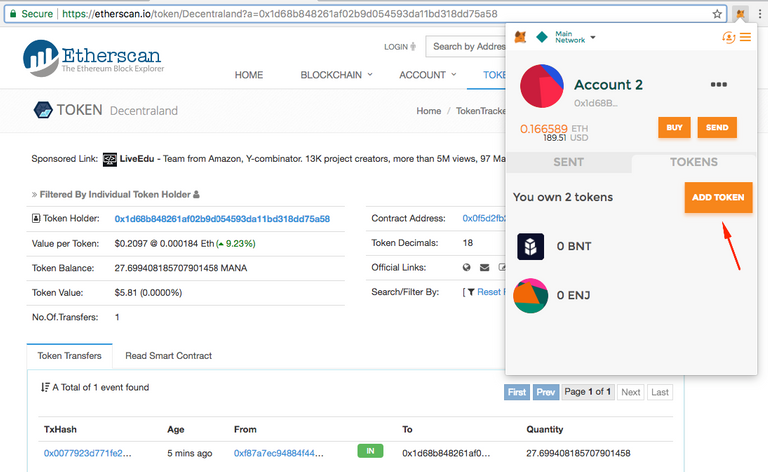
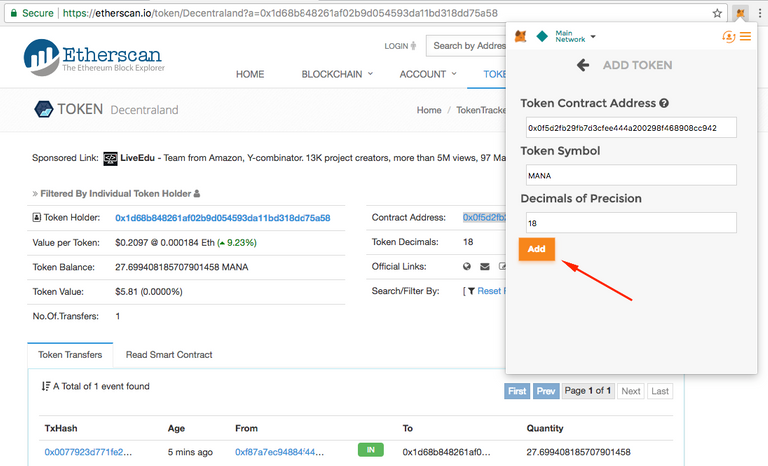
6 - Copy the token “Contract Address” and click again on the MetaMask icon at the top right of your browser.
7 - On your MetaMask wallet, under the Tokens tab, click on ADD TOKEN.
8 - Submit the token’s contract address (which you copied in step 6 above).
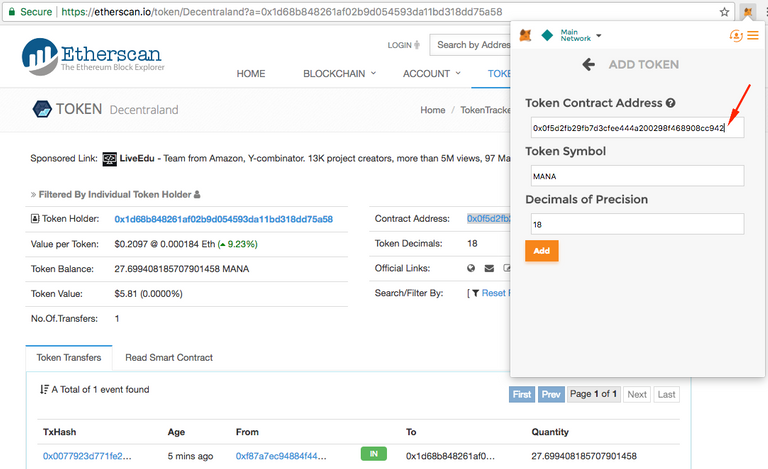
Make sure that the number for “Decimals of Precision” matches the “Token Decimals” number that appears on Etherscan. This number is usually 18 but can at times be different for different tokens.
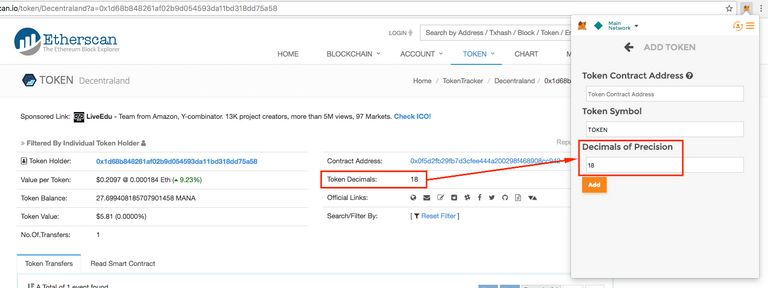
9 - Click "Add".
10 - That’s it 🙂 Now you’ll always see this token’s balance in your MetaMask wallet under the Tokens tab.

Nice tutorial!
Will the GAS fees be lower in the future?
You pay almost the same in GAS as for the token!!
We released a fix that should be lowering gas costs by nearly 50%. Let us know how it's looking on your end, we are monitoring carefully.
I have tried three times tonight to buy wax. I have Meta Mask installed. Tried that, then read I need to download Parity, did that, tried again, all I get is a blue circle running around, and it doesn't open my meta mask? This is frustrating!
OK, I see now, you can not have your meta mask open before you start. Now I have a transaction going by first putting in what I want to buy, then logging in.
If you still need assistance, feel free to email our support team at [email protected]
Thank you fir this guide! Very usefull. We wait it so long :)
I got directed to this article from the SIRIN LABS twitter account !! This is really awesome! I believe that their Phones using Blockchain Technology is a brilliant idea!
will test it soon. I heard fees are currently horrible high. hope this will change soon. please correct me if I am wrong. but anyway ... bancor is just great! 👍🏻
We've deployed a fix which reduces gas cost two days ago.
is it also possible to exchange tokens by calling smart contract functions directly? (for example via myetherwallet)
if yes, can you also provide an "advanced guide" that explains how to do that?
Yes.
See https://github.com/ethereum/EIPs/issues/228
Iove bancor!
Had to drop a thanks for the tutorial. Didn't know Bancor is actually so easy to use.
Bought a bunch of NEXO tokens that i otherwise had to by with more complicated/expensive options.