With the floor finished, it was time to move on to the walls! A deep breath and with rudimentary tools in hand, it was time to start. This stage was surely to transform and uplift the look and feel of my van conversion.
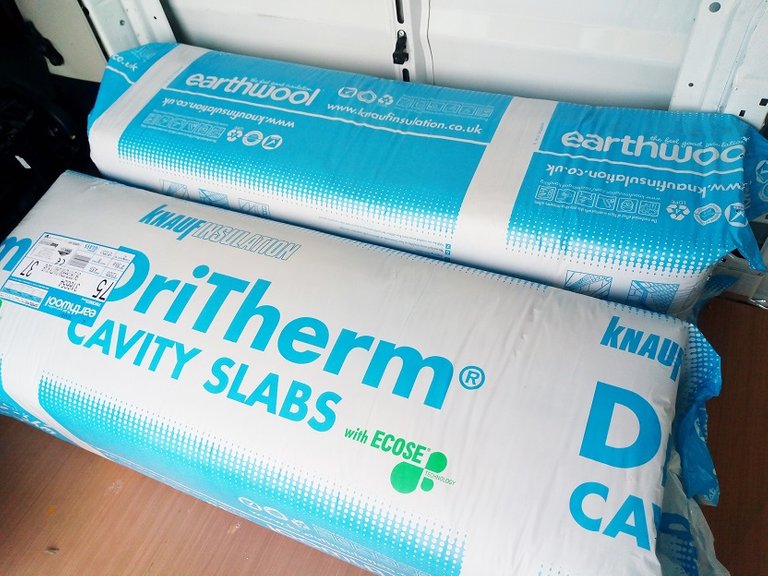
 I used a combination of foil faced insulation board for the flat areas and Earth wool slabs for the irregular surfaces and areas hard to reach.
 Each board had to be tailor made for each panel.
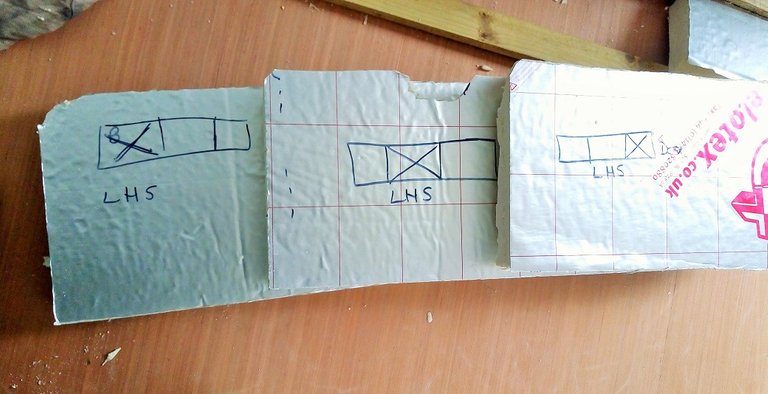
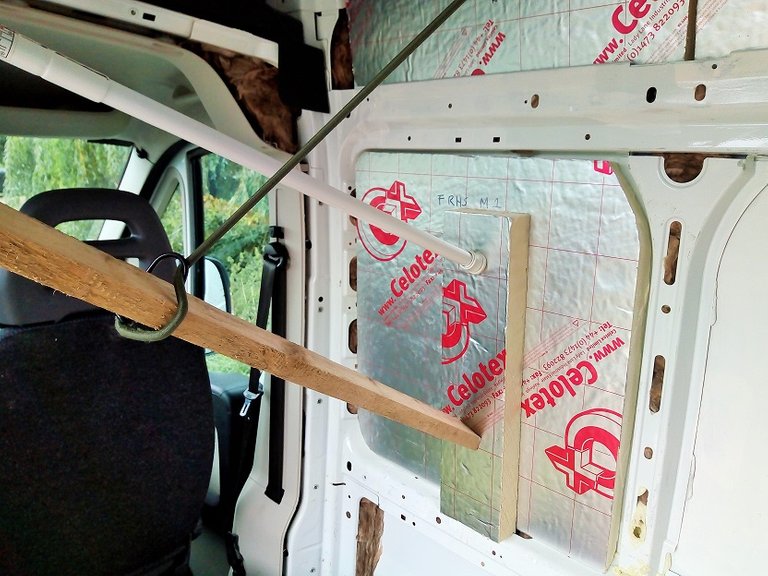
Getting high on glue again, i used a combination of spray adhesive, a strong grab adhesive, foam glue and the odd patch of duct tape just to hold them in place. Bracing around 3 boards at a time per day (it was a long task).
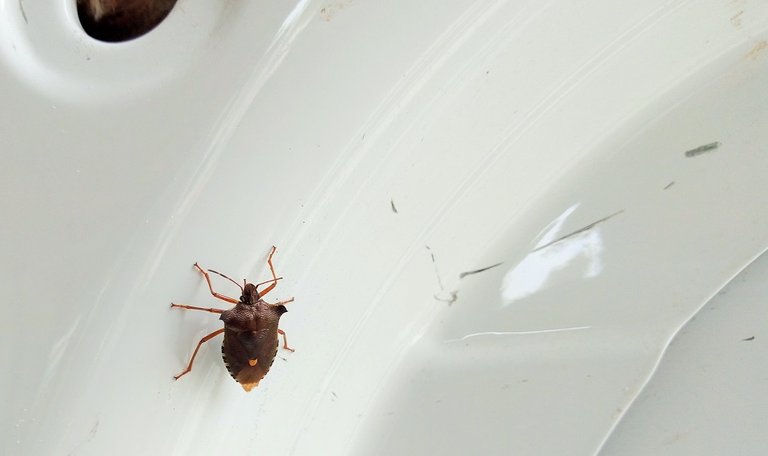
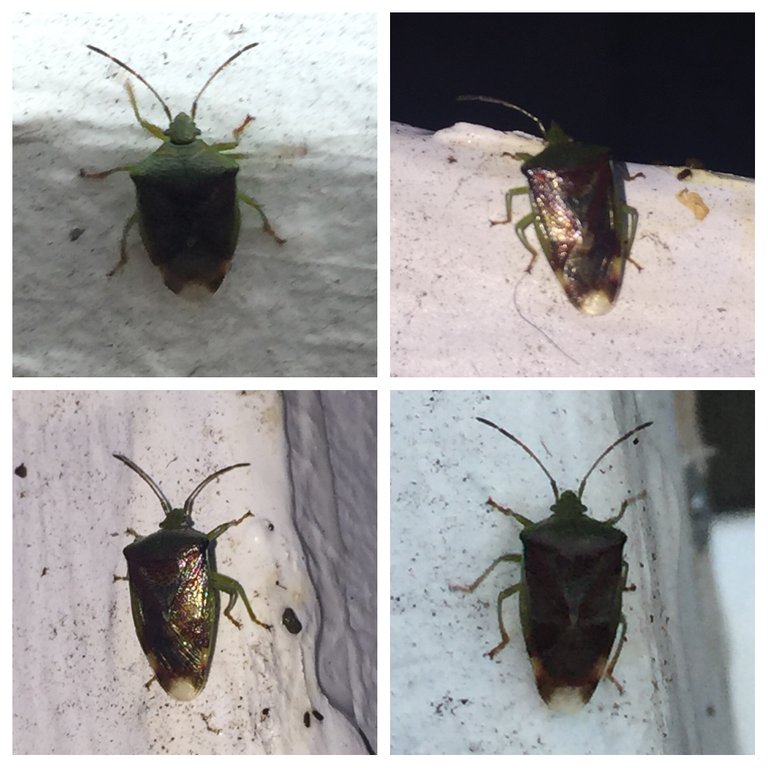
Meanwhile, 8 boards later, the robotic drone of autonomy was broken with a little visitor coming to see what was going on.
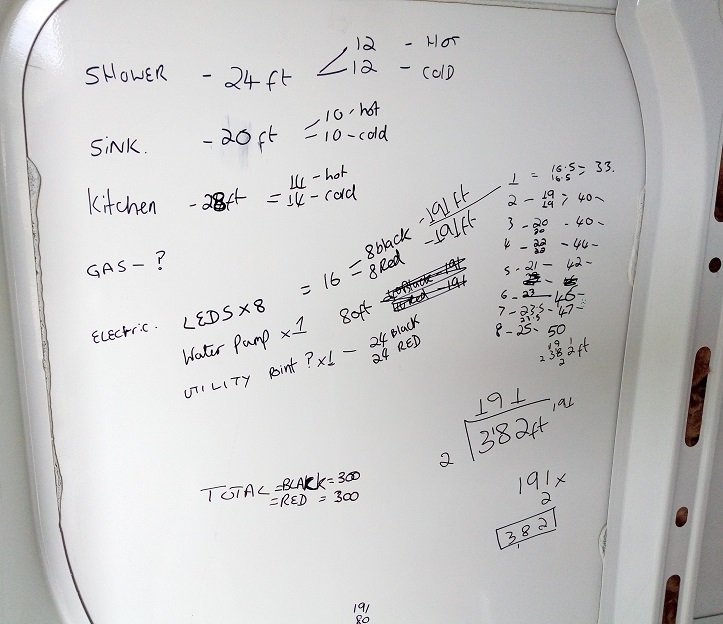
And in the break, some rudimentary workings out.
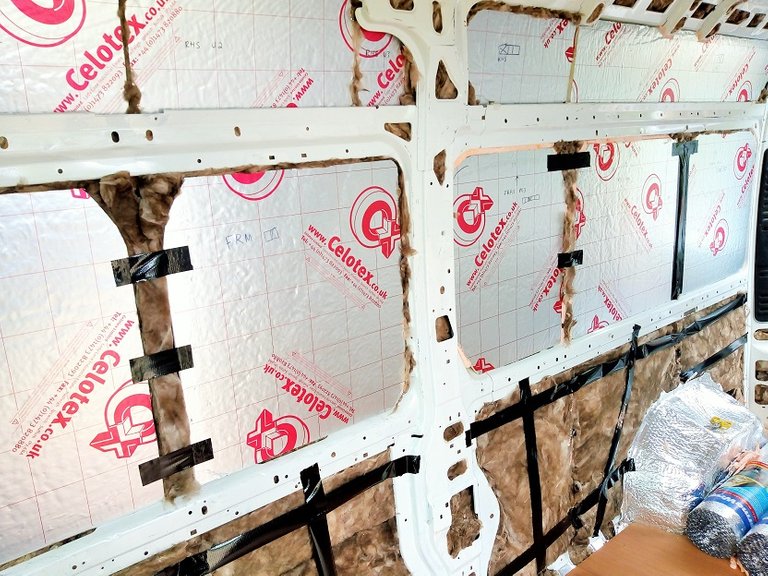
The Earthwool was conveniently situated at the bottom, with the harder, more efficient 50mm board above.
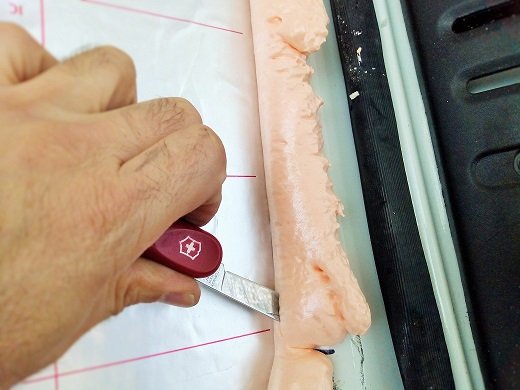
A satisfying task, trimming off the foam glue. Great stuff to play with!
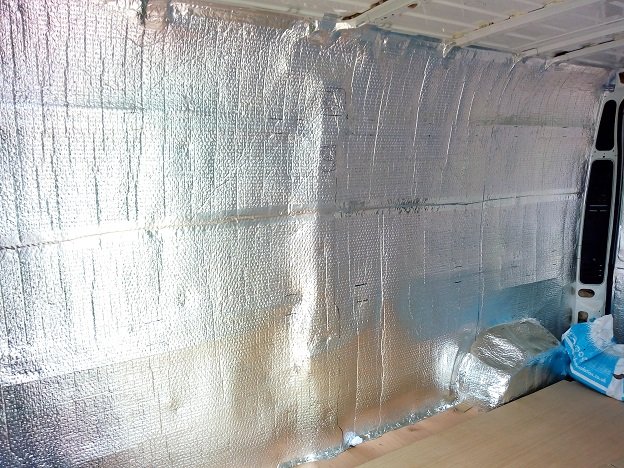
Taking on a new look and a fresher look. The walls were marked up for the locations of the underlying structural supports.
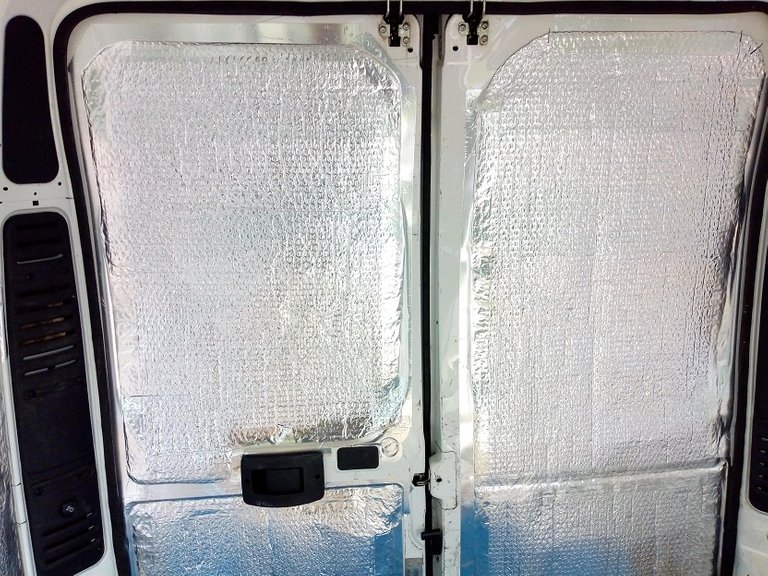
The van now has taken on a new look, it feels like being in some kind of satellite!
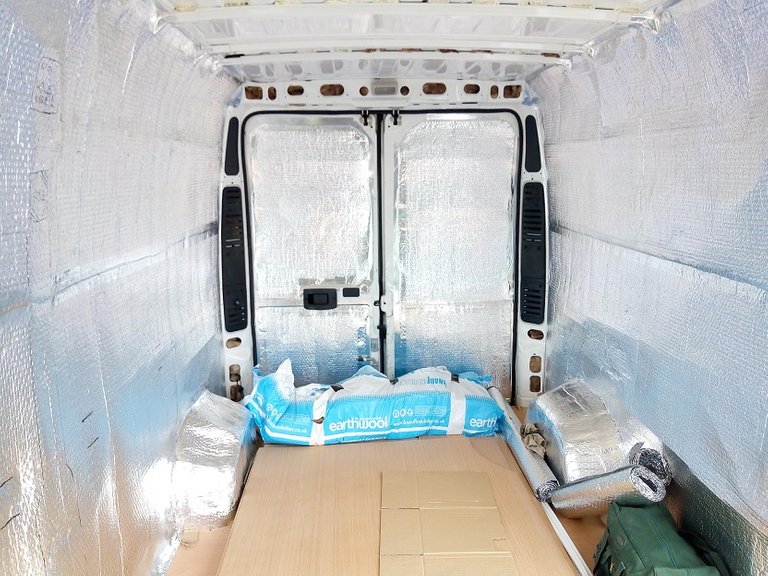
Overall, a relatively simple task, just time consuming! After a quick test drive to ensure its all still in place. I can say that this stage has silenced the van immensely to such an extent that sound suppression was not required, not to mention how warm it now is.
On to the next phase - Lining the walls.
The insulation properties: Board = 0.022 W/mK / EarthWool = 0.037 W/mK
The Complete Project so far:
My Latest Brainwave & Project
Assessing The Task
The Strip Out
Floor Preparation & Rust Treatment
Hole Plugging & Lock mending
Finalising The Floor Foundations
The Insulation Begins
Insulating The Floor
No one can hear you scream . . .
What goes on in the van, stays in the van.
sir preppervetuk!~ wow this is so amazing to watch come together, what an excellent job too, how did you get the foil covering to stick, the spray adhesive? and what about the ceiling?
I was shocked to see that you plan on having a kitchen and bath! how in the world? lol. can't wait to see it, great job!
The foil 'bubble-wrap' is just used as a vapour barrier. It is sealed all round completely using aluminium foil tape (It's a really strong adhesive 'duct-tape' style tape).
The ceiling will be started after the walls are complete - Hopefully in the next day or two. Then i can install the wiring, lights and ventilation.
Bath lol? No i intent to have a Shower, toilet and sink in the WC.
sir preppervetuk! oh ok, the foil duct tape, yes, I've use alot of that.
By bath I meant what you said..shower, toilet and sink, still amazing that you can put all that in there but that's what makes the posts and project so interesting! it's a brilliant idea.
It sort of resembles the inside of the ISS but I think yours is better constructed! 👷👍
I hear that lol - Gives it a 'fresh look', although I am about to cover it with plywood.... Then onto the real living things - Vents, Kitchen, bed, shower etc.
Hey I stumbled upon this and thought of your van, check it out!
http://www.goodshomedesign.com/diy-camper-from-rusty-van-to-cosy-home/
Nice! I've not seen this.... Thanks, every slice of info helps and sparks new ideas.
I thought the bench was cool!
Quick huffing the glue man! LOL
How long did you talk to the stink bug? 😂
Maybe it was attracted to the stink from the glue, that stuff is powerful!
It looks amazing by the way! Sorry I missed the foot being done.
Only kidding about the glue.
'Stink-Bug'? Lol - over here, we call them shield bugs.
I was lucky enough to find one today. Here is our stink bugs
Brilliant. Yeah, like you say.... they look the same to me.
The ones we have are just like it but green with a bit of brown. When you squish them that make a nasty smell, hence stink bug.
Again, well done and I am taking notes. I wasn't thinking about sound proofing at all. Yeah, that might be important in more public areas especially for any stealth camping done in it. Really good job on insulating it. Look...it's really coming along now. Now comes the building!!! Well, after the walls and floor. ❤️
Yeah, in my research, a lot of folk spend a lot of time sound proofing their vehicles with 'dampening boards'. This I reckon is unnecessary. Mostly the reason is as an anti vibration measure and secondary to that - to cut off the outside noise...
Let The Games Begin..
@preppervetuk, I gave you a vote!
If you follow me, I will also follow you in return!
Congratulations! This post has been upvoted from the communal account, @minnowsupport, by Prepper Veteran from the Minnow Support Project. It's a witness project run by aggroed, ausbitbank, teamsteem, someguy123, neoxian, followbtcnews, and netuoso. The goal is to help Steemit grow by supporting Minnows. Please find us at the Peace, Abundance, and Liberty Network (PALnet) Discord Channel. It's a completely public and open space to all members of the Steemit community who voluntarily choose to be there.
If you would like to delegate to the Minnow Support Project you can do so by clicking on the following links: 50SP, 100SP, 250SP, 500SP, 1000SP, 5000SP.
Be sure to leave at least 50SP undelegated on your account.
Congratulations @preppervetuk! You have completed the following achievement on the Steem blockchain and have been rewarded with new badge(s) :
Click on the badge to view your Board of Honor.
If you no longer want to receive notifications, reply to this comment with the word
STOP