You know how every time you buy more books, they overflow onto tables and floors, and it just keeps getting bigger and bigger so eventually, you're forced to repack all your bookshelves?
And when you do, you find all sorts of things, right? Like books that are falling to pieces...
There is no hope for these things, right? No other option but to throw it out?
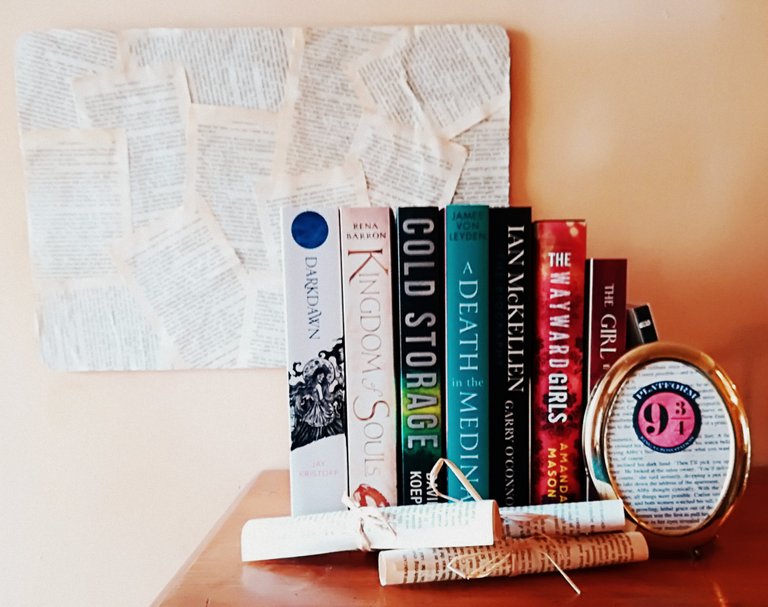
Well, you could do that or you could upcycle it and turn it into something else, something with form and function; why not turn it into a few props that could be used in your #bookstagram photos, for example?
Because that is just what I did with this poor old copy of some Romance that I happened to dig out of a box of books...!
I came up with 3 ideas, one of which was inspired by an old photo frame that I had lying around for years, which you may (or may not, I don't know) find useful.
TIP:* Want to know how to age paper with coffee? I show you how quick and easy it actually is in this post. https://mrpinkink.wordpress.com/2018/05/31/pink-it-up-diy-dumbledores-army-list-aging-paper-coffee-staining/*
Parchment Scrolls
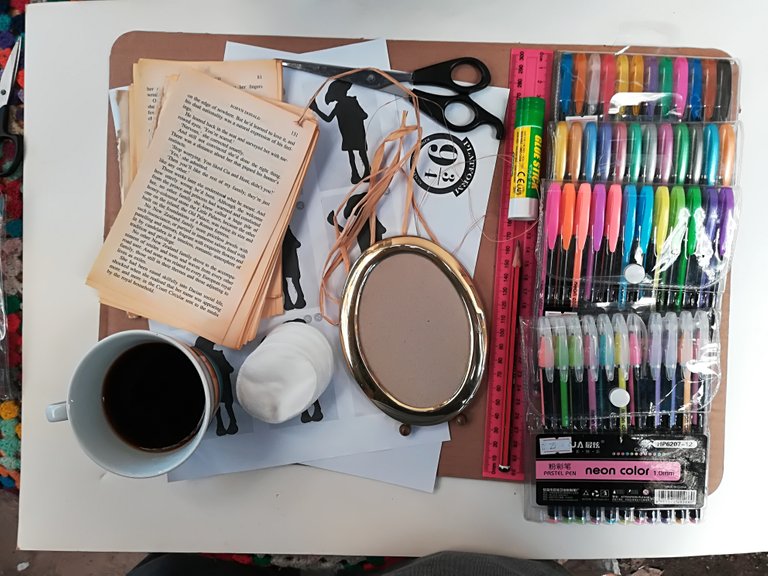
This first little DIY is super easy and super quick - all you need are some pages from the book, a cup of coffee and some raffia / string / ribbon.
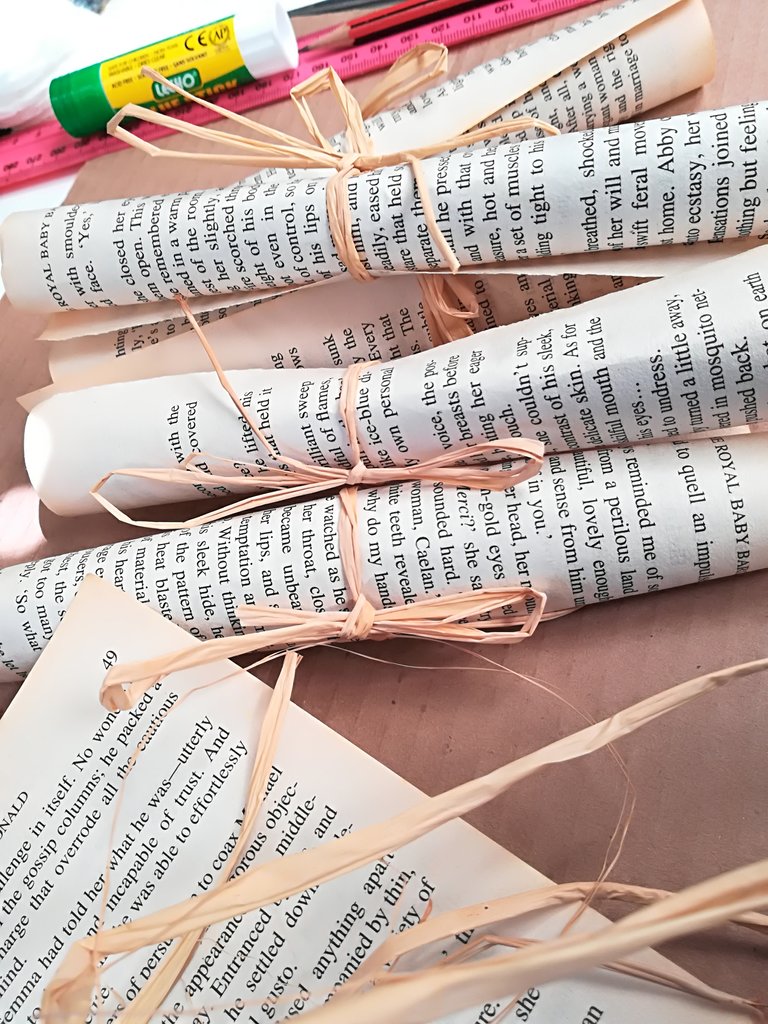
Decide how many scrolls you'd like to make (I made 5) and "age" the pages with some black coffee. (I found that the paper this book is printed on barely changed colour after three coats of coffee; but, luckily, it was already stained by time.) Once they are nice and dry, roll them into a tube; you can use a dowel or a sharpie or any other cylindrical object as a guide if you'd like.
If you feel you want your scroll to be a little sturdier, glueing the edges down may be a good idea.
All that remains left to do is to tie short pieces of raffia / string / ribbon around each tube and then tie a little bow on each one. #JustLikeThat
Portable / Moveable Background
This little DIY is another quick and easy project that won't take up a lot of your time; all it takes is a few loose pages, glue and a nice sized piece of cardboard (which you probably already have lying around or you could cut the side out of a cardboard box).
Decide which side of the pages you're going to stick down, then just glue them down on the cardboard one page at a time; use could use mod podge or normal school glue, both should work fine. I used mod podge and I also spread a layer of glue on top of all the pages to give it a little bit of a sealant. Leave it outside for approximately 2 hours to dry completely.
You now have a background which you can lay flat to use in flat lays, for example, or you can stick it to a wall as a little backdrop - you could even put it in a frame. The best part is that you can slide it behind a cabinet or a closet for storage.
Of course, it doesn't have to stop there; you could embellish it further in any way you want... Imagine a colourful map of the world on top of the pages!
Interchangeable Photo Frame Insets
I have had this little photo frame just lying around forever and I've been thinking of ways to zhoosh it up.
I wanted to respray this frame white, which would make it completely neutral; turns out that I only had some gold spray paint left, so I left the frame as is since it is already naturally distressed.
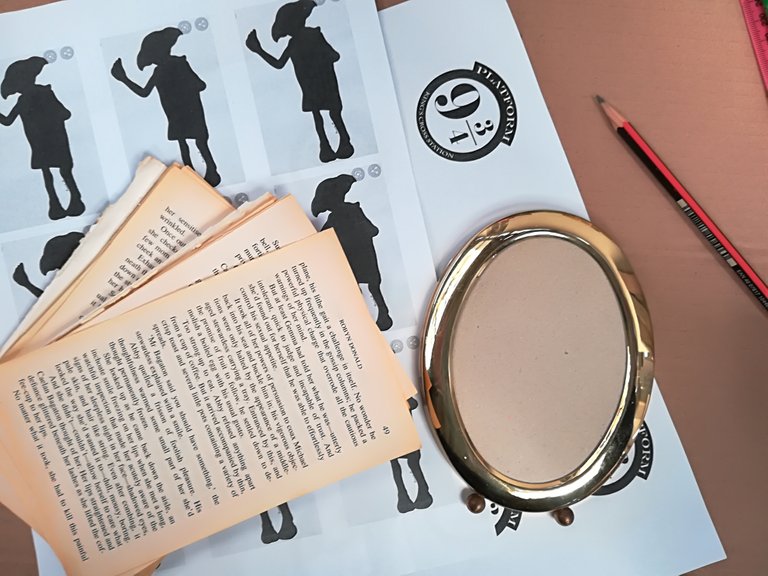
This particular frame just pops right out, no mess no fuss!
All you need for this nifty little DIY is a few pages from your book, some small pictures that you like printed off the internet and some glue. Of course, if you want to glam up your little pictures, you're welcome to do so in any way you want using pens, colour or paint - anything really.
I originally had 5 different designs I wanted to use for this but I seem to have misplaced the newest 3 prints I made.... which left me with these 2 Harry Potter inspired designs.
First, trace the backing of the frame onto your book pages; do this on the side that will be the back, then cut out the shape for each page. Then, cut out the designs you're going to be pasting to these pages; I used Dobby's silhouette and a Platform Nine and Three-Quarters sign (which I coloured using glitter pen).
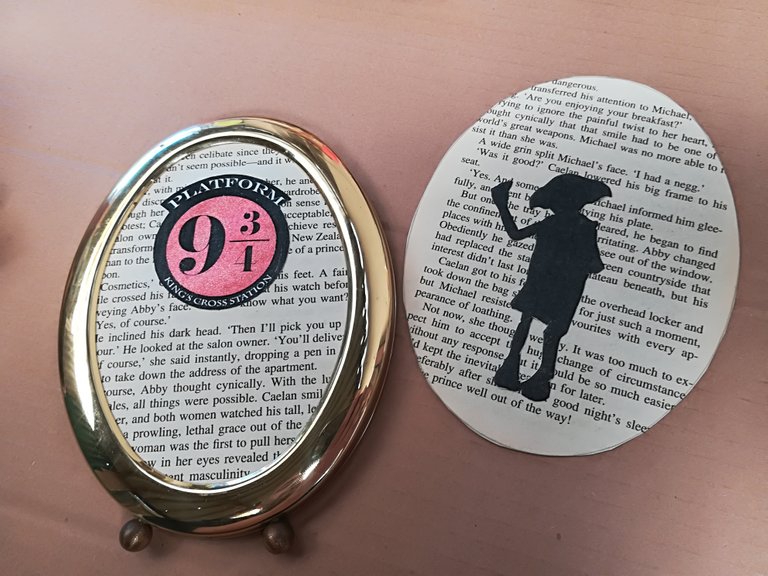
Glue the designs onto the front side of the book pages and reassemble the frame; viola! Since the pieces are all the same shape and size, the designs not in use at that moment can be stored inside the frame, behind the design in the front!
You could paint some designs or scenery onto these pages, separately or as an added background to the design you pasted on - you could even draw with graphite pencils or whatever else may take your fancy.
I didn't have any at the time of making this, but I do suggest getting some clear sheets of acetate and then make a cover since my frame doesn't have one - if yours does have a piece of glass or plastic in the front, bonus!
I hope you enjoyed this little DIY and I'd love to see your creations! What would you do with the pages of a broken book?
Keep smiling
Follow me :
Instagram : https://www.instagram.com/mr.pink.ink/
Blog : https://mrpinkink.wordpress.com/
YouTube : https://www.youtube.com/channel/UCuumD6wq7NSNfDwu03mxUNw/featured
Member : @teamsouthafrica #teamsouthafrica\
Hi! Apologies for popping onto your comments but have called out to most people on a post with very little feedback. I have just launched the new @steemsouthafrica account and discord server and would be thrilled to have you join us! We are trying to build up some SA STEEM momentum again – organising regular meet-ups etc. If you are interested, you can hop onto the new server HERE – hope to see you there soon! Oh, and you are welcome to start making use of the #steemsa tag on your posts so that we can support them with an upvote and resteem!
JOIN US ON TWITTER
Thank you so much!