Hermaphrodite plants are not very amazing. Fortunately, it is possible to make feminized pollen in an environmentally friendly manner. This pollen is capable of producing seeds that are 99.9 percent female. As long as reasonable precautions are maintained, these seeds will be no more susceptible to hermaphroditic transformation than the parent plants.
Today, it is likely the most widely advised and successful way of cannabis feminization. This article contains an original formula for sts, as well as practical preparing suggestions and other useful information obtained from experience with sts.
Non-Hermaphrodite Plants Begin With the Parents
Stress testing female plants is critical for identifying hermaphroditic breeding plants. Even if feminized pollen is not used, mating with unstable parents can result in hermaphroditic seeds. It is critical to expose your prospective parents to the stressors that are known to induce hermaphroditic flower production. Among these are, but are not limited to, the following points:
Inconsistent Scheduling of Lights
Pinhole Light Leaks During Excessive Flowering or Extreme Temperature Changes Bound Roots
pH is insufficiently low or excessively high Lighting Spectrum Change Media Extremely Wet/Dry
Excessive Supercropping/Heavy-Trimming Root Pruning Proximity to Sessions
Feeding Excessively/Insufficiently
Incorrect Nutrient Profile Exposure to Insects/Disease/Fungi Pesticide/Chemical
Prolonged Flowering Period
Only females that remain 100% female should be used for breeding.
Yes, Stress Examinations
Choosing outstanding parents can take a long time and require a significant investment of time and finances. These characteristics are mostly responsible for the abundance of unstable seeds accessible today (2018). Patience and persistence pay off in this case. The more stable the genetics, the sooner you'll have a sufficient number of possible parents. Each stress takes between one and three weeks to develop male flowers. Multiple clones of the same plant are used to confirm the correctness of the test results.
The more stable the mother plants are, the more precious the end seeds. Continue to stress the plant until you are certain it is stable. Once again, be prepared for this process to take a considerable amount of time. Each additional ounce of effort you put on this section of the software will pay dividends in terms of significantly improved quality. You are capable!
Solution of Silver Thiosulfate (STS)
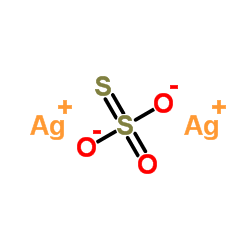
STS is the most often used chemical mixture for feminizing stable pollen. While this is not the only way available, it is perhaps the most popular and is extremely reliable. Female cannabis plants require the production of ethylene in order to produce female flowers. Without the production of ethylene, the female cannabis plant produces male flowers with feminized pollen. Silver Thiosulfate Solution (STS) inhibits the formation of ethylene in plants. When appropriately administered to the bud locations of a cannabis plant, this solution prevents the plant from producing ethylene. Male flowers form again in the absence of ethylene.
The Fundamentals of Silver Thiosulfate Solution
Is it possible to mix a powdered drink mix? Congratulations! You are capable of preparing Silver Thiosulfate Solution. STS is composed of two components referred to be "stock" solutions. These solutions are denoted by the letters A and B. Silver nitrate and distilled water are combined in Solution A. Sodium thiosulfate and distilled water are combined in Solution B. These two solutions can be stored for extended periods of time, even years, in light-proof bottles that are sealed and refrigerated.
After combining solutions A and B, the resulting mixture is diluted with distilled water before use. Once mixed, the STS (full strength or diluted) must be protected from light and can be used for up to a month if properly stored. I've used both mixed and diluted solutions that had been stored in my refrigerator for almost nine months, but fresh solution works the best.
You, Will, Require the Following Tools and Materials to make STS.
Wherever feasible, I've included links to the specific products I purchased and utilized. The remainder of the objects I had strewn about the house. 500g of sodium thiosulfate anhydrous is a LOT of thiosulfate; therefore, smaller applications may prefer to use the pentahydrate form, which is available in lesser quantities.
Silver Nitrate
Sodium Thiosulfate (Anhydrous and Pentahydrate Both Work)
Distilled or Reverse Osmosis Water
A Digital Scale Accurate to 0.1g
2 32oz Brown Glass Bottles
32oz Brown Glass Bottle w/Black Sprayer Top
33 Gallon Black Trash Bag
Tape
60 cc/ml Syringe
Surfactant (Yucca-Extract)
A Cool Dark Place for Storage (Fridge)
Nitrile Gloves
500ml/2 Cup Glass Mixing Container
Small wire whisk
Safety Goggles
Recommendations for Basic Safety
The following stages necessitate precise measurement and a basic understanding of chemical safety. It is strongly advised that you operate on a flat surface protected by a plastic sheet or several layers of newspaper. Due to the fact that silver nitrate stain from brown to black, gloves and safety eyewear is recommended.
Although sodium thiosulfate is quite innocuous, it is still important to thoroughly clean up any spills. Both of these solutions can be safely flushed down the drain after being thoroughly washed with water.
Stock Solution "A" Measuring and Mixing
- Fill your 500ml measuring cup with 500ml of distilled water
- Measure out .5g of Silver Nitrate
- Mix the silver nitrate powder into the 500ml of distilled water
- Pour the silver nitrate solution into a brown glass bottle and seal tightly
- Label the bottle "A" Silver Nitrate
- Thoroughly clean the 500ml container and rinse with distilled water
Stock Solution "B" Measuring and Mixing
- Fill the 500ml container with 500ml of distilled water
- Measure out 2.5 grams of sodium thiosulfate anhydrous, OR 3.9g of sodium thiosulfate pentahydrate
- Mix the sodium thiosulfate with the 500ml of distilled water
- Pour the sodium thiosulfate solution into a brown glass bottle and seal it tightly
- Label the bottle "B" Sodium Thiosulfate
- Thoroughly clean the 500ml container and rinse with distilled water
Note: Ensure that both "A" and "B" solutions are retained. If you wish to store it, keep it in a cool and dark spot.
STS Mixing and Diluting
The last step is to appropriately combine the two stock solutions, resulting in the actual Silver Thiosulfate Solution (STS).
Before spraying with the STS, it must be diluted to a weak solution!
Measure 50ml of the stock solution "B" with the 60cc syringe and gently squirt it in the 500ml glass measure
- Thoroughly rinse the syringe with distilled water, or change to a new syringe
- Measure 50ml of the stock solution "A" with the 60cc syringe
- While whisking solution "B" in the glass measure, slowly squirt solution "A" into the glass measure in less than 30 seconds
- Pour the mixed solution into the 32oz brown glass bottle with a black sprayer top
- Add 900ml of distilled water to fill the sprayer the rest of the way, leaving room for a little bit of surfactant
- Add yucca extract in small amounts and shake well
- Test spray on a leaf to if the solution still beads up and rolls off Add additional yucca extract and shake well, until the solution spreads across the leaf instead of beading up
- Thoroughly rinse all tools using more rinse water than usual
You now have a sprayer bottle containing a solution of STS and water diluted 1:9. You want to do everything possible to shield it from light and heat. Personally, I use a black plastic waste bag to wrap the bottle part and tape it in place. This is to provide additional light shielding when storing it in my refrigerator. I've successfully utilized 9-month-old solution that had been packed and preserved in this manner in my refrigerator.

Using STS Successfully!
I've spent a significant amount of time researching the best method(s) to use for STS success. First, I'll go over the steps I've used successfully in the past. I've also included comments and tips I've gleaned from other growers. Because cannabis is a virtually infinitely varied plant, it's best to get knowledge from as many sources as possible. Who knows which tip will be best for your plants and setup.
Whatever spraying plan you use, make sure to completely soak the branch(es) and early flower clusters.
Spraying Schedule I've Used Successfully
Spray branch(es) you want to be reversed 5 days before flipping to flower
Spray every 5 days until major male flower formation has begun
Alternative Spraying Schedule A
Spray branch(es) you want to be reversed 2 weeks before flower
Spray branch(es) you want to be reversed on the day you flip to flower
Alternative Spraying Schedule B
- Spray branch(es) you want to be reversed on the day you flip to flower
An Observation on STS "Burning" the Plant
Many farmers have stated that the STS solution 'burned' their plants. If you notice any burning of your plants, I strongly advise diluting your spray more than 1:9.
Additional Hints and Tips
As is always the case, the more knowledge you have, the better your chances of success. The following are minor details that can have a significant impact on your outcomes.
Making Use of Cannabis Clones
I've found it really beneficial to deal with clones of the same plant where possible, swapping one or more for pollen in a small blossoming region initially. Pollen is gathered and preserved. At this time, the pollen can be applied to any female plant, including clones.
Though it requires a second process of gathering and storing pollen until use, it allows you to make seeds without having to deal with a reversed plant in the room. Another advantage is that pollen may be stored for years if properly preserved.
Cannabis Pollen Control
I STRONGLY advise you to use filtered intakes and outputs in every flowering environment you create or use pollen in. After working with cannabis pollen for years, many producers have developed sensitivities to it. Filtering the air that enters and exits your floral rooms keeps pollen at bay. (most of the time)
When I disturb the pollen, I use spray bottles of r/o filtered water to spray down the air in the room. After each session of working with pollen, blow the pollen out of the air. After each run, make sure to spray off the insides of tents and flower rooms. This will reduce pollen cross-contamination from various pollen sources.
Cannabis Pollen Dilution
Any visible pollen speck is made up of millions of pollen specks, making one pollen per pistil fertilization unfeasible. Using one part pollen to 50 parts corn starch or flour reduces waste. Each pistil takes only a small amount of pollen to produce a seed, and the dilution facilitates this.
Pollinating Cannabis with a Makeup Brush
When using a clean cosmetics brush, many growers report excellent success with evenly pollinating plants. The brush makes it simple to apply pollen uniformly across the plant. When the pollen is diluted with flour, it is easy to determine which flowers have previously been pollinated.
Cannabis Pollen Storage for Years
Pollen can be kept in the freezer for an extended period of time if well dried. Because silica packets do not absorb at a low enough relative humidity, dry rice is employed.
Uncooked rice should be heated in an oven at 150F-170F for at least 12 hours. Place the hot rice in a glass container that can be sealed (I personally use large peanut butter jars). Allow the jar to cool to room temperature before sealing it.
Collect your pollen and carefully transfer it to a foil baking cup or any small container that will fit inside the jar. Set the pollen in the rice container in a cool, dark spot for 7 days.
Toast some flour in a skillet over medium heat until it turns a dark tan color, then seal hot in another glass, airtight container and set aside to cool to room temperature. The moisture in the flour will be removed as a result of this.
Remove the pollen from the dried rice container and combine it with the flour in a 50/50 ratio.
Fill small containers, foil or plastic sealed pouches, or (recommended) 1.5ml centrifuge tubes with the mixed pollen.
CAREFULLY label your containers, including the precise plant name, date, and any other information you believe you'll remember later. (Because there's a strong possibility you won't)
Place the containers in a thermos and place them in the freezer. The thermos serves as an additional thermal protection barrier in case of a freezer problem years down the road. It also makes moving pollen from one location to another a safe process. Just make sure to keep the thermos at freezing temperatures and restrict the length of time it spends outside the freezer.
Female Stubbornness Refusing to Turn?
While the most stable female plants are the ones we want to breed with, they can be challenging to obtain high-quality pollen from. Even the most obstinate female in your stable should be able to turn a considerable amount of viable pollen with these tips.
Different Spray Schedules Should Be Tried
Small clones of the plant you wish to reverse should flower. With each clone, use a different spray regimen, keeping careful track. You might discover that one schedule works significantly better than the others.
Utilize Colloidal Silver
Some gardeners have claimed success with different spray regimens, including a follow-up spray of a high ppm colloidal silver solution 2-3 weeks into flower.
Gather, Dry, and Crush the Pods
Do you have a plant with large clusters of male flowers that don't seem to open or don't contain much pollen when they do?
Cut the pods off the stem when they have swollen and appear to be fully mature and ready to open. Wrap the clusters in paper towels and bury them in a jar of dried rice that has been tightly sealed. (Heat uncooked rice in an oven at 150-170 degrees Fahrenheit for at least 12 hours, then cool in a covered jar.) The rice will absorb the moisture from the pods and completely dry them.
When the pods are absolutely dry and crisp, gently crush them through a tea strainer or other fine mesh strainer. There will be a lot of viable pollen.
Spray that has been in use for a long time (9 months or more)
The blended STS can be maintained alive for months if the sprayer container is carefully covered from light and stored in a cold environment. Pour a small amount of the solution into a clear glass to evaluate if it will most likely work. The solution should be transparent.
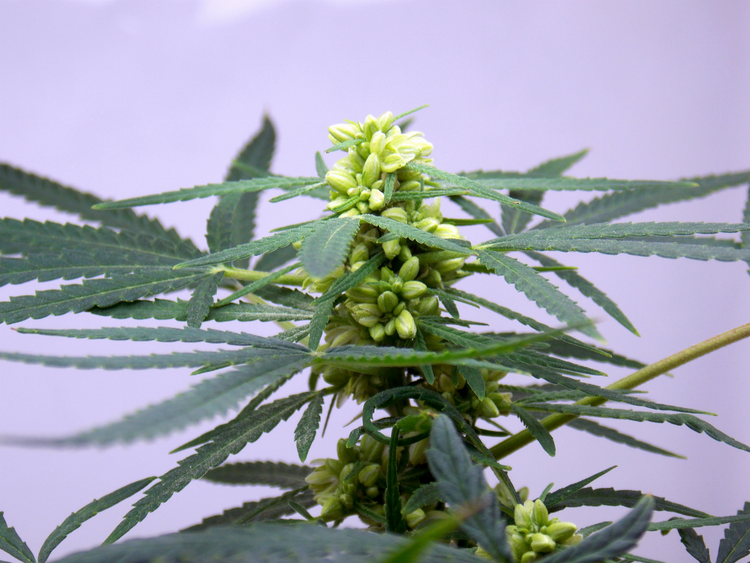
Any darkening of the solution indicates that at least some of the silver has become tarnished. For the best results, only use clear solutions. Here's a photo of a plant that I reversed with STS after it had been mixed and left in my fridge for almost 9 months. As you can see, it worked, but I think the dish soap (rather than yucca) I used stressing the plant.
One of our in house vendors also creates STS on demand for sale and can be found here: STS
This guide can also be found here: Guide
Congratulations @bifbeans! You received a personal badge!
You can view your badges on your board and compare yourself to others in the Ranking
Check out the last post from @hivebuzz:
Support the HiveBuzz project. Vote for our proposal!
I’m glad i found the Weedcash community recently, did not even think about to find this kind of detailed informations regarding breeding. I’ve learned a lot from this post, even about stress factors. Thank you so much for sharing theese, it’s like backstage secret :)