Core recovery and labeling
When removing the core from a tire in a triple-tube breakdown per barrel the following core procedures must be followed. First, two parts of the split tube must be placed on corrugated iron sheets or elbow iron rails. The upper split must then be removed and the core photographed and recorded before being placed in the core tray by the person responsible for core logging.
When transferring the core to the core tray, the best results are obtained by replacing the upper split with a half cut PVC pipe, rolling the combination to transfer the core from the split tube into the cut PVC pipe, then placing the PVC pipe cut and the core directly into the core tray.
To remove the core from a single core or double core, a single core barrel or inner tube from a double core barrel must be raised so that the core can slide out from the core barrel. The core should not be allowed to fall into the core tray; it must be captured by hand and placed carefully. Although it may be necessary to tap the core barrel with a hammer to loosen the pinched core, this technique should generally be avoided to prevent artificial damage.
All cores, including penalties, must be transferred to the core tray in the correct order. The core must be as tightly as possible. Although pieces of extruded core may have to be artificially damaged to fit into the tray, this practice must be minimized. Where practical, it is better to leave a small gap at the long end of the core than to break the core.
Damaged cores can result in underestimates of rock mass strength and predictions of erroneous rock mass behavior. Therefore, it cannot be emphasized strongly enough that the core must always be handled as carefully as possible, with the main objective being to minimize artificial damage. It is very important to ensure that all artificial damage is clearly marked. Correct core handling is the responsibility of the person carrying out core logging (technical geologist or geologist).
When the core has been taken it is the bomber's responsibility to:
■ Carefully wash the core to remove drill mud and place a block of depth at each end of the track. Washing must be done very carefully, to maintain core integrity. High pressure nozzles should not be used because they cause core misplacement and further core deterioration. Great care must be taken not to remove fines from weak or damaged zones;
■ label the core tray with the drill hole ID, the tray number and arrow pointing downhole. The right depth must be marked on small blocks after each run has recovered. Registering the right core depth is very important and the core registrar must always check whether it has been done correctly. In this process two measurements must always be checked:
→ stick-up, which is the measurement that most often results in significant inaccuracies in core depth registration. This everyday term arises from the fact that the depth measurements of drill holes come from (the length of the string rod plus the tube outside the core stem) is reduced (the length of the string rod 'sticks' above the ground). Because the ground surface is hidden under a drilling rig, a convenient datum is used on the rig, usually the top of the chuck head. Measurements are made on this 'constant stick', which must be accurately assessed before starting drilling - a process that is simple in concept but often difficult in practice;
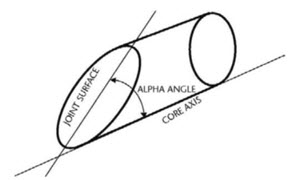
→ stub length, which is the length of the core stub remaining at the bottom of the drill hole after the core is taken (Figure 2.12). The length of the stub can vary greatly depending on the skill of the bomber in breaking the core at the end of each run and the properties of the formation being drilled. To estimate this correctly, it is necessary to check all damage in the core for any grinding or similar damage. If there is no grinding section in the competent stone core, then the stub is progress minus recovery. If there is grinding, the estimate is more subjective.
Core photography
All cores must be photographed as soon as possible after drilling, colored and should use a digital camera with a minimum resolution of 3.0 megapixels. More sophisticated 2D and 3D core scanning techniques are being developed, but they are not yet widely used because of the cost and need to handle the core.
It is important to ensure that there is minimal lateral distortion in the photographs. To achieve this, the core box area must be parallel to the plane of the camera lens and the camera must be directed to the midpoint of the core box. Each frame must include the core of a single hole.
Core photo documentation includes three basic steps.
1 Take a picture of the core and verify the quality of the image needed. In all cases the core must be photographed in the core box before logging to minimize the bias cause by core damage. If the inner pipe has been used, the core must also be photographed on a separate tube before handling. One image must include one or two core trays at a time. 2. Electronic file labeling. 3. Photographic database management. The following criteria must be observed when shooting core. ■ Lighting conditions and lighting time must be consistent throughout the project. If artificial light is being used, better results can be obtained with diffused light rather than bright light. ■ The core must be photographed consistently wet or dry. Experience has shown that for dry core geotechnical photographs it is more informative, although in these arctic conditions it may be difficult ■ The camera must be kept at a constant distance from the core. Wide-angle lenses should be avoided if possible because they will cause distortion ■ The photo must include labels, color lines and scales. The label must provide details of the drill hole ID, date, depth, starting point and direction of drilling. After the core has been photographed, the digital file from the photo must be renamed to be easily identified in the database. The following information must be entered in the file name: ■ drill hole ID; ■ interval depth photographed; ■ indication of whether the core is wet or dry. Here is an example of the file name: ..
After the core image is correctly labeled, it must be stored in the appropriate database. A simple and effective solution is to save images in a basic folder and use the viewing program to access and review files. This program must have the ability to view multiple photo thumbnails at the same time.