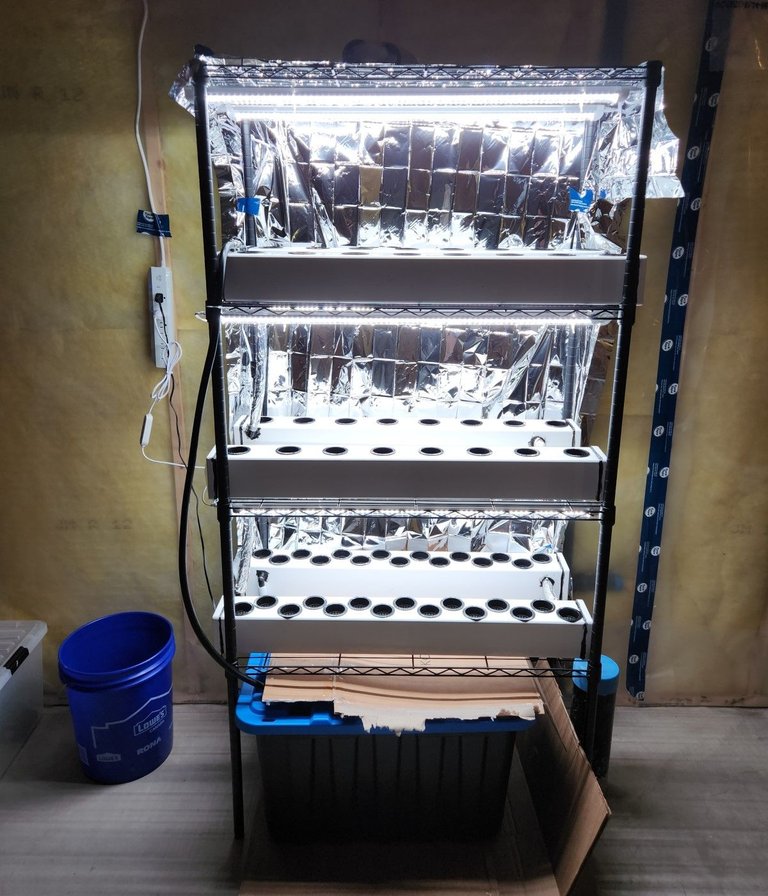
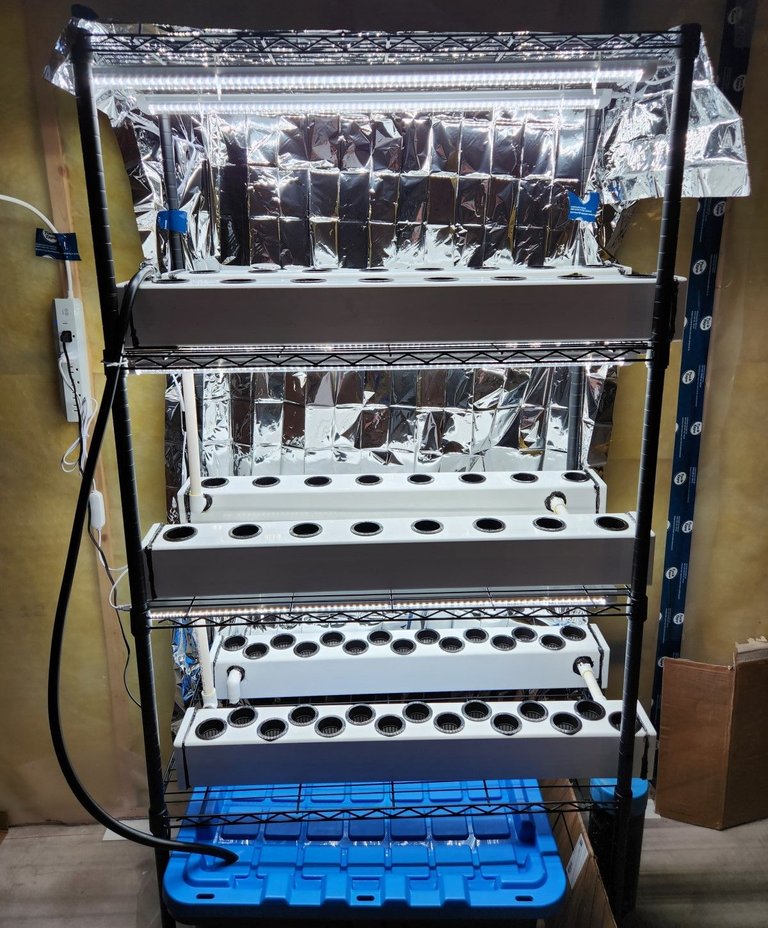
After just finishing a fresh salad in the middle of a Canadian winter, I got inspired to do Part Two of a Home Grown Hydroponics Series. Last time (scroll to bottom for part 1) we went from a bare shelf to sealed reservoirs. This blog will show you how the watering and automation of the system was set up.
The most important thing to consider when automating your system is a pump. I bought an aquarium or submersible pump with a 2.1m (7 foot) maximum lift. You want to make sure it's powerful enough to lift the water to the top of your hydroponics system. It can also move 400 Gallons per minute! Which is far too much for such a system but I could use it to power two such shelves if necessary and the other available pumps were too weak to lift water this high.
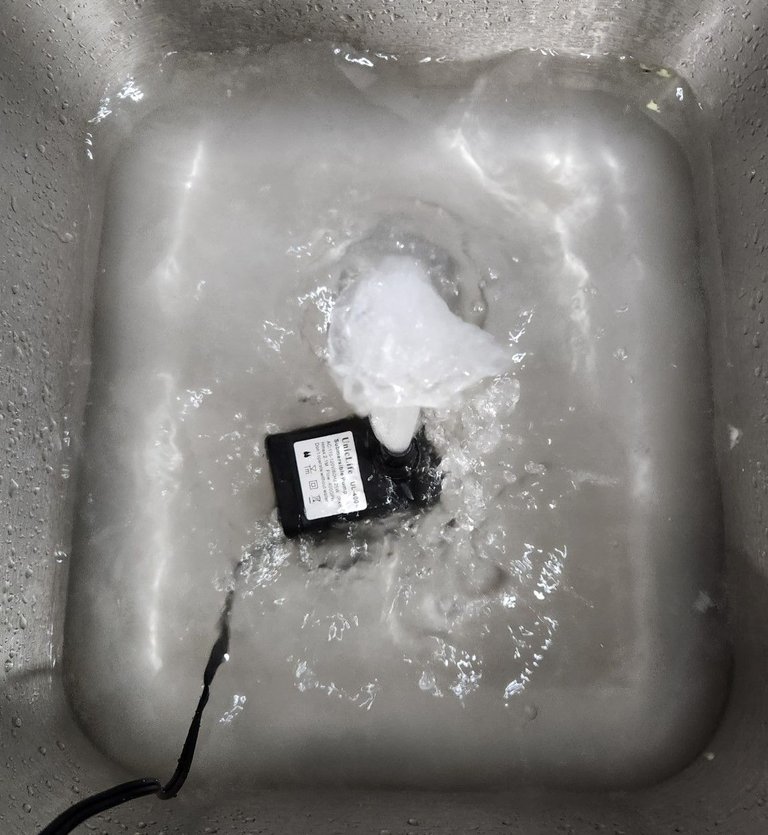
I tested the pump in the sink. The 400 GPM flow would cause a flood beyond what the system could handle but there are ways of dealing with this. We turned the pump intake to low, we made two holes in the hose (preferably underwater, near the source) and used a valve at the point of outflow into the top of the system.
The pump is in the storage box reservoir, (the nutrient reservoir) and is connected to the black hose. I plugged the pump into the timer seen hanging from the yellow extension cord. It runs for 10 minutes every 2 hours which is adequate to flood the entire system and cycle the water.
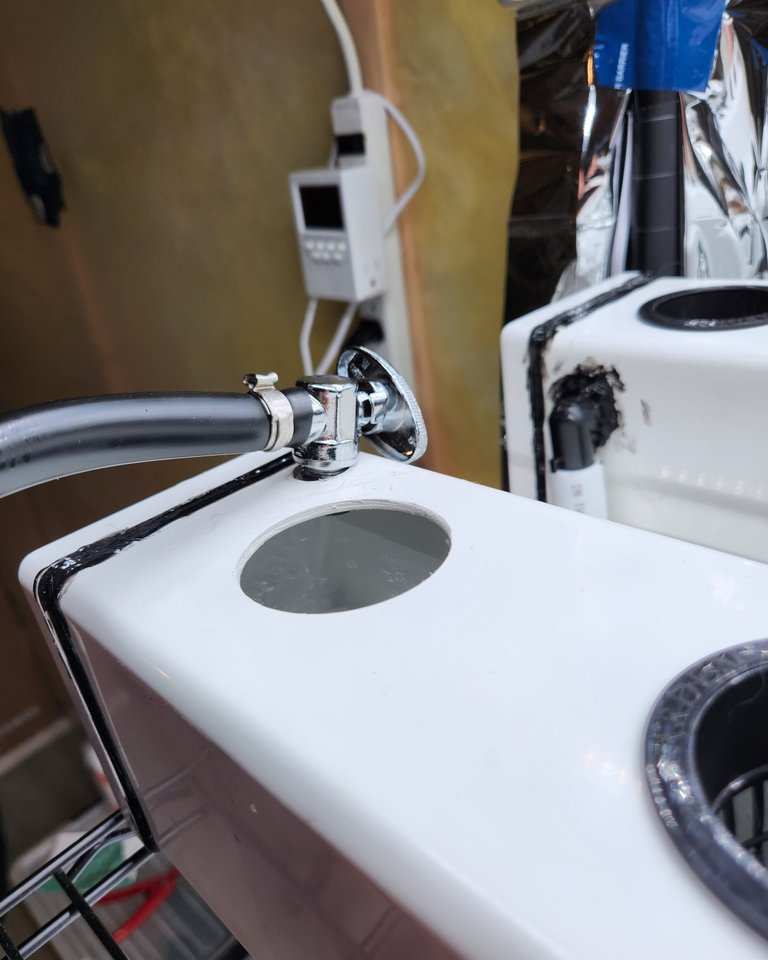
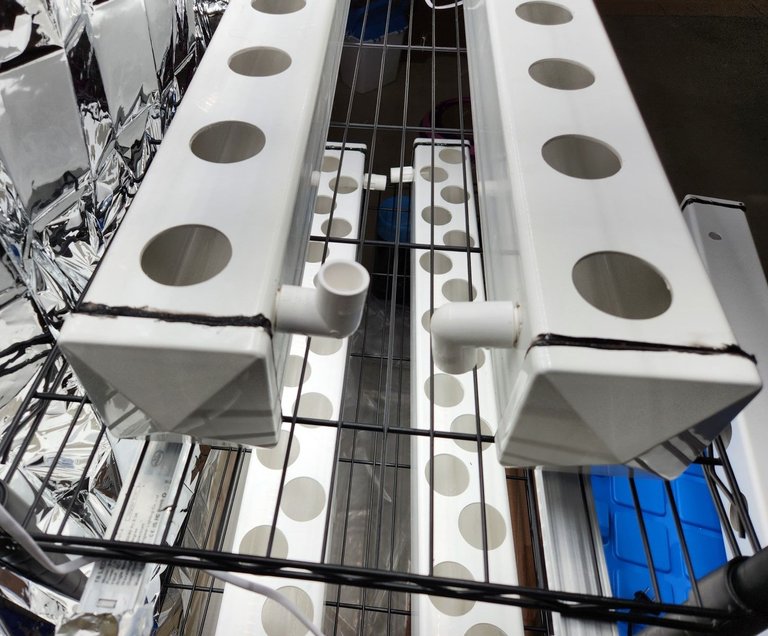
I bought a simple elbow valve for the inlet of the system, it's barely open and sprays water down which adds bubbles or essential oxygen for the roots. If your system does not have sufficient oxygen for the roots, they will rot and your plants won't grow well. Between flooding you would want at least an inch or two of air in the growing reservoirs. It's only necessary that the bottom of the roots are in the water and your growing medium can retain moisture between floods.
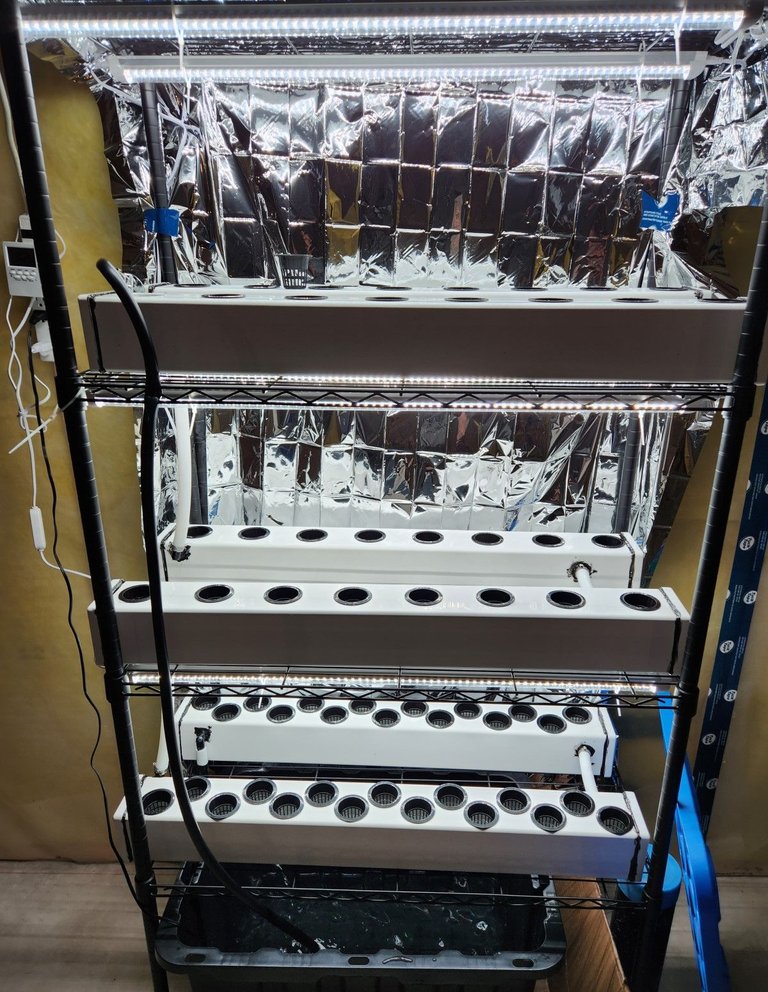
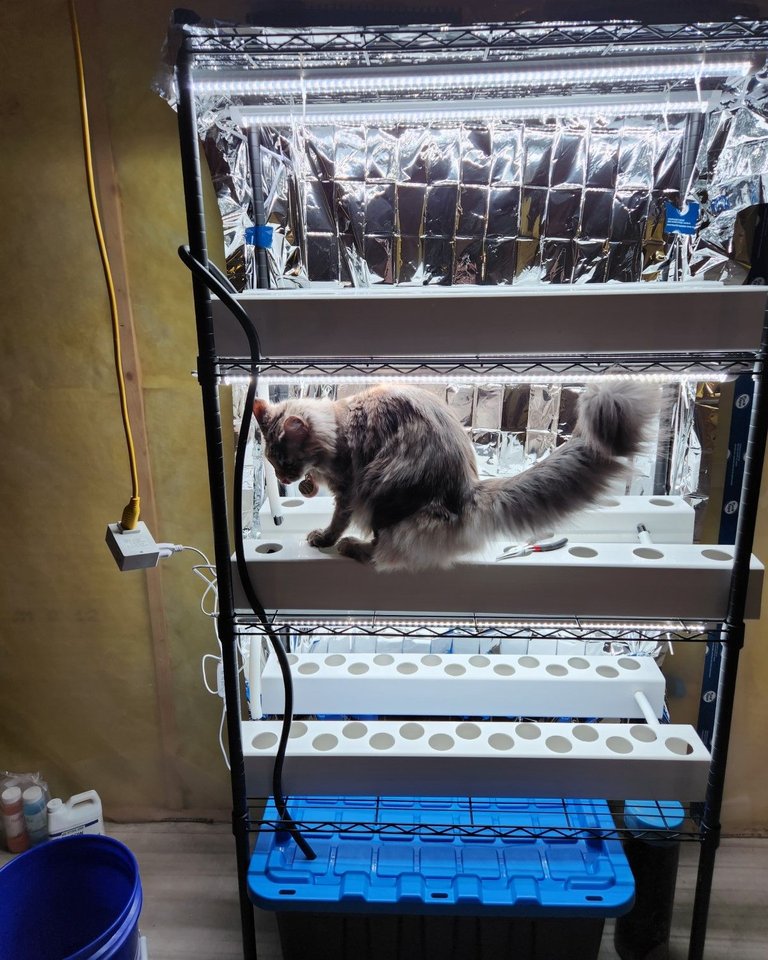
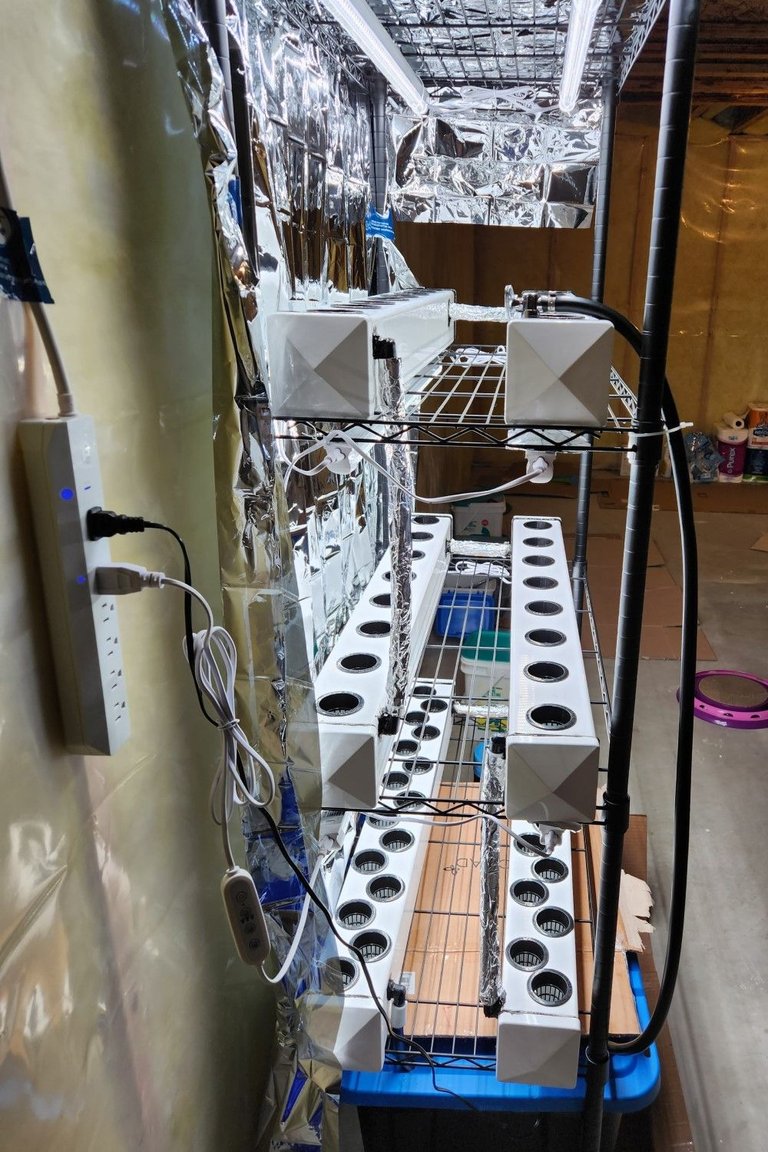
Here's another view of the system. I tested it many times to ensure that it wouldn't leak onto the floor. The pump is on a timer and so are the lights. You would want the lights on for at least 10 hours a day- make sure they are grow lights. Certain spectrums are optimized for greens and others are for flowering. The white light is just so it's not a weird red or blue colour, it's useless for the plants.
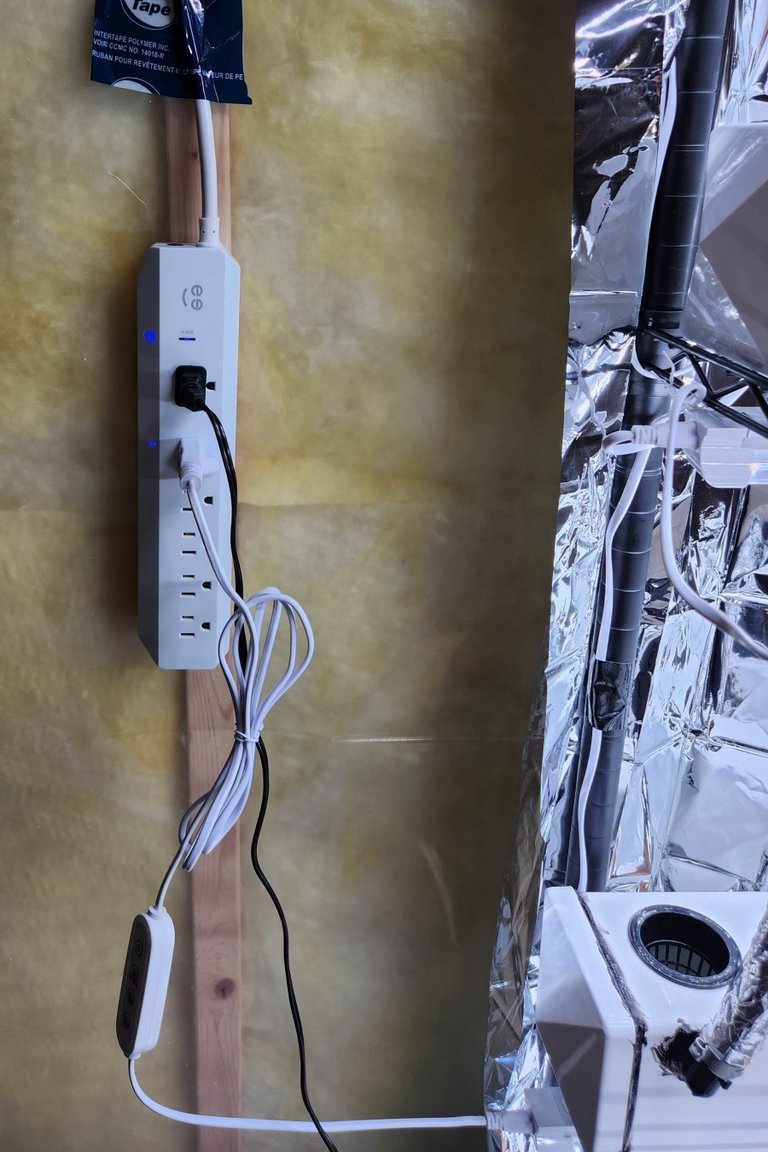
I tried a smart plug but it would crash with my wifi, which was unacceptable. A timer never fails and has a backup battery so you don't have to reprogram it every time the power goes down. I could buy a more expensive smart plug, and a backup battery to run the pump, but we want to keep costs down.
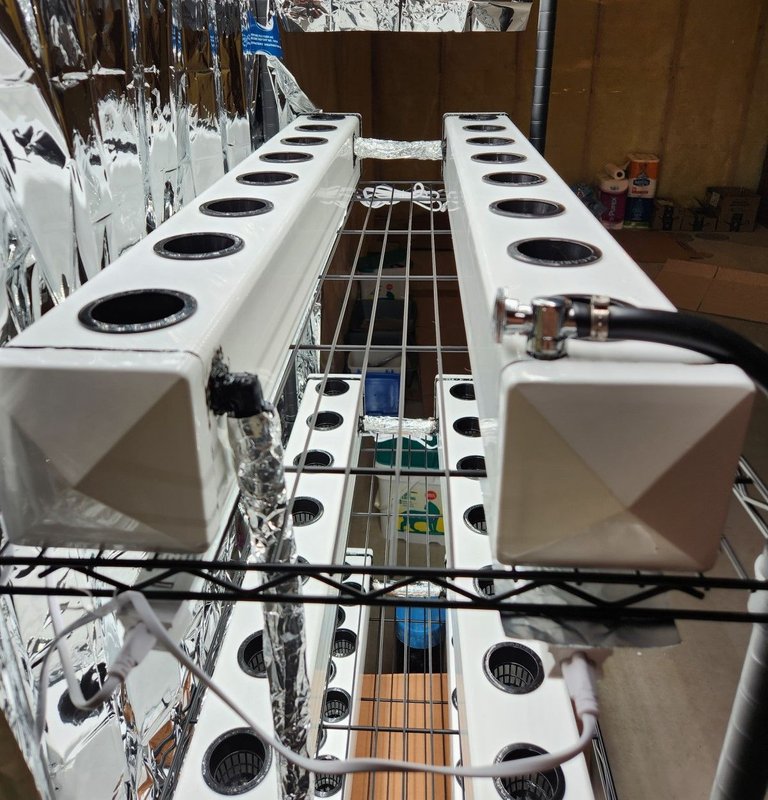
We wrapped the connecting pipes in aluminum foil. You don't want light getting into the reservoirs as it causes algae. The idea is to clean this as little as possible, we want it to be automated.
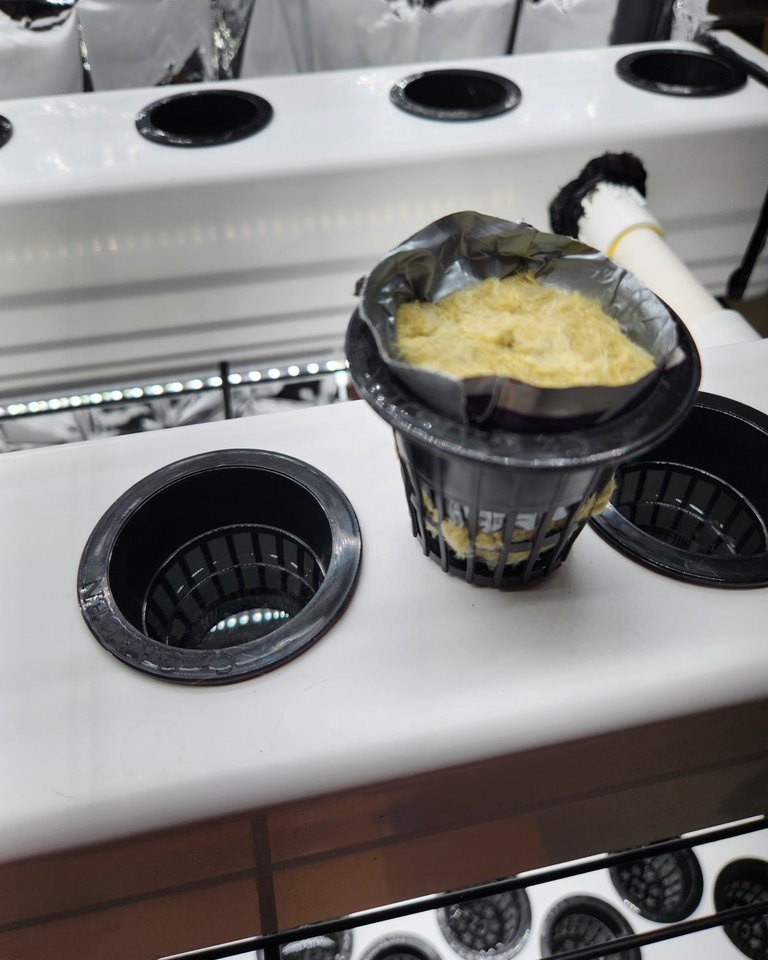
I put some cardboard over the lid so light wouldn't get into the nutrient reservoir and bought special net cups with a black rim, or lip that extends down into the holes to keep as much light out without restricting the airflow, you would want the water between the floods to be below the lip.
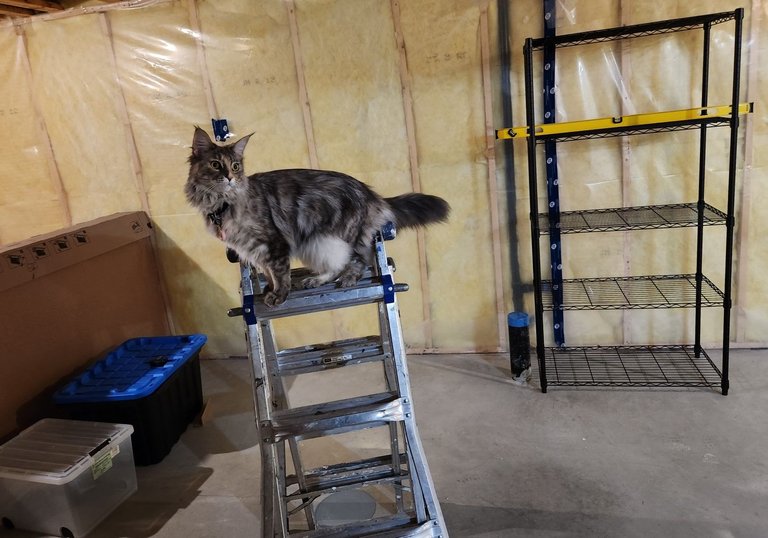
Now it was time to let it run for a few days to flood the plastic out and to get rid of the worst of any chemical leaching. These pipes are all food and drinking water safe, so is the silicone. A couple days later, unfortunately, we sprung a leak! Let's blame the cat.
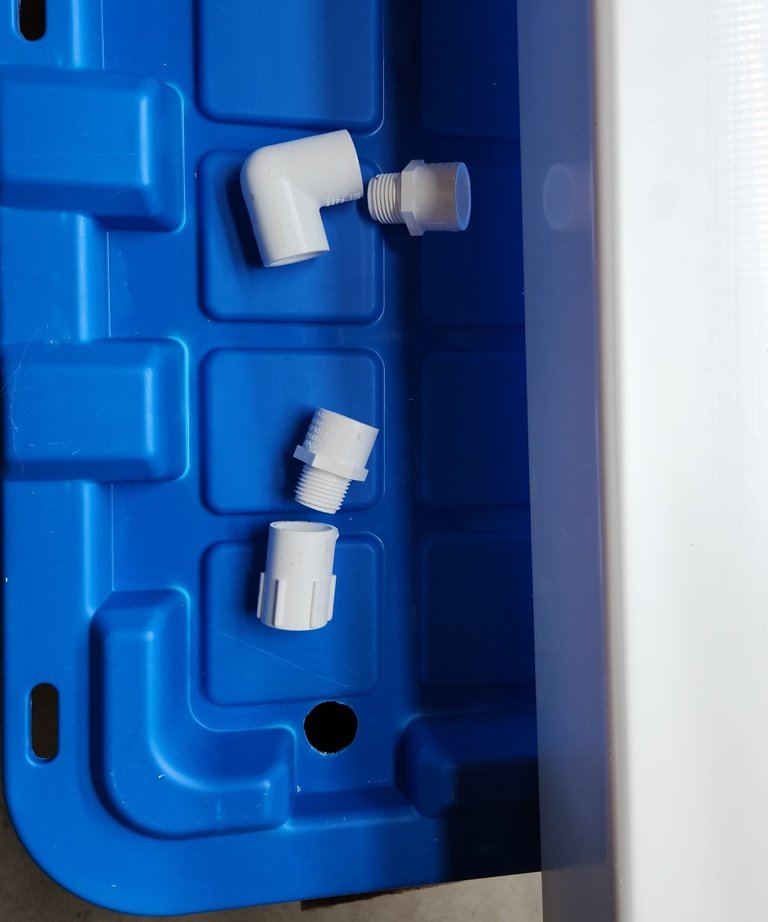
I decided to replace the Pex plumbing with PVC because it's more solid and can be glued instead of siliconed to the grow reservoirs. Screwing them together would ensure they don't come apart and it can be fused to the reservoir.
A rigid system is better and can handle any movements or cats jumping on it. To buy all the elbows, connectors, joints and other parts took a little bit of thinking and a couple trips to the hardware store.
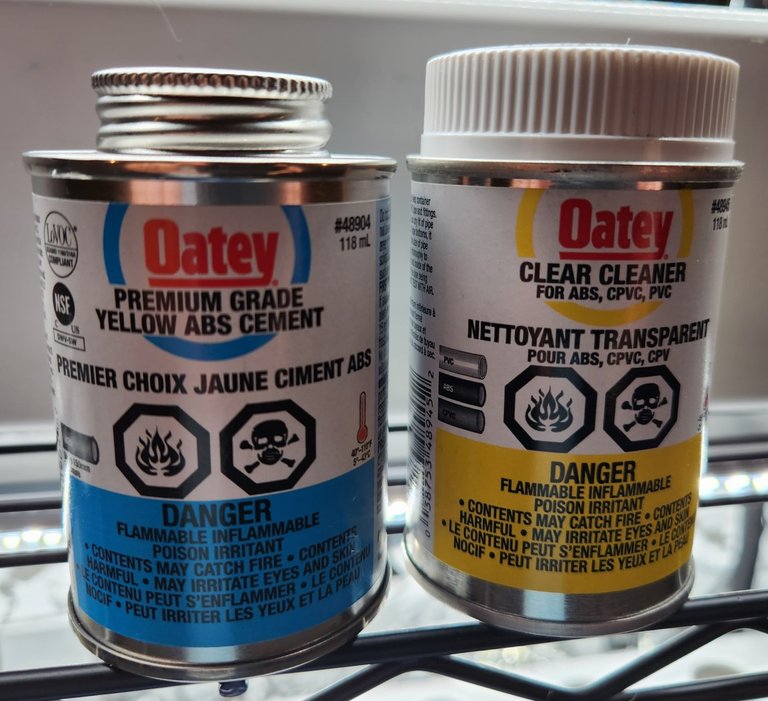
You need ABS cement to melt the PVC plastic and fuse the joints together. This stuff is useful if you ever have to connect some drainage pipes under the sink or shower. It dries quickly so I wasn't too worried about putting this toxic stuff in our system.
Now the grow reservoirs are all connected and it's time to try this again. I shook the shelf a couple of times. You would need extreme strength to break this fused pipes apart. Just in case, I siliconed the outside of the connection joints with leftover aquarium grade silicone. If it's safe for delicate fish, it's fine for a human.
Now that it wasn't going to leak, it was time to plant. I bought some Grodan 1.5 inch rockwool grow cubes and put some seeds in them. When you first start off, you don't really need any light. But once they sprout, 10-14 hours a day is good.
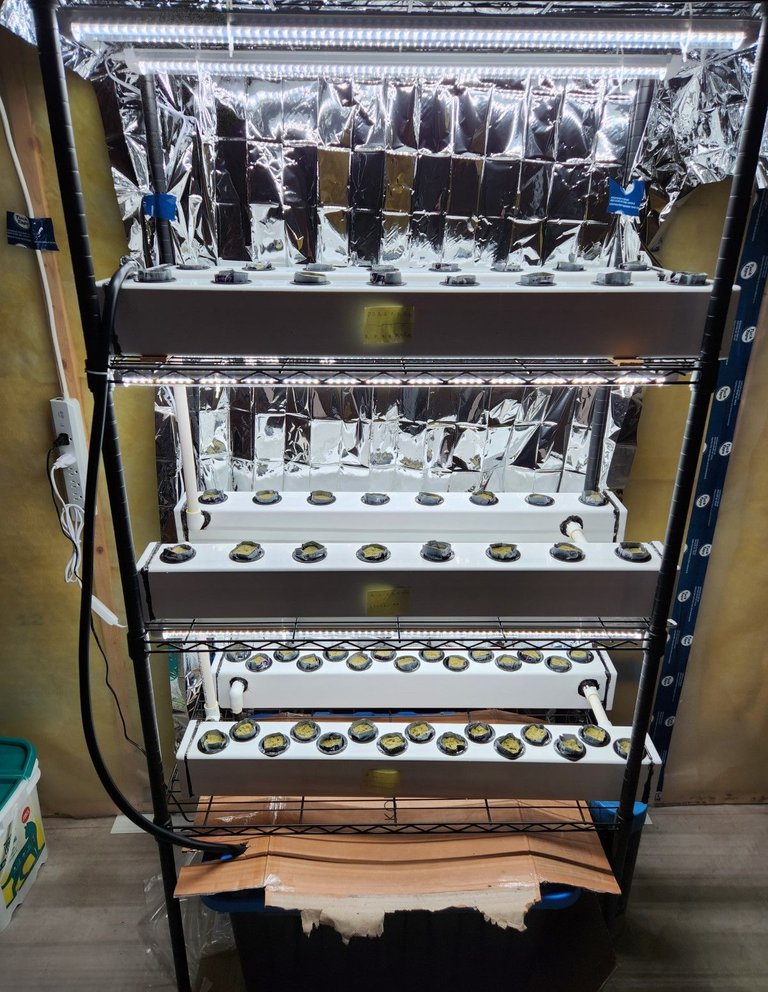
I labelled the tubes so I would know what was growing. It was mixed lettuce, salad lettuce, arugula, dill, basil, green onion and bok choy. It takes time to figure out what grows best in a system, the onions aren't worth it as they take to long and the type of basil we bought was a failure.
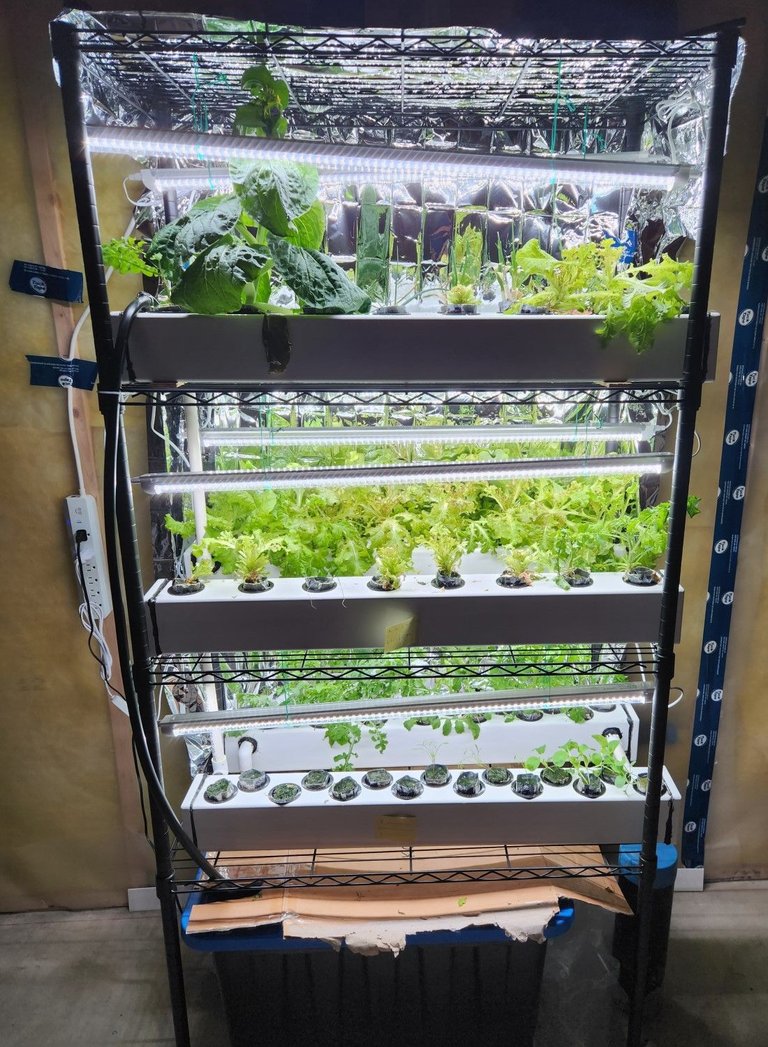
The system worked so well, we went on a two week vacation, came back and the plants were doing just fine. This is three months later, not two weeks. I cut the zip ties off the light and used some plant wire, it's easier to adjust the distance of the light to the plants which is important. The lights are only 30 watts each and the energy doesn't go very far.

These photos were all taken last winter. We are learning so much from this and working on getting the sunk costs down one fresh salad at a time. Next Hydroponics post will be all about growing with it.
Thank you for reading.
Previous Hydroponics Post
https://peakd.com/diy/@crypticat/homegrown-hydroponics-setup
You can now eat fresh vegetables at home during the cold winter months, or anytime.
I once planted lettuce on my apartment balcony and it failed.
That's great. I think it's a great adventure. 👍
There's easier ways of doing hydroponics where you get a single reservoir to grow in and put in an airstone, it doesn't have to cycle. Look up Kratky Hydroponics if you're interested. I might do it in the future with kitty litter buckets for tomato plants as they would be too large for this ebb and flow type system I built.
As for what happened on your balcony, I would think either you were facing north or forgot to water your lettuce. Balconies don't get much moisture especially if they are on higher floors.
You're right. 👌
I forgot to water the lettuce. 😂
Have a nice day.
Congratulations @crypticat! You have completed the following achievement on the Hive blockchain And have been rewarded with New badge(s)
Your next target is to reach 6000 comments.
Your next target is to reach 6000 replies.
You can view your badges on your board and compare yourself to others in the Ranking
If you no longer want to receive notifications, reply to this comment with the word
STOPCheck out our last posts: