The death toll due to the COVID-19 virus just crossed 102,000 and has already infected 1.7 million people worldwide. There is no known cure or vaccine against this virus, but we can help find one.
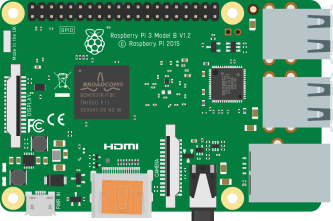
Image credit: Designed by Butix
In this post, we will install software called BOINC Manager onto a Raspberry Pi, and use it to donate our Raspberry Pi’s processing power to medical research of the COVID-19 virus.
BIONIC is an open-source distributed computing middleware, that allows volunteers to donate their device’s computing power to cutting edge research. Today we will be discussing on how to donating our Raspberry Pi’s processing power to one such research called “Rosetta@Home”.
Before you get started
Make sure to have a Raspberry Pi (preferably a Raspberry Pi 4 with 4GB RAM), an adequate power supply for the pi, an SD card (at least 4GB) and a stable internet connection. Optionally, it would be great if you have a heatsink for your Pi, else it may start to thermal throttle during the whole process.
Setting it all up
First, we need to install Ubuntu on the Pi. If you already have the
latest version of Ubuntu then skip to the next step. The best method
to install Ubuntu on to your Pi is by using Raspberry Pi
imager
and selecting the latest Ubuntu distro for your Pi and flashing it
onto your SD card. If you do not know how to do this, then you can
find a step by step guide
here.
Though Raspbian works it is known to have some issues with BIONIC
manager software, as the software was made for Ubuntu specifically,
however, the command line version seems to work pretty well with the
Raspbian image, you can find the steps to install and setup that
hereNow that you have installed Ubuntu onto your Pi, log in to it, if
you haven’t changed the username or the password then the default is
“ubuntu”.Now we need to make sure that the Pi does not go to sleep every time
you leave it unattended. To do this, launch the Settings app by
clicking the gear icon on the right-hand top side, now navigate to
the Power tab and toggle “auto suspend” to off. Optionally, you
can toggle “screen blanking” to off, if you which want to keep a
close eye on your Pi’s activities later on.Now let’s install the BIONIC Manager app, to do this open the
terminal, you can also hit CTRL + ALT + T. Now in the command
line typesudo apt-get install boincthen hit enter. This step may take a minute or longer based on your internet connection.
Now launch the BIONIC Manager app by opening the app drawer on the bottom left side, then clicking on the BIONIC Manager app.
Select Rosetta@Home from the project’s menu, which appears as soon as you launch BOINC Manager for the first time, then click on
Next.If a warning appears saying “This project may not have work for your
type of computer. Do you want to add it anyway?” then click YesRegister an account with BIONIC by providing necessary details, if you have signed up before, then log in by filling in your email
id and password, then click Next.After the project has been added Click Finish
A browser window may open up asking you to finish registration and
join a team to compete against others. Provide all the necessary
details there.That’s it your all done, now leave the Manager running and make
sure you are connected to the internet, and in a little while the
Manager should download some work and start working on it. Sometimes it may take
longer for your device to get assigned any work, but it should not
take longer than a few hours at most. But, try to avoid doing any work on
the Pi when the manager is running, as the manager will stop its
work and wait till you are done.
You can also install Bionic for Windows, Mac OS and Android. You can find the links to download the necessary software here. To setup the manager after the installation follow the instructions starting from step 5.
With all that done you are now contributing to the fight against COVID-19.
Hope you liked this post, if so then don't forget to upvote and share this post. If you have any suggestions about the post or what to post next please leave it in the comment section below.
Stay safe and healthy
Hi! I am a robot. I just upvoted you! I found similar content that readers might be interested in:
https://vocal.media/01/using-raspberry-pi-to-help-fight-against-covid-19