Wooden Sign Tutorial
Step 1: Getting the wood
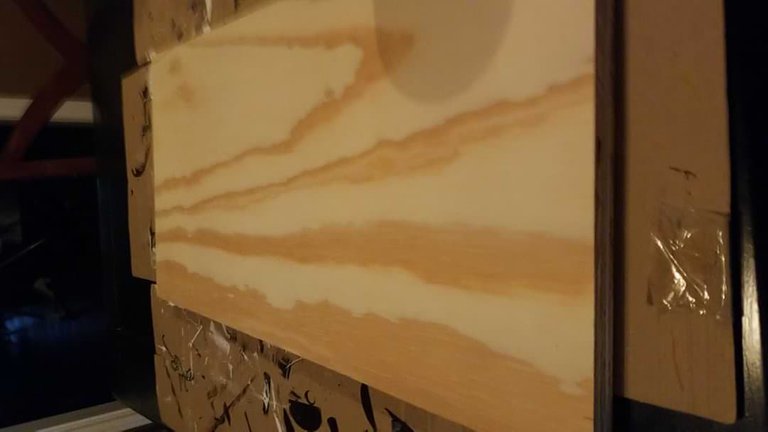
I went to home depot and purchased a large sheet of wood. The trick is to pick out the best quality wood in your price range. Find the best looking sheet (8 ft x 4 ft) you can. Then take it to the wood cutting area. A lot of people don't realize that they offer to cut your wood for free! I like to get a variety of sizes: 16 1ft x 1ft, 2 4ft x 1 ft, 2 2ft x 1 ft, and 1 2ft x 2ft. This gives you a nice amount of wood to work with. Stop by the painting department and pick up some foam brushes, 2 colors of paint (white and black are a good start), and a sanding block.
Step 2: Prep your wood
Pick the wood piece out you want to use for your first sign. Then take the sanding block and go to town! You want to try to make it as smooth as possible. The smoother you can make it, the more time you save on the back end doing touch ups.
Step 3: Now to Paint!
Don't get excited yet, you still have a ways to go! Choose the color you would like for your base, and grab your foam brush. This should be a pretty thick coat, there may need a second one depending how you want your sign to look.
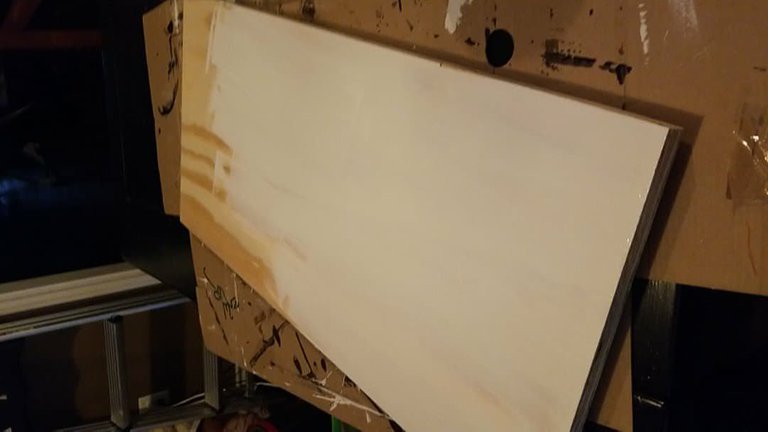
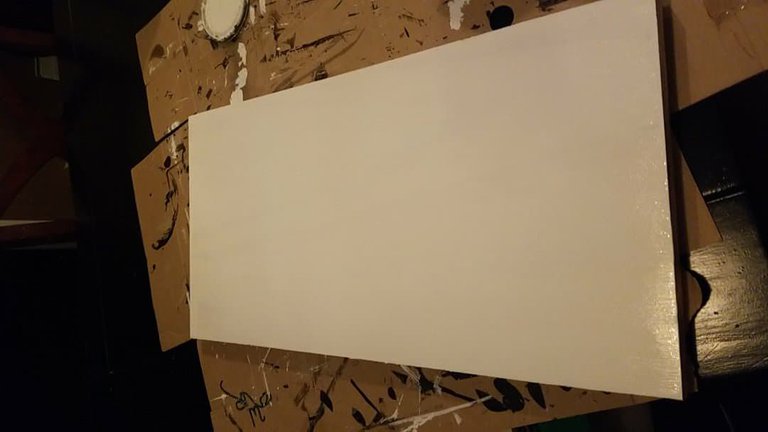
This was after 2 coats. I don't like to see my wood when I'm making a colored sign.
Step 4: Wait
This is the most important step, put the painted wood to the side and WAIT. Do not touch it for 24-48 hours. This is a long time, and yes it sucks, but guess what, it is important. If you don't wait, you will pull up the paint with your stencil.
Step 5: Design your Sign
While you are patiently (or impatiently) waiting, design your sign. I use cricket design space. I put a rectangle the size of the board then design the sign within the shape and arrange it to look how I want. This sign was a gift so I already k re what I wanted it to say, but making it look how you want can take hours! After designing, cut it out. I use oracal 631.
Step 6: Applying the design
Now that your board is dry, apply your vinyl. I use my scraper plus a tennis ball to get the vinyl to apply as best as I can. This is another important step worth taking your time on. It saves you time touching up on the back end.
Step 7: Paint your design
Grab the paint you want to use for your design and another foam brush (I store my brushes in ziploc baggies so I can reuse them). You should do this part quickly. Dab a light coat of paint within your stencil (quick now!). If it needs another coat, go for it, butremember to dab. You need to get the stencil up quickly, the paint should still be wet and not so thick it runs. Careful pulling the stencil!

Step 8: Touch-ups (if needed)
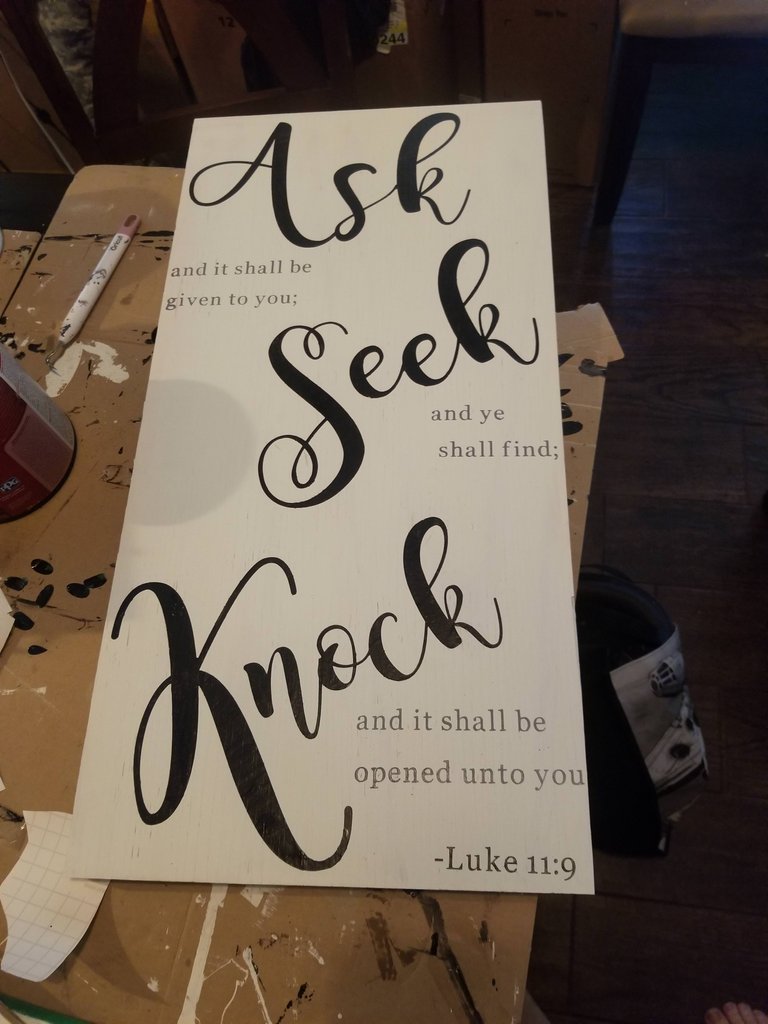
I use a small paint brush to do touch-ups around the design as needed. But if not needed, you are done! Congratulations! Enjoy your beautiful sign knowing you made it from scratch!
Cool :)
Thanks, my wife really enjoys working on these types of projects. Which I can tell because we have a ton around the house lol.
Haha - well thanks for sharing with all of us :)
I've always wondered how hard it was to actually make these signs. Seems pretty easy and straight forward. I'll have to share this Crystal so she can start making these instead of buying them.
Yeah it's not super difficult but definitely takes time and patience. Once Stayci's account gets approved and all she will most likely start posting more of this type of stuff as she makes new signs or whatever else.
Yeah let me know what her account is and when it gets approved. Just did a post welcoming you and all rewards go to you (Already did one for Tate an Morgan). It's just a nice way for me to help y'all get started.