Hello Steemians,
Two weeks back me and my wife organized a birthday 'My Little Pony" themed party. We have been doing this quite long time now but that was the first time we made Piñata.
It was indeed a challenge as we don't know where to start. But after days of thinking and imagining how to do it, we came out with this:
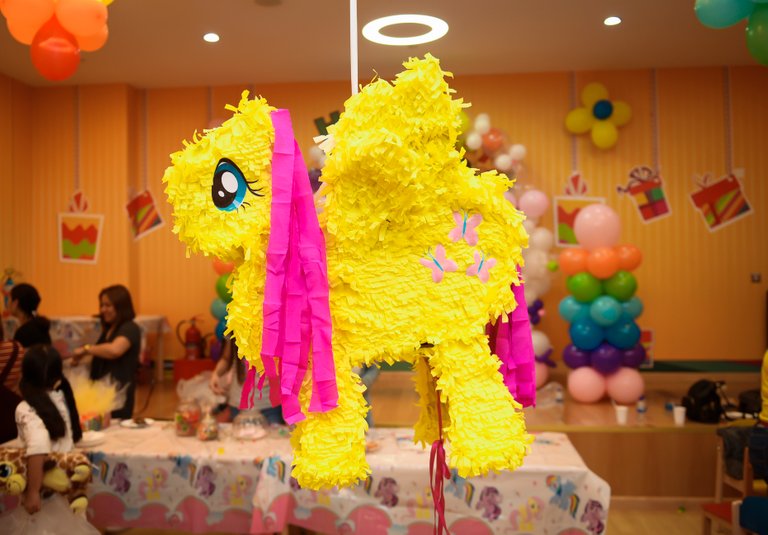
Photo by our Photographer Partner Alvin Mark Buen
Let me show you how we did this DIY that tested our patience with all out effort and hard work. It took us 4 days to complete the project, Yes, FOUR Days!. I keep on telling @pingcess not to worry as it'll be very easy but I was wrong... totally wrong! Though it took us so much time, those 4 days turned out to be -> me and my wife's duo-effort. As I said, it tested our patience - well, more of her patience!
Things We Need:
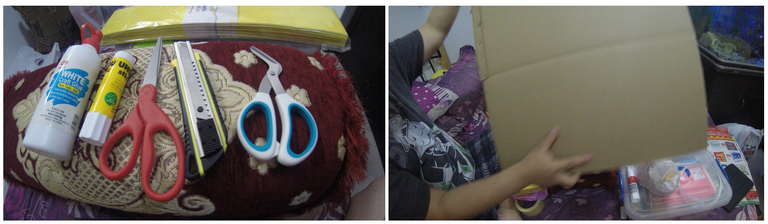
Also masking tape and marker which were missing in the picture. Please note that the box you need will depend on the size of your preferred Piñata, here we used Jumbo size box.
Steps - which I thought was easy!
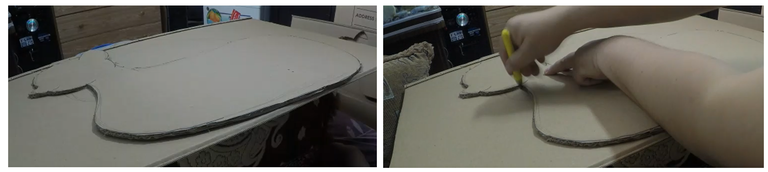
1.) Cut the box into it's sides then draw the outline of your preferred Piñata - here was My Little Pony, Fluttershy. Once you got the perfect shape and size, use marker as guide then cut it using cutter. Just be careful in using cutter
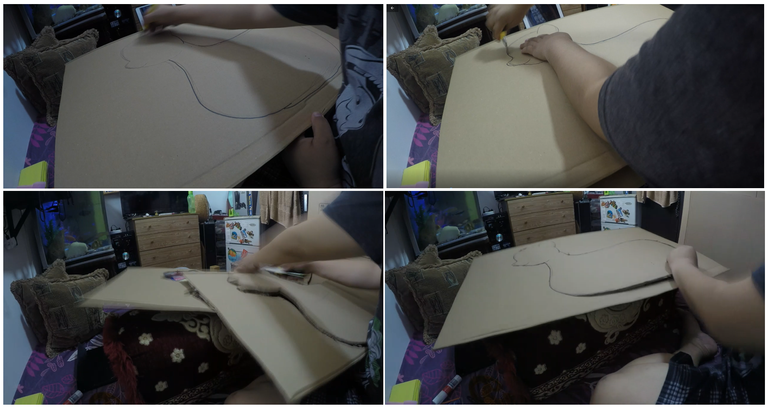
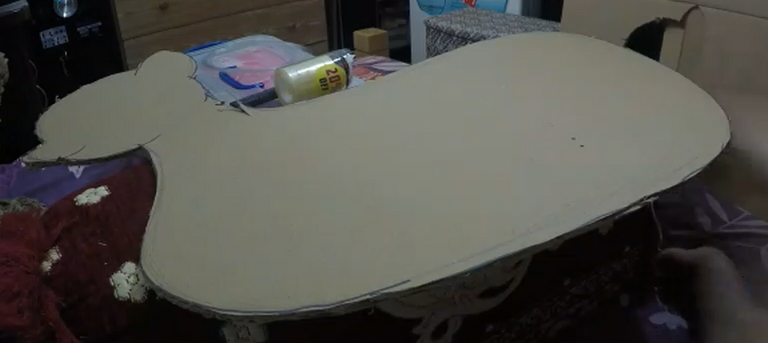
Then you already have one side of the Piñata:
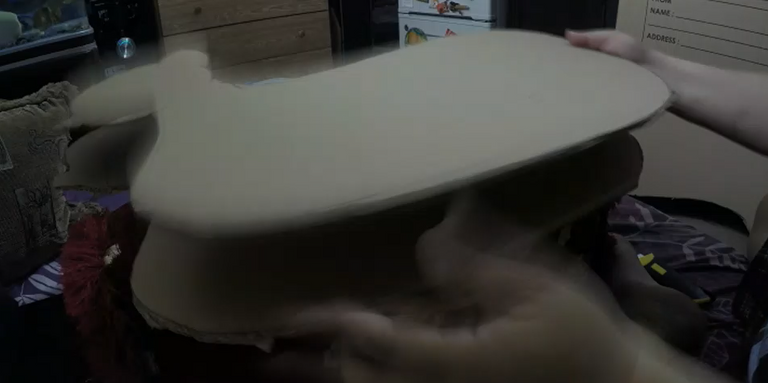
2.) Repeat step number 1 for the other side of Piñata but to make it easy, you can just use the pattern you created as guide.
Then you will have two sides of the Piñata
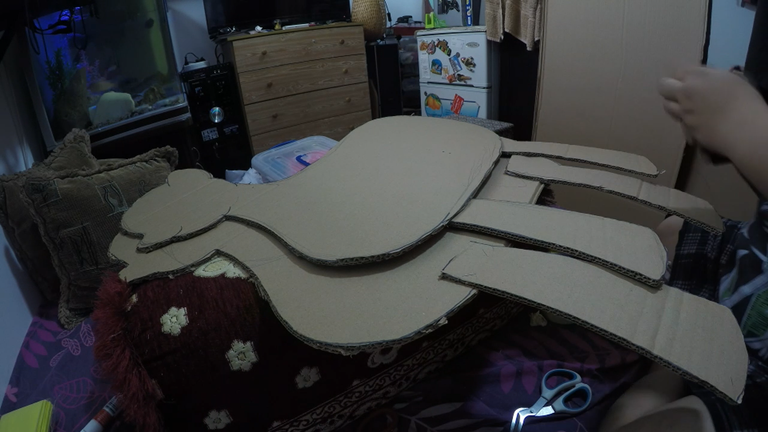
3.) Now it's time to make 4 legs of the pony and wings if required - it would be as easy as repeating steps 1 and 2

4.) Time to stick the 4 legs to Fluttershy's body. Here you can use glue, masking tape or stapler, anything that will surely holds them together and it should looks like this:
At this time, I was so happy as it was like easy peasy. I was doing it while watching PBA Finals Game 5 where my beermen defeated Magnolia Hotshots.
Then it made me think, "How to make sure that all the goodies inside will fall once the Piñata is opened?!
So I came up with step # 5
5.) Create a small pouch where the goodies will be placed, just enough space for all the favors. I cut a rectangle shaped carton and stick it with glue in trapezoid shape inside like this.
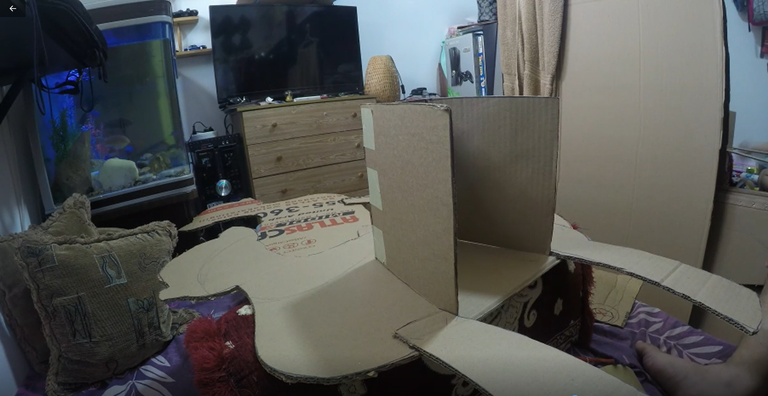
The corners were supported by masking tape to hold it in it's shape. Then I glued the other side of Piñata and Piñata skeleton is almost done!
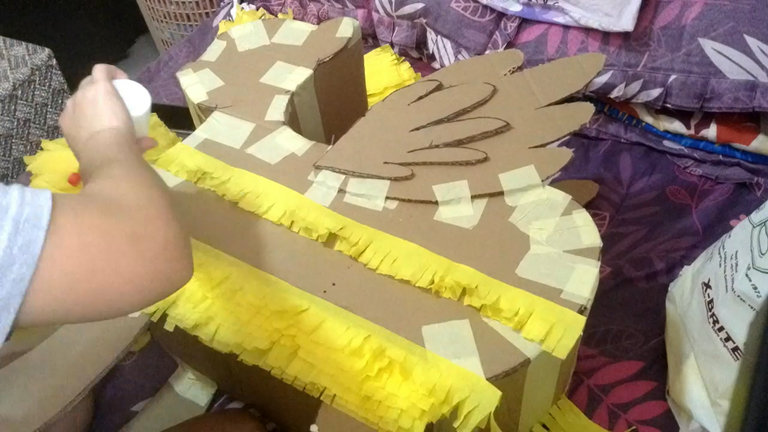
6.) Now the challenge has leveled up! Fixing the side was not that easy and extra-extra-extra patience is required. Cut a long rectangle shape carton -width is same size of the trapezoid we've done on step # 5.
Roll the carton in both side so that it will be flexible and can be adjusted easily.
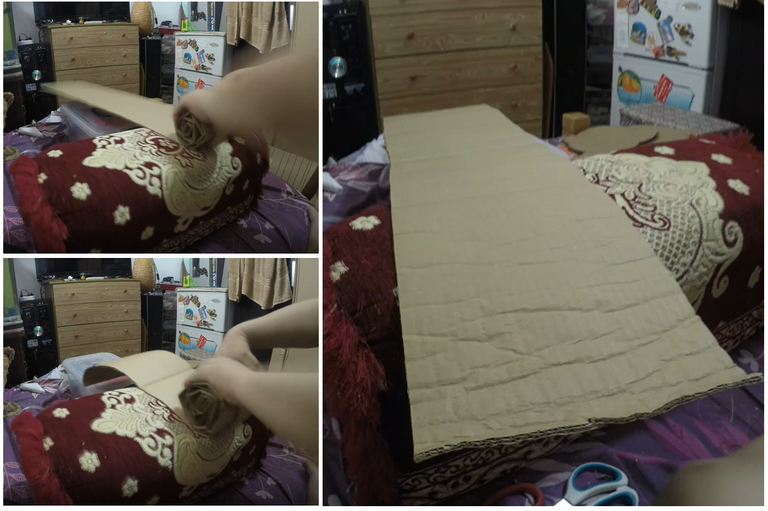
7.) Then glue the rolled carton on pony's side until you covered the whole side. Would be better to start from leg up to the head then to it's back down to the leg again. This really takes time longer than I expected.

Once full side is covered, it would be better to support it with masking tape to ensure that it will hold together.
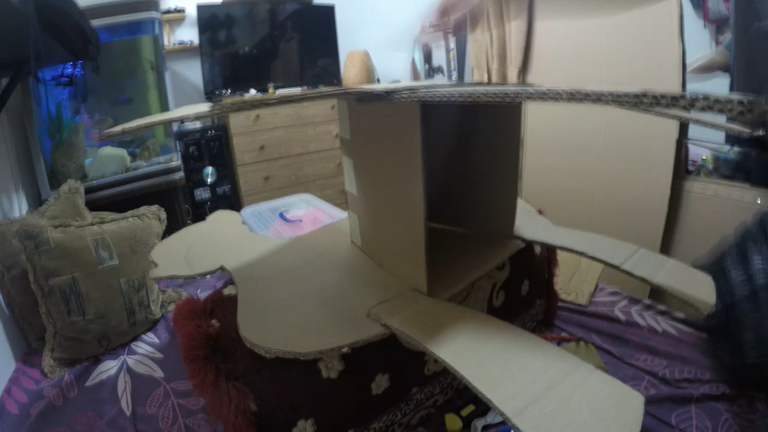
Then you already have Fluttershy's Skeleton!

I did it!
I was so proud and even told to my wife that it was very easy though I spent whole day doing it. That time my wife was busy doing party souvenirs.
continuation...
8.) Cut the crepe paper by 10" each then make a slit -finger apart- on both sides. Once you open the crepe paper, it should looks like this.
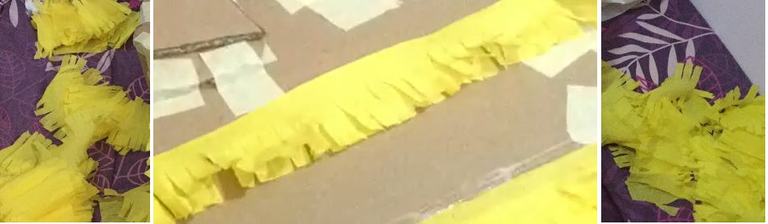
Once all are open, fold it into two - it would be nicer if the front will be a bit shorter than the back so that you can see different layers once we glue it to our Pony Skeleton.
Here's the hardest part
It surely tested my wife's patience as unfortunately I was called for work on weekends and even during public holiday, not to mention the 4-5 hours overtime everyday. So she was left with sticking the feathers.
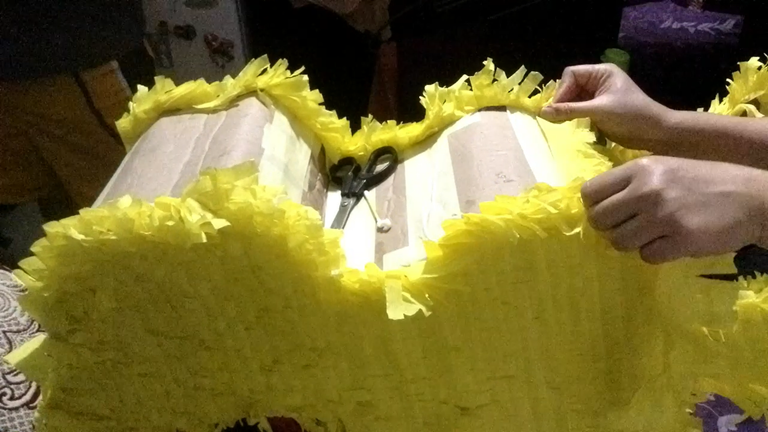
9.) Sticking the feathers, that looks so simple and easy but a big NO!. It took so much time and it gave us lower back pain - well because the Piñata we made was big.
After folding the crepe paper, it's time to stick it into pony's body.
NOTE: start from lowest part as it will look like a layer of feathers and it will be easier to stick on top rather than sticking it under and here is how.
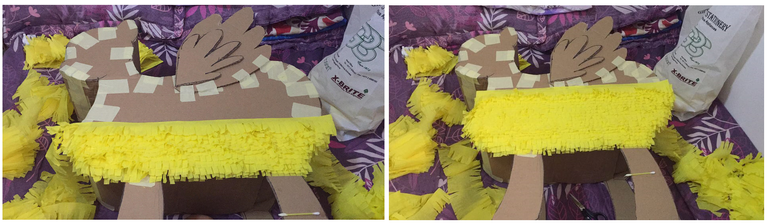
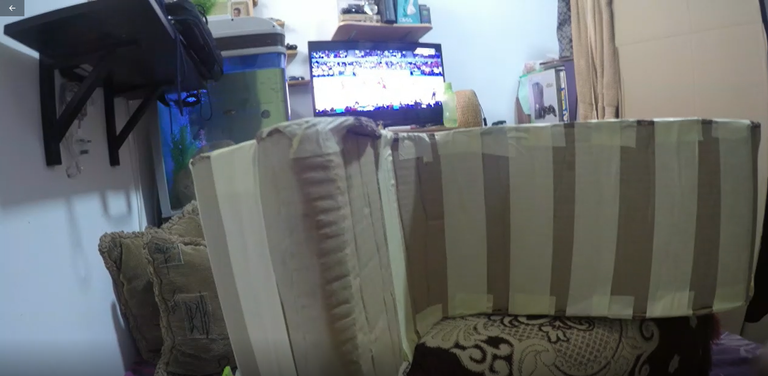
10.) Cover the full pony skeleton with crepe paper and make sure not to leave any spot of carton.
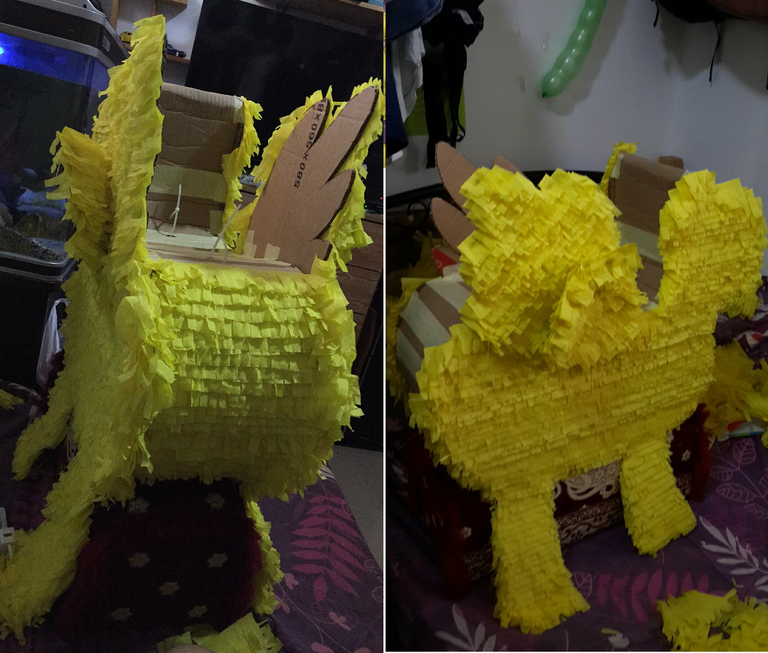
11.) Then glue it's eyes, nose, hair and cutie marks and tadaaaaa....
My Little Pony Fluttershy Piñata!
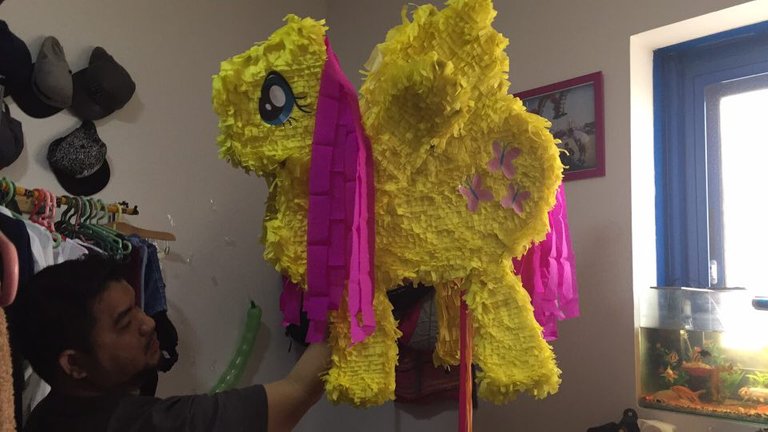
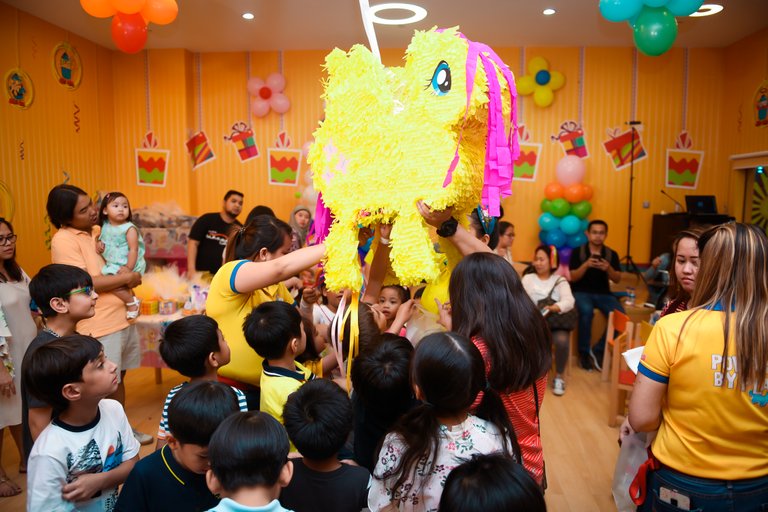
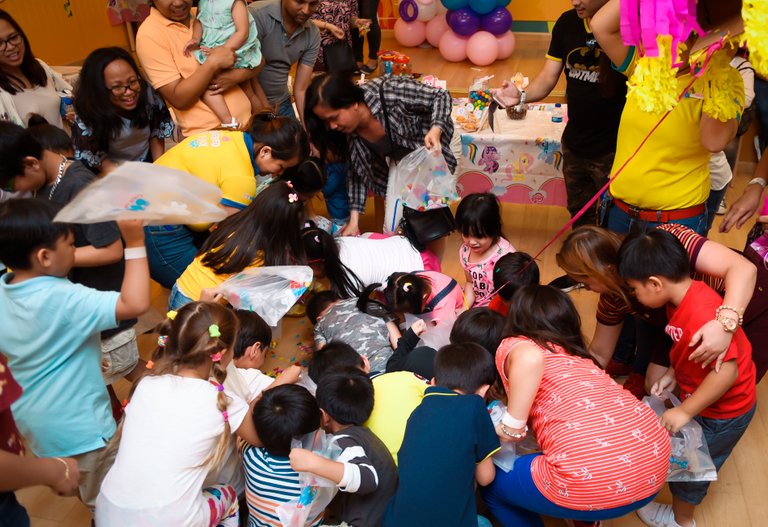
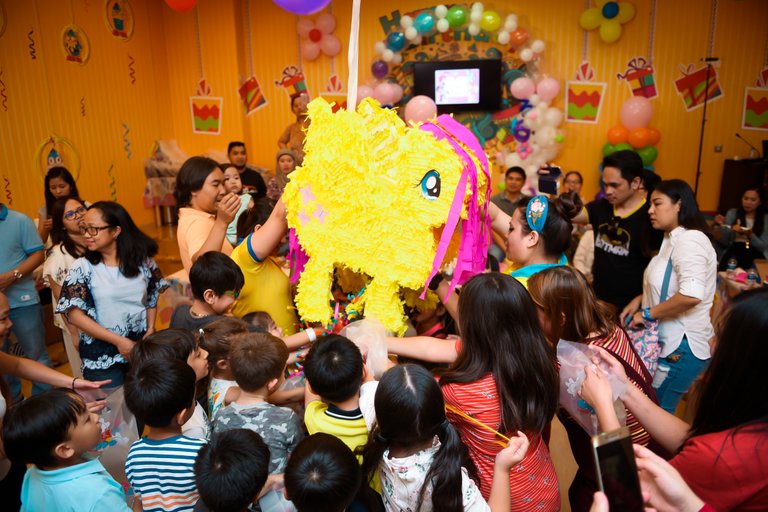
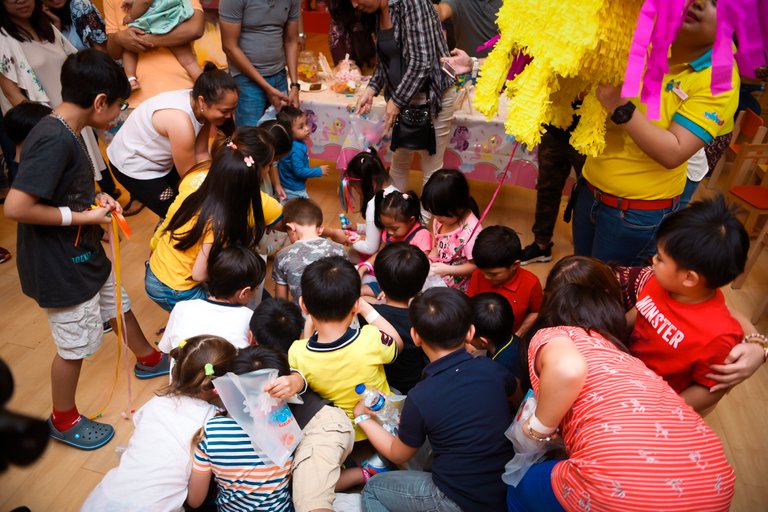
Craft that gave us sleepless nights, lower and upper back pain but was paid off when we saw the excitement and happiness of those children in the party. With that, me and @pingcess were fulfilled and happy!
Below photos by our Photographer Partner Alvin Mark Buen
Click below 3.15 minutes video and check how the DIY My Little Pony Fluttershy Piñata was done!


Both of you are Very creative and patient. Nice work you’ve got there!
Thank you mare!! Team effort indeed!
The Spirit of Communal Unity - "Bayanihan", 16th Philippines' Curation Updates with a 100% upvote plus a vote from our trail that even includes Terry (surpassinggoogle) in it plus a few more amazing Steemians!You've been featured by @bayanihan:
Congratulations and keep up the amazing work! - Curator @deveerei
Thank you for featuring my post...
You're welcome!
Couple goals, nakakainsipred.
So inspired ka na magka couple? Hahaha.. thanks
Best of PH Daily Featured Posts.
You may check the post here.Congratulations @prinsepong, your post have been featured at
About @BestOfPH
We are a curation initiative that is driven to promote Filipino authors who
are producing quality and share-worthy contents on Steemit.
If you would like to delegate to Best of PH you can do so by clicking on the following links.
100SP, 250SP, 500SP, 1000SP, 5000SP.
See Curation/Delegation Incentive Scheme here. Be sure to leave at least 50SP undelegated on your account.
Follow our trail and vote for curated Pinoy authors. If you are a SteemAuto user, @bestofph is an available trail to follow.
If you want to be part of the community, join us on Discord
Thank you for featuring my post.
Congratulations! Your post has been chosen for the
SteemPH UAE : Daily Featured Posts | 18 May 2018.
Shukran for featuring my post.
Banat gyud! Hehehe! So proud of you, guys!
Click Here to Read our New Curation Policy And Updated Rules
You've received an upvote from @slothicorn! (@ghulammujtaba)
cool! Good job!
Though the idea of hitting poor Fluttershy with a bat sounds horrendous for me. XD
Wow! Both of you did well, congrats! @prinsepong