
Setting up Magnet Woocommerce Payment Gateway Plugin is simple and fast. With a Magnet Merchant account, fully synced wallet and a WooCommerce shop, you can be on your way to accepting cryptocurrency payments within minutes. Already existing stores can integrate the plugin seamlessly and add a growing market of cryptocurrency users to their customer base.
We do not require KYC (Know Your Customer) signup and there is no fees. Payments are made directly to your wallet address and this simply means no waiting for third party to release your funds.
Needed before we continue:
- fully synced Magnet wallet (if you need help with this - here is the full tutorial with beginner tips https://magnetwork.io/blog/magnet-cryptocurrency-woocommerce-plugin-setup-tutorial)
- Magnet Woocommerce Payment Gateway Plugin > DOWNLOAD
1. MERCHANT ACCOUNT SIGN UP
1.1 Go to merchant.magnetwork.io page and navigate to Sign up page.
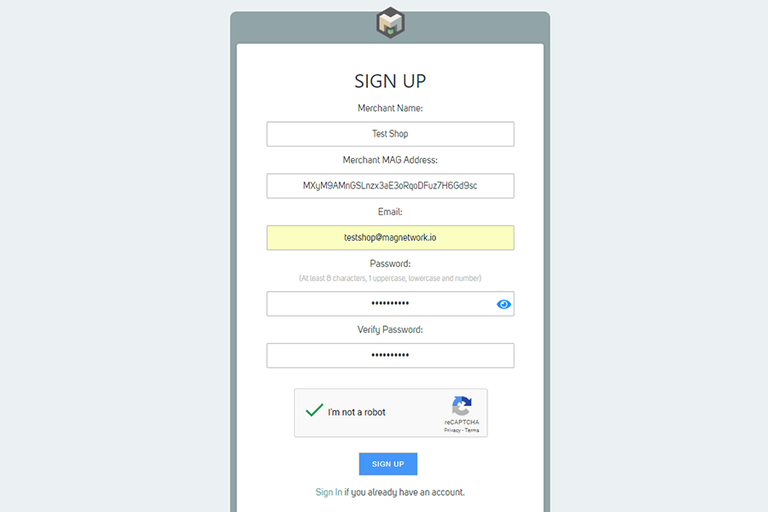
1.2 Following information is needed:
Merchant Name – chosen name will be prompted to users on invoices and is picked once per account.
Merchant MAG Address – enter your Magnet address created in next section
E-mail – cannot be changed later and is picked only once. This address is also used when users want to contact the seller directly through payment gateway.
Password – at least 8 characters, 1 uppercase, lowercase and a number.
1.3 To create Magnet receiving address go to your Magnet wallet, find Receive tab and click on New Address button in the bottom.
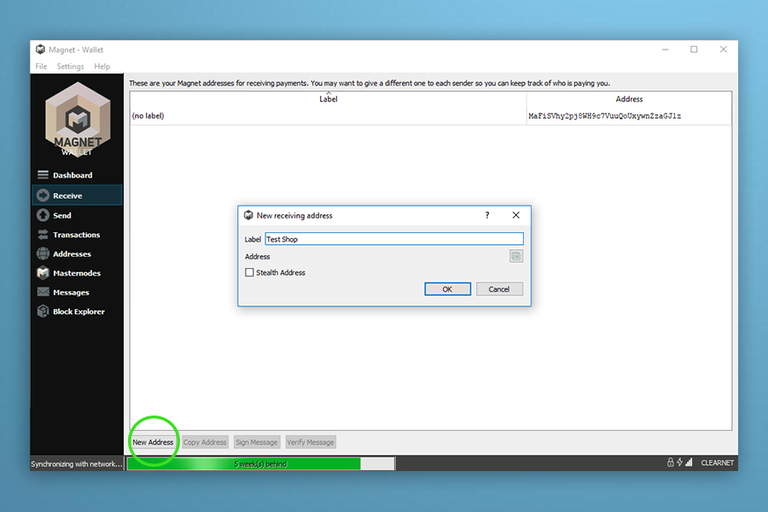
1.4 Name the label of this new address and click OK.
1.5 You will be asked for the encryption passphrase. After entering it, new address will be created!
1.6 Copy the address and enter it to Merchant MAG Address field. We need it also for Woocommerce plugin setup later.
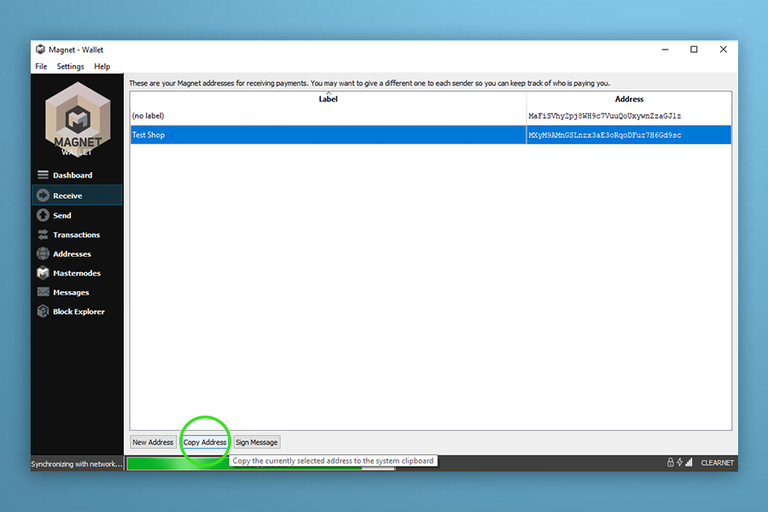
Tip: This address will be the receiving address of your online business. Do not use it for other receiving transactions. If You want to receive other transactions to the same wallet, create a new address for this!
1.7 Check your mailbox and confirm your e-mail by clicking on the confirmation link to finalize your account creation.
1.8 Log In to your Magnet Merchant account for the first time!
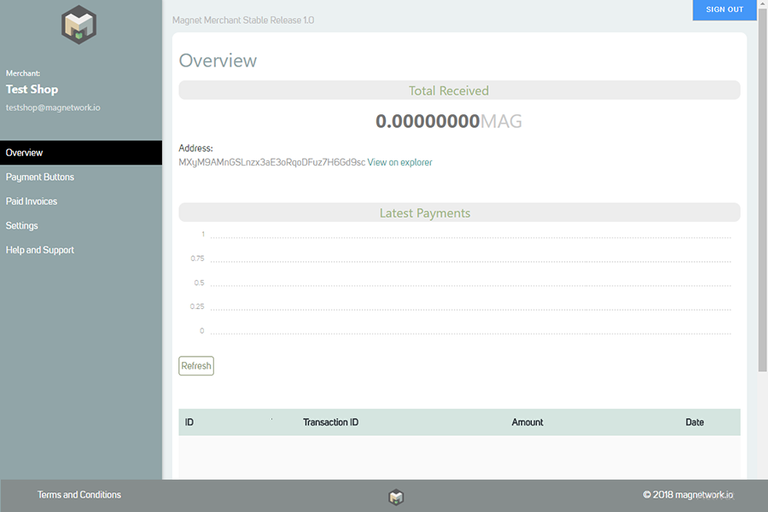
Here You can see your account Overview, create html Payment Buttons for your html page if needed and assign virtual products to them, look through your Paid Invoices or configure Settings for the account. You do not have to do anything additional with the Merchant account after signing in, but feel free to look around!
Now we can move on to the last step – installing Magnet Cryptocurrency Woocommerce Payment Gateway plugin for your store.
2. WOOCOMMERCE PLUGIN SETUP
2.1 Download the plugin.
2.2 Log in to your store admin dashboard and go to Plugins > Add Plugins > Upload Plugin > Browse your computer for Magnet Woocommerce plugin.
2.3 Click on Install Now.
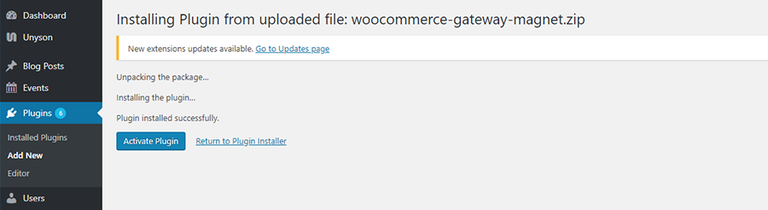
2.4 Click on Activate plugin and you will be redirected to your plugins page.
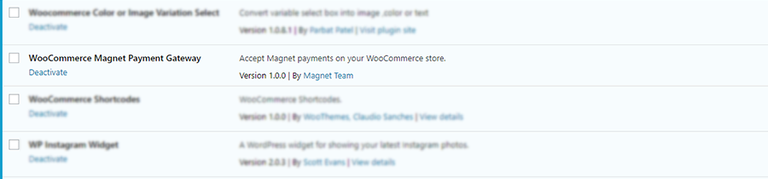
2.5 Find Magnet Payment Gateway plugin from plugins list and make sure it’s activated.
2.6 Select Woocommerce > Settings > Payments Tab and make sure magnet gateway is turned on.

2.7 On the same Payments tab click on Manage button which is assigned to Magnet Payment Gateway.
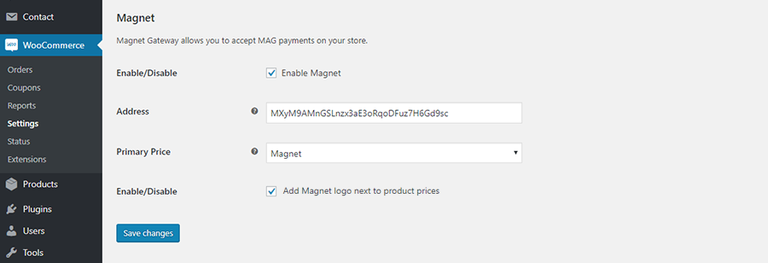
2.8 Enter your Magnet Wallet address you created for Merchant account.
Tip: Here You can choose if the store’s primary displayed currency is Magnet or default one. Also you can decide if you want to display Magnet logo next to product prices.
2.9 Save the changes and you are done.
Recommended: Send us a link to your shop so we can include it in our homepage merchants' section.
Congratulations – your store is now officially accepting Magnet cryptocurrency!
Tip: If you want to see Magnet Woocommerce plugin in action, please visit this online store using our plugin at https://kilo.city/
@magnetwork, I do not understand anything written
Congratulations @magnetwork! You received a personal award!
You can view your badges on your Steem Board and compare to others on the Steem Ranking
Vote for @Steemitboard as a witness to get one more award and increased upvotes!