DISCLAIMER: I do not know how to code, I do not know how to use LINUX, I do not know how to use UBUNTU, I do not know how to use PUTTY. I have installed at least 7 MasterNodes this way, and have worked flawlessly for me.
I have requested input on this method to several infosec experts about this method, and I was assured it is quite safe, so should not be worried about getting your wallets and VPS hacked. BUT do your due diligence to understand if this method is for you.
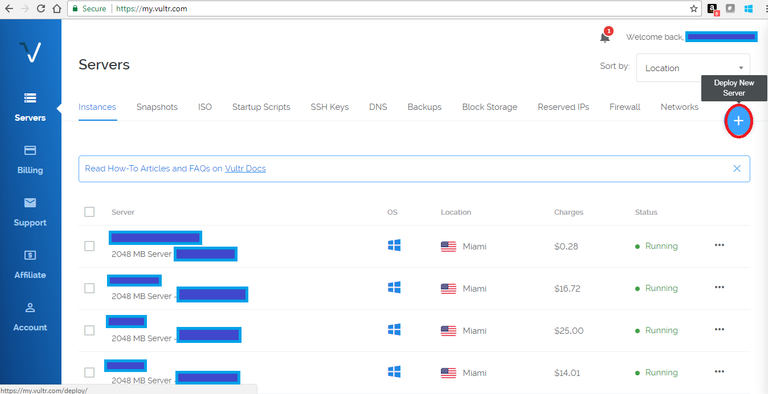
Firstly go to Vultr and get an account, you may use my reference link as a token of appreciation to take the time to write this guide: https://www.vultr.com/?ref=7333351
Click on the + to “Deploy New Server”.
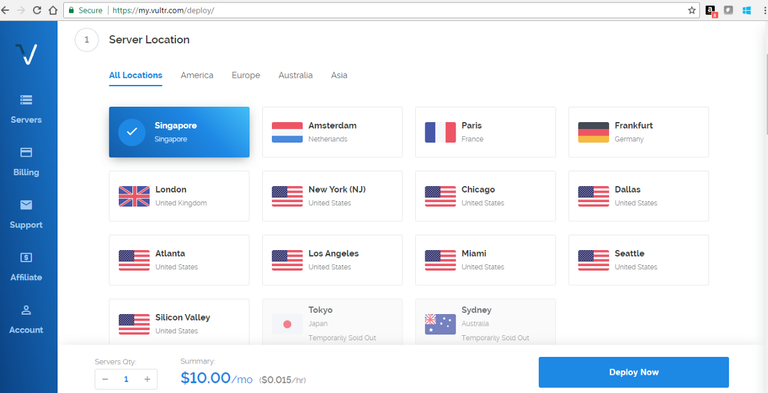
Choose your “Server Location”, choosing the closest place to you, this should minimize ping times.
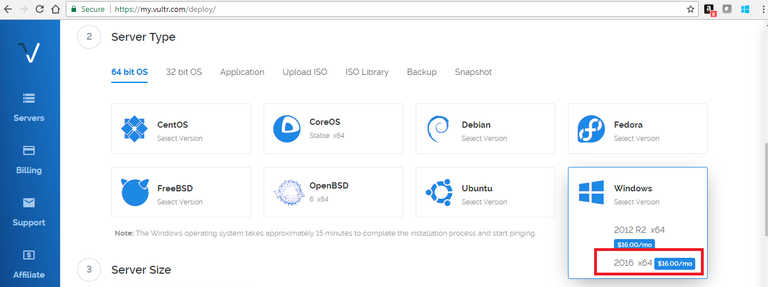
Choose “Server Type”, choose “Windows 2016 x64”.
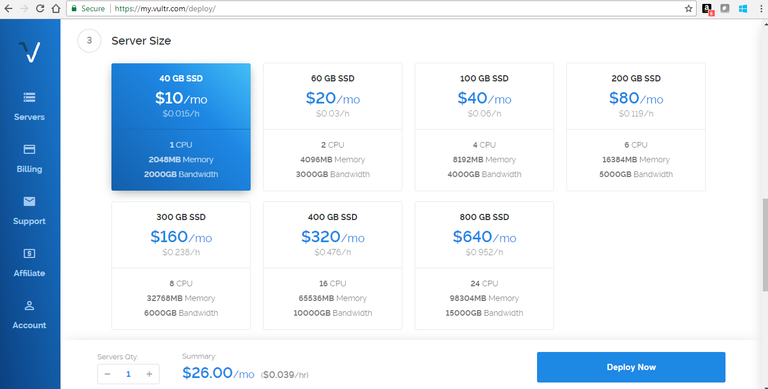
Choose “Server Size”, usually the most basic size will do, choose “20 GB SSD/1 CPU/512MB Memory/500GB Bandwidth”.
On “Additional Features” I always choose only “Enable IPv6" (don't know why to be honest).
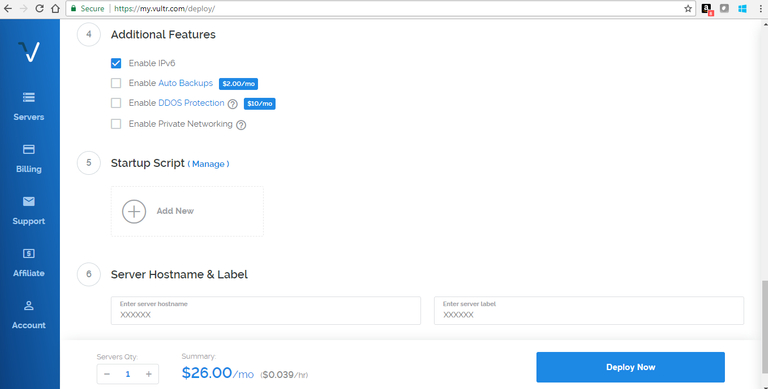
On “Server Hostname & Label”, put the name you want for your VPS.
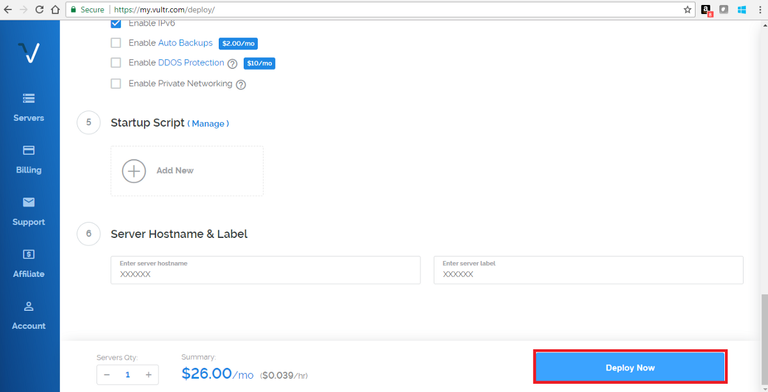
And finally click on “Deploy Now”
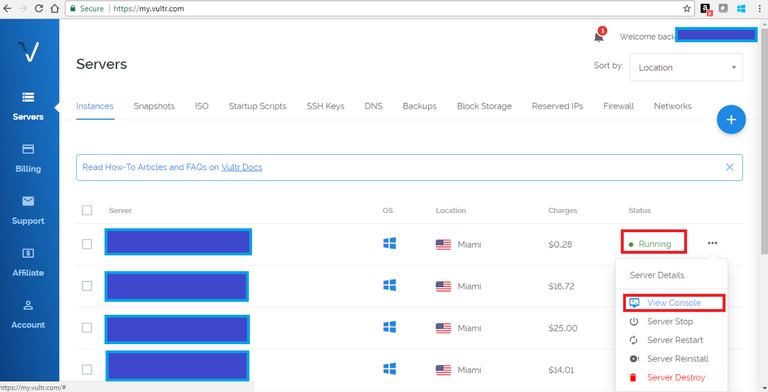
Wait until the “Status” of your VPS says “Running”, then click on “View Console”.
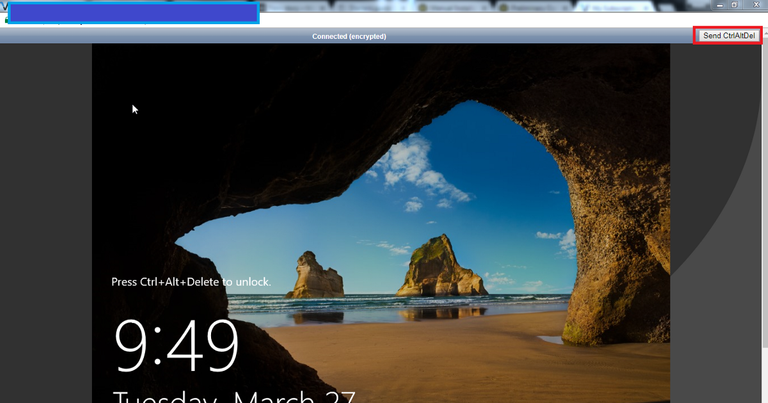
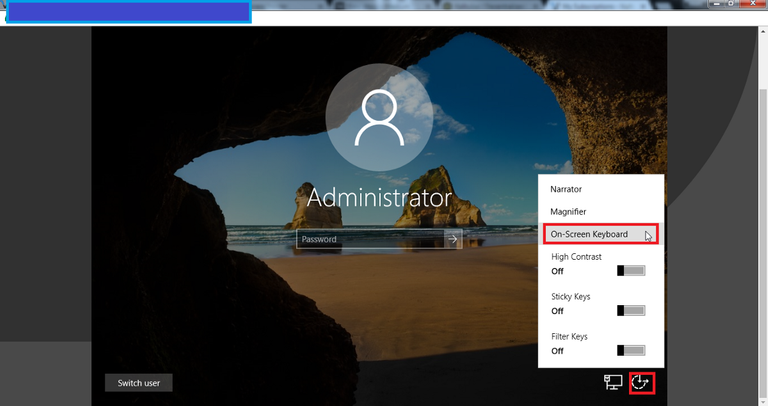
You will get a screen as below, click on “Send CtrlAltDel”.
Click on the icon of “Ease of access”, then choose “On Screen-Keyboard. This will save you hours of frustration, facilitates typing the correct characters in the password.
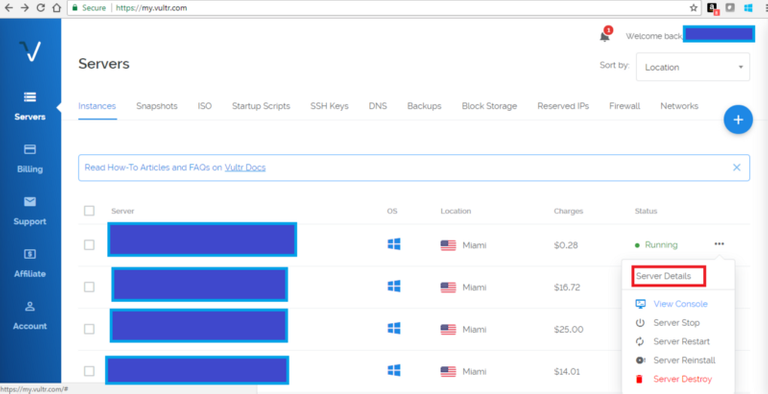
Go back to vultr.com, click on “Server Details”.
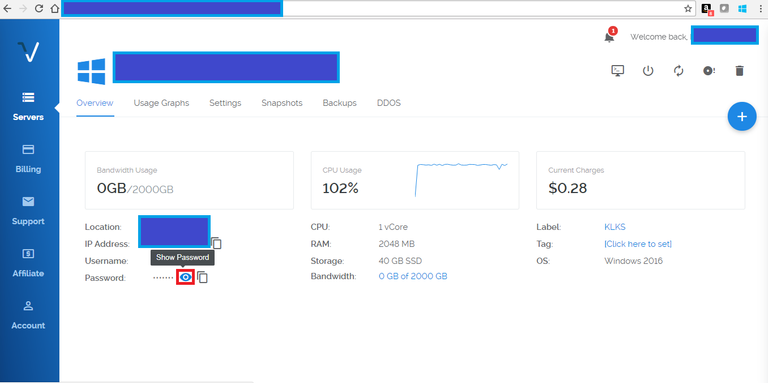
Click on “Show Password”.
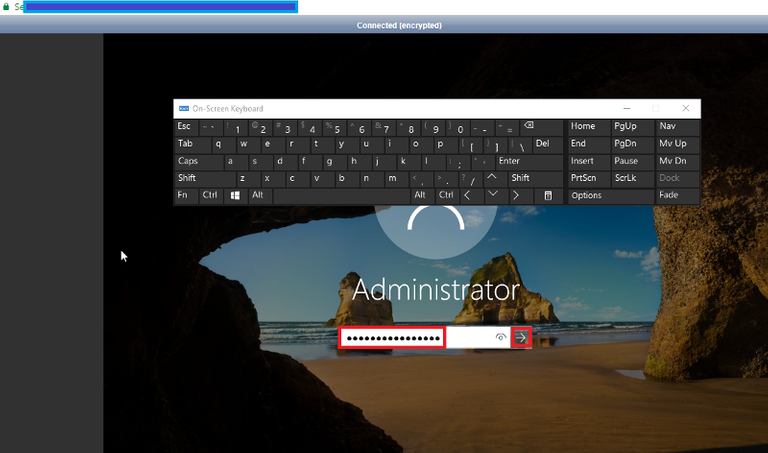
Use password from step #13 to access your VPS. Use On-Screen Keyboard so you dont waste time typing incorrect characters.
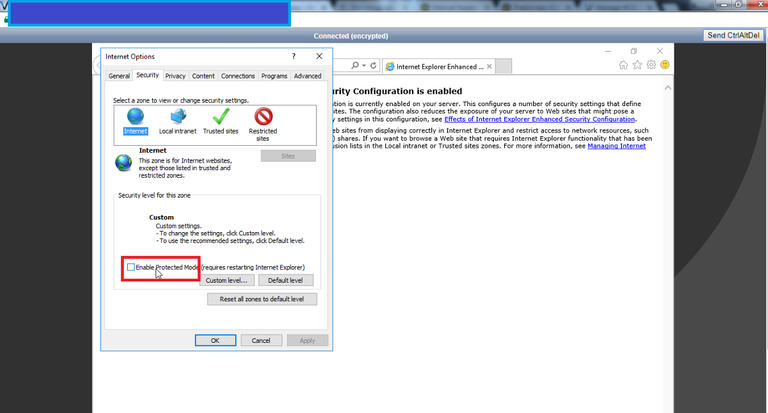
Launch “Internet Explorer”, choose “Internet Options”, then click on “Security” tab, de-select “Enable Protected Mode”.
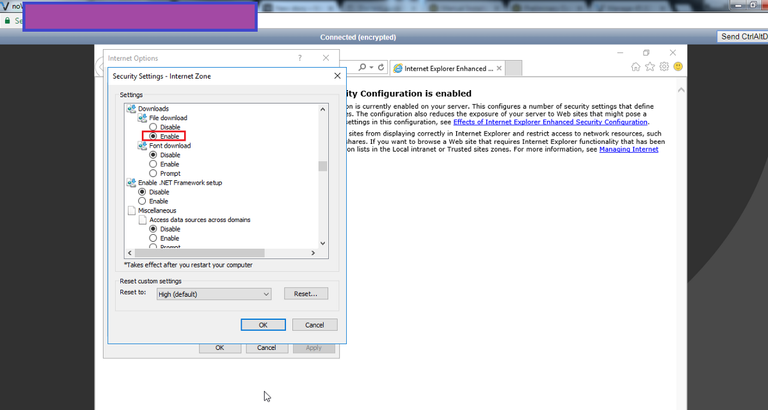
Then click on “Custom level…” button, look for option “File download”, and “Enable” it. Then click “OK”, click “Apply”, and lastly click “OK”
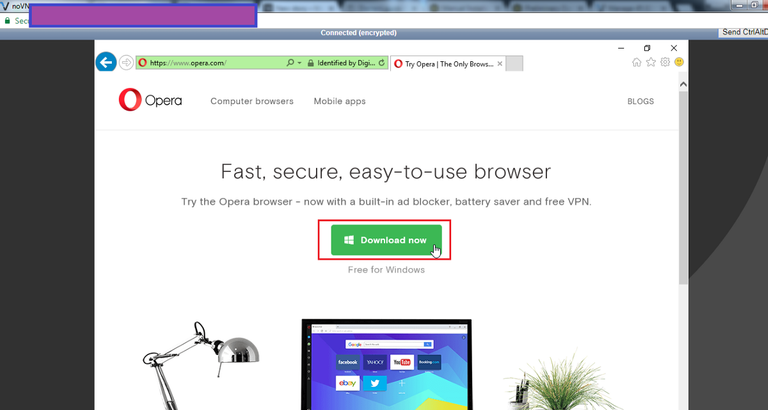
On “Internet Explorer” address bar, go to opera.com, and download and install Opera.
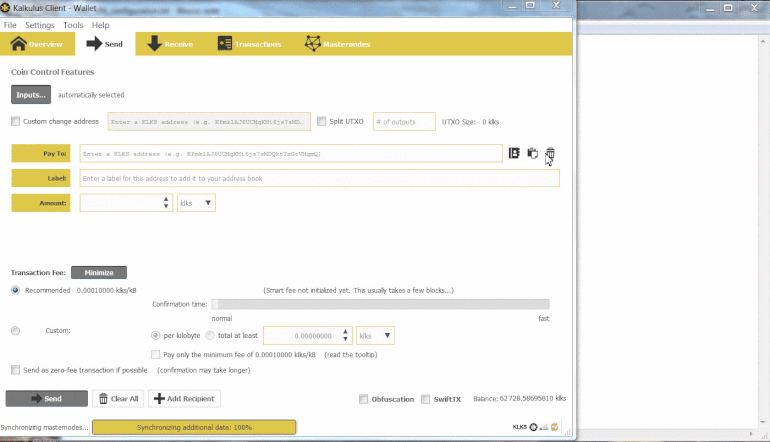
Once “Opera” is fully installed, and is open, go to your coin website and download and install it.
The steps below suppose that you have already downloaded your desired Wallet to your VPS and have the necessary collateral to run a masternode (X amount of coins). You can buy the collateral needed in an exchange were your coin is listed.On the wallet click on “Tools” -> “Debug Console”.
*Enter the command: masternode genkey and copy the output on a Notepad.
*Enter the command: getnewaddress and copy the output on a Notepad.

Send the amount needed for masternodes collateral of (X amount of coins) to the address that you just generated.
*Copy the Transaction ID (TXid).
*Wait at least 20 confirmations (if you attempt to start your masternode before you get 20 confirmations, your masternode won’t work and you have to restart procedure).
Now you need the Transaction Out (TXout), this gets the proof of your masternode collateral transaction.
*Open the “Console Debug” and enter the command: masternode outputs
*Check that transaction is the same as previous step and copy the result of Outputidx in your .txt file, or your Notepad of step #19.
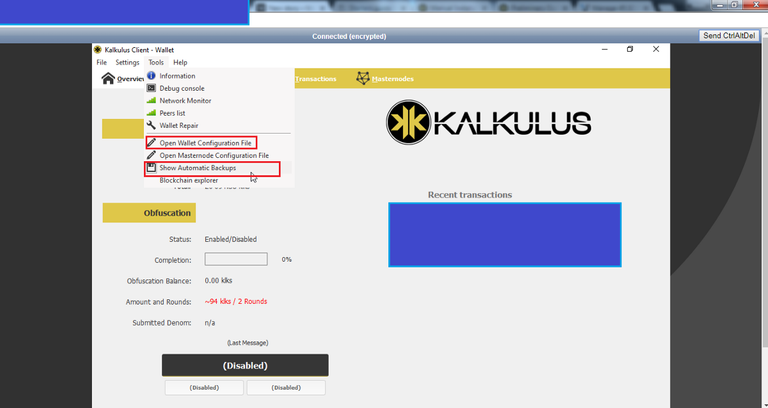
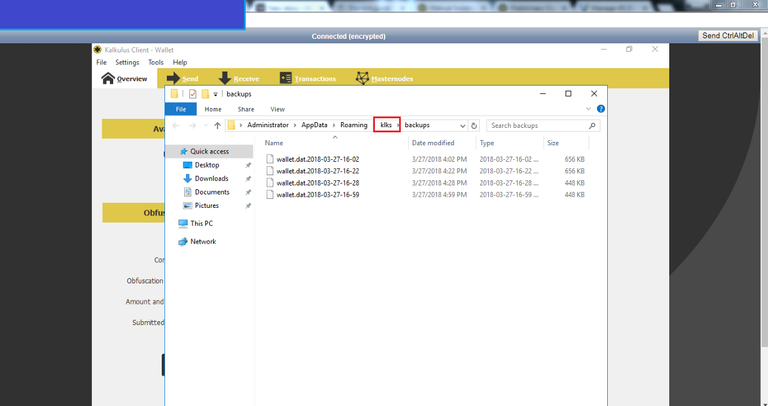
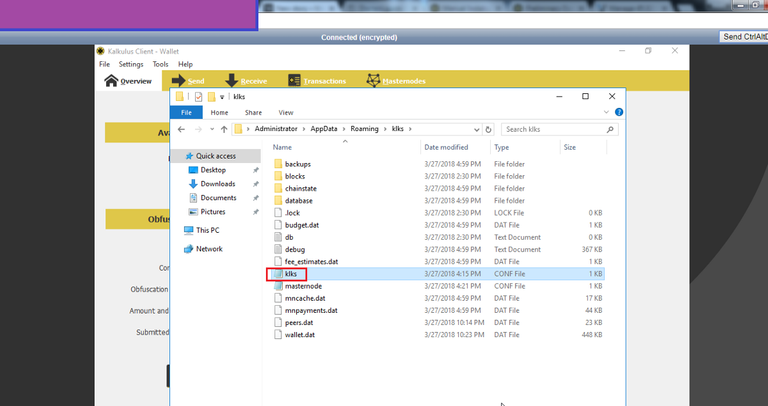
Go to your “NAME OF COIN” system folder and edit the “NAMEOFCOIN.conf” file with your masternode information. Easiest way to find the this file it to go to the wallet of your coin, go to “Tools”, you will have either “Open Wallet Configuration File”, or “Show Automatic Backups”, if “Open Wallet Configuration File” exists, click on it, if it does not exist, click on “Show Automatic Backups”.
If from step #22 you had to choose, “Show Automatic Backups”, this step applies for you. Click on the name of the folder named after the coin, see red box below.
Access the conf file of your coin.
Now you have to enter the follow informations and save:
rpcuser=YOUR_USERNAME
rpcpassword=YOUR_PASSWORD
rpcallowip=127.0.0.1
listen=1
server=1
daemon=1
logtimestamps=1
maxconnections=64
masternode=1
externalip=YOUR_VPS_IP
bind=YOUR_VPS_IP
masternodeaddr=YOUR_VPS_IP:XXXXX
masternodeprivkey=YOUR_MASTERNODE_KEY
a. YOUR_VPS_IP= you obtain it from your vultr.com portal, is below the name of your VPS.
b. bind= same as above.
c. masternodeaddr=same as above + :XXXXX (this is port number, specified by your coin)
d. masternodeprivkey= you obtained this number in step #19.
*This is an alternate conf file of your coin, if option above does not work this, should do the trick.
rpcuser=random since this is disable, but needs to have something.
rpcpassword=random since this is disable, but needs to have something.
rpcallowip=127.0.0.1
listen=1
server=1
daemon=1
logtimestamps=1
maxconnections=256
masternode=1
externalip=YOUR_VPS_IP
bind=YOUR_VPS_IP
masternodeaddr=YOUR_VPS_IP:XXXXX
masternodeprivkey=YOUR_MASTERNODE_KEY
addnode=IP specified by your coin
addnode=IP specified by your coin
addnode=IP specified by your coin
port=XXXXX specified by your coin
staking=1Now it’s time to get back to your Desktop Wallet, open it and click on:
“Tools” -> “Open Masternode Configuration File”.
In the ‘Masternode Configuration file’ we’ll need to input the following information:
MN Label: < Enter a label for your Masternode >
VPS IP:Port: < IP address of your VPS and port XXXXX>
Masternode genkey: < Masternode Genkey> (we generated previously on step #19).
TX id: < Your transaction through the Masternode > (we generated previously on step #19).
TX out: < Output Index of your transaction> (we generated previously on step #21).

Example: klks_ms01 199.247.28.77:51121 525901f650f28c83b4b2df449ea4a738e0627bf151734e62fb30bd56de01cf21 0
Next, save the configuration file, close and restart your coin desktop wallet:
After restarting your Wallet , go to “Masternodes” Section, select your Masternode and click on “Start Alias”.
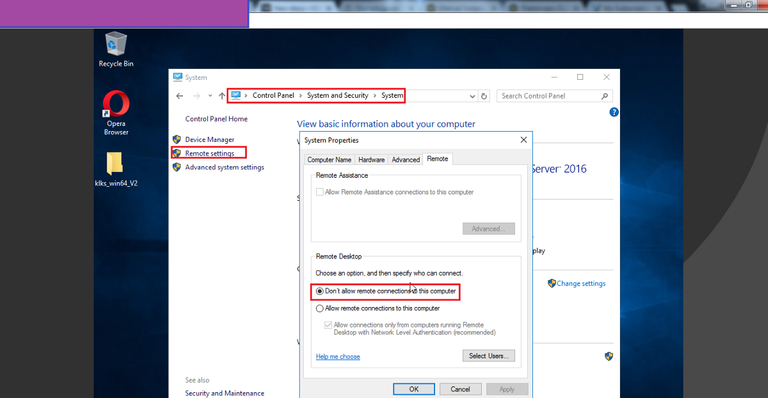
VERY IMPORTANT, go to “Control Panel” > “System and Security” > “System” choose “Remote settings”, and click on “Don’t allow remote connection to this computer”.
Don't forget to encrypt your wallet, create a backup, keep your VPS up to date with latest drivers and latest antivirus version.
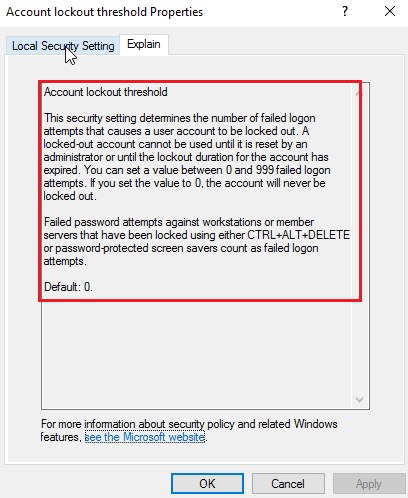
Increase security by setting account lockout policy, so if someone tried too many times, he’ll be locked out for a while. In your VPS, go to Start (“Windows” logo) on your VPS console, bottom left corner, type in “Local Security Policy”, then click on “Account Lockout Policy”, input “3” in “invalid logon attempts”, then click “OK”.
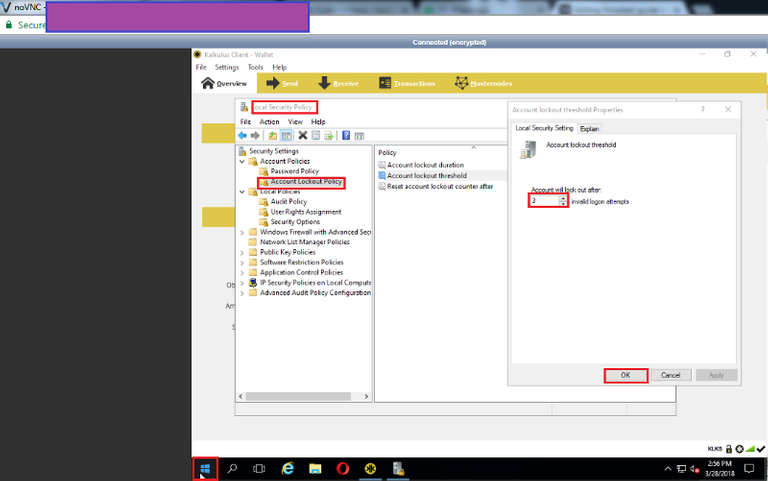
Account lockout threshold explanation.
Credits to Kalkulus for creating an amazing guide for staking and MN setup, with GIF images and all. This are the two links I used from them.
http://kalkulus.trade/cold-wallet-configuration-for-klks-masternode/
http://kalkulus.trade/manual-installation/
If you enjoy the read, follow me on Twitter - https://twitter.com/Panama_TJ, is good for Karma.