
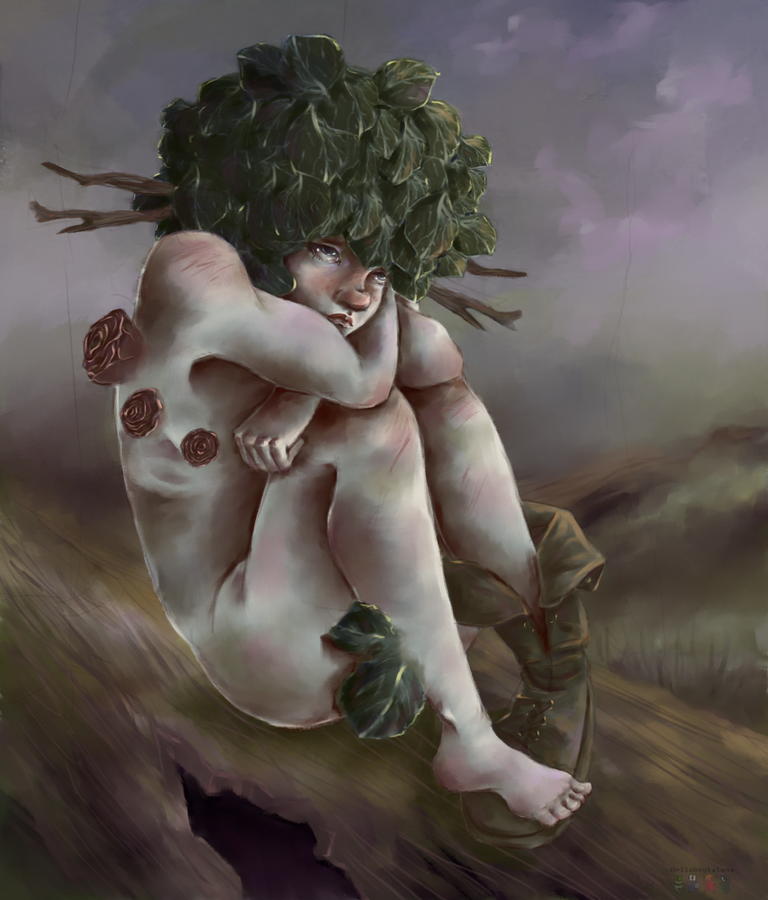
¡Saludos nuevamente, mis queridos viajeros de Steemit! En esta oportunidad quiero compartir con ustedes una ilustración de la que quizá ya hayan conocido su historia en nuestra entrada anterior, misma que pueden visualizar aquí si aún no lo han hecho. Allí encontrarán su significación, así como el por qué de la ilustración. Así pues, me dispongo a mostrarles el procedimiento que he llevado a cabo para obtener el resultado final.
Greetings again, my dear travelers of Steemit! On this occasion I want to share with you an illustration of which you may have already known your story in our previous post, which you can see here if you have not done so yet. There you will find their significance, as well as the why of the illustration. So, I am going to show you the procedure that I have carried out to obtain the final result.

1.
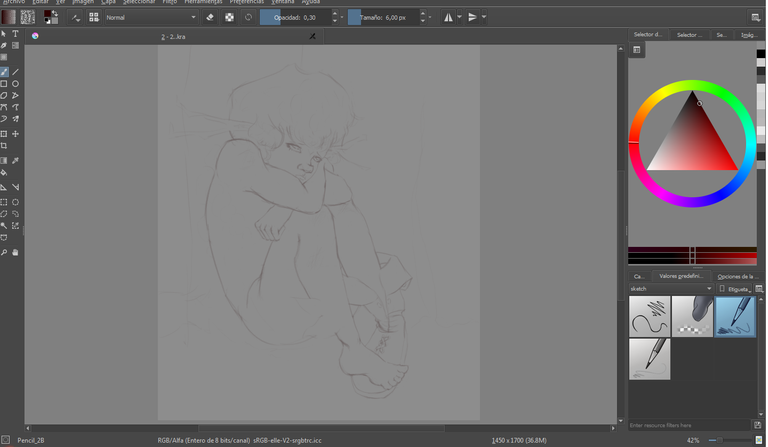
Lo primero que hice fue generar un esbozo con el lápiz 2B (disponible en el menú desplegable de pinceles, en la categoría sketch) con opacidad a 30% y una coloración de un marrón de tendencia rojiza, pues ello me recuerda al efecto de la sanguina y a mi juicio resulta un material increible al momento de evocar una ilustración del género fantástico.
The first thing I did was to generate an outline with the 2B pencil (available in the drop-down menu of brushes, in the sketch category) with opacity at 30% and a reddish-brown coloring, because it reminds me of the effect of sanguine And in my opinion it is an incredible material when evoking an illustration of the fantastic genre.
2.
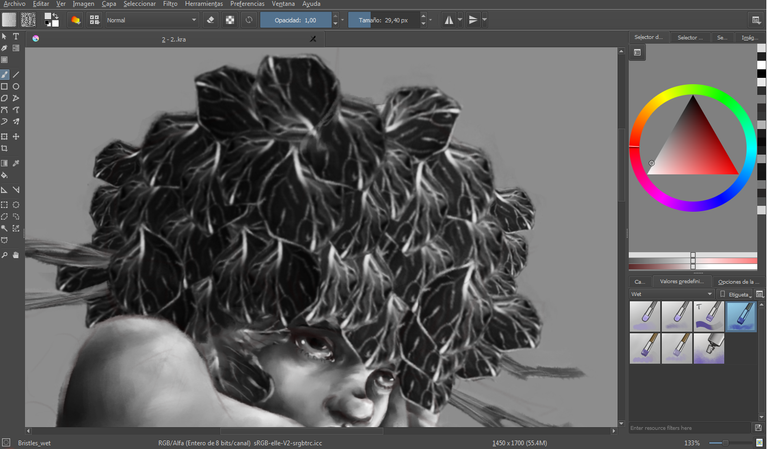
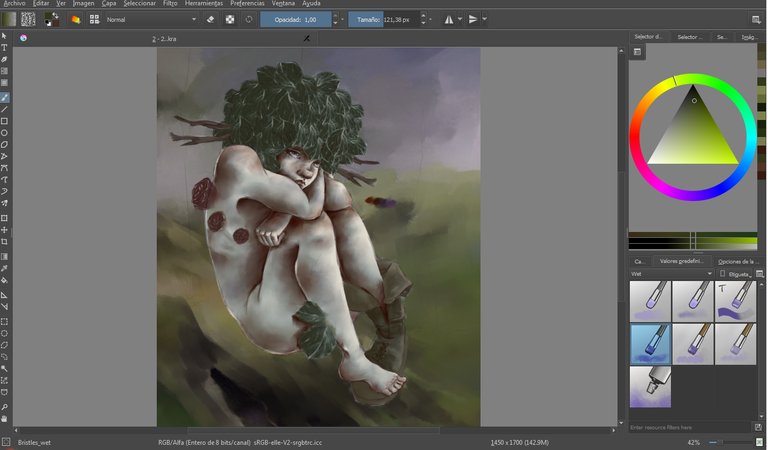
Seguidamente, en una nueva capa, puesta por debajo de la anterior, comencé a manchar al personaje, con el fin de crear los volúmenes así como las texturas en escala de grises. Para ello utilicé el pincel bristles wet (disponible en el menú desplegable de pinceles, en la categoría wet).
Then, in a new layer, placed below the previous one, I began to stain the character, in order to create the volumes as well as the gray scale textures. For this, I used the bristles wet brush (available in the drop-down menu of brushes, in the wet category).

3.
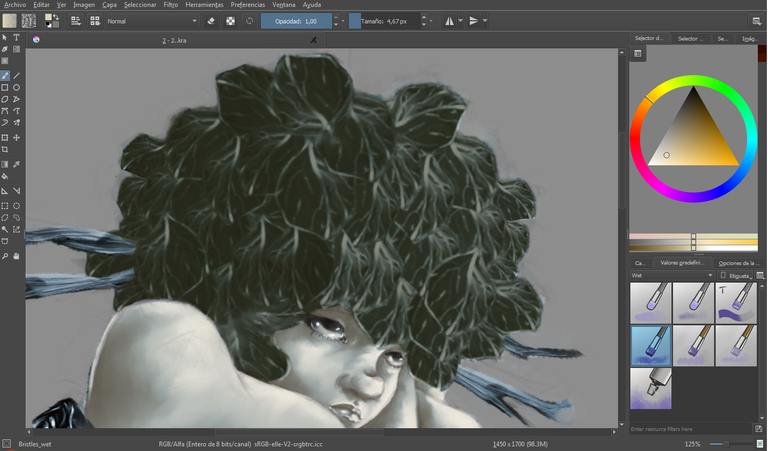
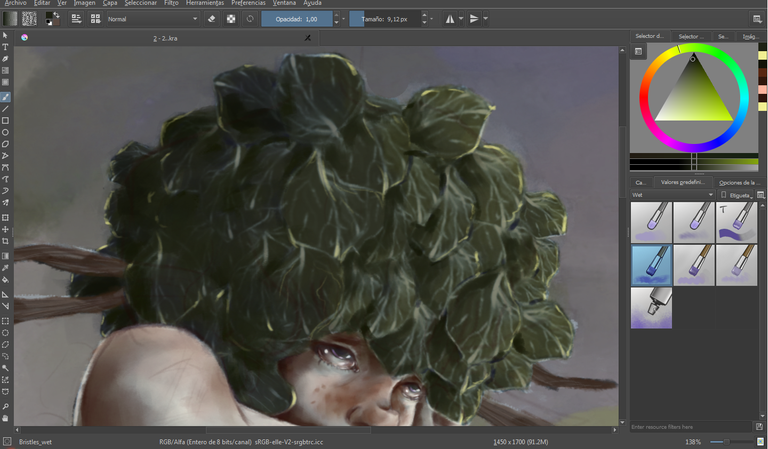
Con el mismo pincel comencé a definir los elementos del personaje, iniciando por las hojas que hacen la vez de cabello (en vista de que se trata de una ninfa del bosque). Para ello tracé cada hoja de modo individual, de manera que en conjunto tuviese un aspecto ovoide, con el fin de imitar los arbustos.
With the same brush I began to define the elements of the character, starting with the leaves that make the hair (as it is a forest nymph). For this I traced each leaf individually, so that as a whole it had an ovoid aspect, in order to imitate the bushes.
4.
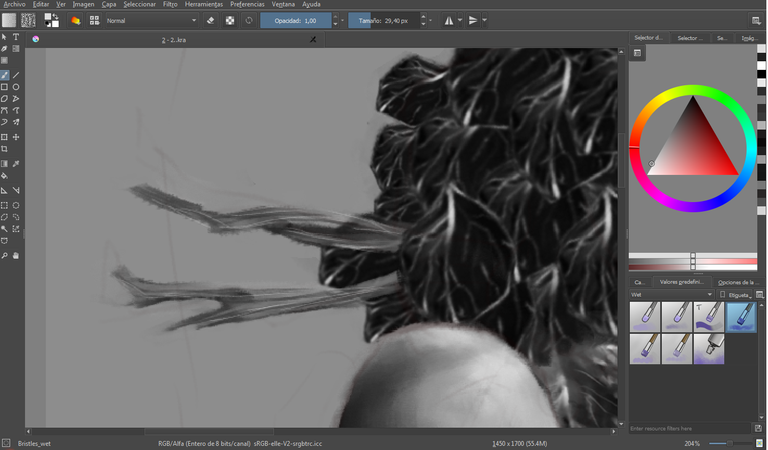
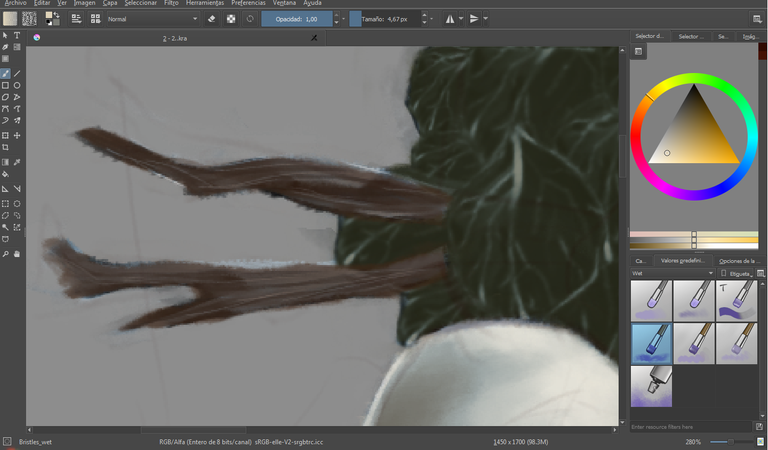
Continué con las ramas incrustadas en sus orejas, generando la textura con líneas delgadas que siguiesen la forma de la misma.
I continued with the branches embedded in their ears, generating the texture with thin lines that followed the shape of it.
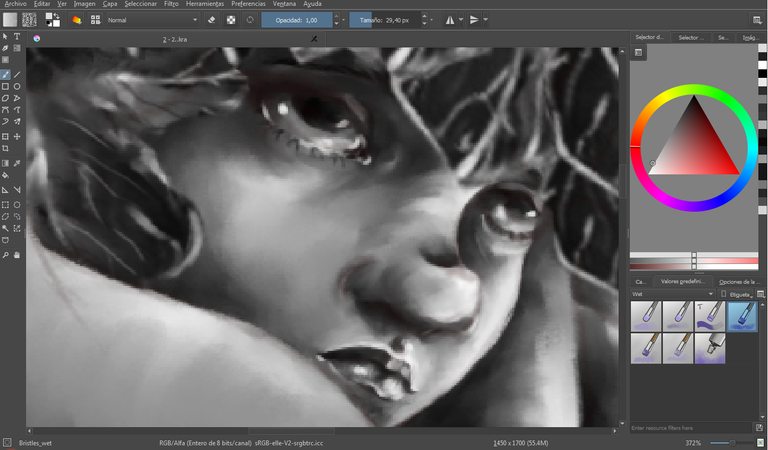
5.
El rostro lo construí con base en pinceladas más suaves, con el fin de evocar la textura tersa de la piel.
I built the face based on softer brush strokes, in order to evoke the smooth texture of the skin.
6.
Lo mismo hice con el resto del cuerpo.
I did the same with the rest of the body.
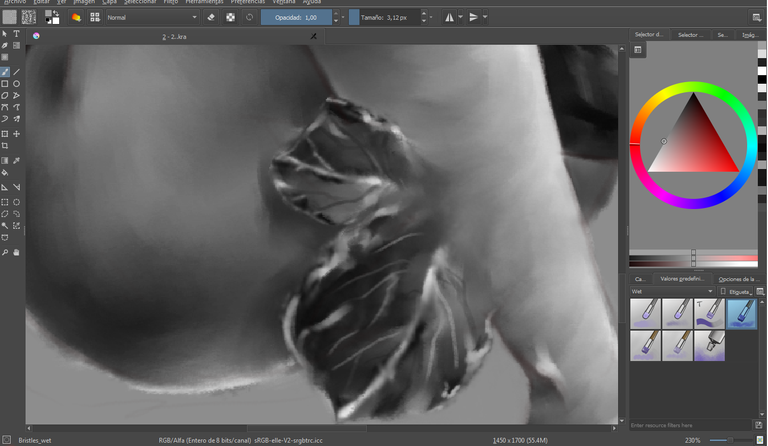
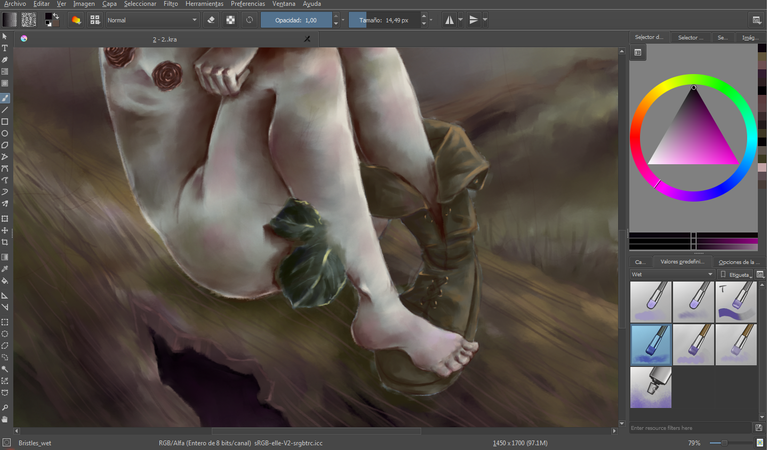
7.
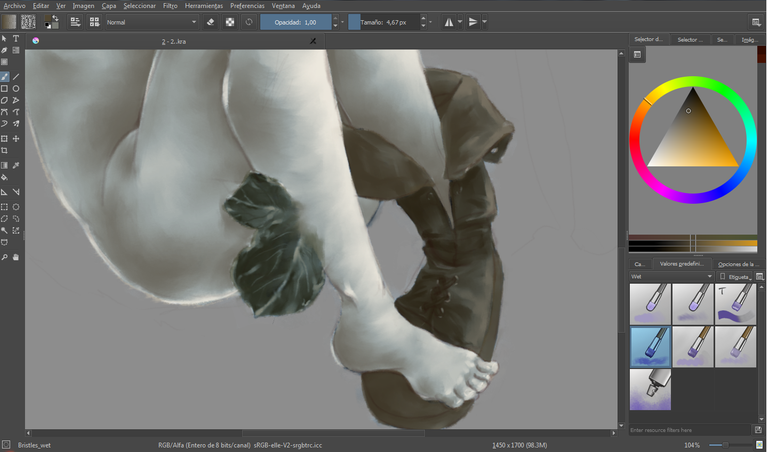
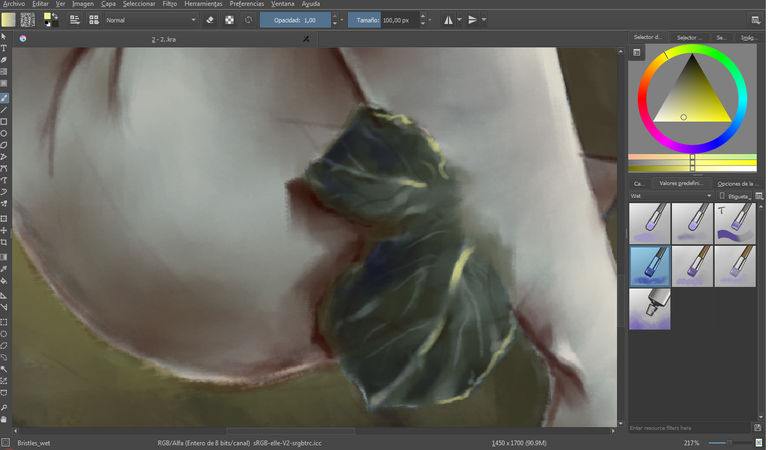
Para las hojas que se desbordan de su pierna, seguí el mismo procedimiento de las hojas de su cabeza, es decir, crearlas de modo individual y añadirle diversas líneas delgadas, características de las mismas.
For the leaves that overflow his leg, I followed the same procedure of the leaves of his head, that is, created them individually and add various thin lines, characteristics of them.
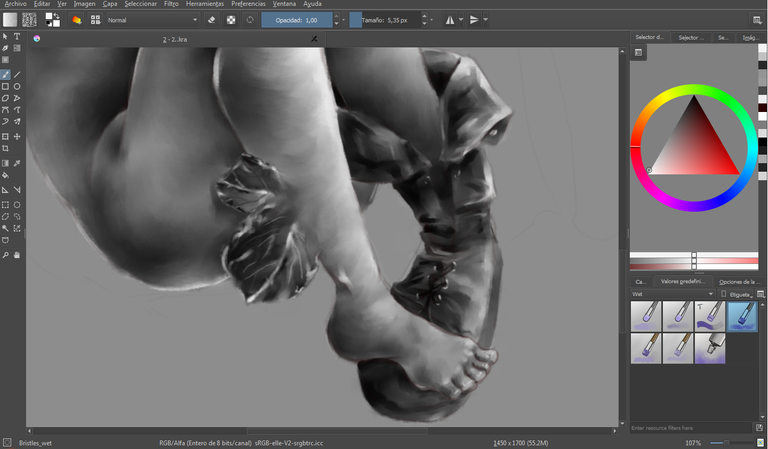
8.
Para la bota opté por una pincelada más rápida, sin reparar en detalles (a excepción de los aros incrustados en los agujeros de la bota), con el objetivo de aludir a la tosquedad del material.
For the boot I opted for a faster brush stroke, without paying attention to details (with the exception of the rings embedded in the holes of the boot), with the aim of allude to the roughness of the material.
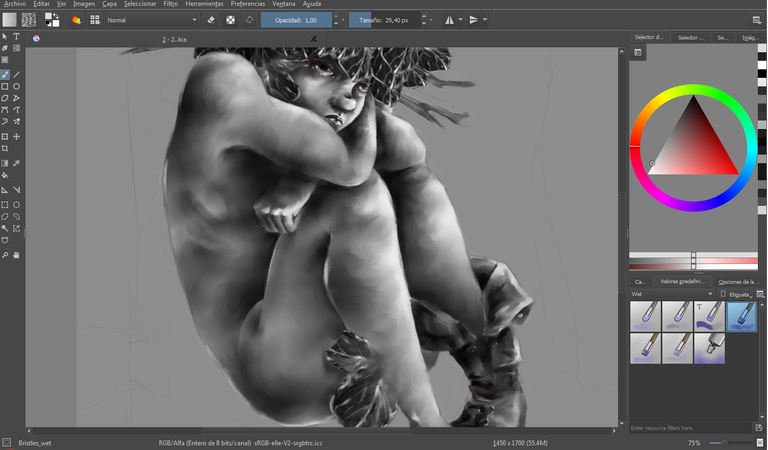
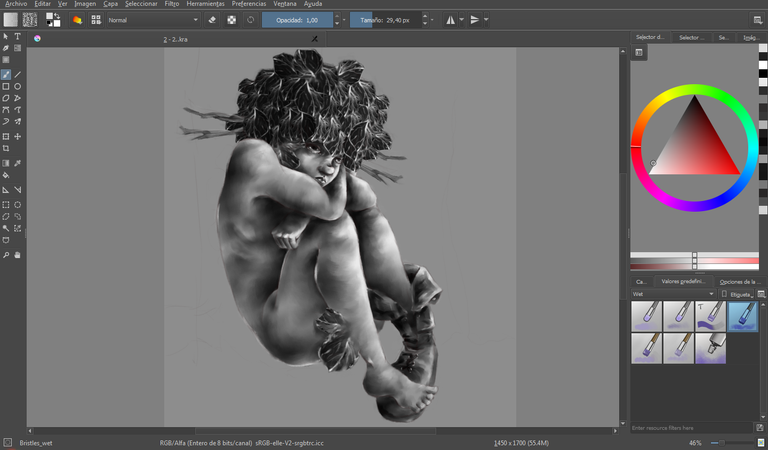
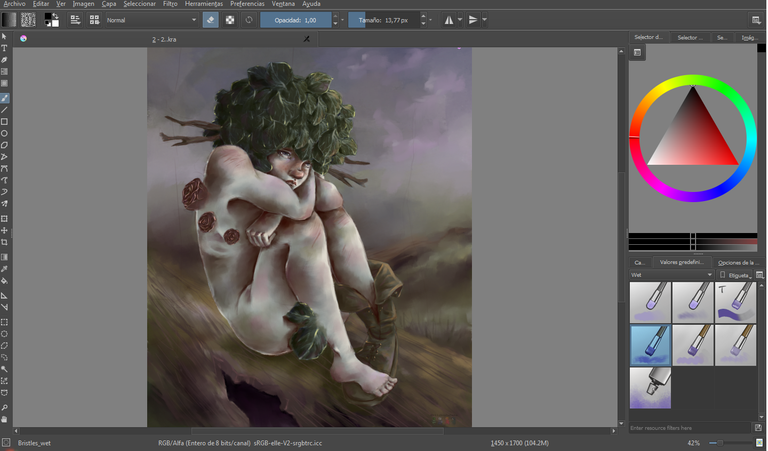
9.
He aquí una vista del personaje en escala de grises.
Here is a view of the character in grayscale.
10.1, 10.2, 10,3
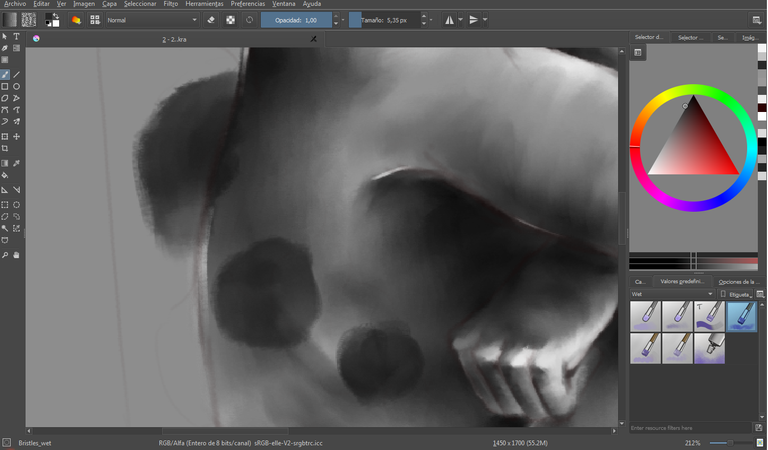
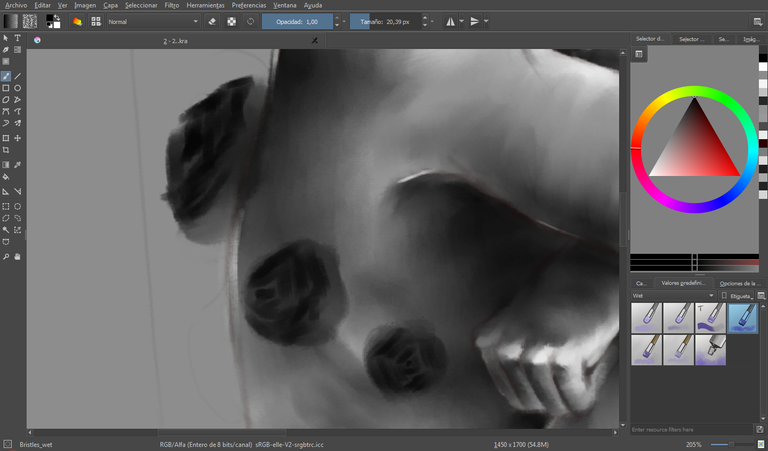
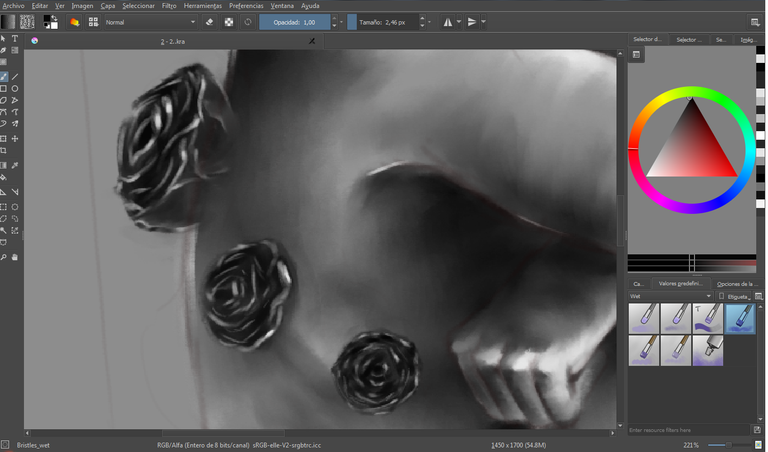
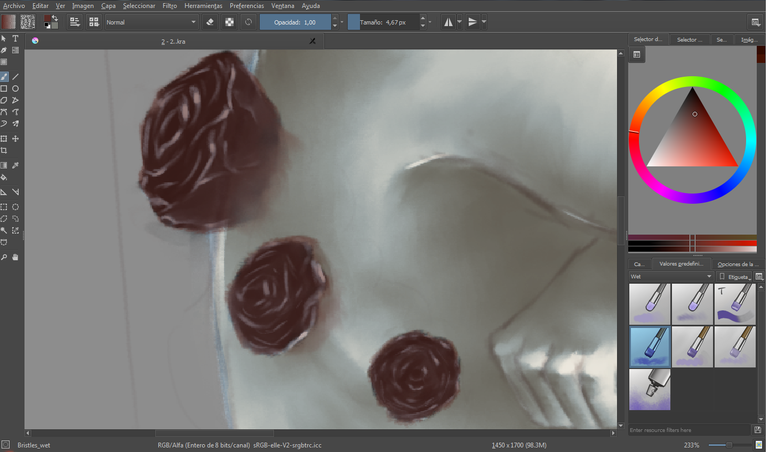
Seguidamente comencé a crear unas rosas en una suerte de línea paralela a sus costillas. Para ello comencé generando unas manchas circulares; después, con un tono más bajo, las líneas que emularían los pétalos; y finalmente , trabajando con el pincel más delgado, y un tono alto tracé líneas curvas en los bordes de los pétalos.
Then I started creating roses in a kind of line parallel to his ribs. For this I started generating circular spots; then, with a lower tone, the lines that would emulate the petals; and finally, working with the thinnest brush, and a high tone I drew curved lines on the edges of the petals.
11.1, 11.2
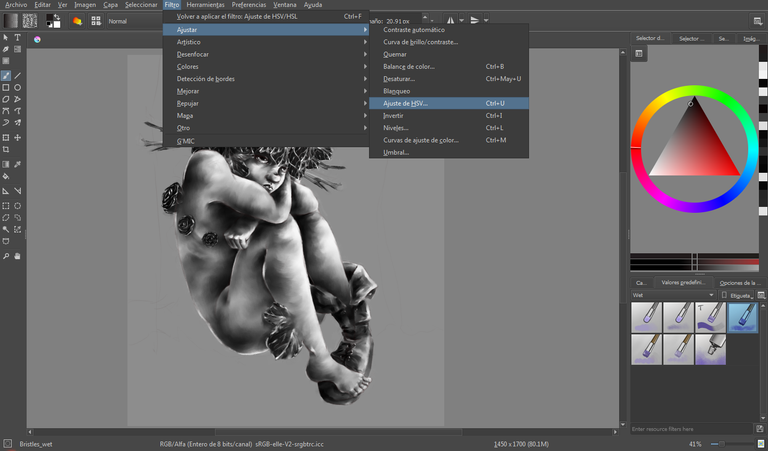
En este punto noté que el contraste de la escala de grises no contenía un denotado contraste, motivo por el que decidí ajustarlo, para ello fui al panel de opciones superior > filtro > ajustar > curva de brillo/contraste y ajusté la curva de modo manual y di click a ok.
At this point I noticed that the gray scale contrast did not contain a dense contrast, which is why I decided to adjust it, so I went to the upper options panel> filter> adjust> brightness / contrast curve and adjusted the curve manually and click ok.
 )

 )
![]()
)
![]()
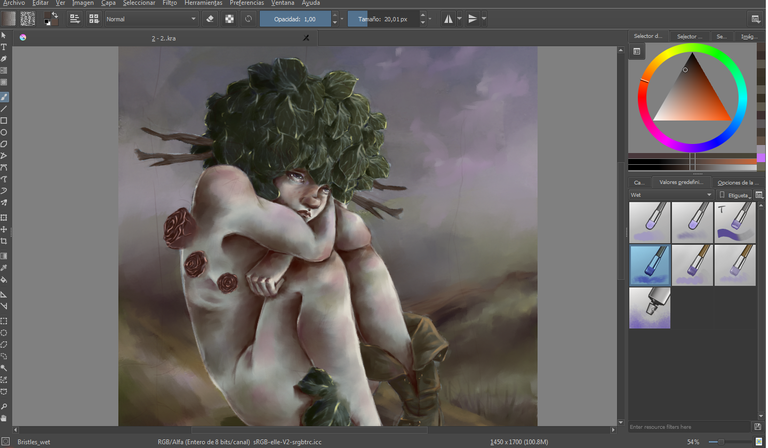
12.1, 12.2
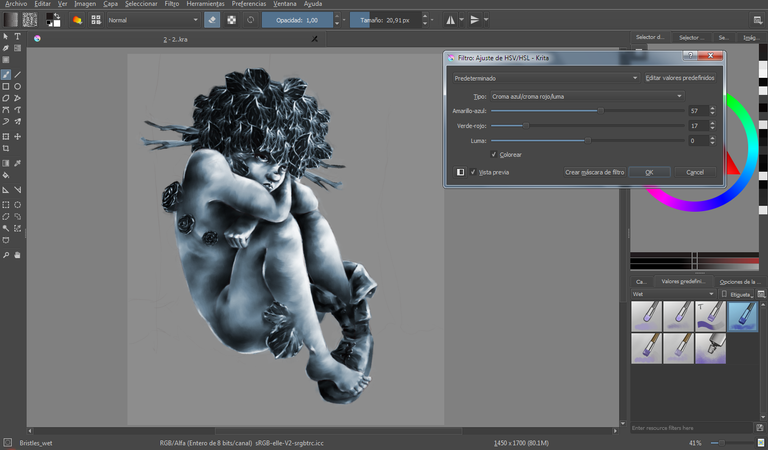
Ya habiendo hecho esto, ajusté el color de la escala de grises con un color azul, pues más tarde esto me serviría para matizar el personaje, así como el resto de la escena. Para ello fui de nuevo al panel de opciones superior > filtro > ajustar > ajuste de HSV > segundo panel desplegable (tipo) > croma azul/croma rojo/ luma > click en la casilla colorear > ajusté el color de modo manual > ok
Having already done this, I adjusted the color of the gray scale with a blue color, because later this would serve to qualify the character, as well as the rest of the scene. For this I went back to the top options panel> filter> adjust> HSV adjustment> second drop-down panel (type)> chroma blue / chroma red / luma> click on the color box> I adjusted the color manually> ok
13.
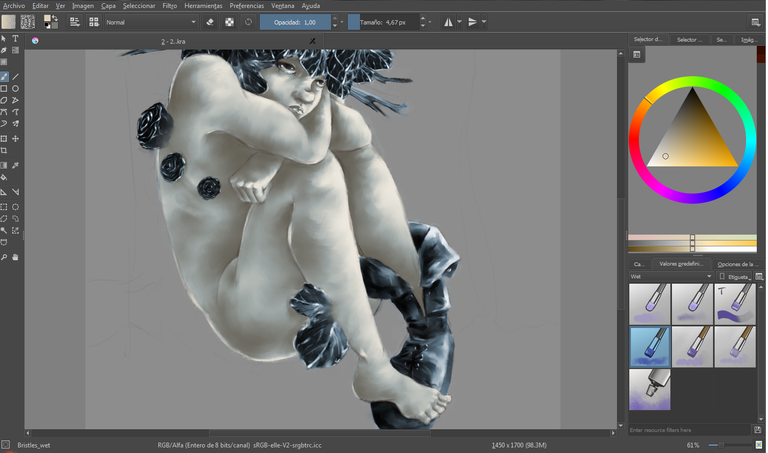
En una capa nueva comencé a aplicar los colores, iniciando por la piel, de un modo más bien plano.
*Nota: es importante que la totalidad de los colores esté separada por capas, pues cada color posee su propia luminosidad, y en caso de que necesiten ajustar la opacidad de alguno, el resto no resulte afectado.
In a new layer I began to apply the colors, starting on the skin, in a rather flat way.
* Note: it is important that all the colors are separated by layers, because each color has its own brightness, and in case you need to adjust the opacity of some, the rest is not affected.
14.1, 14, 15, 16, 17.
Lo mismo hice con las hojas, y el resto de los elementos.
I did the same with the leaves, and the rest of the elements.
18.
Una vez coloreados de modo plano los elementos del personaje, inicié a matizar la piel, utilizando colores rojizos y de tendencia morada.
Once colored the elements of the character in a flat manner, I began to tone the skin, using reddish colors and purple tendencies.
 )
![]()
)
![]()
19.1, 19.2.
Para colorear los ojos comencé con un color terracota, yendo desde afuera hacia adentro, presionando cada vez menos la tableta, con el fin de generar el volúmen de una forma esférica. Seguidamente añadí luces para acreditarle más acuosidad a los ojos.
To color the eyes I started with a terracotta color, going from the outside in, pressing less and less the tablet, in order to generate the volume of a spherical shape. Then I added lights to accredit more wateriness in the eyes.
 )

 )
![]()
)
![]()
20.1, 20.2
Para los labios comencé manchando con un color terracota, y posterior a ello, añadí líneas delgadas que siguiésen la forma convexa de los labios, con un rojo más alto.
For the lips I started staining with a terracotta color, and after that, I added thin lines that follow the convex shape of the lips, with a higher red.
 )

 )
![]()
)
![]()
21.
Seguidamente, en una capa nueva, puesta por debajo de todas las anteriores, comencé a manchar los colores que se ubicarían en el fondo.
Then, in a new layer, placed below all the previous ones, I began to stain the colors that would be located in the background.
22.1, 22.2
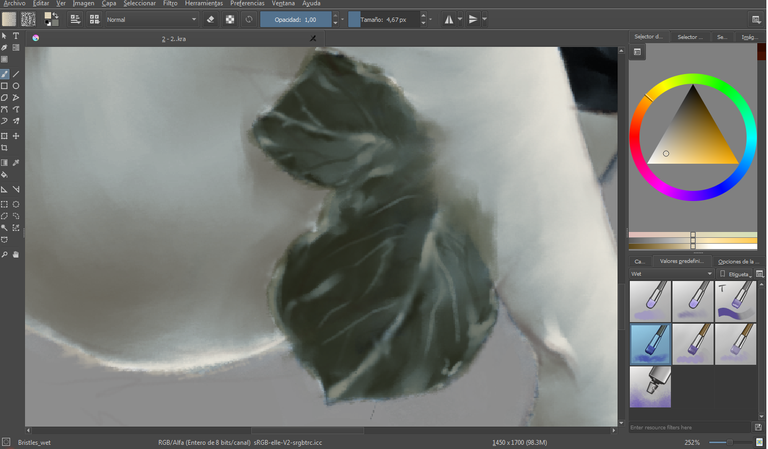
Continué trabajando en las hojas, tanto de la cabeza, como de la pierna, denotando la transcición entre luz y sombra, valiéndome pues, del color amarillo, como también del azul.
I continued working on the leaves, both the head and the leg, denoting the transition between light and shadow, thus using the yellow color as well as the blue color.
23.
Asimismo, trabajé en las rosas, añadiendo luces con un rojo alto (rosado), con el fin de destacarlas.
Also, I worked on the roses, adding lights with a high red (pink), in order to highlight them.
 )
![]()
)
![]()
24.
Continué añadiendo matices a la piel.
I continued adding nuances to the skin.
 )
![]()
)
![]()
25.1
Continué con el fondo, definiéndolo y añadiendo texturas. Asimismo, no quise reparar mucho en él, en vista de que tenía la intención de añadir perspectiva de la forma (mistras mas lejano está un objeto, más tiende a perderse con el resto de los elementos).
I continued with the background, defining it and adding textures. Also, I did not want to fix much on him, since he had the intention of adding perspective of the form (more distant is an object, more tends to get lost with the rest of the elements).
25.2
Seguidamente comencé a trabajar en el tronco sobre el que se encuentra mi personaje, para ello añadí diversas líneas de un grosor muy delgado, que harían la vez de corteza.
Then I started working on the trunk on which my character is, for this I added several lines of a very thin thickness, which would make the bark.
26.
Finalmente coloqué detalles, véase los matices (no es más que añadir todos los colores de la ilustración, en todos los elementos presentes en la misma) en la totalidad de la composición. Además añadí las heridas de la ninfa y limpié los rastros de la capa de tonos.
Finally I put details, see the nuances (it is not more than adding all the colors of the illustration, in all the elements present in it) in the whole composition. I also added the nymph's wounds and cleaned the traces of the toned layer.
Y para recordaaar, aquí tienen nuevamente la ilustración finalizada. Me divertí mucho creándola, pues realmente me encanta colorear y matizar pieles. Por otra parte, me he sentido muy feliz con el resultado que he obtenido. Muchísimas gracias por leer hasta el final, y si te gusta nuestro contenido, está atento, pues continuaremos subiendo entradas de este tipo e intentando siempre mejorar. Se despiden cariñosamente, el Lobo y la Luna <3.
P.D.: La ilustración fue realizada en el software LIBRE Krita, versión 3.1.3
P.D.2: Qué prefieren, viajeros ¿Entradas largas y detalladas como estas, o prefieren que lo resuma un poco más?
And to remember, here you have the finished illustration again. I had a lot of fun creating it, because I really love coloring and tinting skins. On the other hand, I have been very happy with the result I have obtained. Thank you very much for reading until the end, and if you like our content, is attentive, because we will continue uploading entries of this type and always trying to improve. Affectionately bid farewell, El lobo and La Luna <3.
P.D .: The illustration was made in the FREE Krita software, version 3.1.3
P.D.2: What do you prefer, travelers? Long and detailed entries like this, or would you like me to summarize it a little more?
Facebook
Tumblr
Instagram
Deviantart
"This work is licensed under a Creative Commons
Attribution 4.0 International License"
Copyright @elsll - All Rights Reserved
¡Excelente trabajo @elsll!
Me gustó el proceso del paso a paso, eres creativo. Al final te quedó bonita.
Saludos.
¡Gracias por tus palabras!
¡De nada!
Congratulations @elsll! You have completed the following achievement on the Steem blockchain and have been rewarded with new badge(s) :
Click on the badge to view your Board of Honor.
If you no longer want to receive notifications, reply to this comment with the word
STOPDo not miss the last post from @steemitboard: