Hello friend steemit, good Morning wherever you are

this time will be shown the creation of writing PCPLUS nuanced transparent fluorescent lights that are enhanced with additional attractive colors. PCplus uses Photoshop CS3 version without using the help of additional effects. It can be applied also in Photoshop other versions. Here are the steps:
1. Black background

File> New, give transparent name, fill column Width 900 pixels, Height 650 pixels, others leave by default. Click Ok. Use the Paint Bucket Tool to make the background black. Next, make the background color into two parts. Click Create A New Layer, Click Rectangular Marquee Tool, drag the box up half of the background to the down position. Click Gradient Tool> Gradient Editor, click the bottom left button and change the color to dark blue, click the lower right button to dark blue, click OK to close. Drag a straight line pointing down through the middle of the background, and loose.
2. Create a post

Click the Horizontal Type Tool text, select the Calibri font with the size adjusted to the size of the screen. Type PCPLUS and position it right in the center of the color border. Choose the color of writing to white. Click the Move Tool, Click Apply The Transformation with Yes.
3. Duplicate the layer
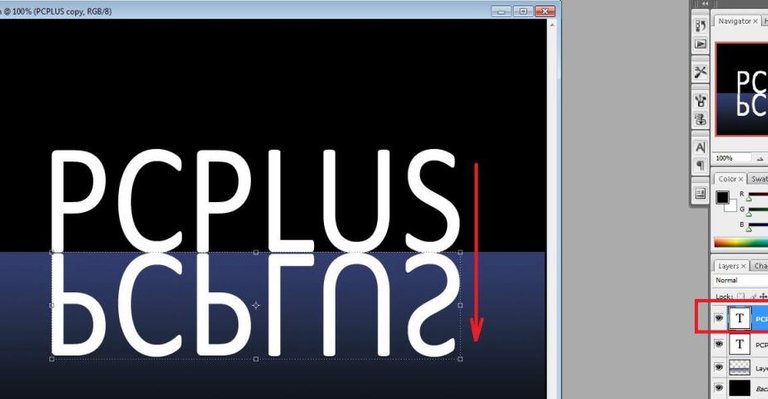
Right click on PCPLUS Layer, choose Duplicate Layer, click OK. Will appear Layer PCPLUS Copy. Click Edit menu> Transform> Flip Vertical. Click the Move Tool, and slide the PCPLUS writing upside down and position it to the right. Click the Move Tool and Apply The Transformation.
4. Add a layer
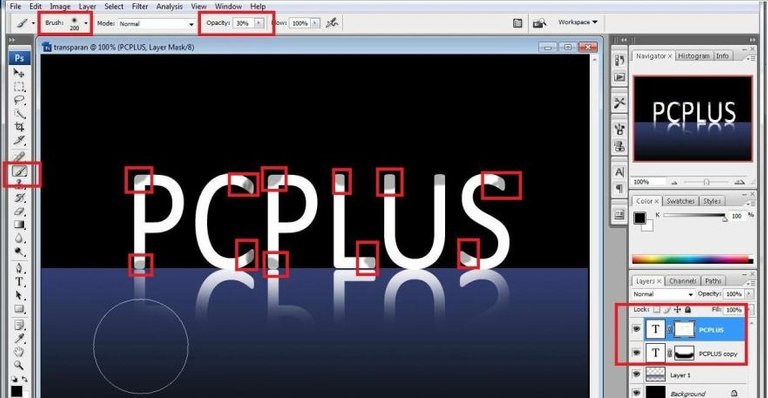
Click Add Mask Layer, on PCPLUS Copy. Click Brush Tool, select size 200, and delete the bottom until only partially arise (see picture). When finished, slide the PCPLUS Copy Layer down to the PCPLUS Layer. Click on PCPLUS Layer and add Add Layer Mask. Select Brush Tool, choose 5 px size, 30% Opacity, and color on each end of PCPLUS writing.
5. The effect of writing
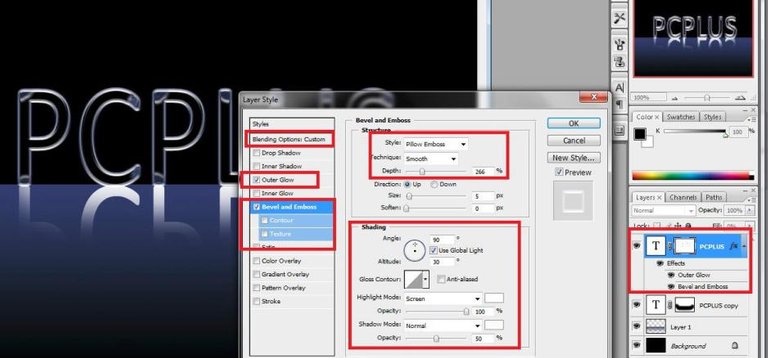
Click on PCPLUS Layer, right click and select Blending Options. In Advanced Blending, make the Opacity up to 0 (lost). Move to Bevel And Emboss option, change Style to Pillow Emboss. Depth to 266, Angle to 90 °, Highlight Mode to Screen, 100% Opacity, Shadow Mode to Normal with color to white, and Opacity to 50%. Move to Outer Glow, choose Gradient to light blue color, and Opacity change to 100%, click OK.
6. Noise background
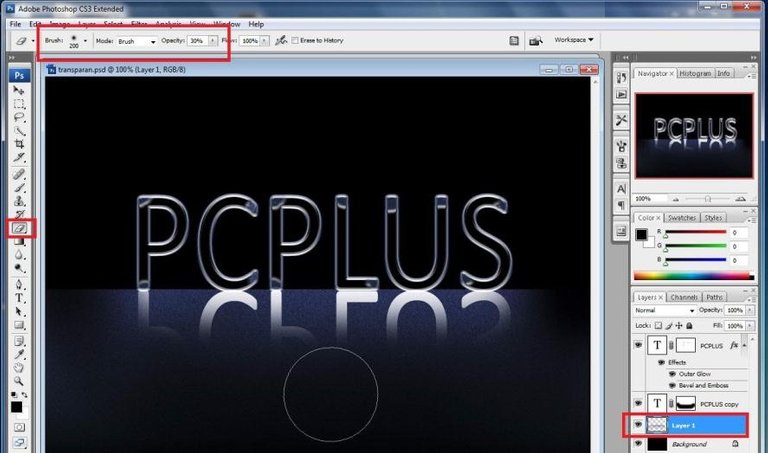
Select to Layer 1 position, click Filter> Noise> Add Noise. Change Amount to 5, Gaussian, and Monochromatic, click OK. Next remove some background noise, click Eraser Tool, select Brush 200px and Opacity 30%. Then delete some background as shown.
7. Create a shadow
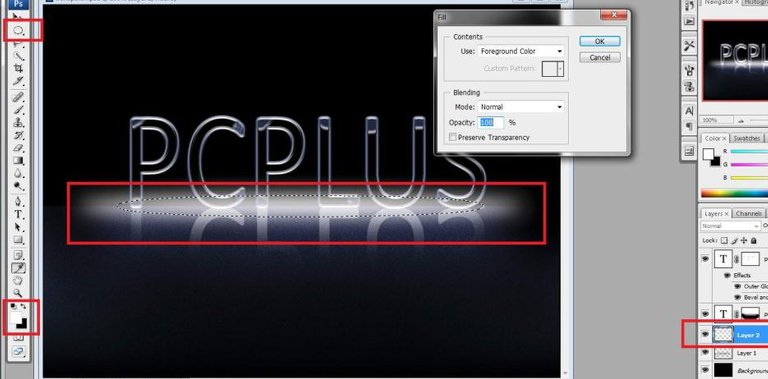
Click Create A New Layer, on the tool menu, click Elliptical Marquee Tool, choose Feather to 15 px. And position the ellipse between the writing PCPLUS and shadow according to the picture. Move the position of black and white to black and white. Click Edit menu> Fill, do not change anything and click OK.
8. Effect of luster
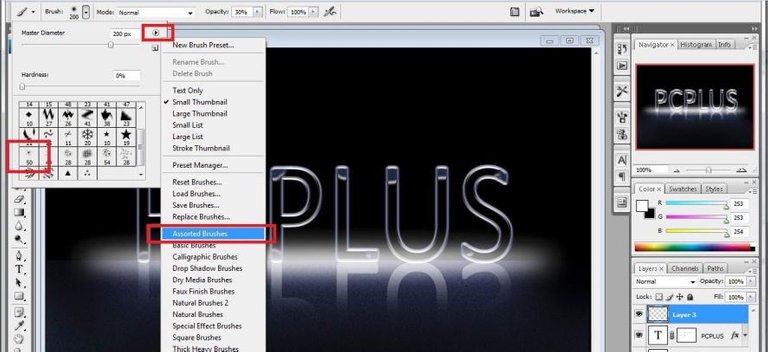
Move to PCPLUS Layer, click Create A New Layer. Click Brush Tool, click Brush Editor, click icon> and choose Assorted Brushes, and click OK. Choose a logo like root with size 50 (see picture). Change the diameter to 95 px and Opacity to 100%. Place the symbol to the end of each letter on the PCPLUS paper so as to give the impression of a luminous effect.
9. Lamp color
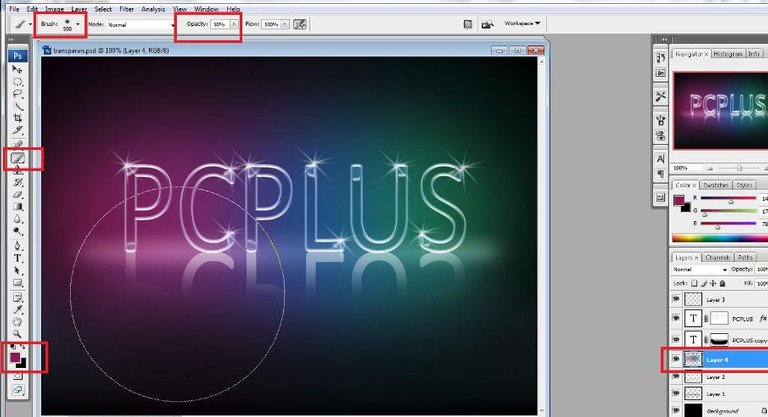
To be more interesting we will try to give colors like lights. Move to Layer 2, click Create A New Layer. In Layer 4 again click on Brush Tool, click Brush Editor and click icon> and choose Reset Brushes. Select Air Brush Soft Round 300, and resize it to 500 px, change Opacity to 50%. Use yellow, and click on PCPLUS start, change orange color next to it, change to blue next to it. Do it until the writing of PCPLUS is covered.