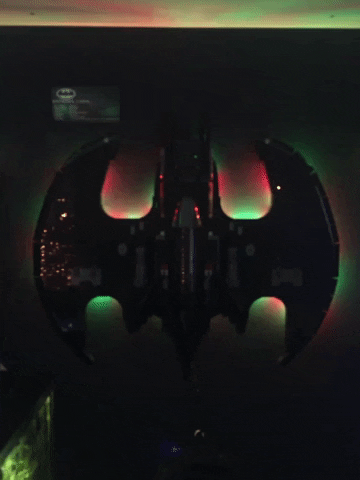
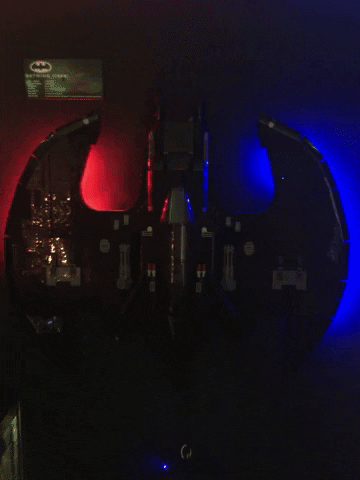
Is there anything cooler than having a Lego Batwing attached to you wall? Some might say "no", but I say that adding WiFi controllable, home automation integrated, addressable RGB LEDs as a backlight to the batwing adds even more coolness. That's what I did to mine, and this post is going to show how I did it.
I've currently got the batwing in Xmas mode
.... which is very festive...
So what do you need for this? Other than the batwing of course, you need
- A string of WS2812B type LEDs. These are fully addressable LED's which means you can turn each individual LED whatever colour you like. These are also compatible with the WLED system which I will talk about soon. The batwing has 2m of LEDs wrapped around the perimeter.
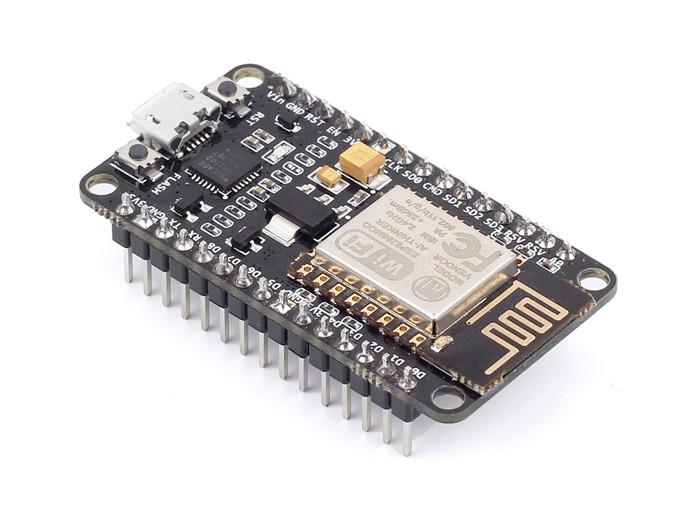
- An ESP8266 controller.These are basically little computers that have built in wifi, onto which you upload the firmware from WLED to control them
- Depending on how many LEDS you are trying to light (and how bright you want them), you may need a 12v power supply, or a 5 v one. For the batwing I have a seperate 5v power supply, but it is possible to power the LEDs from the NodeMCU directly (could be 5v or 3.3 volts). For big projects, you might need multiple power supplies at different points along the run of LEDs.
- A copy of the latest WLED firmware
- Software to flash the firmware to the EPS8266(I use pyflasher but others are available)
- Micro USB cable to connect your PC to the ESP as well as a wall plug for the USB cable
- Some jumper wires and maybe a soldering iron or connector blocks for wire connections.
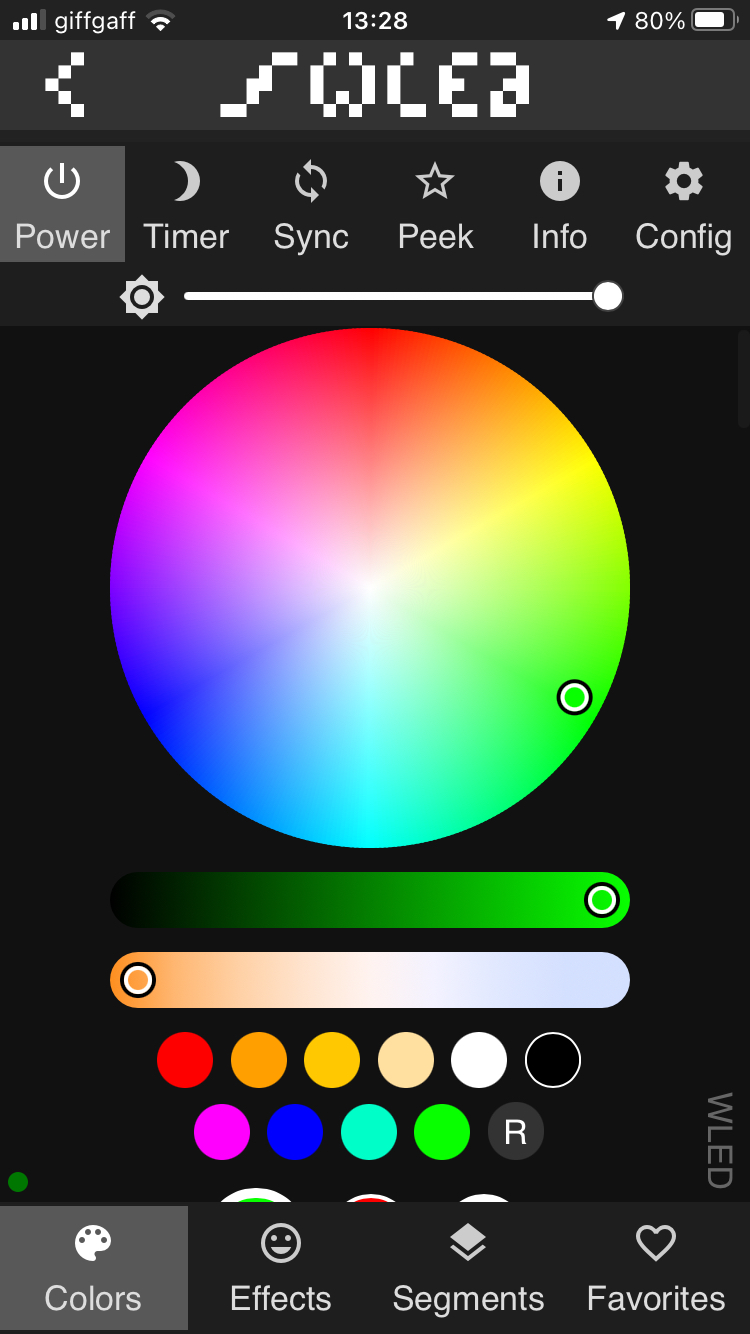
The WLED system is a prebuilt bit of software that comes with a downloadable app as well as a browser interface if you want to change the patterns and colours on the fly. This all becomes available once you have installed and configured WLED on your ESP8266. That's pretty easy to do and I followed one of the many guides online, this one being one of the best. I wont go into a massive amount of detail, but you basically plug your EPS8266 into your PC, load up pyflasher and upload the WLED firmware from the above link using the pyflasher software onto your ESP. Once you have done that, the ESP/WLED device will show a wireless access point to connect to. Jump onto that and configure it for your home WiFi network. Once it's set up on your home WiFi, you can just go to it in any old browser and make changes as you want to.
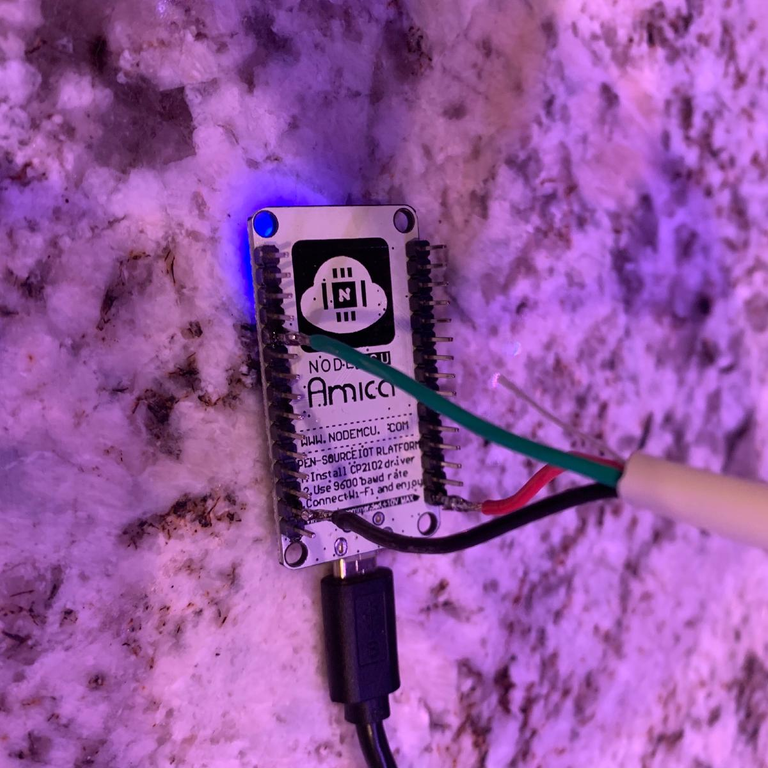
So at this point you should have an ESP8266 with WLED running on it. The next job is to connect this up to your LEDs. Addressable LEDs are pretty straightforward, they have a live wire (normally red), a ground wire (normally black) and a data wire (green). You need to connect them up as follows
| Wire Color | Summary | Pin On ESP |
|---|---|---|
| Red | 5V Power | Vin |
| Black | Ground | GND |
| Green | Digital out. The D4 pin tells the LEDs what to do. | D4 |
For a system where you want an external power supply, the only difference is that only the live from the power supply goes to the LED strip and both the ground from the power supply and the ground from the ESP are connected.
A setup without an external power supply (image source https://tynick.com/blog/11-03-2019/getting-started-with-wled-on-esp8266/)
So now, when you plug your EPS into a USB power supply, you should find your LEDs come on and you have an accessible web interface on your network (for example, 192.168.1.100) to control the LEDs
Here is an example of the web user interface. You can see that you can change colours yourself or use one of the dozens of pre-built palettes available. There are also dozens of effects to use, and there is also a more complicated way of creating your own. You can split the LED stip up into a number of segments and have different colours or effects on any of them. You can also create a number of presets and store them, even cycle through them
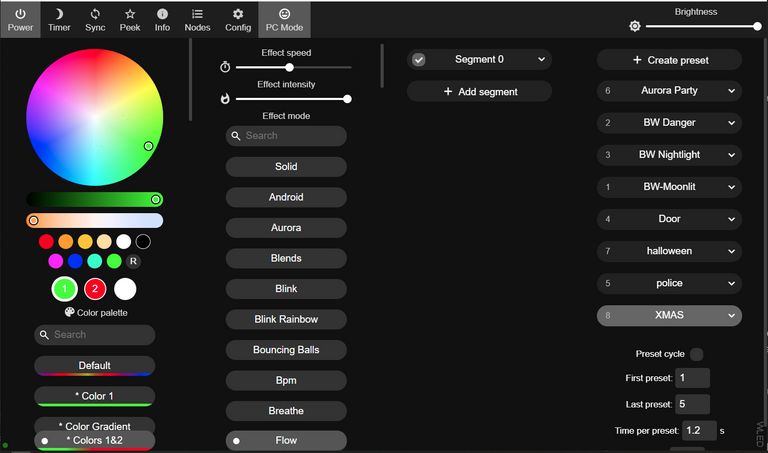
I've got a few presets that I like to use, but the possibilities are endless
 | 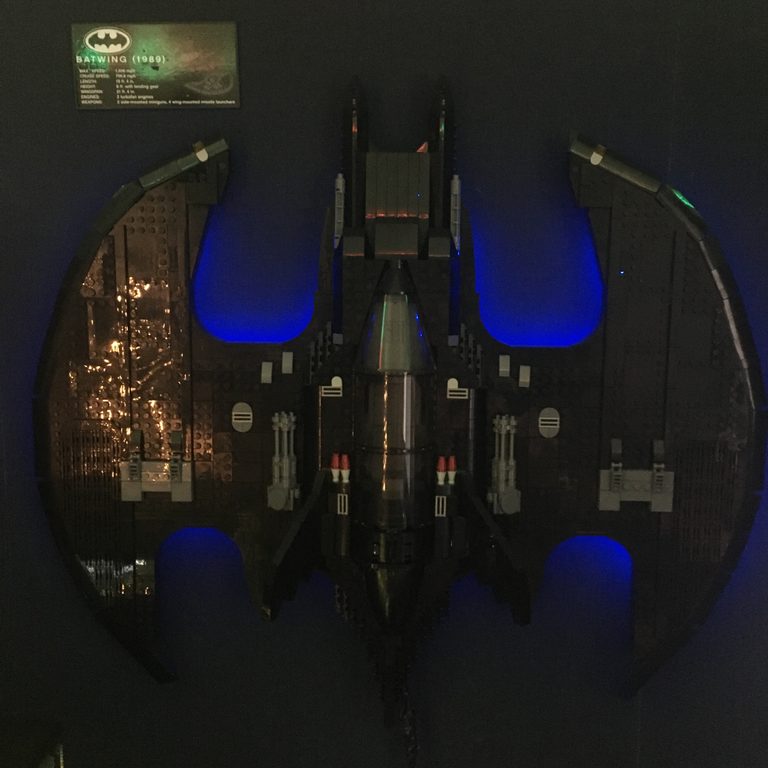 | 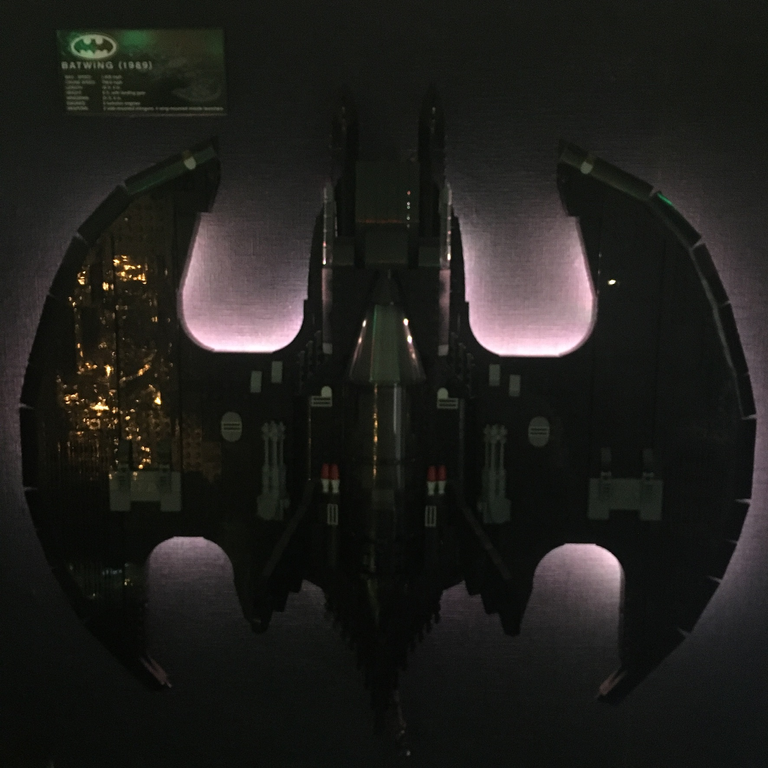 |
| Police | Blue Static | Moonlit Static |
The other interesting thing is that there is WLED integration in NodeRed, which I use in my home automation. I have one of my presets come on for 15 seconds when someone approaches the house during daylight hours - its fun to see the batwing light up when someone is making a delivery. That's something I might go into more in another post. That is managed with Home Assistant Scenes.

I also have another LED system set up on something I'll be adding to a new fish tank im getting, but more on that in another post soon.
This is honestly the coolest thing
Your content has been voted as a part of Encouragement program. Keep up the good work!
Use Ecency daily to boost your growth on platform!
Support Ecency
Vote for new Proposal
Delegate HP and earn more