It's been a while since I've done any posts, and I've wanted to do a post about this particular thing for a while, but I've been wanting to wait until I can get some work done refurbishing it before doing a post. Alas, I've got at least 3 other projects that need doing before I'll get to this one, that I think I should just show it as is and hope it's still an interesting story for everyone here. After I talk about the machine and getting it to my house, I'll explain why this one is so special.
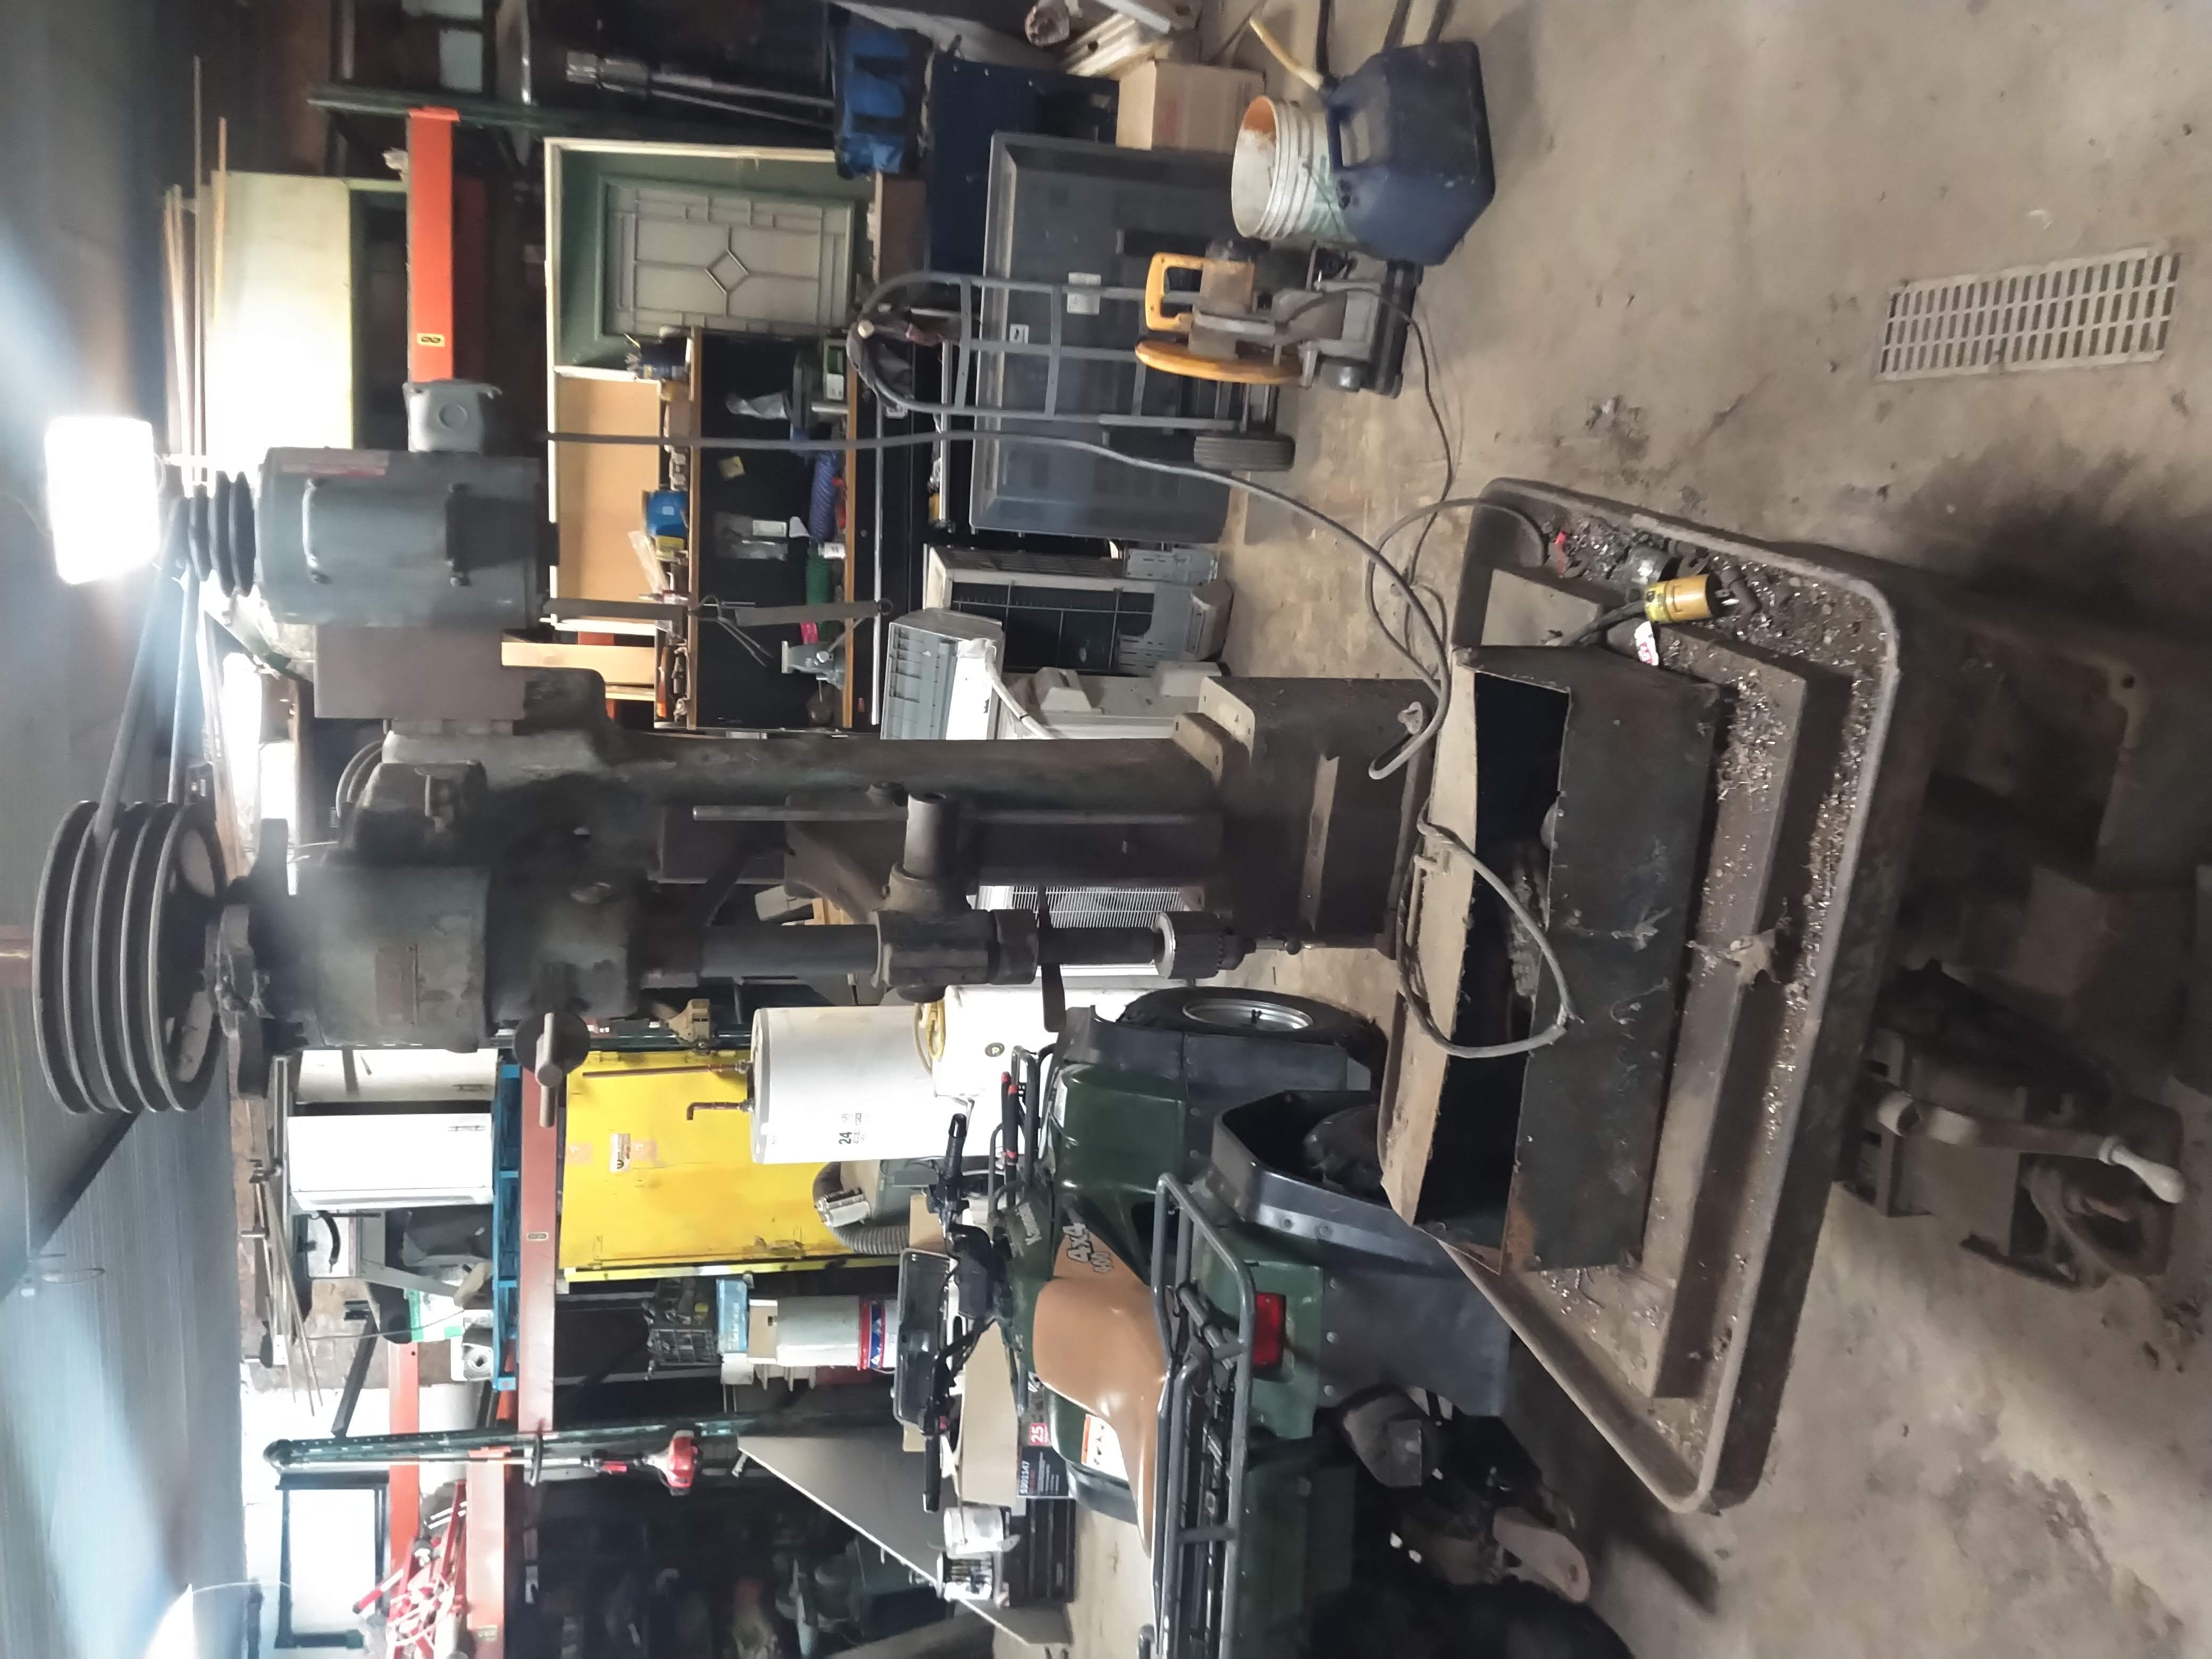
What you see is an antique industrial drill press. Made by Allen, the most recent patent on the tag was in 1914 so even if they kept making it for a couple decades, it's a pretty old machine either way. It's quite the beast, weighing in at about 3/4 or more of what a Bridgeport milling machine would weigh, so about 3/4 of a ton. I would wager that if you installed a a milling table on this, it would be rigid enough to do some halfway decent milling. Probably at least on par with the hobbyist mill drill machines you can get from southeast Asia these days. Given that it was only intended to drill holes, it's way overbuilt, and will probably last several lifetimes in the kind of home shop use I'll give it. This is how I found it in my brother's shop, all dirty with some trash on it because it hasn't been used in so long. He inherited it from my father but since it takes up so much space in the shop, he opted to just get a regular old drill press for the bench top and get rid of this one. Me having a thing for old American iron, I couldn't pass it up when he told me I could have it. I was planning on visiting the area anyway in a few weeks, so I drove up with my pickup truck so I could throw this on the back and bring it home.
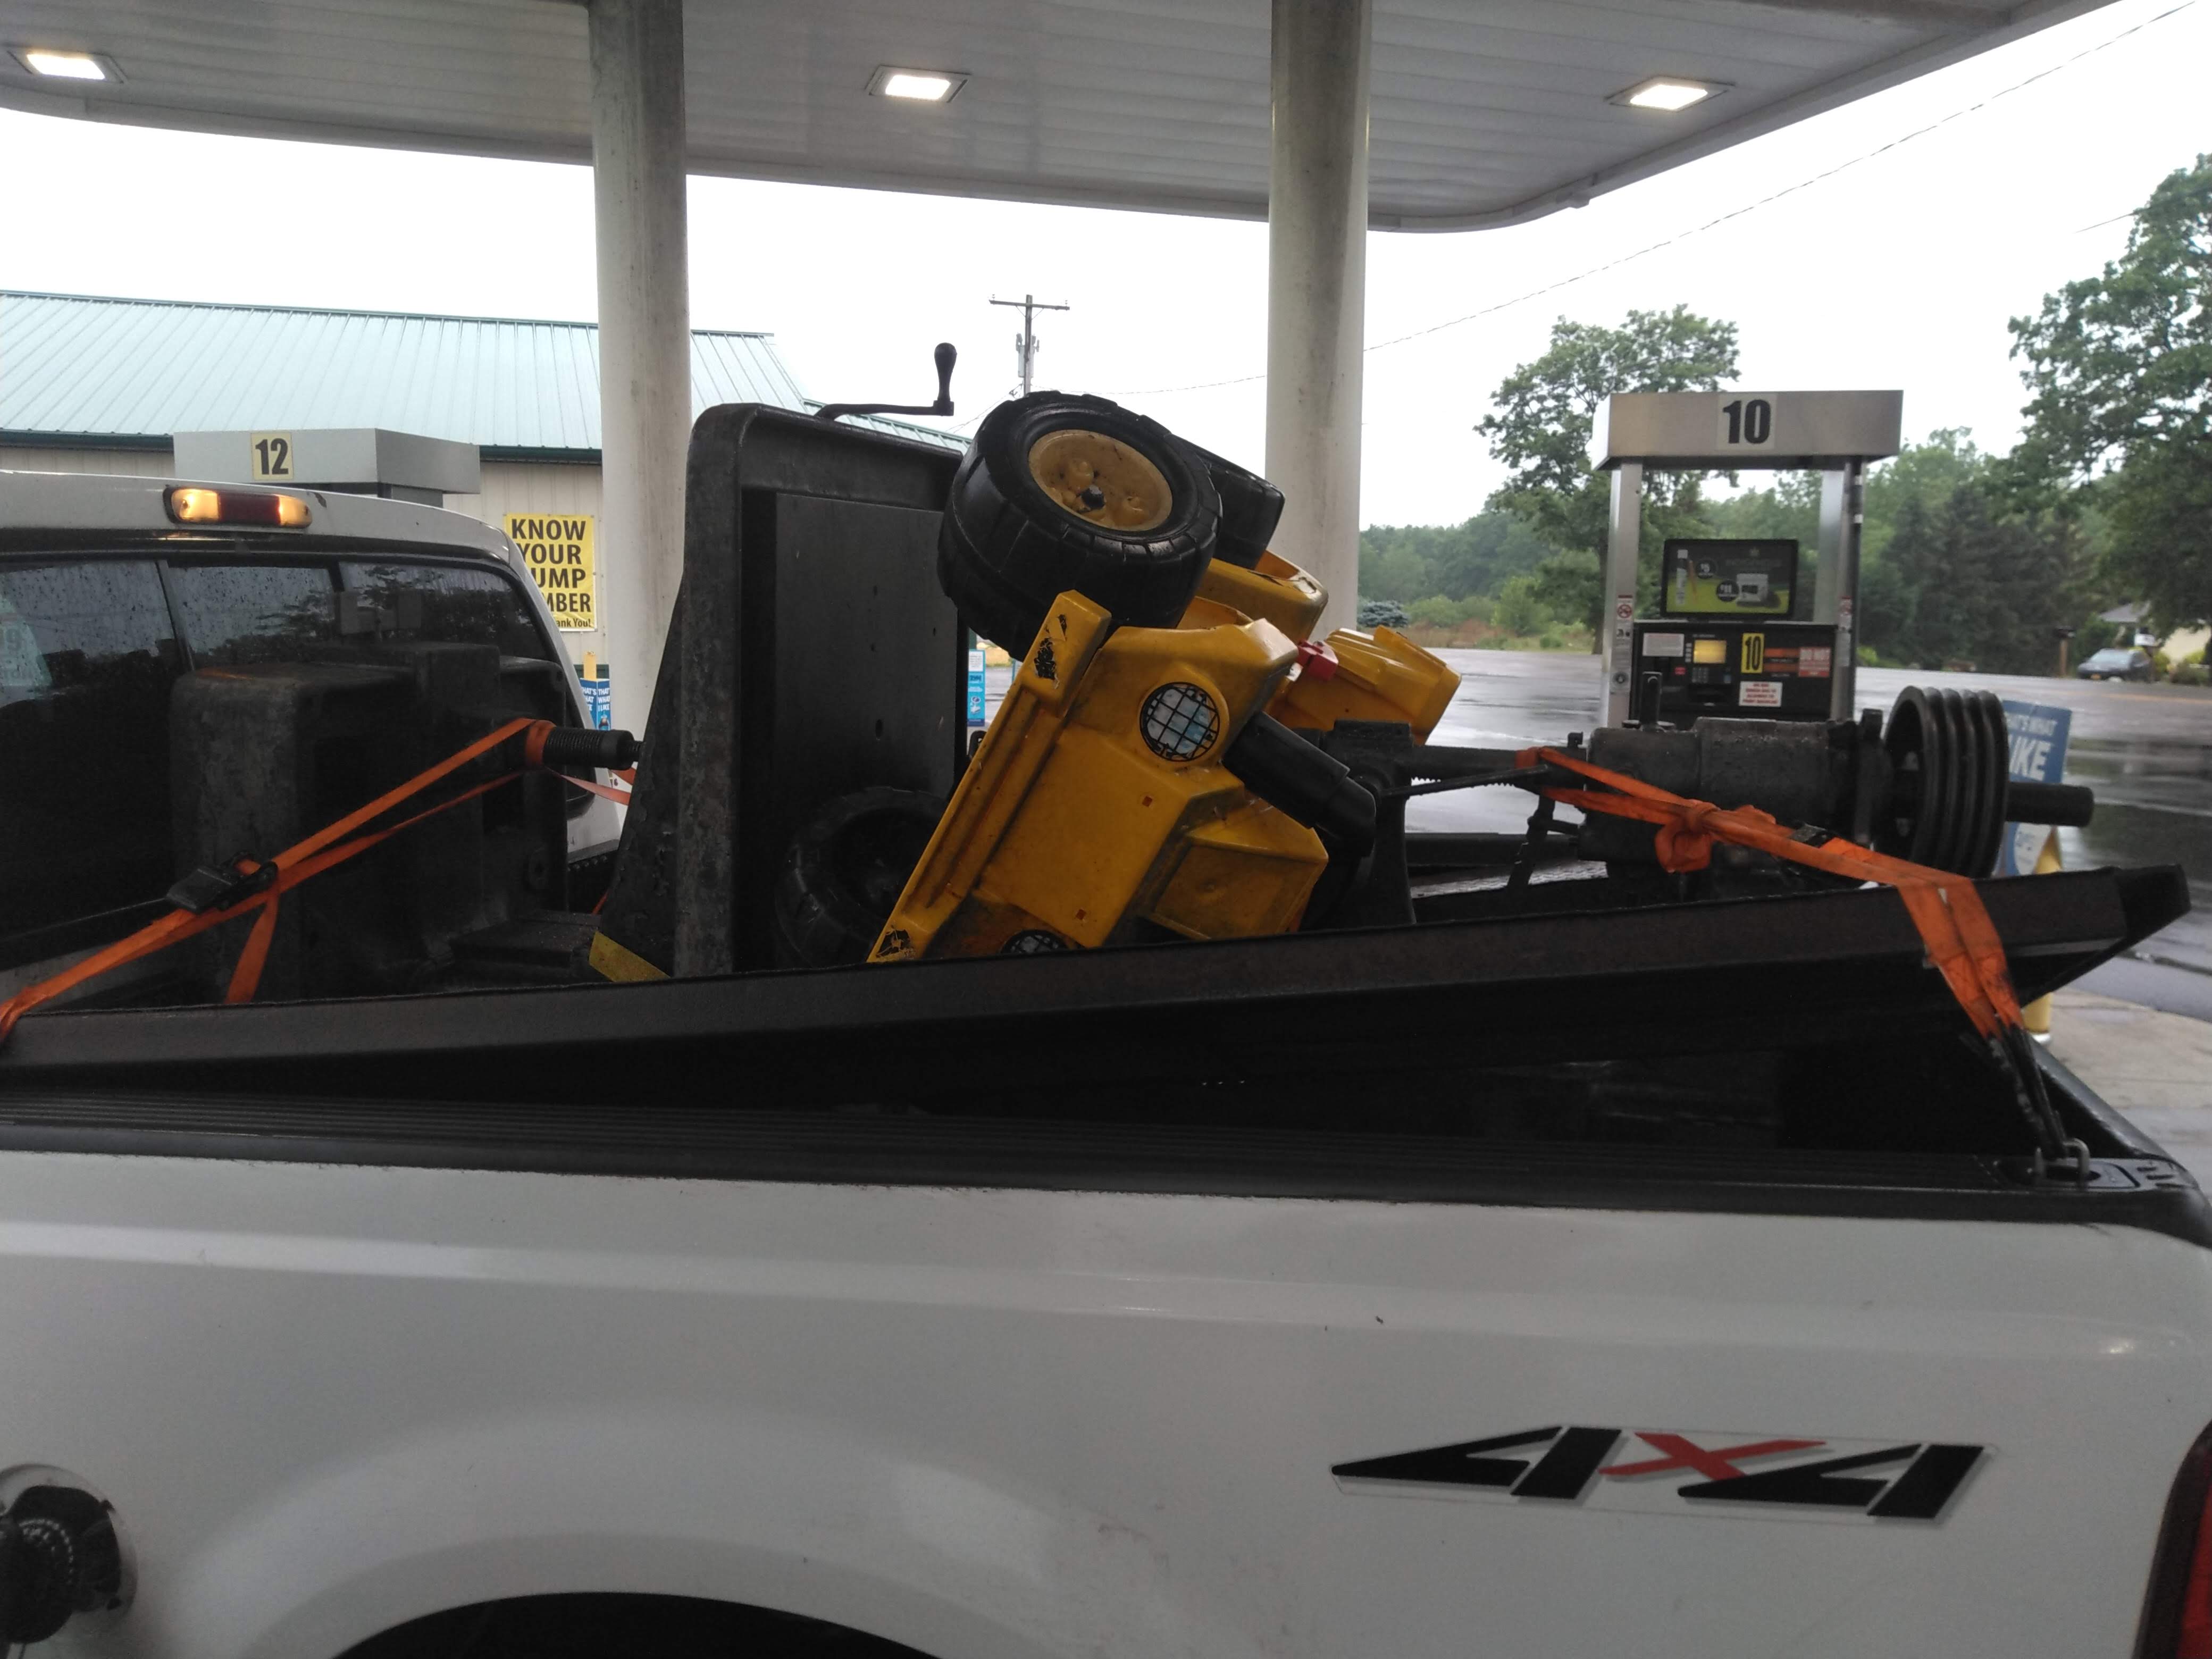
I was in kind of a hurry when we loaded this thing so I didn't get any pics of the process, but it was pretty straightforward. We used his gantry crane to take the weight off of the base, then scooted the base out little by little using my truck (being careful not to pull the crane over), then eased it down on its back with the chain fall hoist. Then we re-hooked with a strap close to the center of gravity, picking it up high enough so I could back the truck under. I did this because I didn't want some big top heavy hunk of iron sticking over the top of my truck. It was such a close fit that if that pulley hadn't cleared I wouldn't have been able to put up the tailgate. Last minute we threw on that old broken power wheels when they asked me if I wanted it. I still have to fix it, but my son was super excited when I brought it home. He won't have to ride in his sister's pink off-road racer any more. You may also notice that other piece of metal in there. I grabbed an old set of ramps from a trailer of my father's that has since rusted in half. They're good ramps but my brother didn't want them due to their heft, so I took them off his hands. That's about a ton of weight back there, maybe more, but the airbags I installed for hauling heavy trailers evened the suspension right back out to keep weight over the front wheels. Other that being a little bit slower to accelerate and struggling a bit more on steep grades, I didn't notice the extra weight. It handled just like it does unloaded, and it still stopped quite well.
The trip was pretty uneventful all 11 hours down to Raleigh from Buffalo. Uneventful, that is, until I got about 35 minutes from my house and ran out of gas. My truck is pretty thirsty being a V10 4x4 F250 and all, so it was a stretch to make it all the way home with only one fill up. I figured I could make it easily after calculating the mileage I got on the first tank. Obviously I miscalculated a bit or maybe in my fatigue I was driving a bit more aggressively and using more fuel, but at any rate, it got significantly worse mileage than on the first leg. I was hoping to get home in time to see the kids before they went to bed and do bath time with them, which I could have easily done if I had taken a few minutes to stop for fuel when I still could have, but I ended up waiting another hour and a half on the side of the road waiting for AAA to show up with some fuel. I even had an empty can in the truck but the nearest station was like 7 miles from the exit I coasted to a stop on, so I just waited for them to come. Unfortunately the kids were asleep when I finally filled up and got the rest of the way home. Note to self, you can't make that trip with only one fill up in the pickup truck when it's loaded with over a ton of iron.
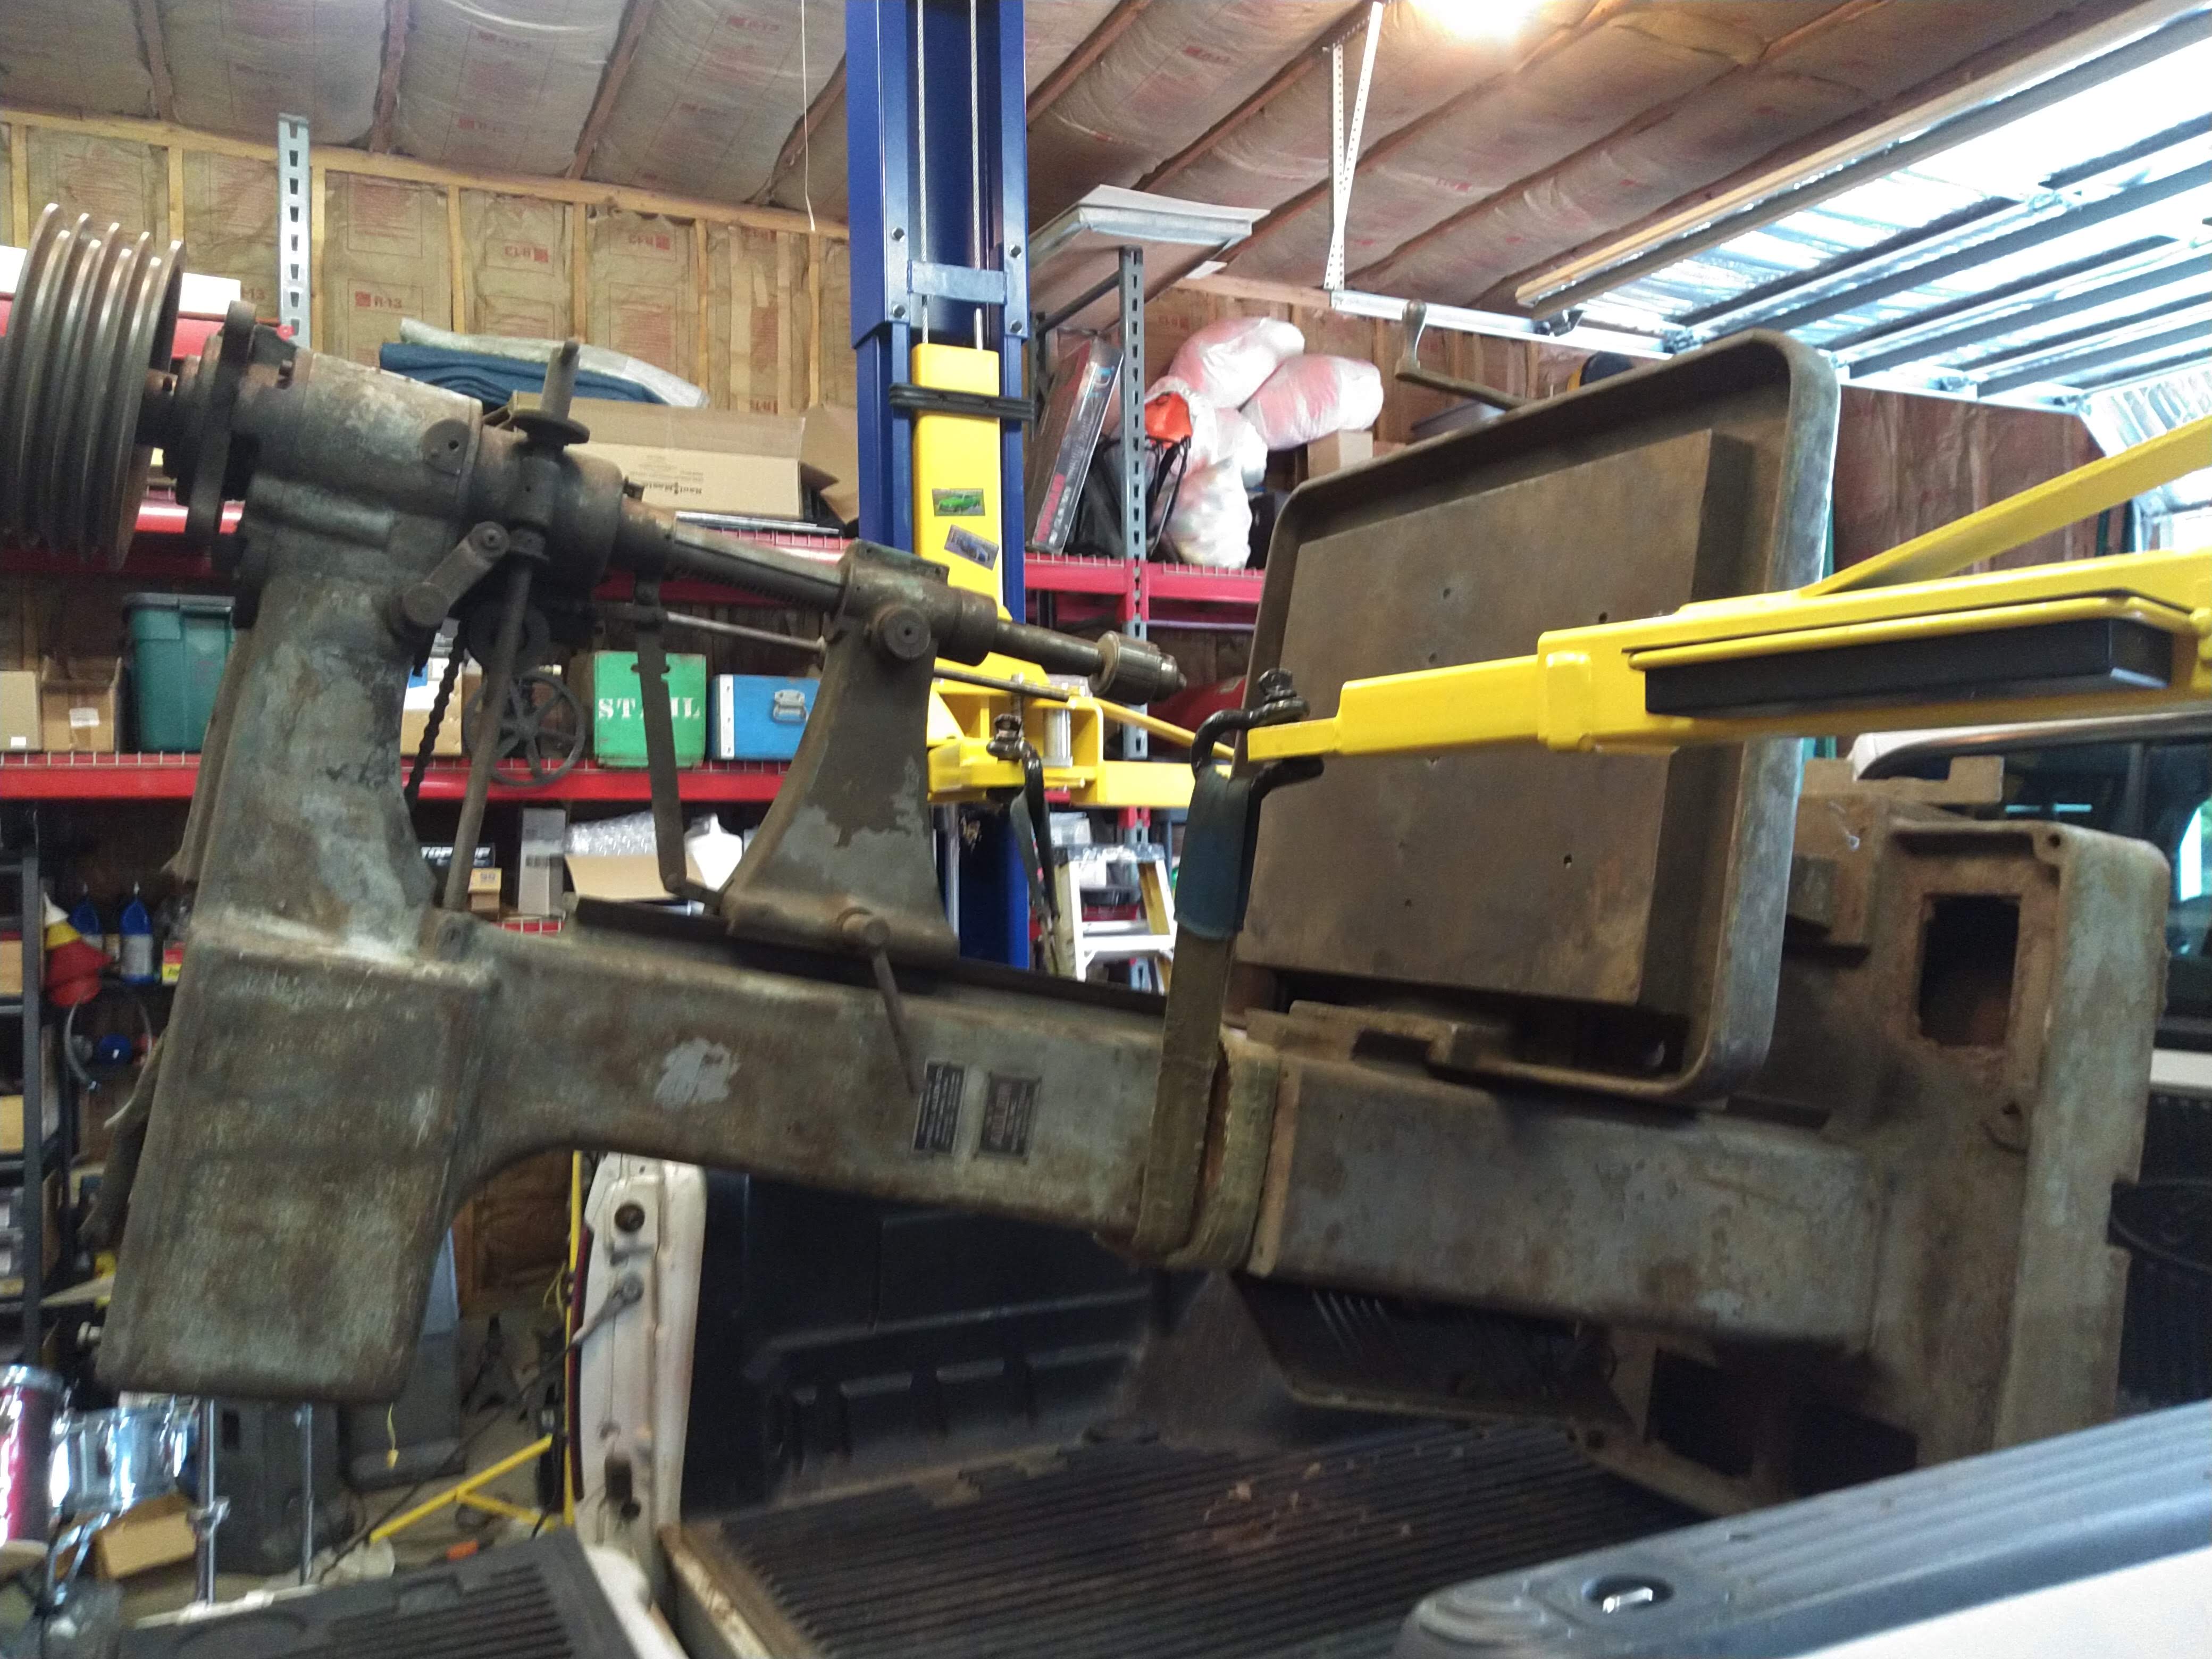
Next order of business was to get this bad boy off the truck. I did it next day because I actually found a killer deal on a tractor the night before that I just couldn't pass up, and I needed to get this thing off of there so as to lighten the load and have better visibility backing the trailer. The guy gave me 24 hours to unload my truck and trailer, so I needed to get this thing off right then. I'll tell that story in another blog post. I used a proper lifting strap on the top end, but not having a second one, I used a ratchet strap around the base. I wrapped both of them over themselves on there so they'd bind on each other if the machine tried to rotate and prevent it from doing so. It felt a bit sketchy, but with how slow and easy the lift operates, there were no jolts as it was going up and down, so everything went nice and smooth with the unload. Once the load was off the truck I drove it out from under and set it on its back right on the floor using the lift.
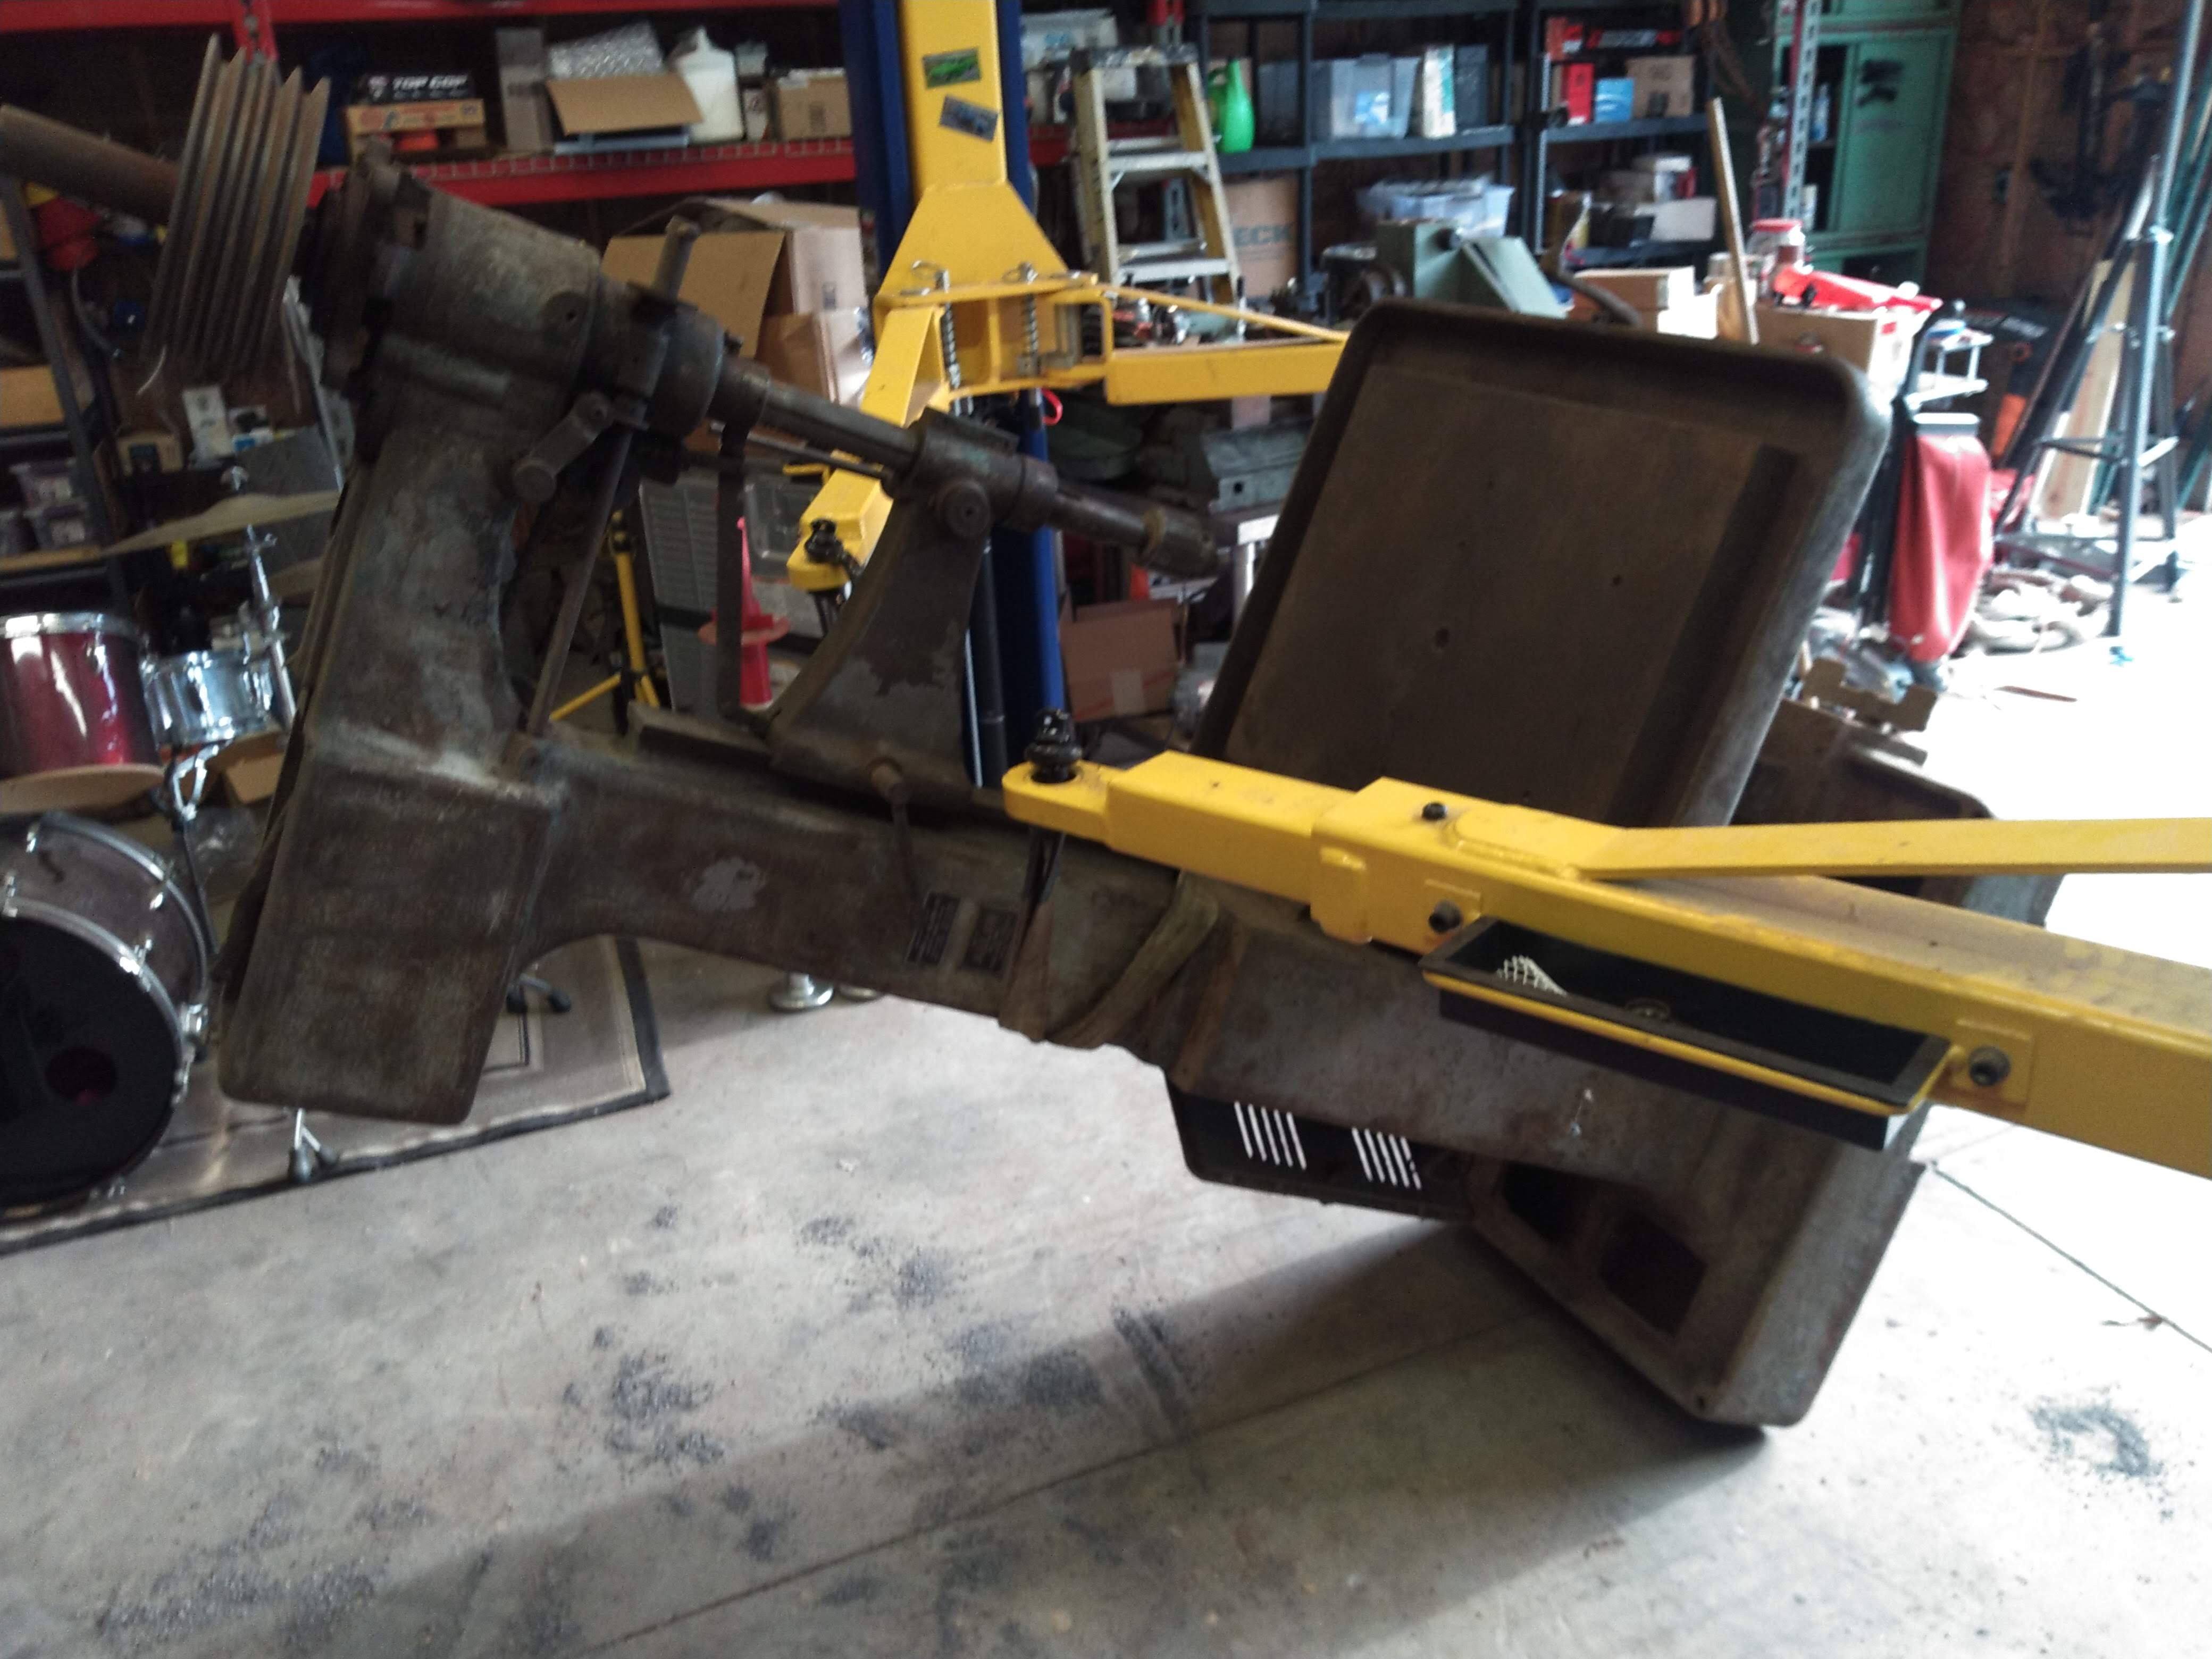
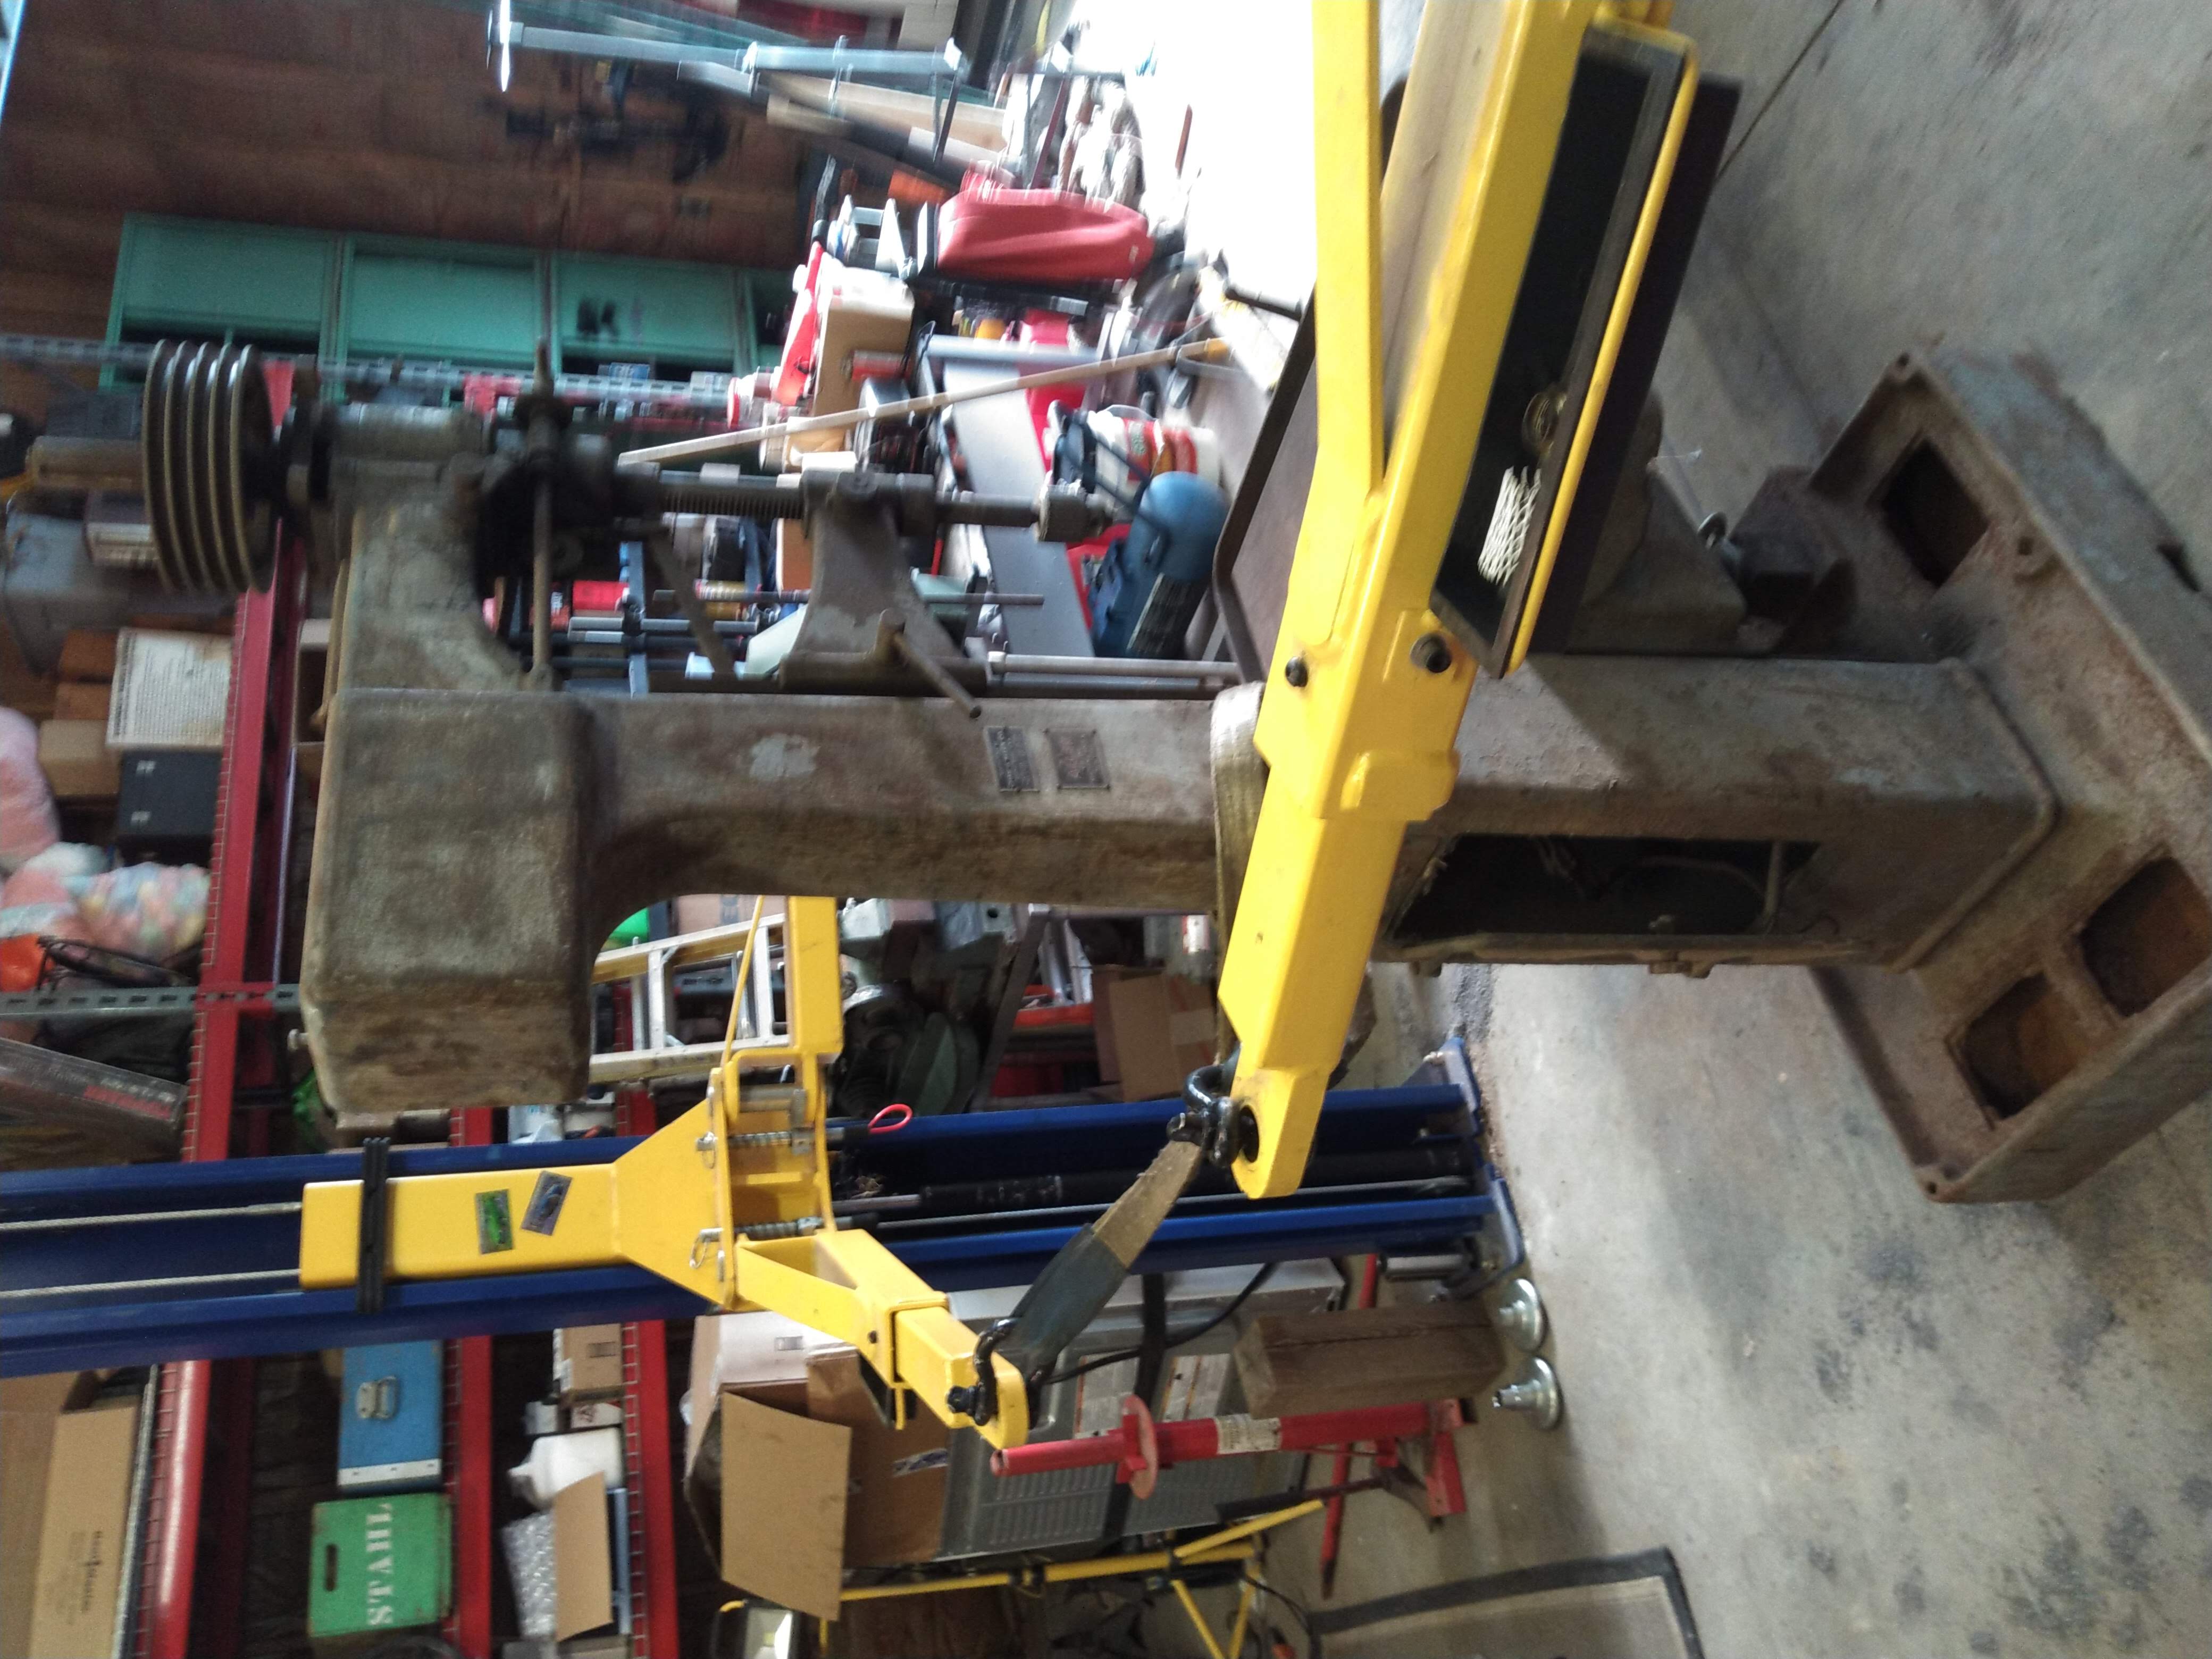
Once it was down I unhooked from the bottom and began picking it up from the upper lifting point. It was fairly close to the center of gravity, but still high enough up that the base would stay down as I lifted.
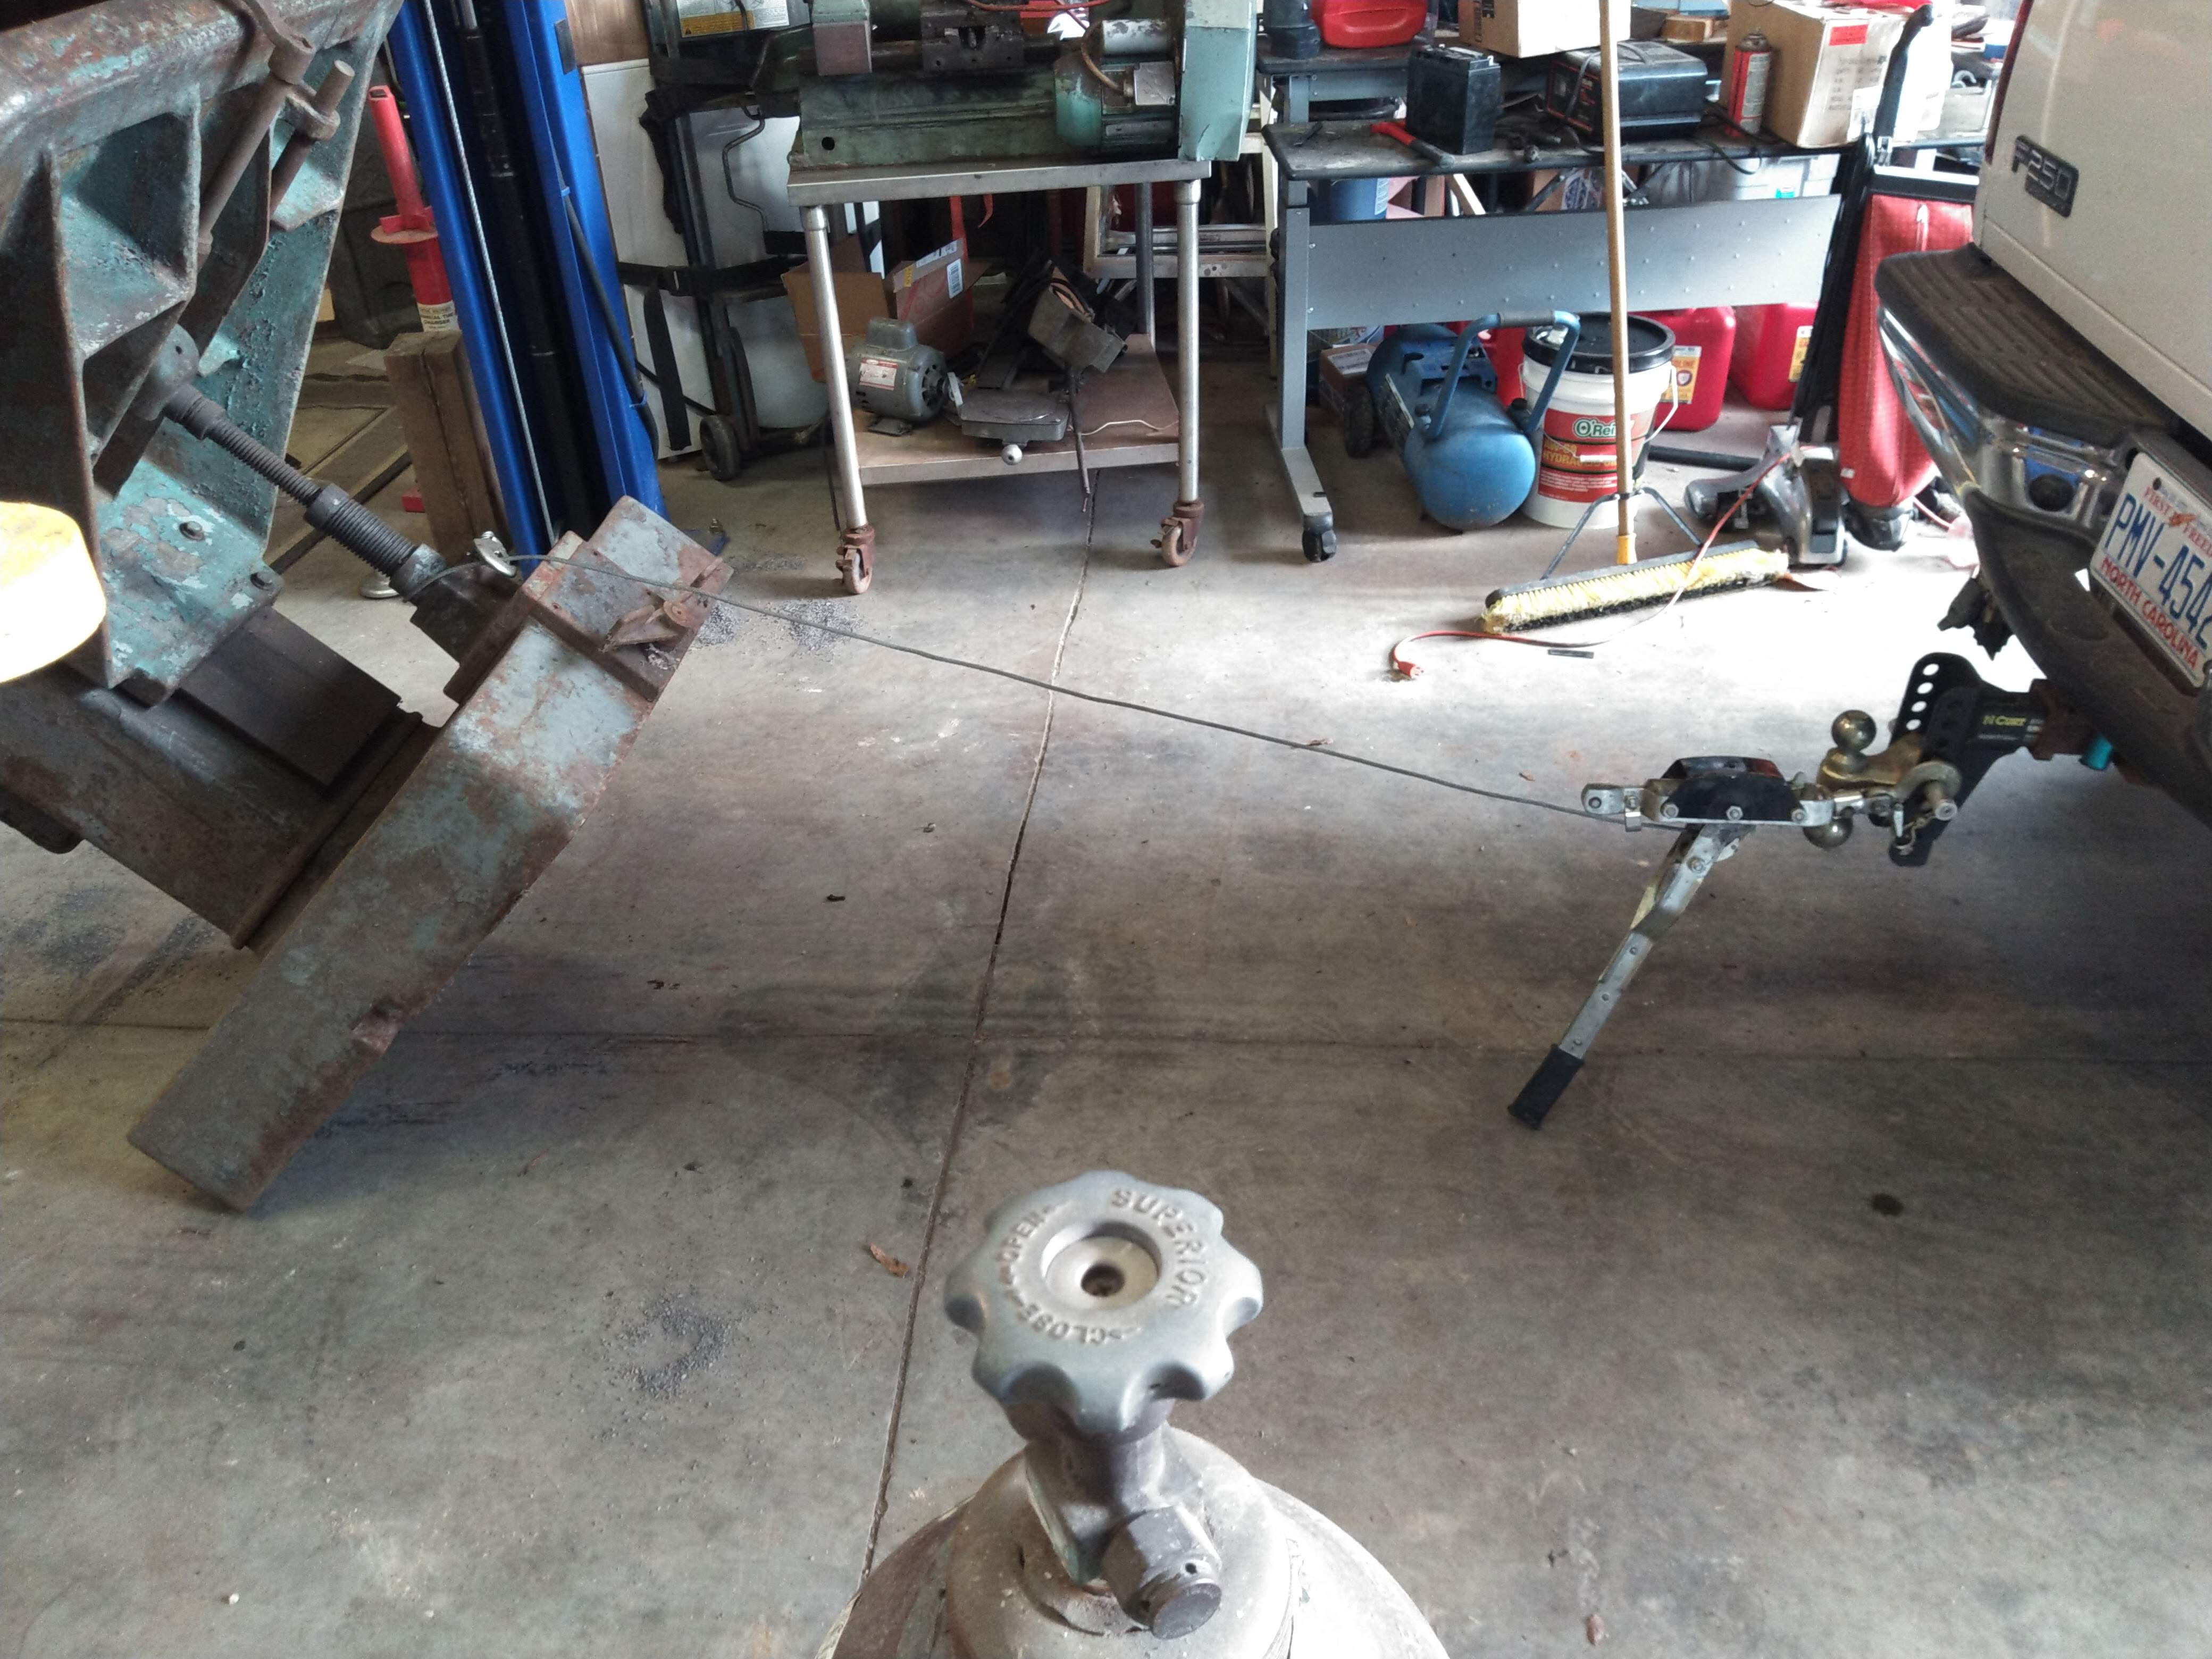
After getting it to a certain point, I hooked the base to the hitch of my truck here to keep it from swinging in case I lifted it too high. This did help, but I should have actually hooked the come-along to the top so it wouldn't drop down, because it did, and pretty hard. Luckily the concrete is thick enough there that it didn't crack it.
Success! Once it was here I left it for a couple of days while I went to deal with that tractor.
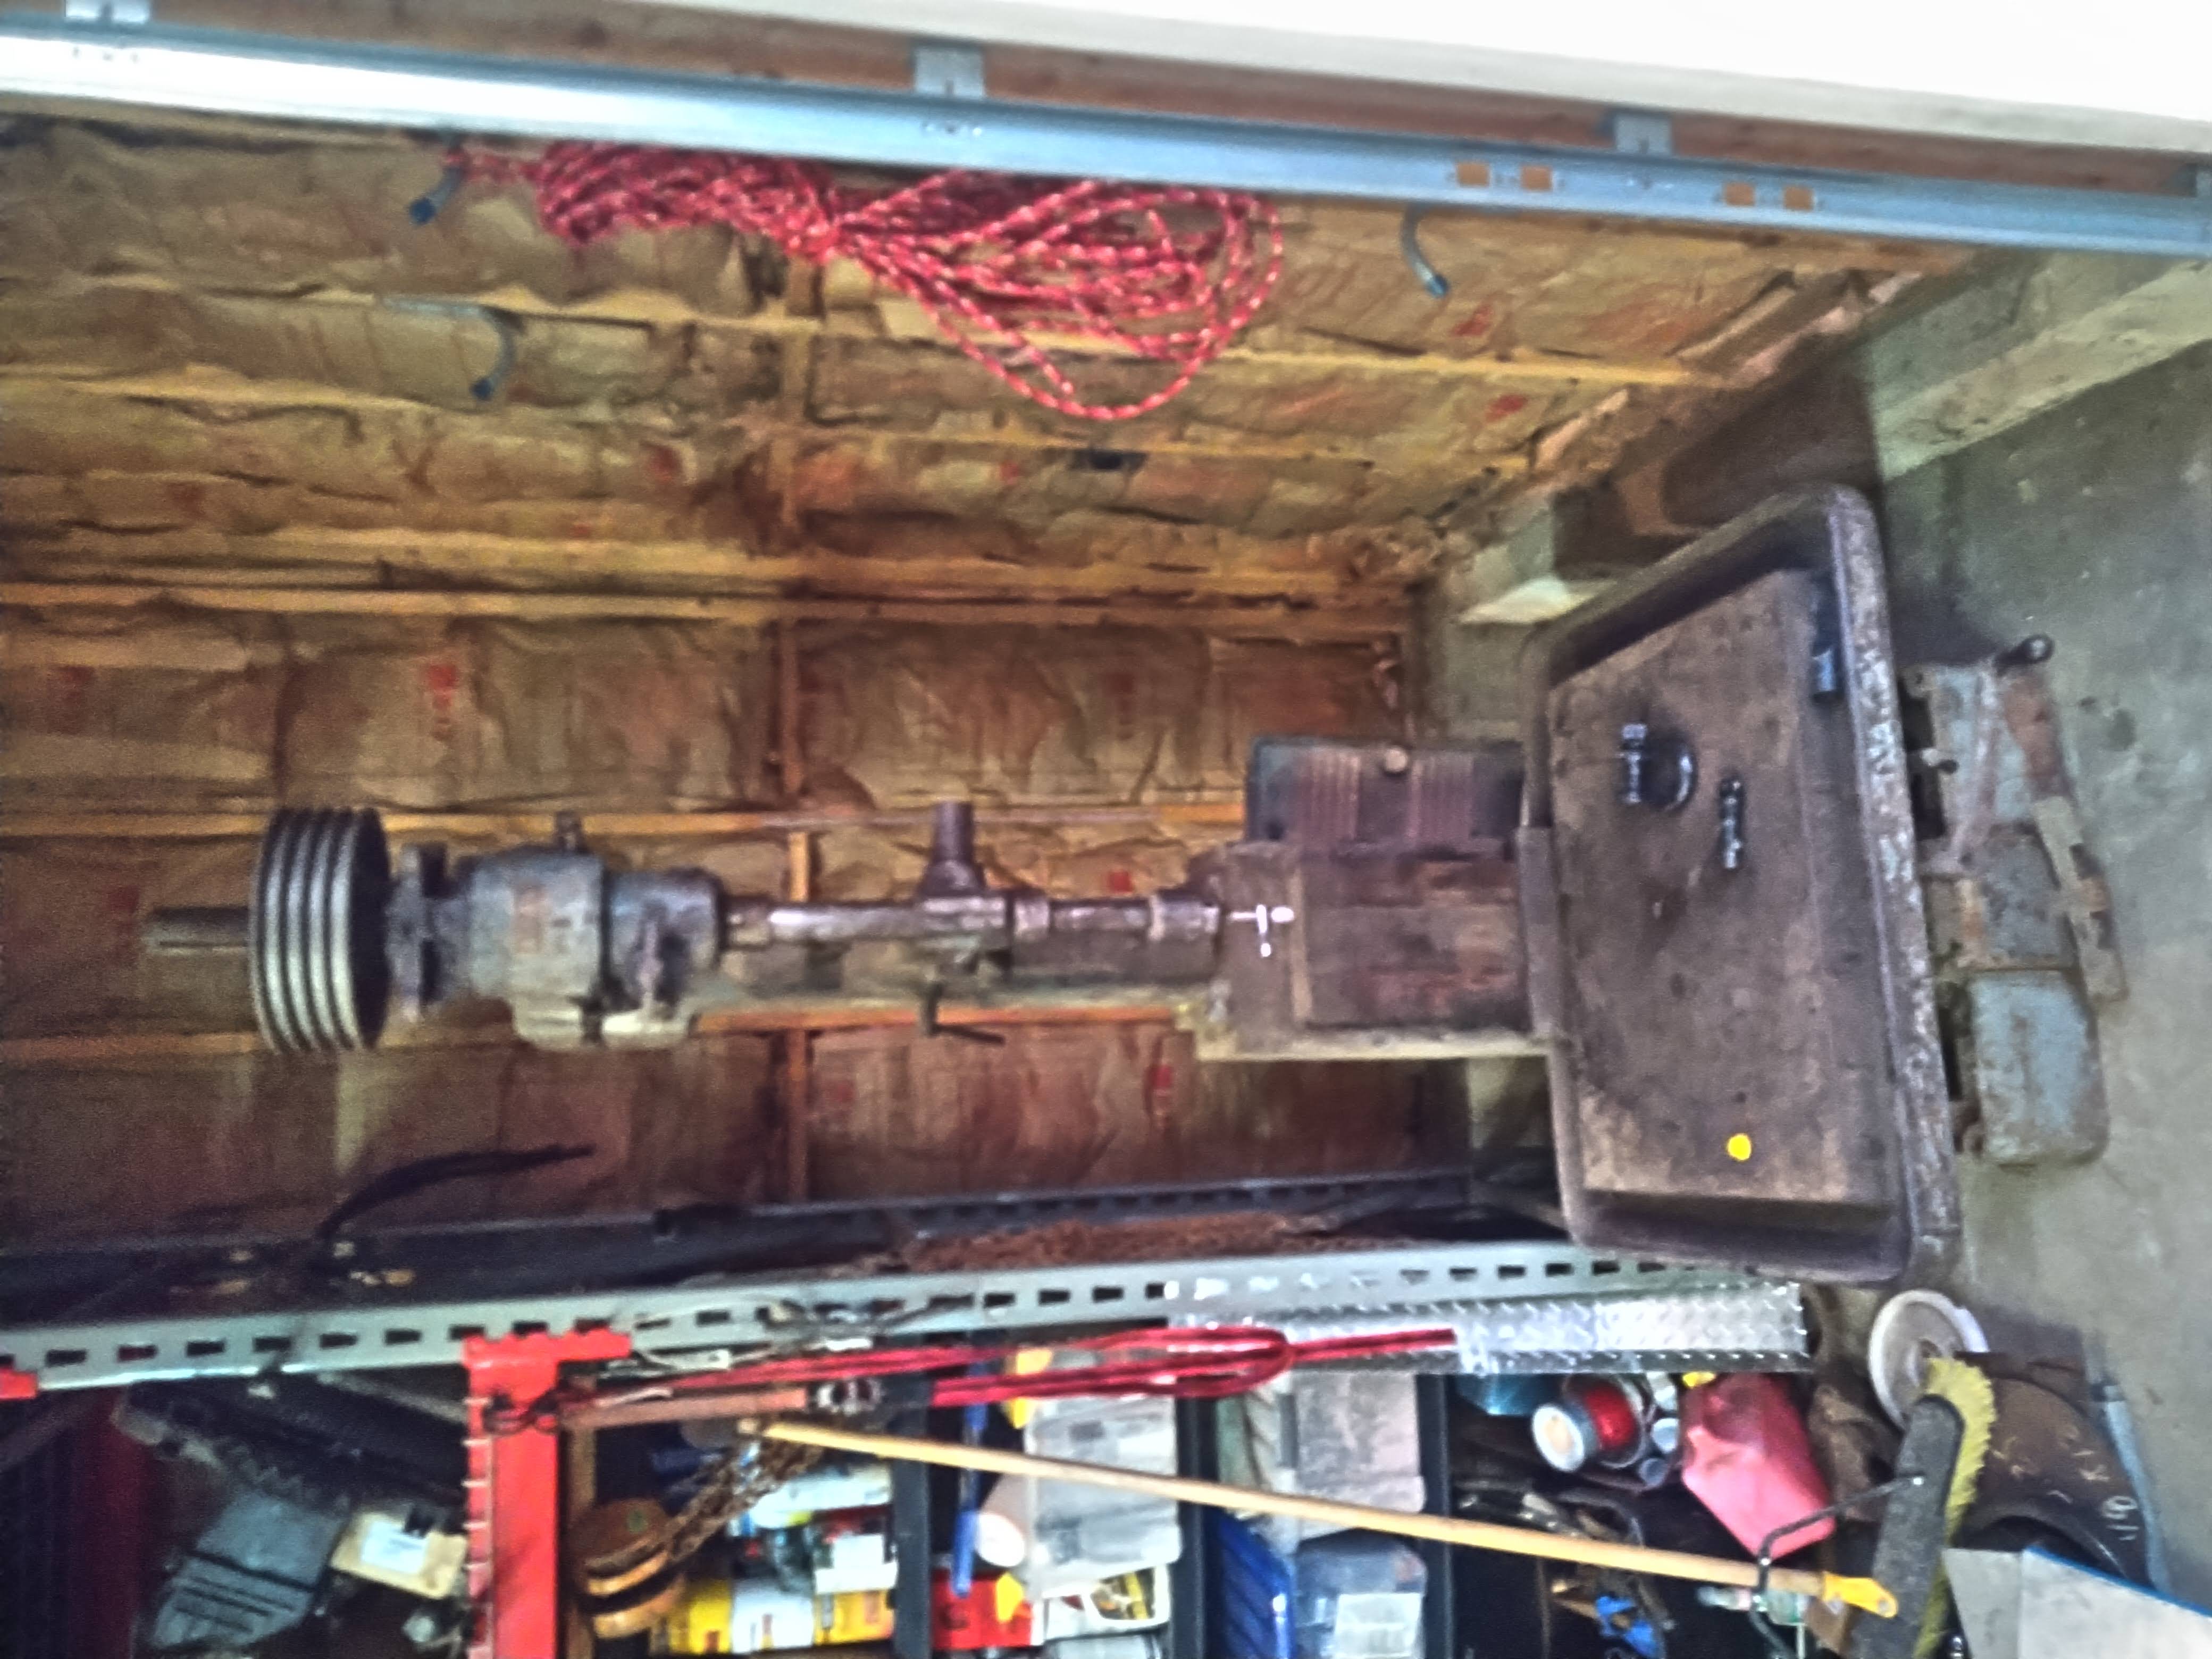
This is the drill press in probably its final resting place, although I do have plans to do a partial restore of it a la the Matco toolbox I featured in an earlier blog post, so I may have to move it out of there again for that, but it'll go right back to this spot when I'm done. The way I got it over here from the lift was to lift the machine straight up and set it back down on some furniture dollies. A standard dolly is rated for 1000 lbs, which is a bit under what is needed for this thing, so I put a pair of them under this. I then used the come-along attached to the truck hitch trick to pull it around from its base to get it close to this corner. I then used a pry bar to walk it most of the rest of the way. The last step I did with my engine hoist, to take the weight off the front dolly and pull it out. The back dolly was pulled out by grabbing the top of the drill press with the come-along again and tilting it forward. Then the pry bar was used to scoot it the few remaining inches and get it situated.

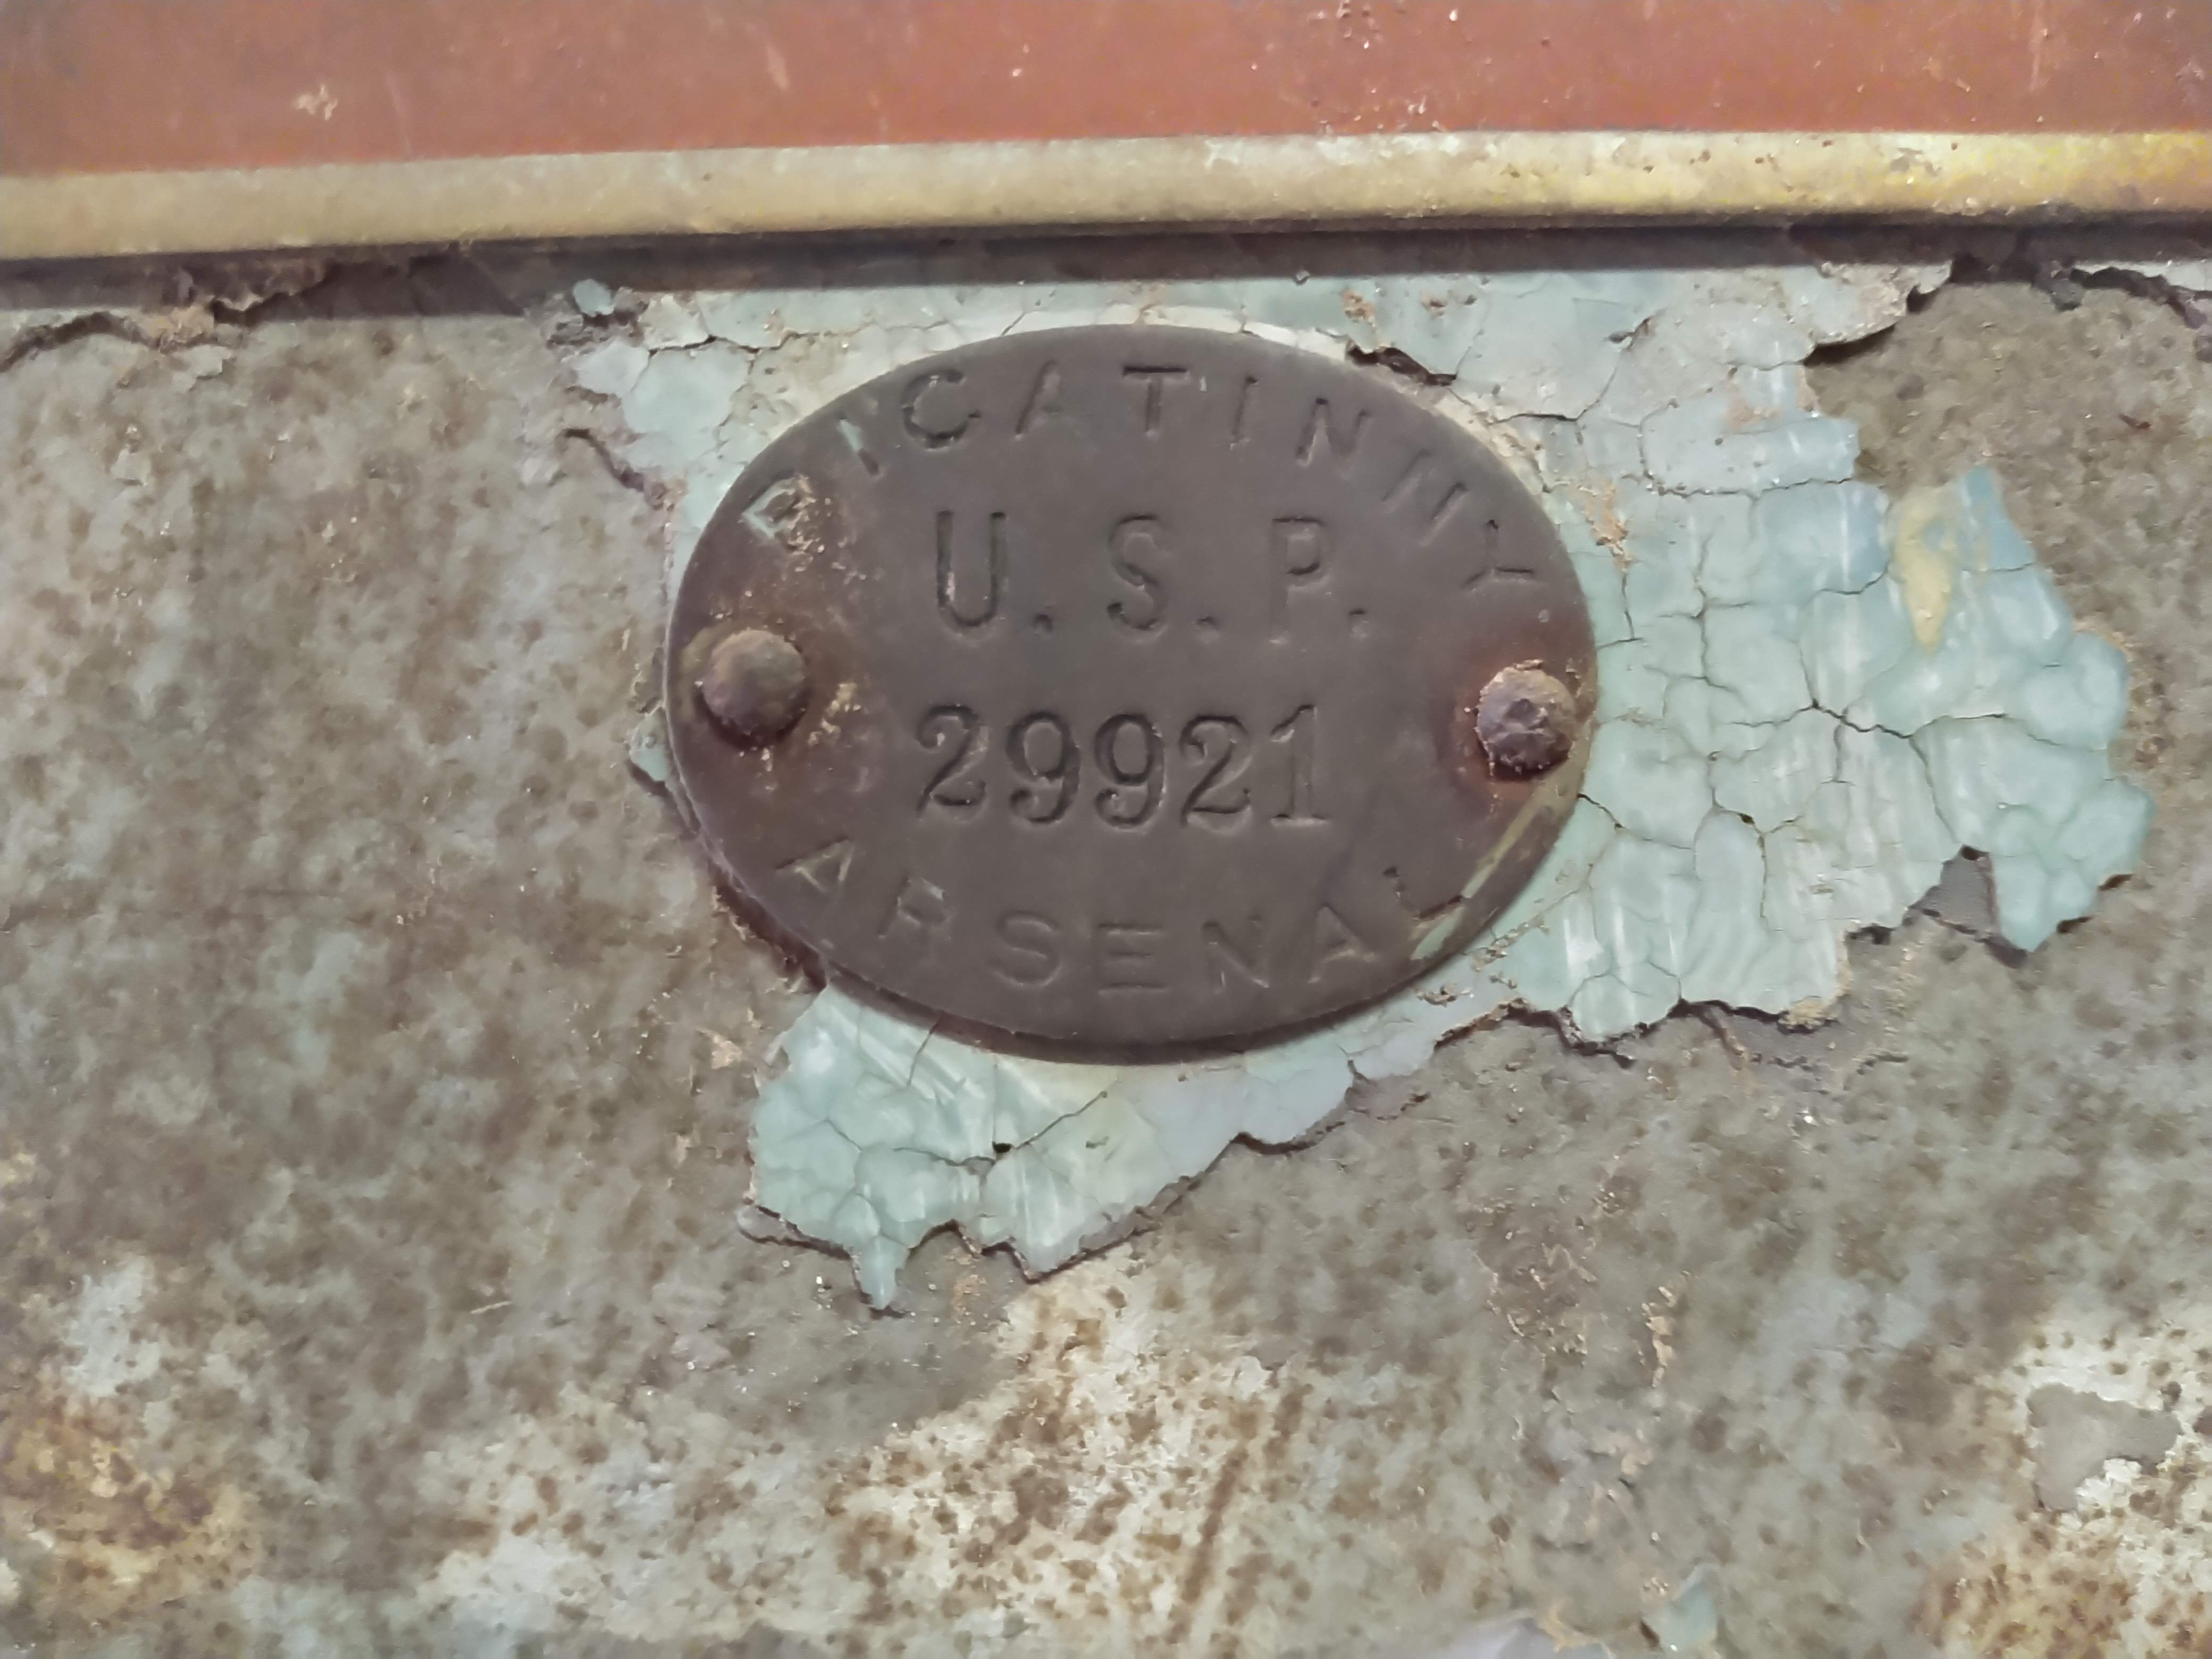
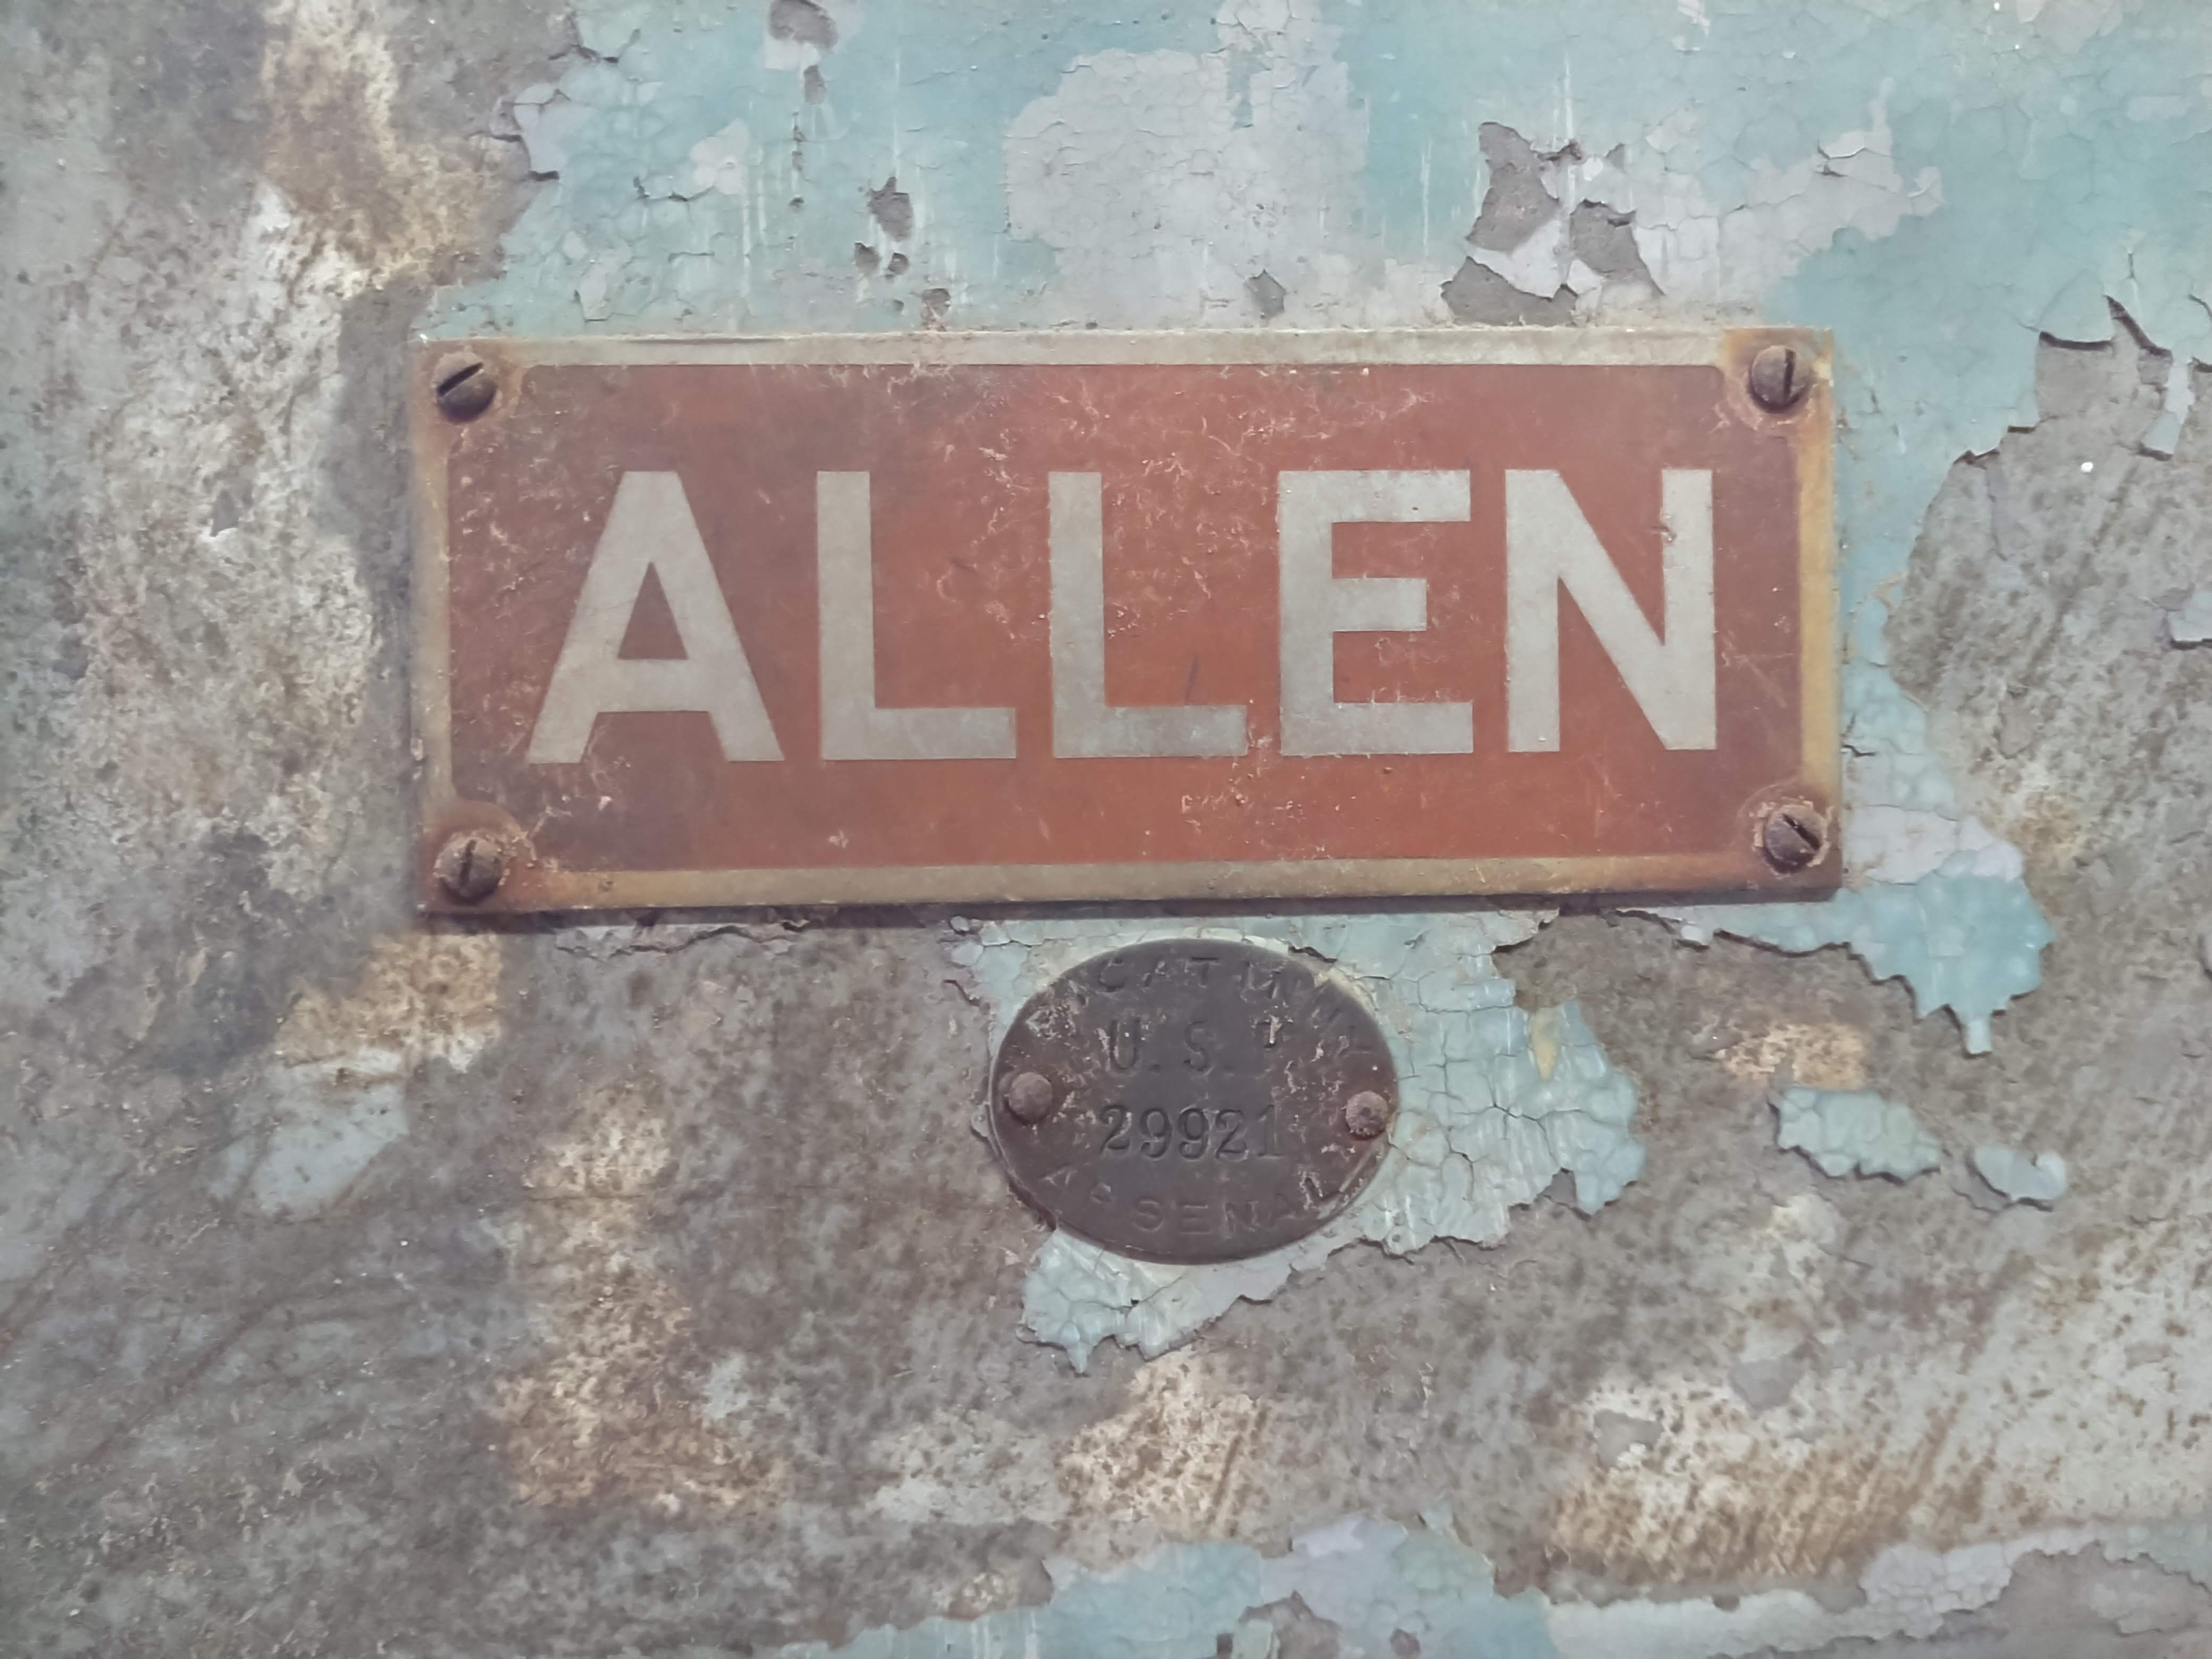
These last few photos are close-ups of the metal ID tags on the machine. That's one of the cool things about old iron like this. They took pride in their work and spent some time on the appearance of the castings, but also the tags were usually prominently displayed and some care went into their design as well as their longevity. Now they slap a sticker on there and it falls off after a few years so that if anyone were to do the same as I am after 100 years they'd have no idea who made it. It just adds to the cool factor that after a century of use and abuse, those tags are still clearly legible, proudly displaying the maker's mark.
So here's what makes it even cooler. Up until 1956, the American side of the gorge at Niagara Falls featured the Schoellkopf hydroelectric power plant. It just so happens that this drill press was in the building and fell down into the gorge with it. I've looked at a bunch of photos of the wreckage, along with this video to see if I can spot the drill press down there, but alas I couldn't find it. Maybe some day I'll find a picture of it ass-over-teakettle in the bottom of the gorge. Some guy who must have been a part of the clean up and recovery crew somehow fished this thing out of the wreckage and kept it for himself. It sat in his home workshop up until the early '80s when he passed away. I'm not sure how my father knew him, but his wife, not knowing what to do with a non-working drill press that weighed almost a ton, offered it to him as long as he got it off her property without destroying anything. That's how it ended up in my father's shop.
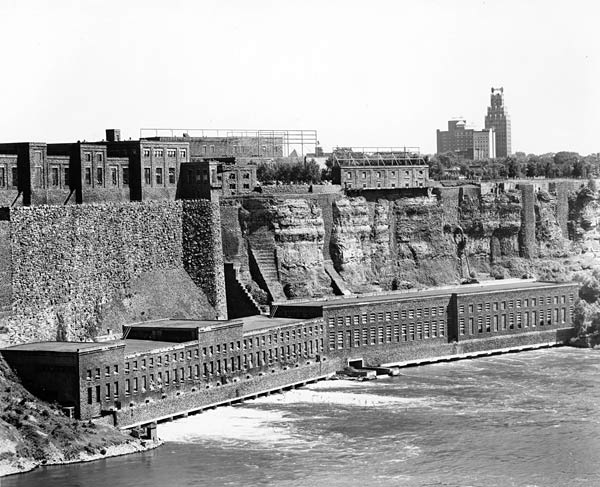
According to this Wikipedia entry, Station No. 3 was completed in 1914, so it's a good chance this drill press was put into service that year and was used by plant engineers until its collapse in 1956. I just couldn't bring myself to let my brother scrap this thing or sell it in light of its history, so I am now its new caretaker.
Another side note to this story, the power plant that replaced this one, the Robert Moses Niagara Power Plant, was a major construction project in the area that my paternal grandfather worked as a carpenter on. It was a concrete and steel structure, so I imagine he was building concrete forms or scaffolding or something. He's not around to ask any more, so all I have to go on are memories of the stories he told. I have this one memory of him that stuck with me in which I was working on a pole-barn project with him over one summer in junior high. I didn't have my high top sneakers tied as we started work, because it was what the cool kids were doing at the time. Grandpa told me this story about when he was working on that power plant, which had several deaths from falls. A foreman spotted one of his guys walking around with his shoes untied, so he called him over and apparently fired him right on the spot.
Another story he told me right after that one was about this pair of Native American brothers who were twins. He said he was down in the gorge having lunch with one of the two twin brothers. They watched in horror as the other brother picked up a sheet of plywood and fell to his death from the top of the works, falling through the hole that the plywood was covering. It was so high up that it should have killed him instantly when he hit the ground, but my grandfather said he stood up, wiped the blood off his mouth, looking like he was going to be okay, then collapsed dead.
I tied my shoes after that.
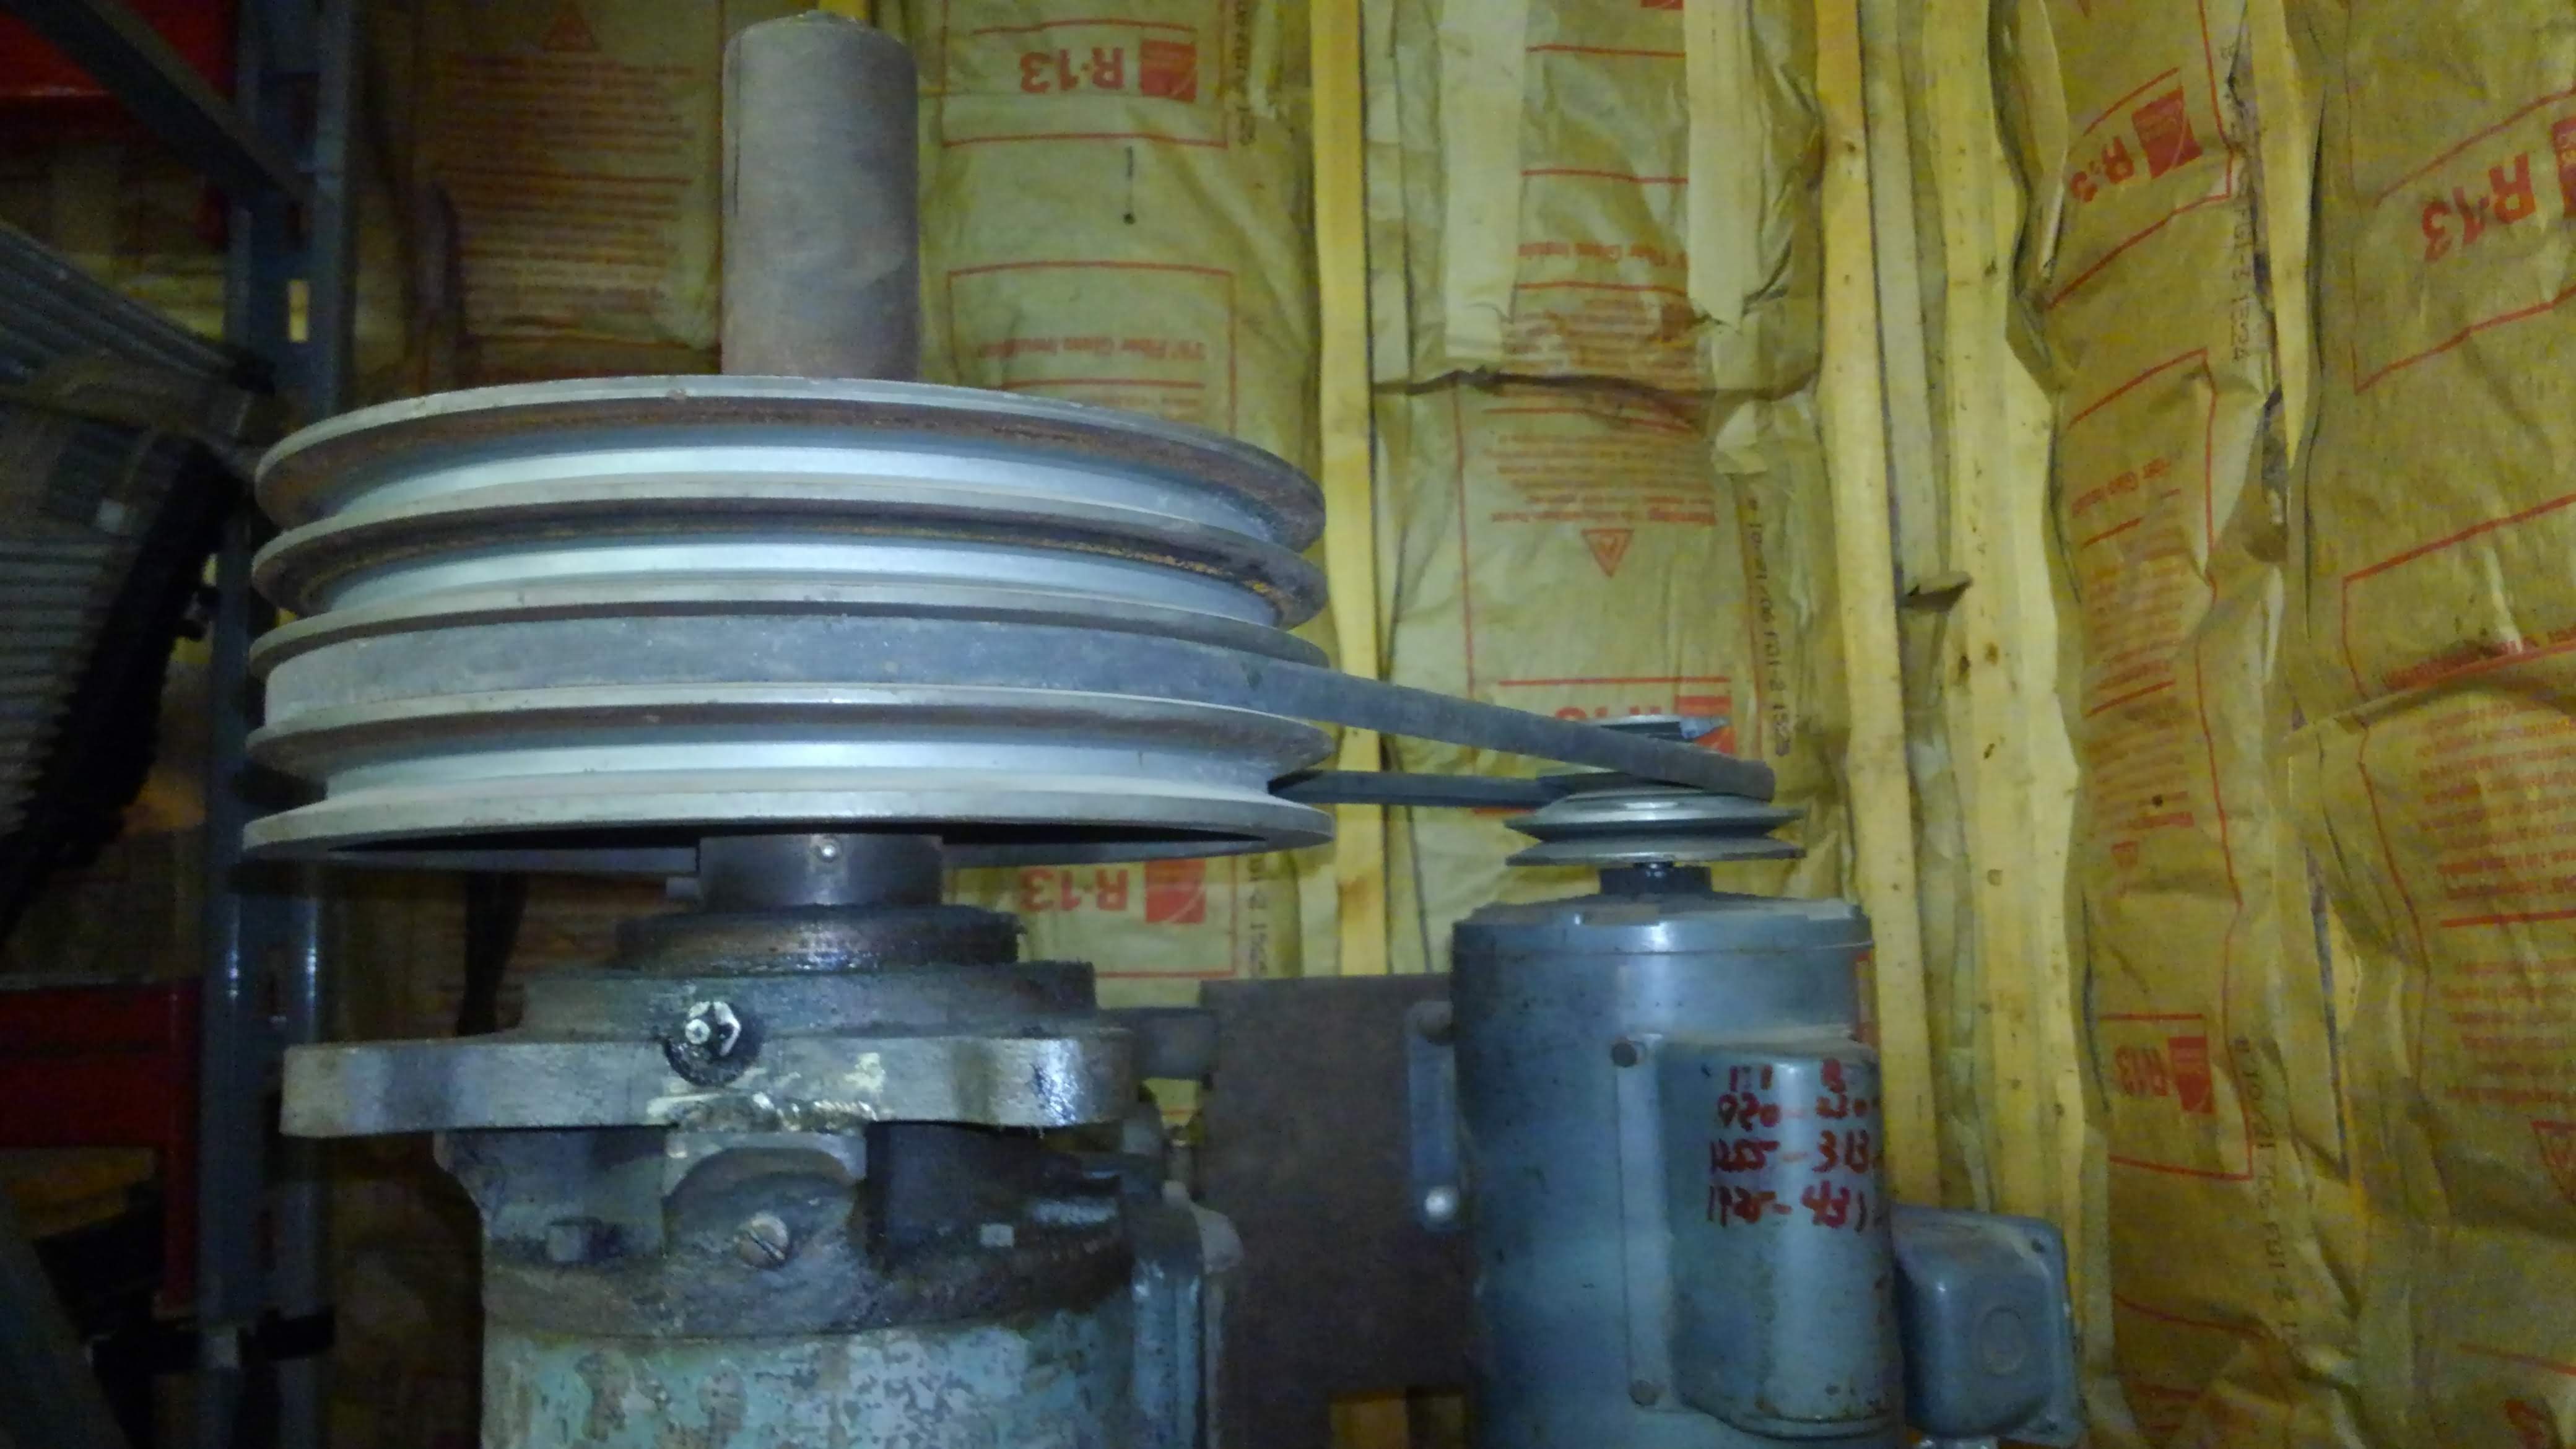
If you look at the above photo, you can see that instead of trying to repair or source a replacement for the original 3-phase motor and the old complex wiring for speed control, my father just welded a flanged bearing right on top of the main casting, then attached a 4 belt sheave using the shaft from the broken electric motor to drive the spindle. I'm making an assumption here because the only part I remember being present for was him trying to weld this thing on there with no light in the shop, my job being to hold the trouble light. I think that shaft must have come from inside the motor, because I don't know where else he would have gotten something with the proper dog teeth to engage the top of the spindle and drive it. At some point I'll pull this apart and see how it's put together. The welds I found here look exactly like they were made both by someone who was new to welding and also someone who didn't have enough light. I remember that he had gotten his first welder, one of those old tombstone looking red Lincoln arc welders, right before this project, so he wasn't exactly expert with it yet. What you see here is me having ground those welds off and re-applied my own with my wire feed welder. There's some bad run out on that pulley, which causes a vibration that eventually cracked the embrittled cast iron off of there, so my welds will probably eventually crack off as well. I intend to figure out what the problem is. If it's the spindle I'll straighten it. If it's the shafting, I might make a new piece from scratch, or try to true up what's already there with my lathe.
This is the thing that got my brother to finally give up on using this drill press, other than its heft and its large footprint. With it broken like that it needed more attention than he was willing to give to it. The business end of the spindle where the morse taper is, runs perfectly true, so I think it's doable to get rid of that runout enough on the other end to cut down on vibration and make it last a bit longer. Honestly I don't know if this is the spindle or the shafting that holds that sheave in place that's got such bad runout, but like I said I'll find out when I go in there to fix it properly.
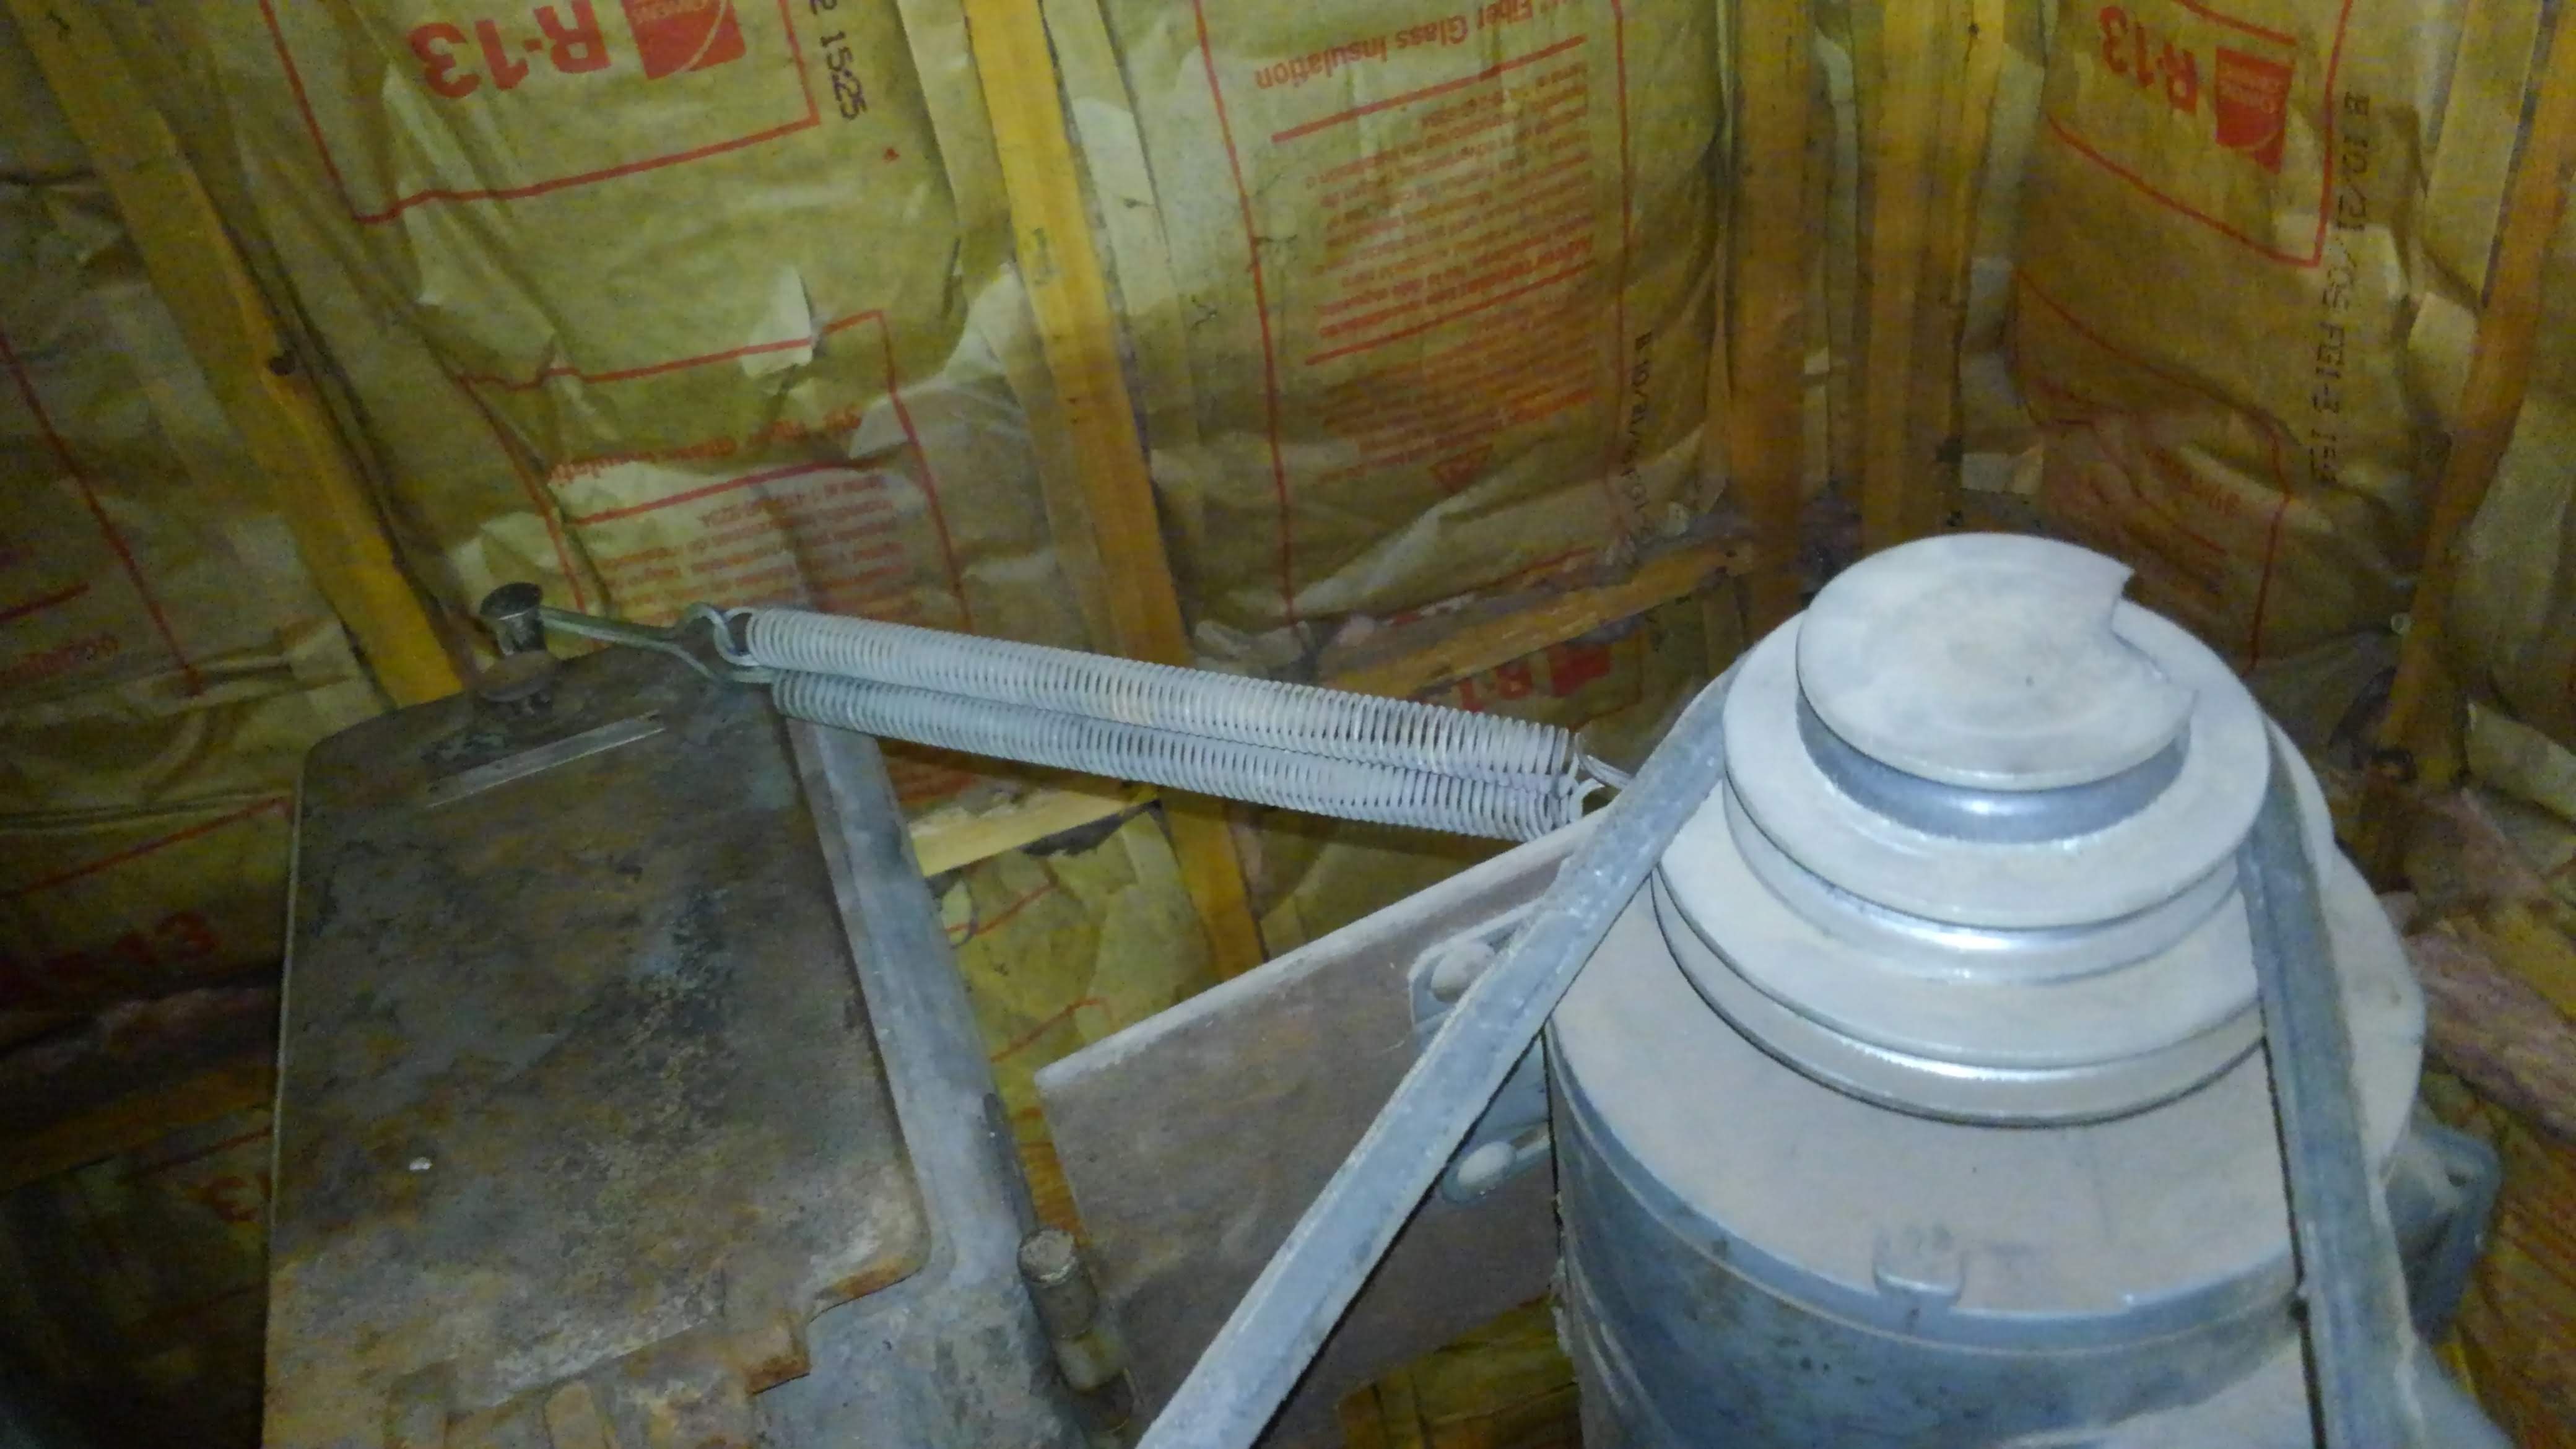
Here you can see the hinged mounting plate for a 120V 1 HP single phase motor , which can just be plugged into the wall. It needs 20 amp service though. When I first fired it up using an extension cord, it tripped the breaker on my 15 amp outlets instantly. The hinge is just a regular old steel door hinge like you would find on the front door of your house, welded to that mounting plate on one half and drilled and tapped into the casting on the other half. Because those hinge pins are removable, it's actually very convenient for disassembly if anything needs to be serviced, or in my case, needs to be moved.
Belt tension is taken care of with this pair of springs off the back of the hinged mounting plate. These springs look like they might also be from a screen door or something. Needless to say, it wasn't the most professional refurbishing job, but we were pretty poor at the time, and these were mostly parts he had laying around from other scrapped out old machinery, so it would have to do. We put this thing to work as it is over the years and it's drilled quite a few holes in everything from steel and cast iron to plexiglass and wood. It's got a 1 HP motor on it and other than it spinning a bit too fast for some of the bigger bits when drilling into tough materials, it's a beast. Just the flywheel effect of that huge sheave gives it some extra momentary torque when applying bit into a work piece.
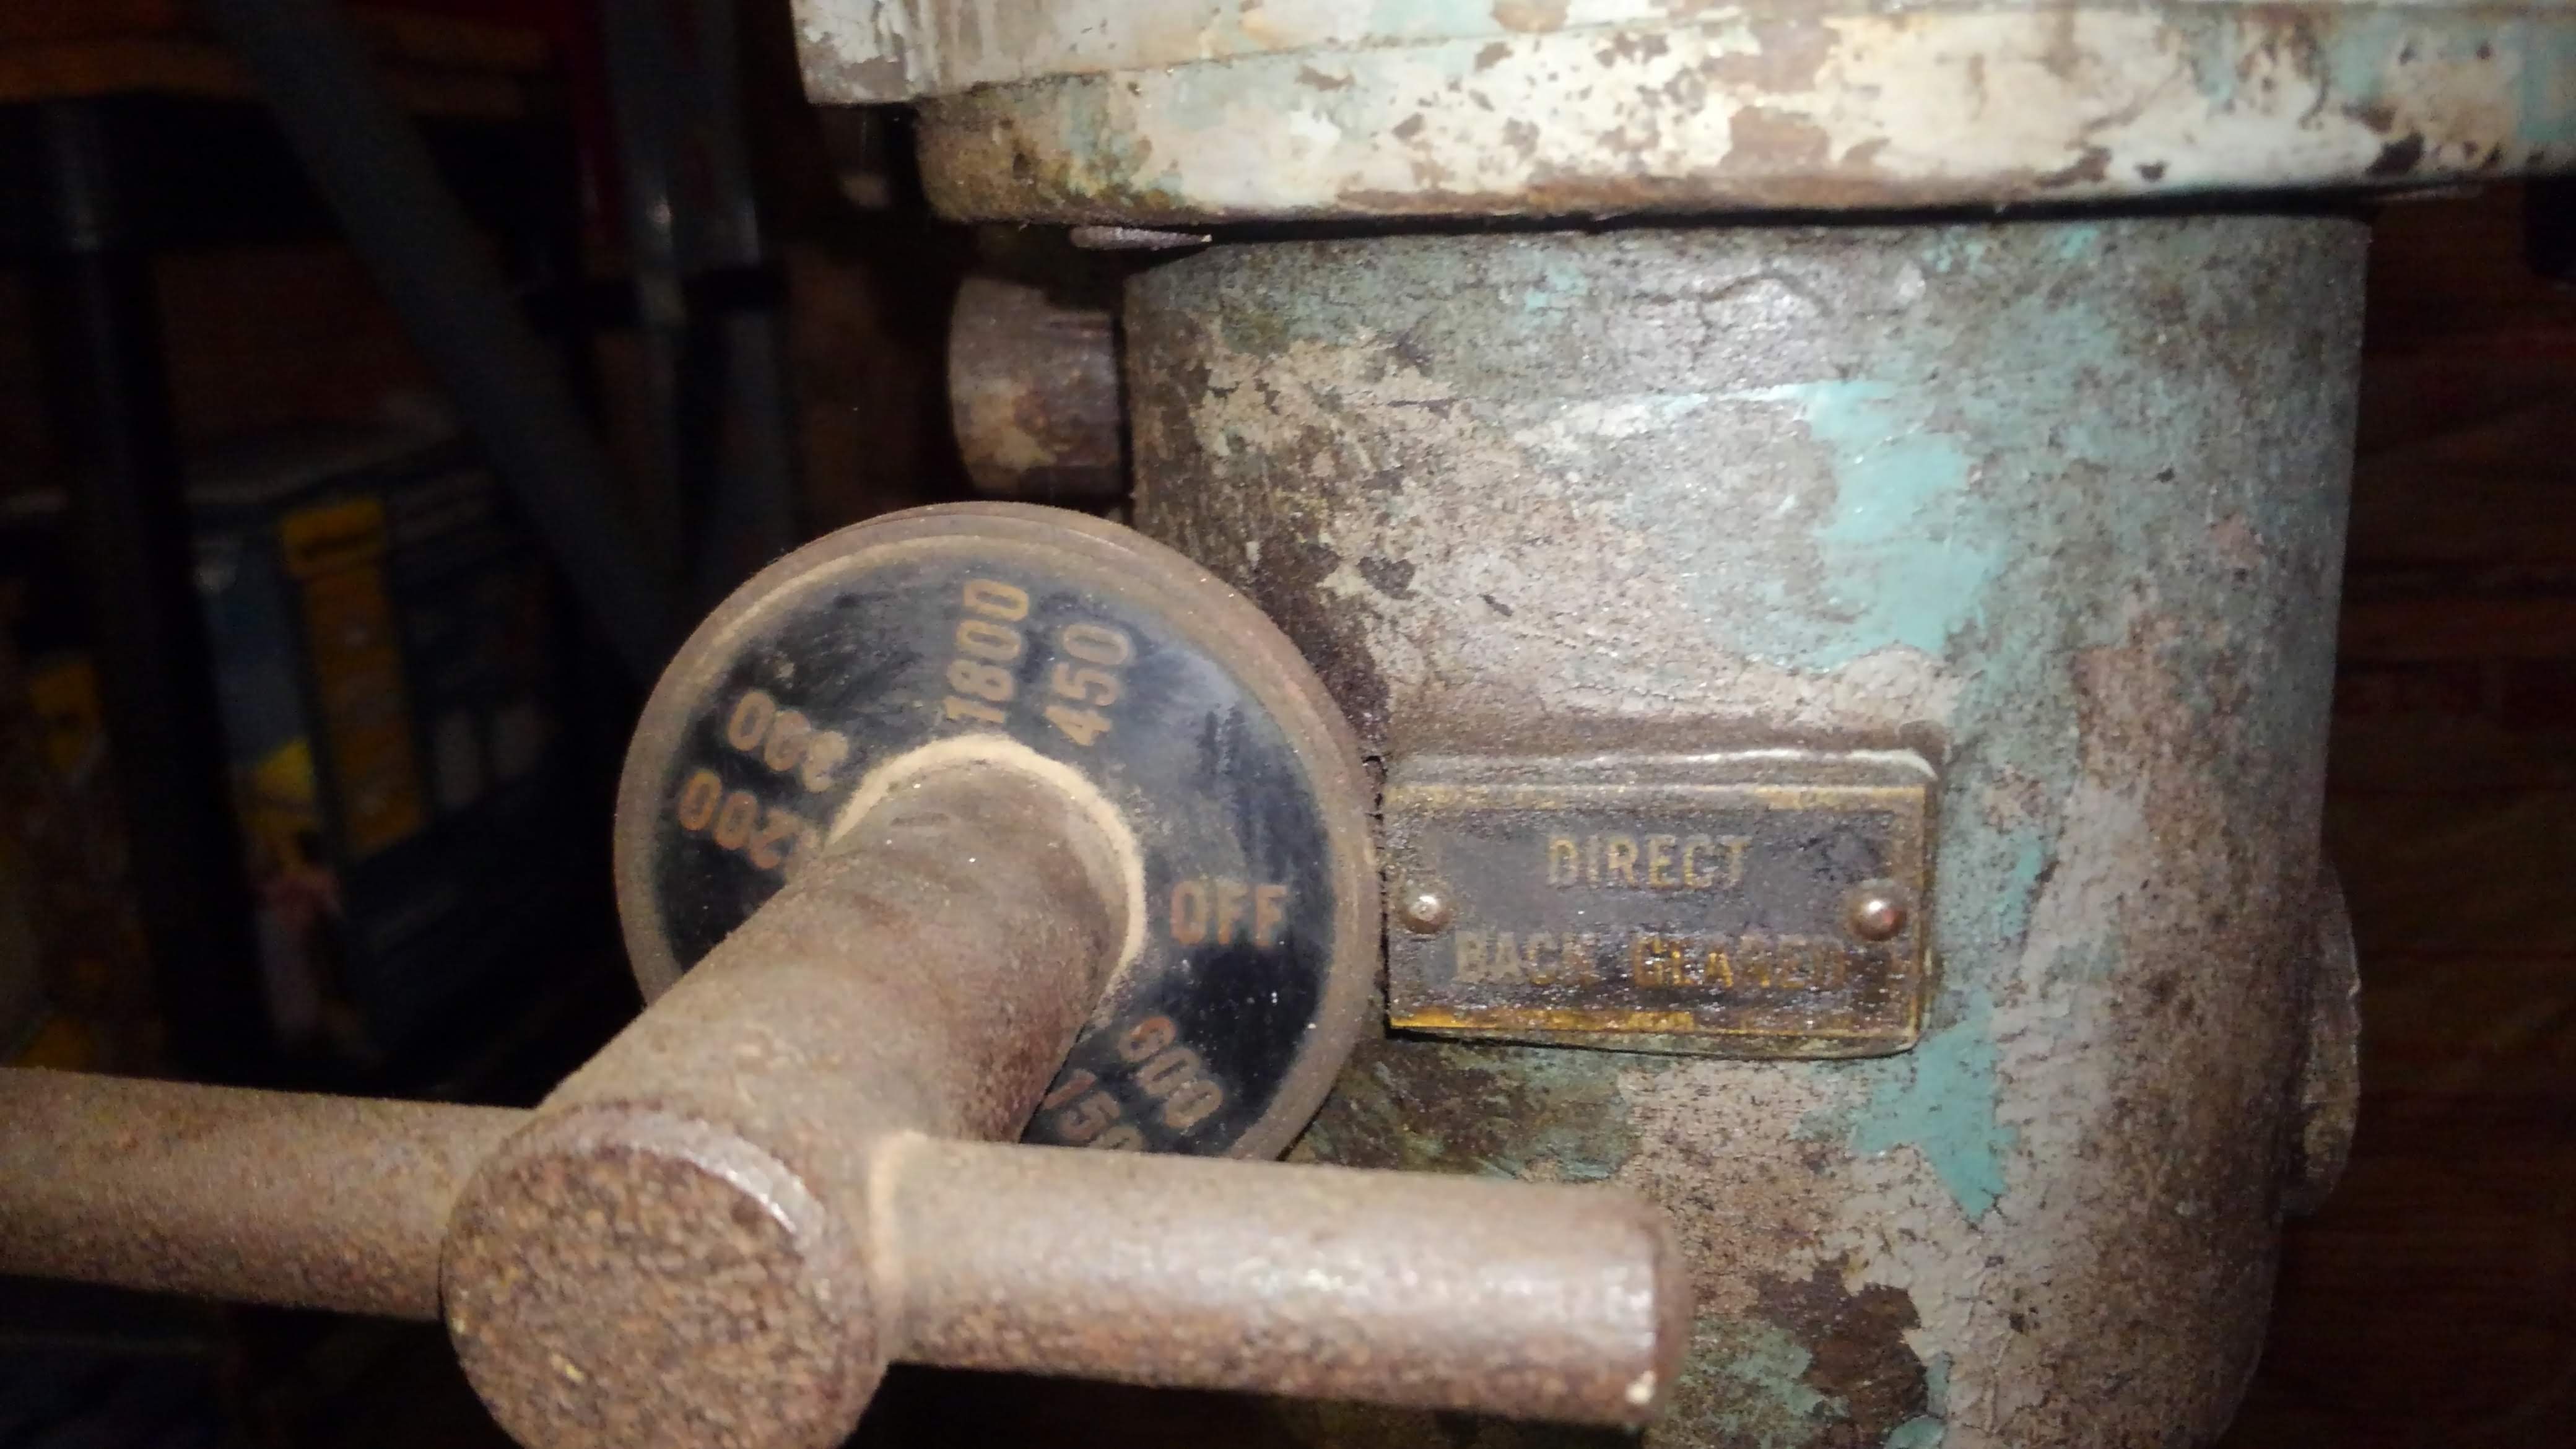
This is the old speed control I was referencing earlier. I'm not sure on how this works, but it looks to me like it's a giant potentiometer. There's a mess of wires in the back side of the housing, and this shaft you see here, which is frozen in place (I can't get it to turn by hand), extends back into that part of the housing. If this thing is mechanical, I might be able to get it working again, but I think it's electrical, and due to the limited electronics available in 1914, I think they just built a one off potentiometer right into the housing, which is indexed off this overkill solid steel shaft here.
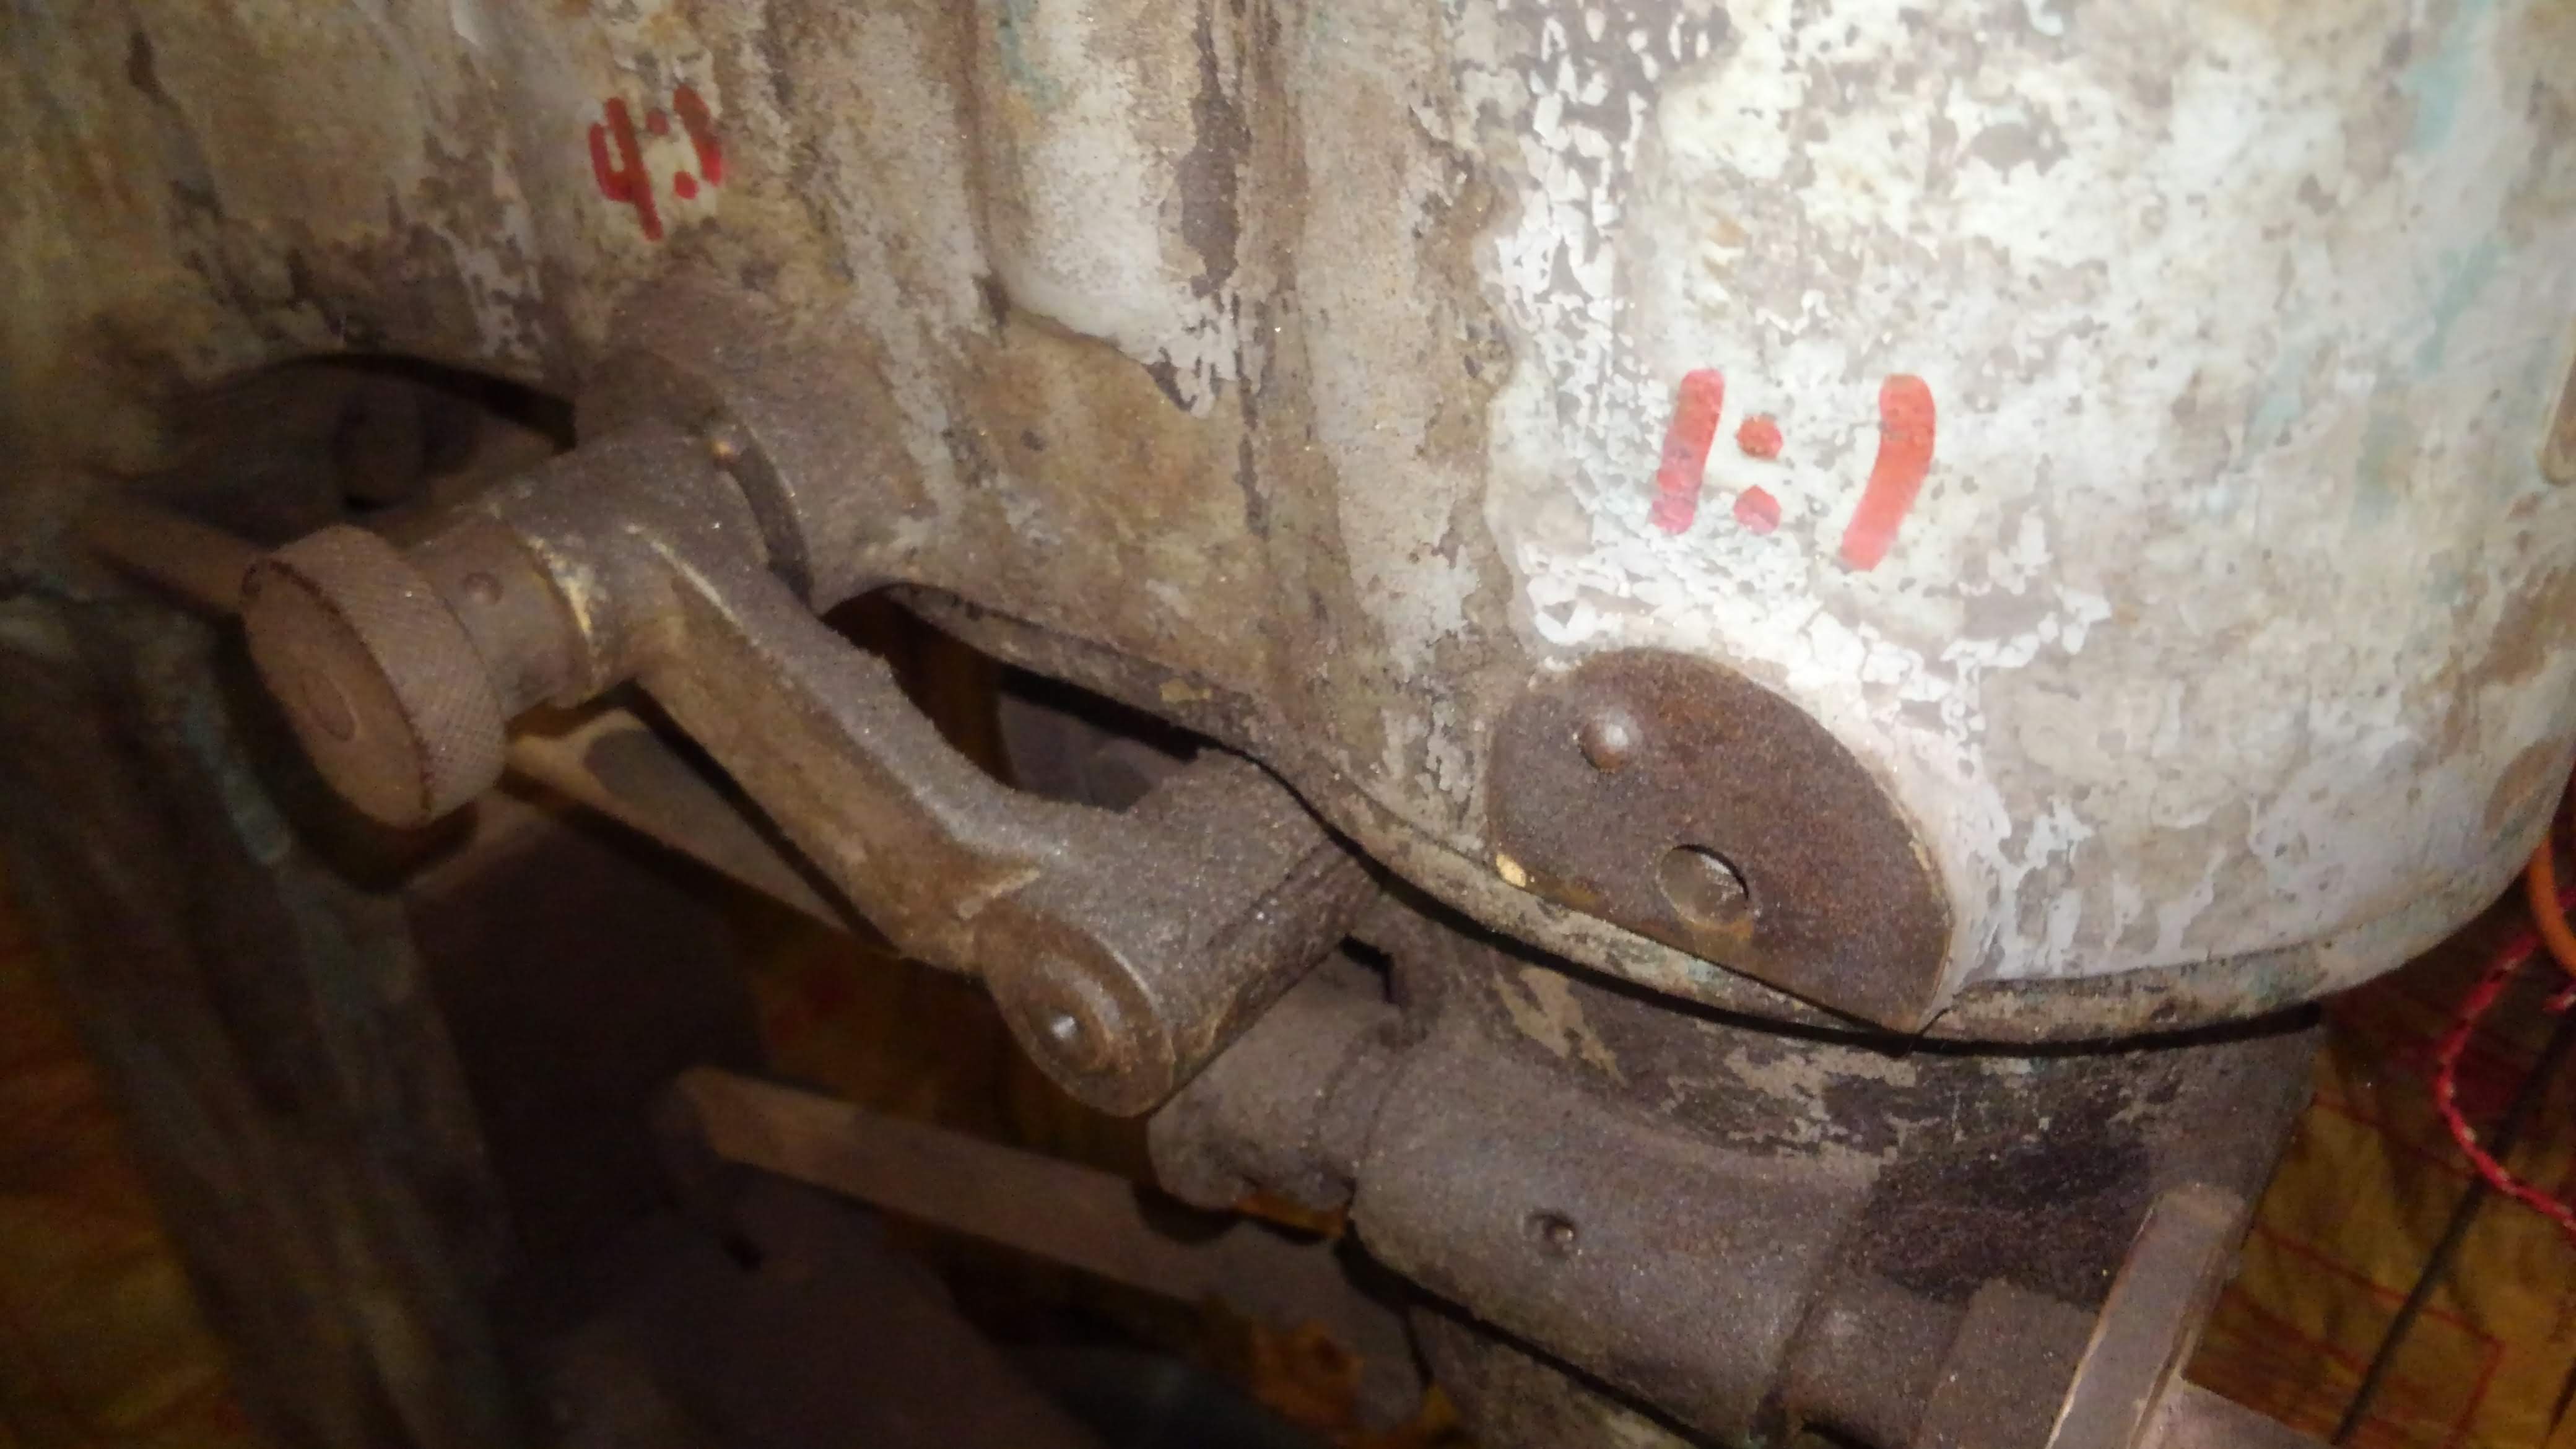
Just like a milling machine or a lathe, this thing has a back gear as well as direct drive. You can see in this picture as well as the other one of the motor that I have the gear ratios and speeds scrawled on there in red sharpie marker. It will work fine for most stuff, but even in back gear on the smallest step of the motor pulley, it's still a little too fast for drilling with the bigger inch plus bits that I'd like to use on it.
For now though, I've got a functional drill press for typical stuff in the shop, which I won't have to use my mill for. It's got some patina and a really cool story behind it, and for me it's worth having over and above a store bought drill press just for that reason. The bigger attraction to this machine for me though, is the fact that it's just so incredibly overbuilt, I could put a 3 or 5 hp compressor motor on it, mount some 2 inch bits in it (biggest I can find online), and the bearings/spindle/chuck on the machine would handle it just fine. I only ever find myself complaining when I don't have enough power at my disposal in whatever tool I'm using. It's never a problem the other way around, and this thing is about as capable as anything you'd ever be able to buy for this purpose.
Thanks for reading! Please leave a comment below if you've got any questions or just want to chat.
Unless otherwise noted with a link to the source, all images are taken and owned by me.
The rewards earned on this comment will go directly to the person sharing the post on Twitter as long as they are registered with @poshtoken. Sign up at https://hiveposh.com.
Congratulations @randr10! You have completed the following achievement on the Hive blockchain and have been rewarded with new badge(s) :
Your next target is to reach 1500 comments.
You can view your badges on your board and compare yourself to others in the Ranking
If you no longer want to receive notifications, reply to this comment with the word
STOPTo support your work, I also upvoted your post!
#posh