If you are interested in learning how to use solidworks then begin here... I will start off with the basics of how to draw simple shapes and we will eventually dive into the deep end and I will show you how to surface complex models. Lets set these out in 3 stages Beginner - Intermediate and Advanced. I may try out different ways of presenting these tutorials as in text and images or videos. We will see how it goes and see what people prefer, so please let me know in the comments.
Lets begin.
When you first start solidworks you will want to go to file new. Then open a new part. You will then come to the screen below:
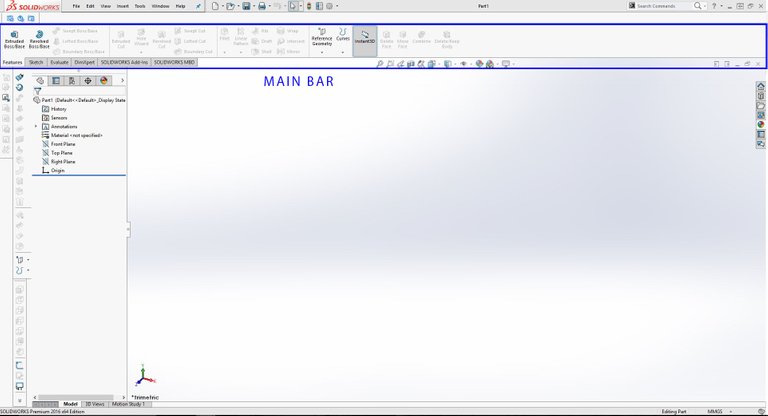
The area highlighted is the main bar where you find all your tools to help you model.
To get started the first thing you always have to do is create a sketch. To do this click on the sketch tab (next to the features tab).
You then want to click on the sketch icon in the left corner. After this select a plane that you want to sketch on.
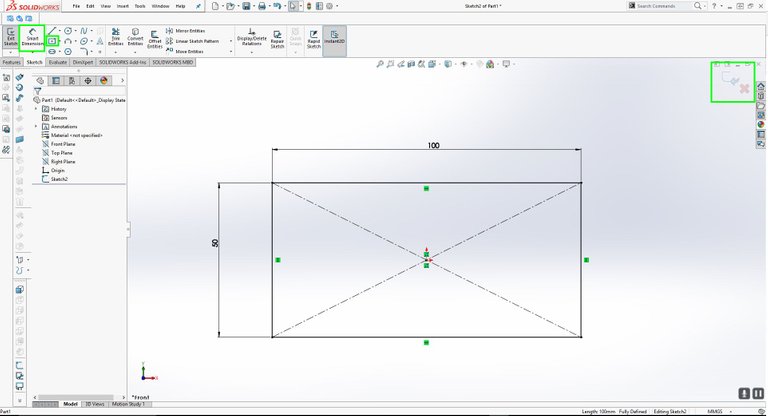
Lets take the front plane. Select the rectangle tool (highlighted in green below). Click the mouse down and draw a rectangle.
Then select the Dimensions tool (highlighted in green) and click from one line to the other to set a dimension.
Exit the sketch on the far right hand corner (highlighted in green).
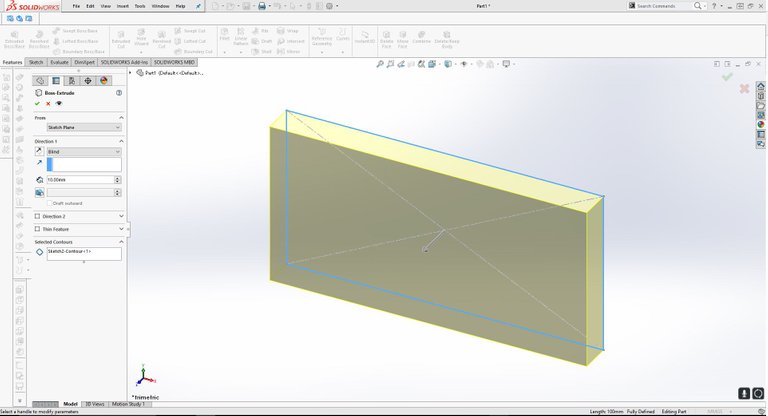
7 . Now click on the features tab in the far left corner. Click the extruded boss/base button and then click on your sketch in the main window. You will then come to the screen below where you can set the length of your box. Lets make it 10mm. Click done in the top right corner.
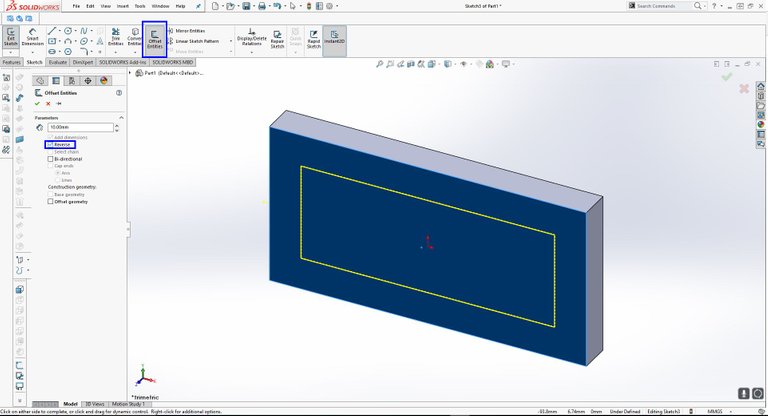
8 . Click on the face of the box and go back to the sketch button (top left).

9 . Now lets offset the entities to the middle of the box 10mm (highlighted in blue). You may need to reverse the offset (highlighted on the left hand side in blue) See below:
10 . Now click done on the top right and exit the sketch again in the top right. Lets go back to the features tab and select the Extruded Cut button. Select your sketch once again and lets cut through the box.
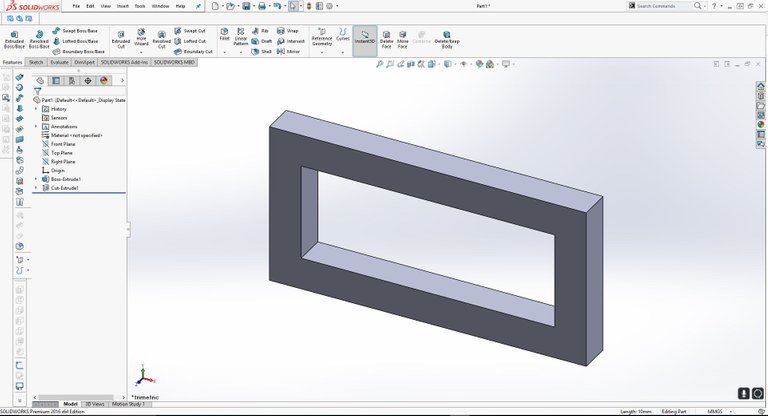
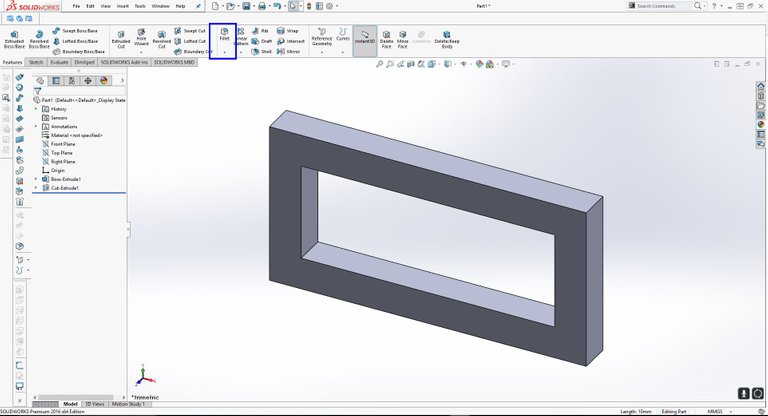
11 . Click done on the feature. Now lets create some fillets. Go back to the fillet tab and click the fillet button (highlighted below)
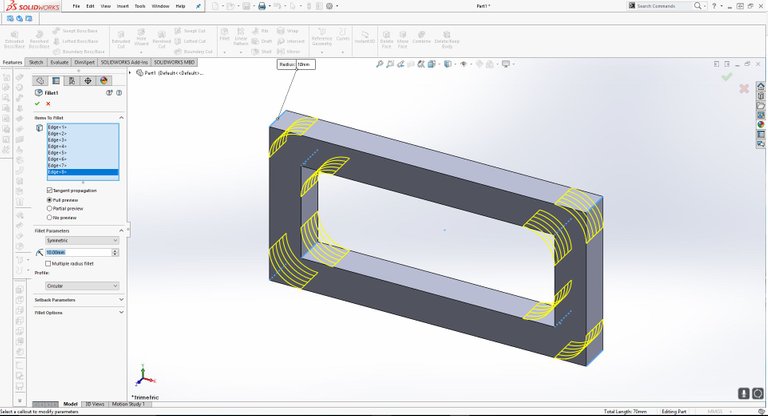
12 . Now lets click on the corners inside and out. Make the fillet 10mm.
13 . Click done. Maybe you can repeat this process with a smaller fillet on the rest of the corners to get the result below:
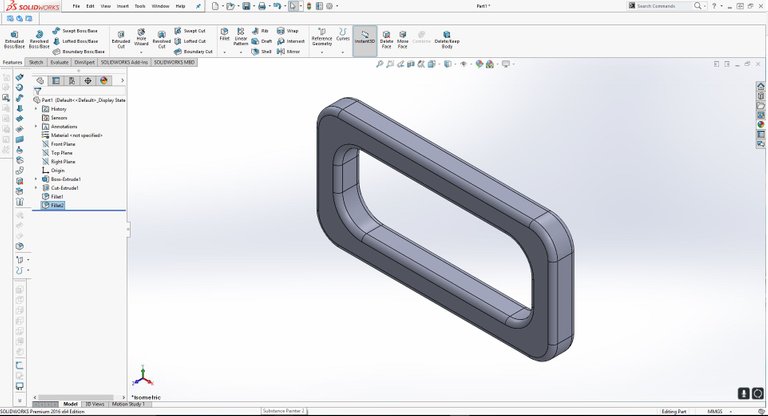
That's it for the first tutorial, we have covered the basics of sketching boxes and using them for cuts and extrudes. I hope this was helpful. Please give me feedback and upvote if you like my content! Plenty more to come. Thanks!
Congratulations @xo3d!
Your post was mentioned in my hit parade in the following category:
wow love that. I know 3d max . solid works interesting . a time I got solid works big project. But no one can not help me. nice to know you know it.
That's great I am looking to learn 3d max in the near future. I would like to use it with V-Ray as I am into rendering as well.
nice
Wow congrats on being listed on Daily Hit Parade for Beginners. I love how straightforward you present your tutorial. I personally don't think I have a use for SolidWorks, but it's always nice to see what's happening in relevant fields.
I too was featured for my black and white photo contest entries. I have followed your account.
Together, let’s build a wonderful
💙 Steemit Community 💙
Have a great day!
Thanks for letting me know and cheers for the feedback! I have followed you back and upvoted your work.
Wow. So awsome. Thx for sharing. Followed and upvoted