Steemit Blog Post Layout –
How to make your posts stand out from the rest

So you can write?
But you are struggling with the layout a bit?
Don’t worry, with these handy tips, you can turn your Steemit blog post into something spectacular.
Let’s be honest, blogging isn’t easy. At first you have to find your niche. Then find topics to write about in that niche. After spending hours figuring out if your grammar is correct, you have composed your masterpiece and it’s time to present it to the world.
You open the Steemit site, click on the green-cyan/turquoise “POST” sign and paste your script. Add some large images that fill the whole width. Add your footer, tags and hit the “POST” button again.
Now comes the exciting part to see how much user interaction and $$ your crypto creating content will generate.
But...
What if you could stand out from the crowd a bit?
Luckily there are some different ways, but you will have to learn the quick basics of HTML.
Don’t be afraid of it, it’s very easy.
It might seem bit time consuming, yes. Is it worth it? Oh definitely! This method is suggested to be used only if you post via a laptop/desktop computer, though. It will be easier via laptop/desktop, in my personal opinion, but putting in that extra effort will go a long way in the end.
Basic Post Layout
When you think about your blog post when writing it, you have to think about how you want to present it to the world. Will I have a large image at the top? Do I want a smaller image on the side and text next to it?
Here are three examples:
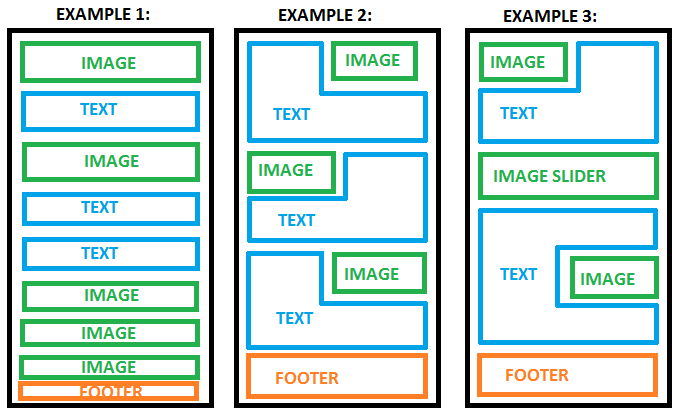
The second example can be used for story or information posts
The third example can be used for DIY or food blogs
Where do we find the HTML code when writing our blog posts on Steemit?
- Click on “POST”
- Type something into the body
- “Markdown” will change to “Raw HTML”
- Click on “Raw HTML”
Your post layout will change to the html code with a live review below it. I have yet to learn and try Markdown styling, but I find that I have more control of my post when I work with the html code directly.
When you see the following code, you will know that what you did was correct:
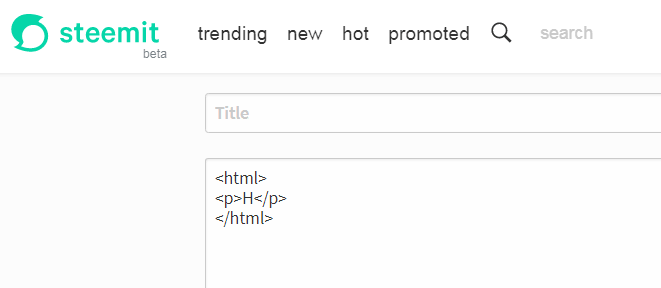
What you are seeing now is the pure basic form of html. It has an open tag with <html> in it to state the type of document to the browser and at the end a closed </html> tag.
Each tag has to be opened and closed. You can see the same with the <p> tag which is for a paragraph and the <h> tag inside. You open the paragraph and you close “/” the paragraph.
When I compile my post, I will divide it into a couple of paragraphs. Yes, I know it’s not necessary, but it’s how I lay the code out in my mind. It prevents me from becoming confused and allows me to concentrate on a specific code section at a time.
How to create layout 2:
Ok, let’s give the half page image and neighboring half page text layout a try.
This layout is best for desktop view. On mobile the images might look a tad on the smaller side.
Below are two examples of the view on my mobile. The first one (left) was taken from the @steemapp and the second one from Google Chrome for iPhone 6.
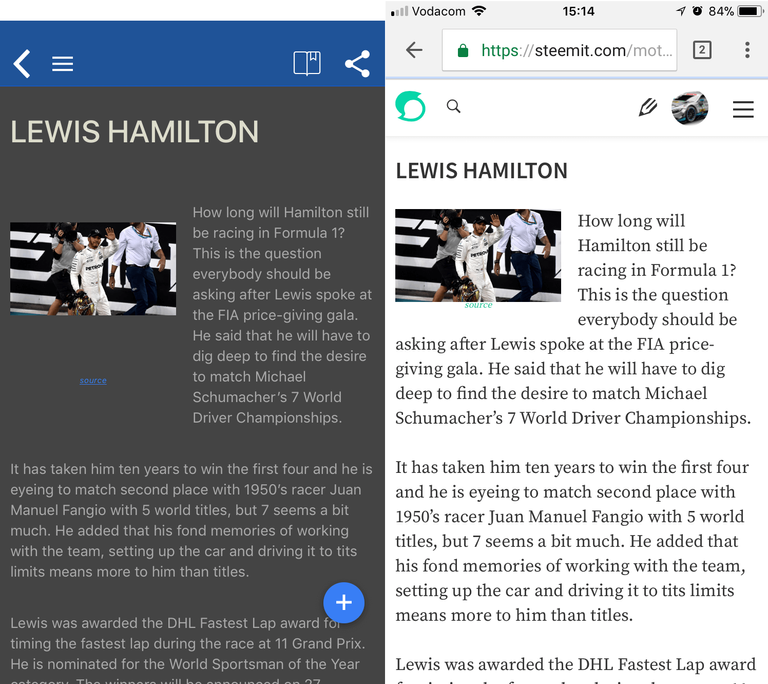
As you can see, it’s best to stay away from images that have high amounts of detail, which you want your reader to concentrate on for some specific reason. Low attention, but vibe creating images to boost the message of your post in a more professional way is the best to aim for.
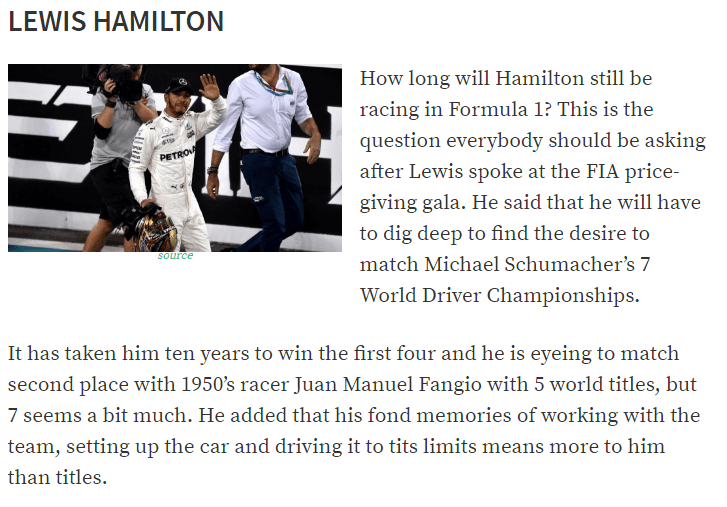
Let’s say that for this example, our post is about Lewis Hamilton. So we start with the open <html> tag, then the largest open header tag available <h1> followed by the post name.
CODE
<html>
<h1>LEWIS HAMILTON</h1>
</html>
RESULT
LEWIS HAMILTON
There are six different heading tags available for html. You can check them all out here or try them out yourself <h1><h2><h3><h4><h5><h6>. The html editor on @steemit is live. Whatever you edit at the top will have changed by the time you have scrolled down.
For SEO (Search Engine Optimization) purposes, it’s never suggested to mix your <h> tags. Don’t use <h1>, <h6>, <h3> etc. Keep them in an orderly fashion. <h1>, <h2>, <h2>, <h3>, <h3>, <h1>, <h2>, <h3>, <h2>, <h3>, <h4>, <h3>, <h4> etc. Think of the <h> tags as the index of a book. Use this index method as a way to lay our posts out. Hence, the name header tag.
Normally the header tag is on the left hand side of the page. If you want it to be in the middle, I use the following code to accomplish it:
CODE
<html>
<p><center><h1>LEWIS HAMILTON</h1></center></p>
</html>
RESULT
LEWIS HAMILTON
Notice how you close the tags in the reverse order of which you opened them. The last tag you opened is the first one you close again. You always close you code up and lock it in when you are done with it.
To add the image to the left hand side, we have to add it before we add our first text paragraph. We are going to use the <div> tag to package it and pull it to the side of the page. When we do this, it shrinks to a quarter of the original image size. The height and width of the image both halved in size.
So let’s add the code to our existing code:
CODE
<html>
<p><center><h1>LEWIS HAMILTON</h1></center></p>
<div class="pull-left">
<center>
<img src="https://www.YOURIMAGELINKHERE.com/" />
<br>
<em><a href="LINK TO IMAGE SOURCE WEBSITE"><sup><sup>source</sup></sup></em></a>
</center>
</div>
</html>
Now your image should display on the left side of your page after you scrolled down to your live view at the bottom of your “Raw html” document:

If you want the image to be on the right hand side, change “pull-left” to “pull-right”
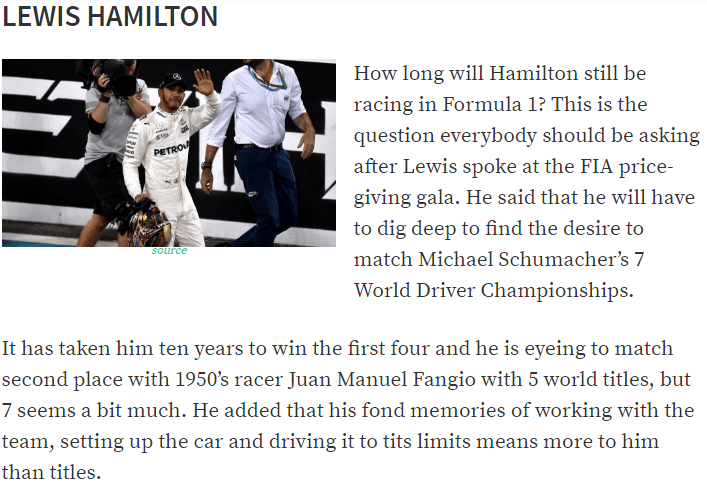
Next step is to add your first paragraph. Keep it short, otherwise it will hang over at the bottom like mine did. To add the first paragraph, we are going to use the <p> tag.
CODE
<html>
<p><center><h1>LEWIS HAMILTON</h1></center></p>
<div class="pull-left">
<center>
<img src="https://www.YOURIMAGELINKHERE.com/" />
<br>
<em><a href="LINK TO IMAGE SOURCE WEBSITE"><sup><sup>source</sup></sup></em></a>
</center>
</div>
<p>YOUR FIRST PARAGRAPHT TEXT COMES HERE</p>
<p>YOUR SECOND PARAGRAPH TEXT COMES HERE</p>
<p>YOUR THIRD PARAGRAPH TEXT COMES HERE</p>
</html>
You have officially created your basic layout!
All you have to do going forward is to copy the <div> code into your post, choose which side of the page, add the link to your image and don’t forget to add the source if you don’t own the image. If you do own the image and don’t want to link to a personal or specific portfolio or account, delete the <a href section and only use:
CODE
<html>
<p><h1>LEWIS HAMILTON</h1></p>
<div class="pull-left">
<center>
<img src=" https://www.YOURIMAGELINKHERE.com/" />
</center>
</div>
</html>

If for some reason you want your image to be a clickable image, but still looks like the image above, use the following code:
<div class="pull-left">
<center>
<a href="https://LINK-TO-WHERE-THE-USER-MUST-GO-TO">
<img src="https://www.YOUR-IMAGE-SOURCE.com/" />
</a>
</center>
</div>
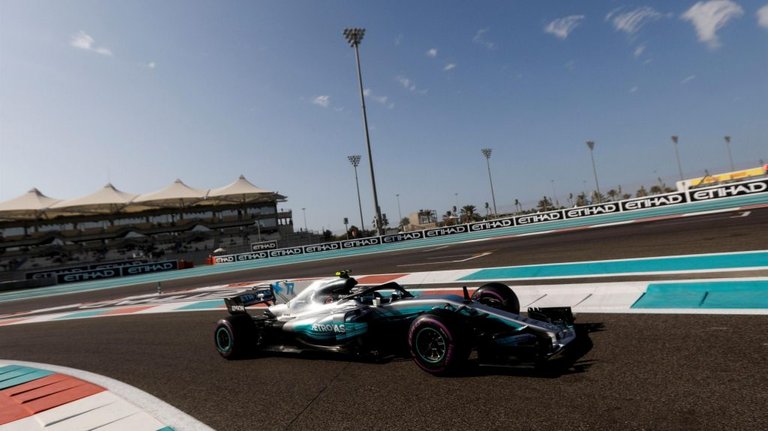
How to create layout 3 - Image Slider
For layout three, we are only going to concentrate on the image slider of things. Sometimes you want to keep things the old original large image way, but what if you can add an interesting twist to it?
The slider images can be used to display random images pertaining to your post, e.g. bunching images together, to help give more life to your post or to be used as a step-by-step method. Cooking, diy, any type of step by step guides!
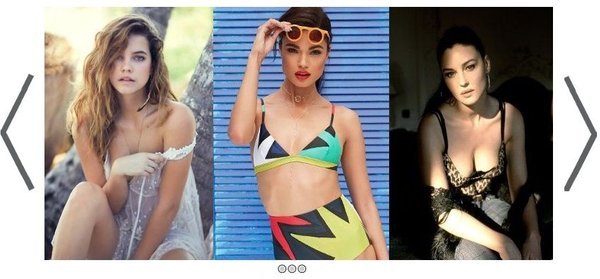
Here is an example of the image slider:
SLIDE LEFT TO RIGHT FOR IMAGES
 |
|
 |


CODE
</table>
</td> </pre></img src="LINK-TO-IMAGE-1" /></img src=" LINK-TO-IMAGE-2" /></img src=" LINK-TO-IMAGE-3" /></img src=" LINK-TO-IMAGE-4" /> <//pre> <//td>
<//table>

How to set up your Previous Posts list
Oh yeah, if you are still with me, BONUS! You will like this idea…
If you are a regular @steemit publisher, this will aid you in not only gaining followers, but help with up votes on recently published items alike. It can be used to emphasize important posts, previous work or anything that flows your mojo.
Whatever tickle your beans.
The images I used dimensions were all 150 x 84 and it did the trick nicely. You should be able to go higher than 84px, but try so keep the width at 150px.
I could only get this to work after my signature and at the very end of my post. If I put it before my signature, it pulls it in to one of the columns, even though the code shows that it’s closed.
Maybe someone can shed some light on this?
Here is an example of the previous posts (only use at the end of your post, after signature!). Example is an image, click HERE to see it live in action:

CODE
<p><div><table><thead>
  <tr>
    <th><center><a href="https://LINK-1"><img src="http://LINK-1-IMAGE" alt="img"></a><br><h4><a href="https://LINK-1"><center>POST NAME<br>HERE AND HERE</center></a></th>
    <th><center><a href="https://LINK-2"><img src="http://LINK-2-IMAGE" alt="img"></a><br><h4><a href="https://LINK-2"><center>POST NAME<br>HERE AND HERE</center></a></th>
    <th><center><a href="https://LINK-3"><img src="http://LINK-3-IMAGE" alt="img"></a><br><h4><a href="https://LINK-3"><center>POST NAME<br>HERE AND HERE</center></a></th>
    <th><center><a href="https://LINK-4"><img src="http://LINK-4-IMAGE" alt="img"></a><br><h4><a href="http://LINK-4"><center>POST NAME<br>HERE AND HERE</center></a></th>
   </tr>
</thead></table></div></p>
It's not beautiful, but it works! Every time I try to neaten it up, the code breaks. If you have an easier method, please post it in the comments below.
Thank you for taking the time and that you stuck with me through this. It might seem very daunting at first, but you will see that in the end, it’s the best to have as much control over your post as possible.

Team South Africa banner designed by @bearone
Very informative post about using html in steemit @darnscotty the only thing I have not found that does not work in markdown is right or left image display (will only work using html).
I think I have seen some bloggers combine both markdown and HTML code in their posts. Can you do this in markdown?
Yeah... I found markdown lacking a lot too and so I use a mix of HTML and markdown in my formatting. Unfortunately, the two don't always play nicely together, and this "RAW HTML" option is totally gonna make my life so much easier! THANK YOU!!!
If Steemit had a double-upvote button, I would have used it on this post!
Thank you @braaiboy, appreciated. I will have to grab some tips from you for markdown...
Great information. As a new user I am always looking for ways to make my posts stand out and garner some attention. Not an easy task by any means. I love knowing that I have the ability to alter the layout. I’ve been using just straight paragraphs with inserted images separating. The wrap around text is a wonderful option. I might have to read this post a few more time to truly understand how but it is exciting! Thanks
Hey @broncofan99, I am glad that I could help someone at least. It makes the time spend worth it. Other people's posts helped me, it was time to give back to the community. The half image and wrap around text does look good, but take mobile layout into consideration. The images will be very small. If you are using an image to display important info, I suggest keeping it full width.When you have time,visit @motorsport on your mobile and see the layout of one of the posts on your cell phone.
I am planning to release a post this week about how to find HTML code that interests you. You can visit a Steemit blog post, inspect it and use their code. No, it's not illegal :) @darnscotty
This post has received a 4.63% upvote from thanks to: @darnscotty.
For more information, click here!!!!
Send minimum 0.050 SBD|STEEM to bid for votes.
Do you know, you can also earn daily passive income simply by delegating your Steem Power to @minnowhelper by clicking following links: 10SP, 100SP, 500SP, 1000SP or Another amount
I am also one of those that work solely in markdown! HTML could come in handy if one could create some sort of a combination! But any errors in this regards will create a lot of wasted posts, or errors? Blessings and Upvoted!
Congratulations! This post has been upvoted from the communal account, @minnowsupport, by darnscotty from the Minnow Support Project. It's a witness project run by aggroed, ausbitbank, teamsteem, theprophet0, someguy123, neoxian, followbtcnews, and netuoso. The goal is to help Steemit grow by supporting Minnows. Please find us at the Peace, Abundance, and Liberty Network (PALnet) Discord Channel. It's a completely public and open space to all members of the Steemit community who voluntarily choose to be there.
If you would like to delegate to the Minnow Support Project you can do so by clicking on the following links: 50SP, 100SP, 250SP, 500SP, 1000SP, 5000SP.
Be sure to leave at least 50SP undelegated on your account.
I'm a bit new to markdown and I know nothing about htlm. Such posts are very helpful in helping people such as myself to learn something new each time.
Looks like we are in the same boat when it comes to markdown! Lol
hey @solomonsel, come to my blog,
Make Image Slider ❮📸📸📸❯ on Steemit 🅱eginer's guide to 🅰dvanced
Wow excellent
This post has received a 10.91% UpGoat from @shares. Send at least 0.1 SBD to @shares with a post link in the memo field.
Invest your Steem Power and help minnow at the same time to support our daily curation initiative. Delegate Steem Power (SP) to @shares by clicking one of the following links: 1000 SP, 5000 SP or more. Join us at https://steemchat.com/ discord chat.
Support my owner. Please vote @Yehey as Witness - simply click and vote.
This post has received a 0.56 % upvote from @booster thanks to: @motorsport.
This post has received a 20.00 % upvote from @sleeplesswhale thanks to: @darnscotty.
This post has received a 2.37 % upvote from @boomerang thanks to: @motorsport
Depending on the type of post, I usually combine HTML and Markdown.
I will try referencing my previous posts as shown and see how it turns out.
hi, @darnscotty , i think you get inspired from my posts, I am happy for it, but it will be better to add my reference link of my post.
would you share more simple multi-columns code?
yes, sure. sharing is caring
Hi @ladyluck, I cannot seem to edit the blog post anymore. So your post HERE inspired me, but some of your code did not work for me and I had to change it to suit my post. I had to inspect the page to understand the html you used better. This is where I noticed that you used a combination of Markdown and HTML, where my post concentrated on HTML only. I will remember to add every link to every post that inspires me to write a post in the future. It might be a lot of links...
Congratulations @darnscotty! You have completed the following achievement on the Steem blockchain and have been rewarded with new badge(s) :
You can view your badges on your Steem Board and compare to others on the Steem Ranking
If you no longer want to receive notifications, reply to this comment with the word
STOPDo not miss the last post from @steemitboard:
Vote for @Steemitboard as a witness to get one more award and increased upvotes!
Congratulations @darnscotty! You received a personal award!
You can view your badges on your Steem Board and compare to others on the Steem Ranking
Vote for @Steemitboard as a witness to get one more award and increased upvotes!
Hi! Apologies for popping onto your comments but have called out to most people on a post with very little feedback. I have just launched the new @steemsouthafrica account and discord server and would be thrilled to have you join us! We are trying to build up some SA STEEM momentum again – organising regular meet-ups etc. If you are interested, you can hop onto the new server HERE – hope to see you there soon! Oh, and you are welcome to start making use of the #steemsa tag on your posts so that we can support them with an upvote and resteem!
JOIN US ON TWITTER