
The EOS Nation Utility Guide for MyEOSKit is finally out for you, community members!
Here, you will find a complete walkthrough on how to interact with MyEOSKit web application. From creating a new account to how to stake your tokens, this utility guide will guide you step by step through everything you need to know right from the start. If you have any question or suggestion, we invite you to leave us a comment at the end of this post.
You can have access to MyEOSKit web application from EOS Asia here!
THIS WEB INTERFACE APPLICATION REQUIRES SCATTER
Here is our complete utility guide for Scatter
ATTACH YOUR SCATTER IDENTITY
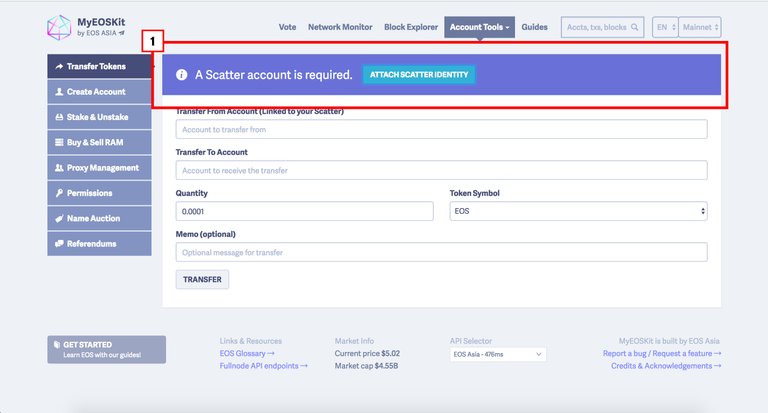
1- Click on “Attach Scatter Identity” action key to interact with the MyEOSKit web application
MAIN DASHBOARD
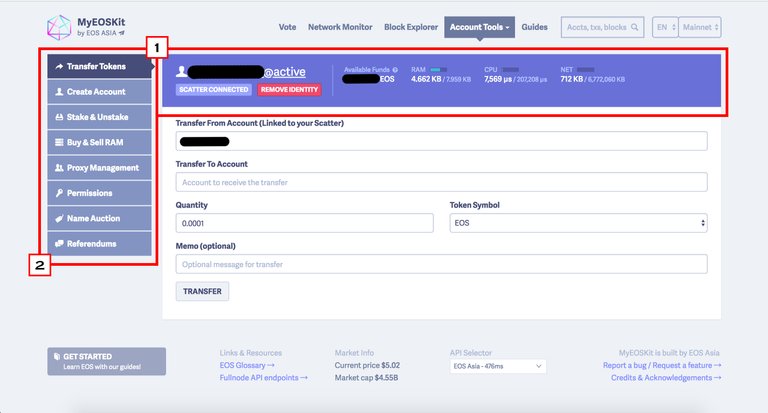
1- Your account dashboard with all the general information on your account attached to your Scatter identity.
2- Navigation tabs
TRANSFER TOKENS
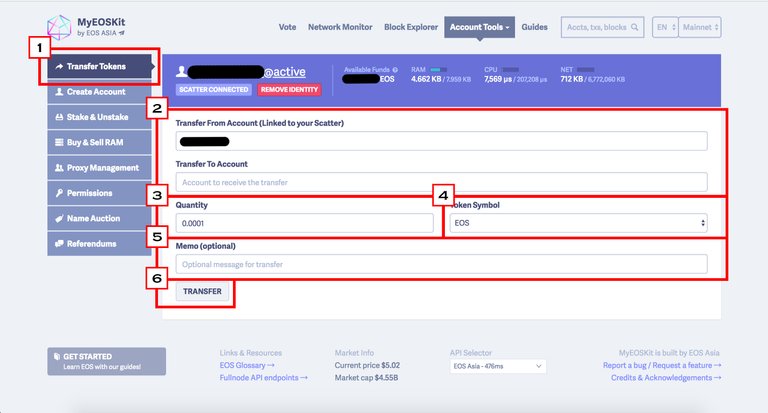
1- “Transfer Tokens” tab
2- Enter to which account you want to transfer tokens
3- Enter the quantity of tokens you which to transfer
4- Select which tokens you want to send
5- (optional) Enter the memo that you want to send with your tokens transfer
6- Click on the “Transfer” action key to sign the transaction with Scatter
ACCOUNT CREATION VIA EXCHANGE WITHDRAWAL
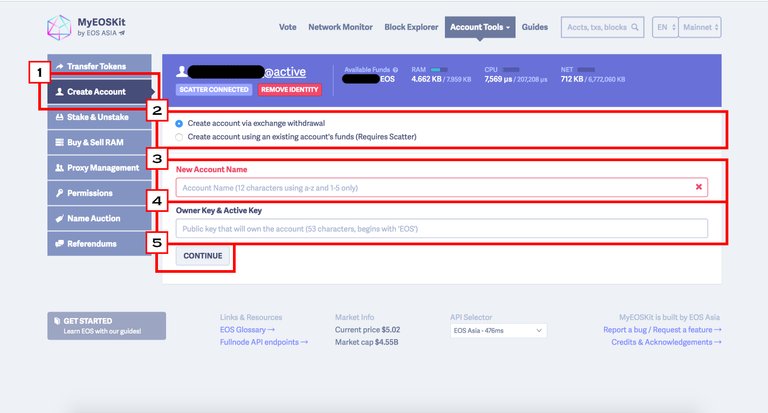
1- “Create Account” tab
2- If you want to CREATE an account via an EXCHANGE WITHDRAWAL, select this option
3- Enter your account name
4- Enter the “Active Key” and the “Owner Key” of the account that will be associated with this new account
5- Click on the “Continue” action key to sign the transaction with Scatter
ACCOUNT CREATION VIA EXISTING ACCOUNT
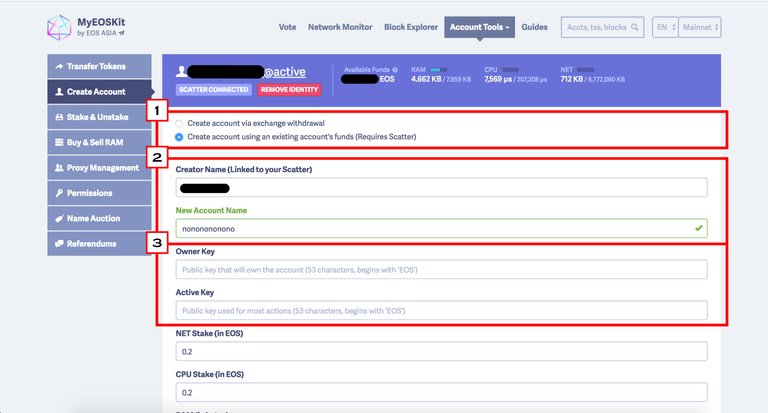
1- If you want to CREATE an account via an EXISTING ACCOUNT, select this option
2- Enter your account name
3- Enter the “Active Key” and the “Owner Key” of the account that will be associated with this new account
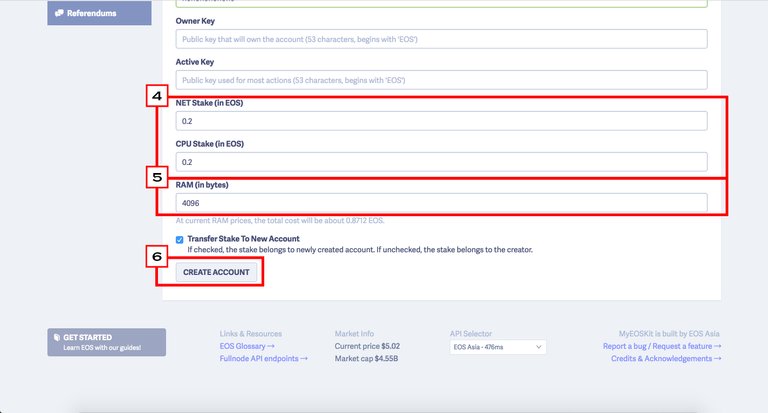
4- Enter the amount of “CPU” and “Bandwidth” you want to delegate to this new account
5- Enter the amount of “RAM” you want to delegate to this new account
6- Click on the “Create Account” action button to sign the transaction with Scatter
STAKING & UNSTAKING
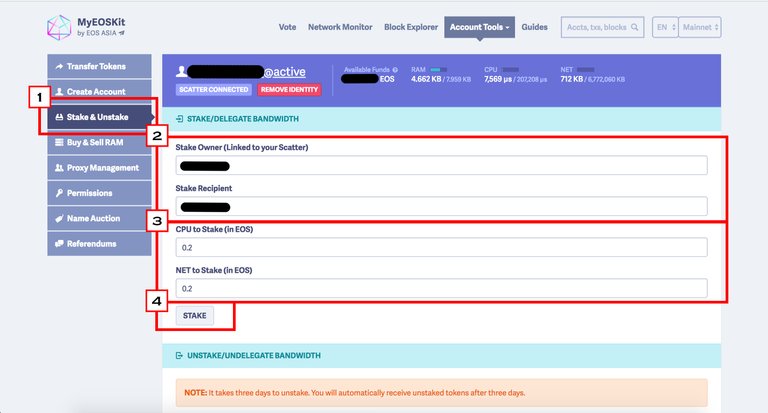
1- “Stake & Unstake” tab
2- Enter the stake recipient account that you which to stake tokens to
3- Enter the amount of “CPU” and “Bandwidth” you want to stake
4- Click on the “Stake” action key to sign the transaction with Scatter
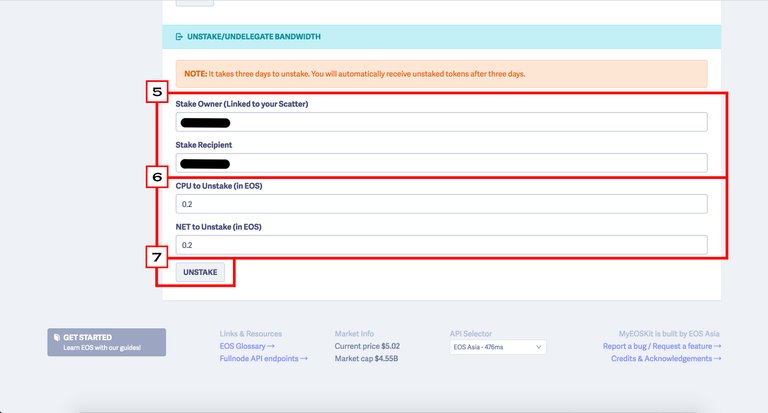
5- Enter the stake recipient account that you which to unstake tokens from
6- Enter the amount of “CPU” and “Bandwidth” you want to unstake
7- Click on the “Stake” action key to sign the transaction with Scatter
BUY RAM
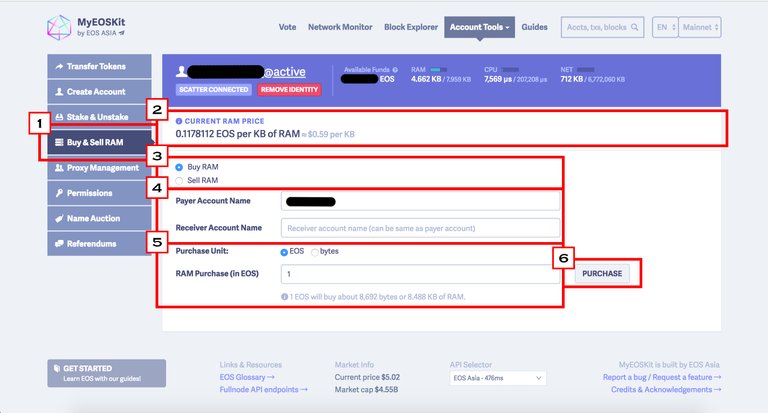
1- “Buy & Sell RAM” tab
2- Current “RAM” price
3- If you want to BUY “RAM”, select this option
4- Enter the account name who will receive the delegated “RAM”
5- Choose your purchase unit and enter the amount of “RAM” you want to buy
6-  Click on the “Purchase” action key to sign the transaction with Scatter
SELL RAM
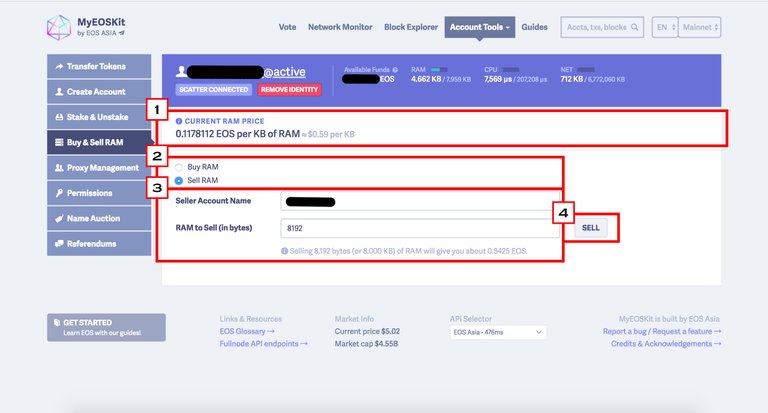
1- Current “RAM” price
2- If you want to SELL “RAM”, select this option
3- Enter the amount of “RAM” you want to SELL
4- Click on the “Sell” action key to sign the transaction with Scatter
PROXY MANAGEMENT
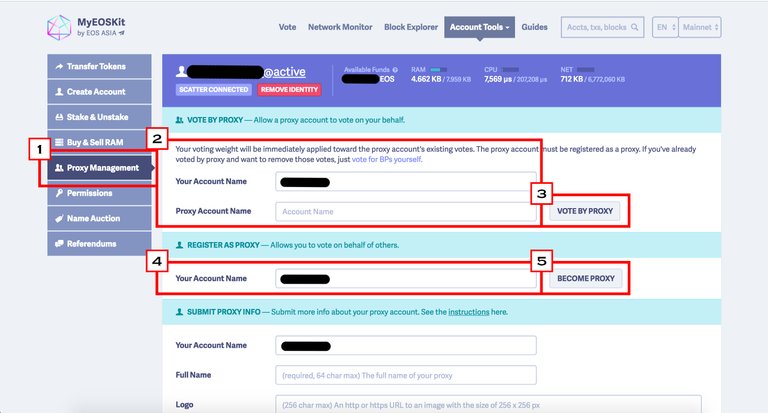
VOTE BY PROXY
1- “Proxy Management” tab
2- Enter the account name you want to set as a Proxy
3- Click on the “Vote by Proxy” action key to sign the transaction with Scatter
REGISTER AS PROXY
4- Enter the account name you want to set as Proxy
5- Click on the “Vote by Proxy” action key to sign the transaction
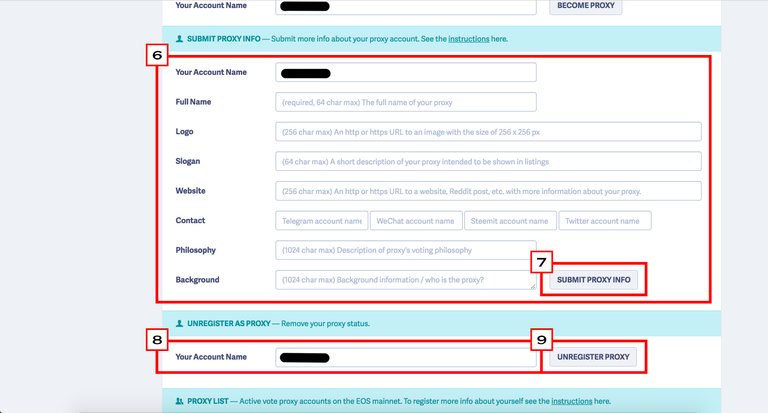
SUBMIT PROXY INFO
6- Fill up all your Proxy info
7- Click on the “Submit Proxy Info” action key to sign the transaction with Scatter
UNREGISTER PROXY
8- Enter the account name you which to stop voting for by Proxy
9- Click on the “Unregister Proxy” action key to sign the transaction with Scatter
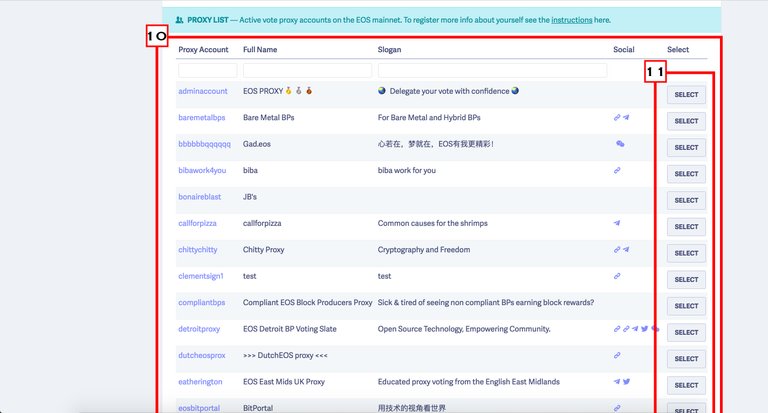
PROXY LIST
10- Search in the Proxy list which Proxy represents your core values
11- Click on the “Select” action key to select your proxy and to sign the transaction with Scatter
PERMISSIONS
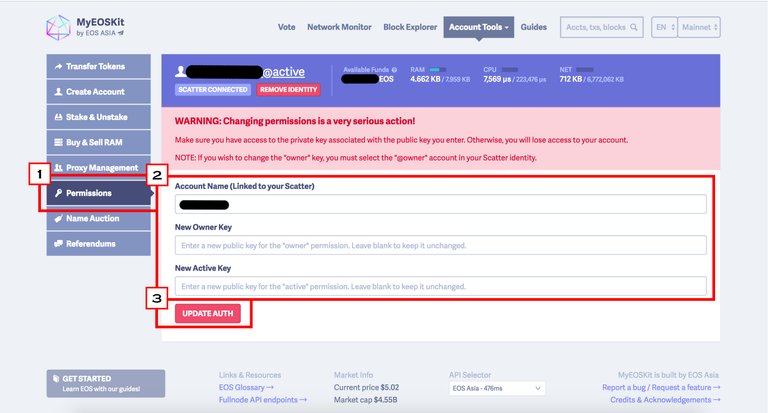
1- “Permissions” tab
2- Enter the NEW “Active Key” and “Owner Key” you which to associate with this account
3- Click on the “Update Auth.” action key to sign the transaction with Scatter
NAME AUCTION
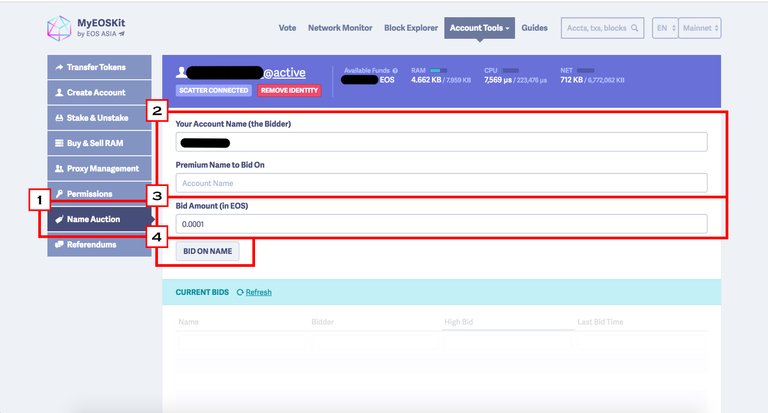
1- “Name Auction” tab
2- Enter the Premium name you want to bid on
3- Enter the amount of EOS you want to bid on the selected premium name
4- Click on the “Bid on Name” action key to sign the transaction with Scatter
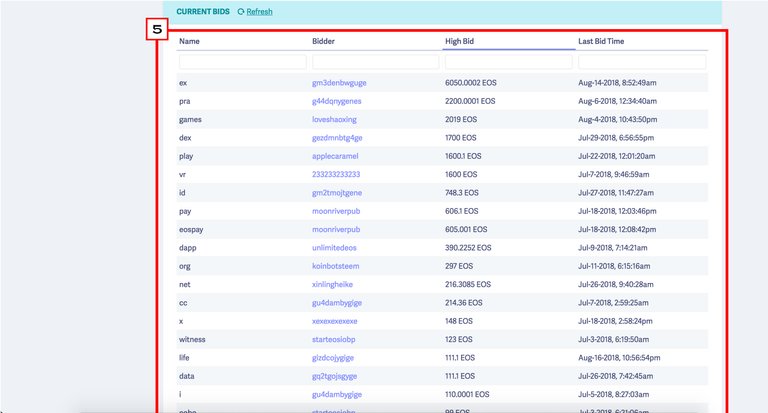
5- Current “Premium Name” bid list